SMART TL-2109 Product manual
TL-2109, TL-2109V Chair Belts
WARNING: Failure to comply with warning may result in injury or death.This device is not suitable for all individuals. Other devices may be required.
This device is not a substitute for visual monitoring by caregiver. The manufacturer does not claim that this device will stop elopement and/or stop
falls.This device is designed to augment caregivers’comprehensive resident mobility management program. THIS DEVICE IS NOT DESIGNED
TO RESTRAIN OR HOLD INDIVIDUALS IN POSITION INTHEIR CHAIRS.Test this device before each use. Read the instructions and Legal
Disclaimer.
The Smart Caregiver Corporation TL-2109 andTL-2109V Chair Belts are designed to be installed by the end user. As such, it is the entire responsibility of the
buyer to insure that the system is properly installed and tested. Further, the system is not designed to replace good caregiving
practices including, but not limited to:
A.) Direct patient supervision
B.) Adequate training for sta personnel for fall prevention and elopement
C.) Testing of the system before each use
WHERE PERMISSIBLE, IT IS THE SELLER’S INTENTTO LIMIT ANY LIABILITY FOR SPECIAL, CONSEQUENTIAL OR INCIDENTAL ECONOMIC DAMAGES TO
REFUND OF THE PURCHASE PRICE OR REPLACEMENT OFTHE GOODS. SELLER DISCLAIMS ANY LIABILITY FOR COMPENSATORY OR OTHER DAMAGES
ARISING OUT OF THE USE OF THE GOODS.
WARNING: The manufacturer does not claim that this device will stop elopement and/or stop falls.This device is designed to augment caregivers’
comprehensive resident mobility management program. This product is to be used by a licensed caregiver only.
LimitedWarranty: Seller warrants that the goods sold will be free from defects of workmanship and manufacturing, for a period of one year from
the date of sale. Other than this limited warranty, seller makes no express or implied warranties. Except for this limited warranty, NO EXPRESS OR
IMPLIED WARRANTIES ARE GIVEN AND NO AFFIRMATION OF SELLER, BYWORDS OR ACTION, WILL CONSTITUTE A WARRANTY. THE GOODS BEING
PURCHASED ARE BEING SOLD ON A“WITH ALL FAULTS”BASIS. THE ENTIRE RISK AS TOTHE QUALITY AND PERFORMANCE OF THE GOODS IS WITHTHE
BUYER. SHOULD THE GOODS PROVE DEFECTIVE FOLLOWING THEIR PURCHASE, THE BUYER, AND NOTTHE MANUFACTURER, DISTRIBUTOR OR RETAILER,
ASSUMES THE ENTIRE COST OF ALL NECESSARY INSTALLATION, SERVICING OR REPAIRS.
SMART CAREGIVER CORPORATION
1229 North McDowell Blvd., Petaluma, CA. 94954 | Tel: 800-650-3637
csr@smartcaregiver.com | www.smartcaregiver.com
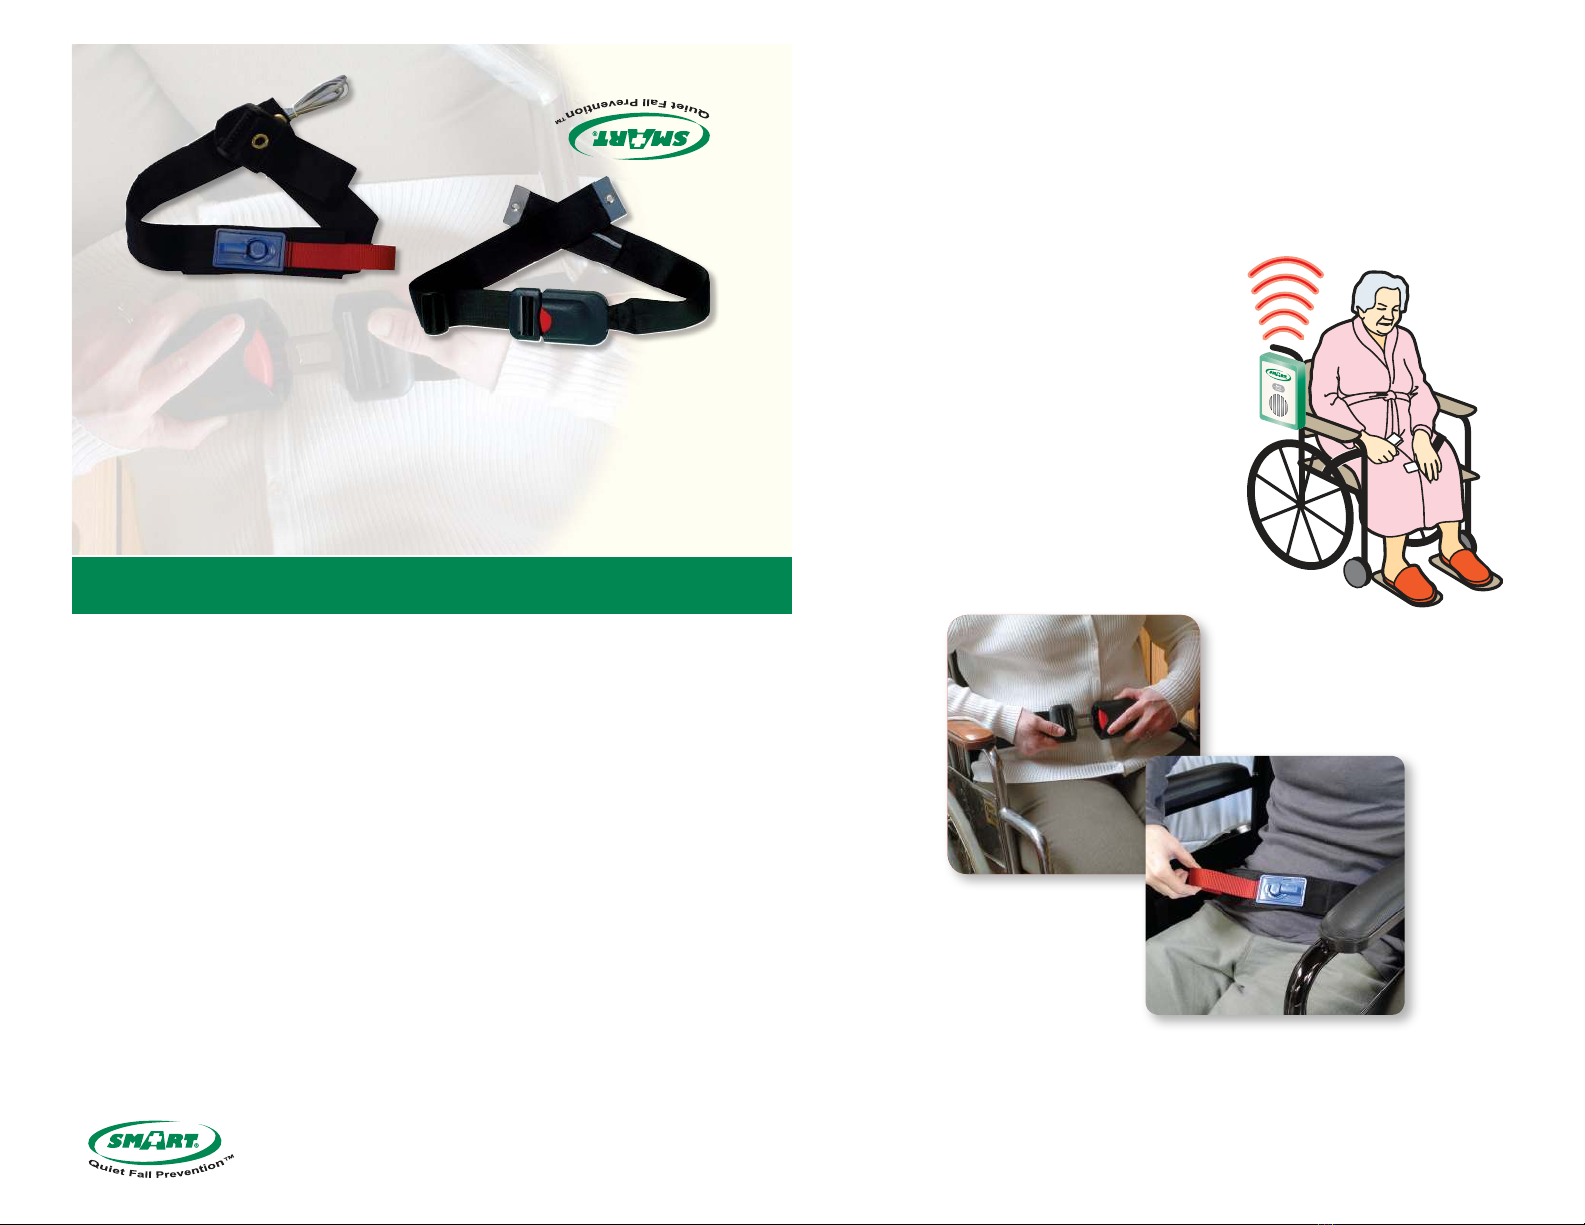
Seat Belts
SEAT BELT PLACEMENT
• Unscrew one screw on either side of wheelchair that holds the seat in place.
• Attach the seat belt to wheelchair by lining up the grommet holes on seat
belt with the screw holes. Re-insert screws through both seat belt and
wheelchair to hold seat belt in place. Make sure the screws are tightened.
• Adjust the seat belt to the desired length using the black buckle that holds
the adjustment strap in place.
• Connect the seat belt cord to the monitor.
• Place the monitor out of reach of the resident. Suitable mounting
locations include the back of wheelchair, or on the chair handle so that
the resident cannot tamper with the monitor.
TEST THE SYSTEM
• Buckle and unbuckle the seat belt to set o the alert. The monitor is
now active.The alert will sound whenever the seat belt is unbuckled.
• When the alert is activated, press the “Reset”button on front of the
monitor to silence the alert or use the Caregiver Key, depending on your
reset setting. The status light on front of monitor will blink when the
seat belt is plugged into the monitor and buckled.
Need Set-up Help? (800) 650-3637
TL-2109 & TL-2109V
Chair Belts
Non-Restraint Chair Belts
for use with Smart Caregiver
Fall/Mobility Monitors
Installation and Use Instructions
SMART CAREGIVER CORPORATION
TL-2109_TL-2109V 1-14
Unscrew one screw on either side of the wheelchair that holds the
seat in place.
Attach seat belt to the chair by lining up the grommet holes with
the screw holes. Re-insert screws through both the seat belt and
the chair securing the seat belt in place.
Adjust the seat belt to the desired length by
routing the strap through the buckle as shown
in Figs A-C.
Quick Start Instructions TL-2109 & TL-2109V
Need Set-up Help? (800) 650-3637
Seat Belt Installation
2
4
Mount the Fall Monitor
5Test the System
Unfasten and fasten seat belt to set o the monitor.The monitor is
now active.The monitor will sound the alert whenever the Seat
Belt is unfastened.
When the monitor is activated press the“Reset”button.This will
shut down the alerting mode.
3
Mount the monitor out of reach of the resident. Suitable
mounting location is the back of wheelchair, so that the resident
cannot tamper with monitor or reach the“Reset”button.
Connect the Seat Belt to
the Fall Monitor
A.
B.
A. Route the strap through
the buckle as shown
C. Pull the end of the
strap to tighten
B. Strap routed correctly
before tightening
Seat Belt Closed Seat Belt Opened
Bottom of
monitor
Pinch the cord together
and route it through
the strain relief recess.
Plug the cord
into the monitor.
SMART CAREGIVER CORPORATION
Tel: 800-650-3637 | www.smartcaregiver.com
For more information about the
Caregiver Key™, and how it can be used
in your facility’s Fall Assessment Program
call 800-650-3637
* Tamper Proof mode not available on TL-2100E
Resetting the Monitor/ Tamper Proof ™Mode with Caregiver Key™(Optional)
Caregivers can choose to reset the
TL-2100S in either of two ways:
Select either “Reset Button ON”or
“Reset Button OFF, Use Caregiver
Key™ To Turn OFF”with the switch on
the side of the TL-2100S Fall Monitor.
1. Press the Reset button on the front
of the monitor (“Reset Button ON”
mode).
2. Place the optional Caregiver Key™ over
the red dot on the front of the monitor.
(“Reset Button OFF, Use Caregiver
Key™ To Turn OFF” mode).
This mode allows only the caregiver
to reset the monitor.
“Reset Button ON”Mode
Press the Reset button to reset the
monitor.
“Reset Button OFF, Use Caregiver Key™ To Turn OFF” Mode.
Place the Caregiver Key™ over the red dot to reset the monitor.
For more information about the
Caregiver Key™and how it can be
used in your facility’s Fall Assessment
Program call 800-650-3637
Safety Auto Reset™
Pad
Lost
Low
Battery
Monitor Status
Active When Blinking
Pad and Monitor
Reset
Safety Auto Reset™
Pad
Lost
Low
Battery
Monitor Status
Active When Blinking
Pad and Monitor
Reset
Refer to User Instructions
before changing this setting.
Reset Button-
ON
Reset Button OFF
Use Caregiver Key
To Turn OFF
6V DC
300mA MAX
-
Install
Batteries
1
The battery compartment
door is secured with the
included Phillips-head screw
Alert Volume
Adjustment
Tone
Adjustment
Alert Delay
Adjustment
Warning: Failureto comply with warning may result in injury
or death. Thisdevice is not suitable for all individuals. Other
devices may be required.This device is not a substitute for
visual monitoring by caregiver.Sensor pad fall monitors are
prone to diculties. Be sure cordc annot entangleor choke the
user.The manufacturer does not claim that this device will
stop elopement and/or stop falls.This device is designed to
agument caregivers comprehensiveresident mobility
management program.Test this device before each use.
Read the instructions and legal disclaimer.
Read Instructions Before Use:
Battery not included. Use 3 x AA alkaline Batteries.
Set Up: Plug sensor pad into the fall monitor.Apply pressure to
the sensor pad to test the system.The monitor will emit two
beeps, indicating that the system is working.The Monitor
Status LED will blink every 3 seconds when the system is
activated and operating properly.
Delay
2sec 1sec 0sec3 2 1 Dcrease/Increase
Volume
Tone
Close battery door and secure
it with small Philips-head
screw.
Place monitor back into its
plastic protective boot.
This manual suits for next models
1


