Smartenit EZUIRT User manual

EZUIRT Universal IR/Insteon/X10 Transceiver #5010H
Your EZUIRT is a multi-functional device that brings the versatility of
Insteon and X10 to the coee table through commonly available infra-red
(IR) remote controllers. The device allows control of anything connected
to an Insteon or X10 network with the same remotes used with audio-
visual/entertainment equipment. As an IR X10 transceiver, your EZUIRT
receives and decodes all 256 X10 addresses from an IR remote and sends
them over the power line. In Insteon mode, any IR X10 address or IR code
can be set up to send Insteon group commands or status change
broadcast messages to control single or multiple Insteon devices in a
scene. EZUIRT is also an IR sender, capable of converting Insteon
commands to IR codes (singularly or as macros) that your A/V equipment
can readily understand.
The built-in IR receiver can be bypassed with an external one (included)
allowing ultimate placement exibility. EZUIRT can also function as an IR
repeater or distribution box (IR blaster) sending the IR signals received
through 4 separate jacks that accommodate up to 8 IR emitters (not
included.)
Setting Up EZUIRT With a Remote as an Insteon or X10 Controller
EZUIRT receives IR X10 codes and sends them on the power line, emulating the IR543 or IR543H. In Insteon mode, the
unit associates an IR code (X10, NEC, RC5 or SONY) with a group number from 1 to 40. Multiple devices can be set up
on the same group thus enabling a single IR command to control multiple Insteon units in a scene. EZUIRT can
alternatively be made to send an Insteon broadcast message (instead of a group command) upon receiving the IR
code. This mode is useful with some software applications.
Controlling Insteon Devices with IR X10 Codes:
When linked to Insteon devices using X10 IR codes, EZUIRT will send Insteon ON, OFF, BRIGHT and DIM group commands upon
detection of corresponding X10 commands. It is only necessary to link the X10 ON button of the controller as follows:
1. Press and hold the pushbutton on the side of EZUIRT for about 10 seconds, at which point its LED will ash about
once per second (slow rate) indicating EZUIRT is listening for an IR code.
2. On the IR remote press the X10 ON button to be used for control. The LED on the side of the EZUIRT will ash
more rapidly when it “learns” the IR signal—EZUIRT is now in Insteon linking mode.
3. To link one or several Insteon devices to this code, press the pushbutton on the Insteon device to be controlled
until its LED (or the load connected to it) ashes indicating a successful link (3-4 seconds.) The LED on the EZUIRT
will continue blinking as it stays in linking mode ready to accept additional devices.
4. If no additional devices need to be linked, end the linking process by pressing the pushbutton on the EZUIRT for
about 4 seconds. The LED on the EZUIRT will glow steadily.
Controlling Insteon Devices with IR Codes Other than X10:
When using IR codes other than X10, it is necessary to tell the EZUIRT the desired Insteon command to be sent, as outlined below.
1. Press and hold the pushbutton on the side of EZUIRT for about 10 seconds. Its LED will ash about once per
second (slow rate) indicating EZUIRT is listening for an IR code.
2. On the IR remote press the button to be used for control. The LED on the side of the
EZUIRT will ash more rapidly when it “sees” the IR signal—EZUIRT is now in linking mode.
3. To link one or several Insteon devices to this code, press the pushbutton on the Insteon
device to be controlled until its LED (or the load connected to it) ashes indicating a
successful link. The LED on the EZUIRT will continue blinking as it stays in linking mode
ready to accept additional devices.
4. If no additional devices need to be linked, end the linking process by pressing the
pushbutton on the EZUIRT for about 4 seconds. The LED on the EZUIRT will turn o.
5. We now tell EZUIRT, via taps on its pushbutton, which Insteon command to send. Tap the
pushbutton (according to Table 1 on the right) a number of times corresponding to the
desired command to be sent upon receiving this code.
6. Now end the linking process by pressing the pushbutton on the EZUIRT for about 4
seconds. Its LED will glow steadily again.
1-949-429-3303 smartenit.com © 2015 Compacta International, Ltd. EZUI RT and Smar tenit ar e tr ademar ks of Compacta Inter nation al Ltd. Rev 2—3/2015; Applies to firmware 2.8 and above
Insteon is a trademark of SmartLabs, Inc. and the Insteon networking technology is covered by pending U.S. and foreign pate nts.
Table 1
# of Taps Insteon
Command
1On
2Off
3Toggle
4Not Used
5Bright
6Dim
Installation
Select a suitable power outlet anywhere in your Insteon power line network close to where the IR remotes will be
operated. The built-in IR receiver is on the lower front of the unit and must be in the line of sight of the controlling
remote for best results. Optionally, the unit may be placed behind a cabinet, and the IR signal brought to it by either
an external receiver or an IR repeating emitter placed next to the built-in receiver. For convenience, a pass-through
outlet is provided. Avoid exposure to moisture.
External IR
Receiver
Push Button
and LED
Built-in IR
Receiver
IR Signal
LED
Sending Insteon Broadcast Messages in Response to IR Codes:
Any given code can be used to produce an Insteon status change broadcast, instead of a group command. This mode may be useful to cause events to
be acted upon by another controller in the Insteon network. Please note that, for a given code, only one mode (either group command or broadcast
message) can be employed. Set up as follows:
1. Press and hold the pushbutton on the side of EZUIRT for about 10 seconds. Its LED will ash about once per
second (slow rate) indicating EZUIRT is listening for an IR code.
2. On the IR remote press the button corresponding to the desired control (if X10, press an ON button.) The LED on
the side of the EZUIRT will ash more rapidly when it “learns” the IR signal—EZUIRT is now in linking mode.
3. Press the pushbutton for about 10 seconds. The LED on the EZUIRT will glow steadily. From now on, the EZUIRT
will send a “status change” Insteon broadcast message every time the learned code is recognized. The code
representation is encoded in the “To” eld of the broadcast message.
Using Your EZUIRT as an Insteon-Controlled IR Sender
EZUIRT can be programmed to send up to eight IR codes in response to a command from another Insteon controller.
Multiple IR commands are useful to control multiple A/V devices simultaneously with a single button from a controller
such as a KeypadLinc. To link an Insteon controller, and teach the EZUIRT the IR code(s) to send, proceed is as follows:
1. Put the appropriate Insteon controller in linking mode by holding one of its buttons until it indicates linking mode (4-10 seconds
depending on the controller.) Usually its LED will blink or a light connected to it will ash.
2. Hold the pushbutton on the EZIUIRT and release it after 3-4 seconds. Its LED will now blink slowly when the link is established
with the controller. The controller being linked will also give an indication of a successful link by ashing its LED or a load
connected to it.
3. Now teach the EZUIRT the code(s) that will be sent by successively activating the IR remote while pointing it at the EZUIRT IR
receiver. The LED on the side of the EZUIRT will ash briey and then resume its slow blinking each time a new code is
recognized and stored. Up to 8 codes can be added this way, or the process ended by pressing the pushbutton for 3-4 seconds.
The LED on the side of the EZUIRT will turn on solidly indicating the end of the linking process.
Codes learned in this manner are stored in the data elds of the Insteon links database. Thus, more than 1,000 codes can be sent!!
Other Operating Notes
Programming with an External PC or Server
EZUIRT has a built-in power line interface and its conguration may be done through the power line. Although control of Insteon
devices can be set up manually as described in previous sections, EZUIRT is or will be supported by an ever-growing list of home
automation software packages such as our free MS-Windows utility and EZBridge/EZSrve. A PC application or utility on a home
automation server may be used to rapidly change several parameters such as the Insteon commands to be sent and the IR codes.
Setting the X10 House
Some X10 IR remotes do not send House codes and assume the controller is set to a specic X10 House. EZUIRT is factory set to
House code C and this code changes automatically in response to IR543H type extended IR X10 codes. For convenience, the House
code can also be changed via Insteon commands with our free MS-Windows utility or other compatible software.
Resetting EZUIRT to Factory Conguration
To erase all links, and restore the EZUIRT to factory settings, unplug the unit for about 5 seconds. Then plug it back in while pressing
the pushbutton and continuing to hold it for about 4 seconds or until the buzzer stops.
Unlinking an Insteon Device from a Control Button:
1. Press and hold the pushbutton on the EZUIRT for about 10 seconds, at which point its LED will ash about once
per second (slow rate) indicating EZUIRT is listening for an IR code. Then press and hold the pushbutton again for
about 10 seconds and the LED will continue to ash at the slow rate.
2. On the IR remote press the button to be unlinked. The LED on the side of the EZUIRT will ash more rapidly when
it “sees” the IR signal—EZUIRT is now in unlinking mode.
3. To unlink an Insteon device on this code, press the pushbutton on the Insteon device for about 5 seconds until its
LED (or the load connected to it) ashes indicating a successful unlink. The LED on the EZUIRT will glow steadily.
Using your EZUIRT as an IR Distribution (Repeater) Hub
IR signals received through the built-in or external IR receiver, are transmitted over the 4 jacks provided using
external emitters (not included.) Each jack can drive either single or dual IR emitters thus enabling up to 8
repeaters. The modulated frequency of the IR signal transmitted by the emitters is set at the factory at about
38Khz. Other frequencies are possible by a conguration jumper available on the left side of the unit. Contact
product support if other frequency is needed.
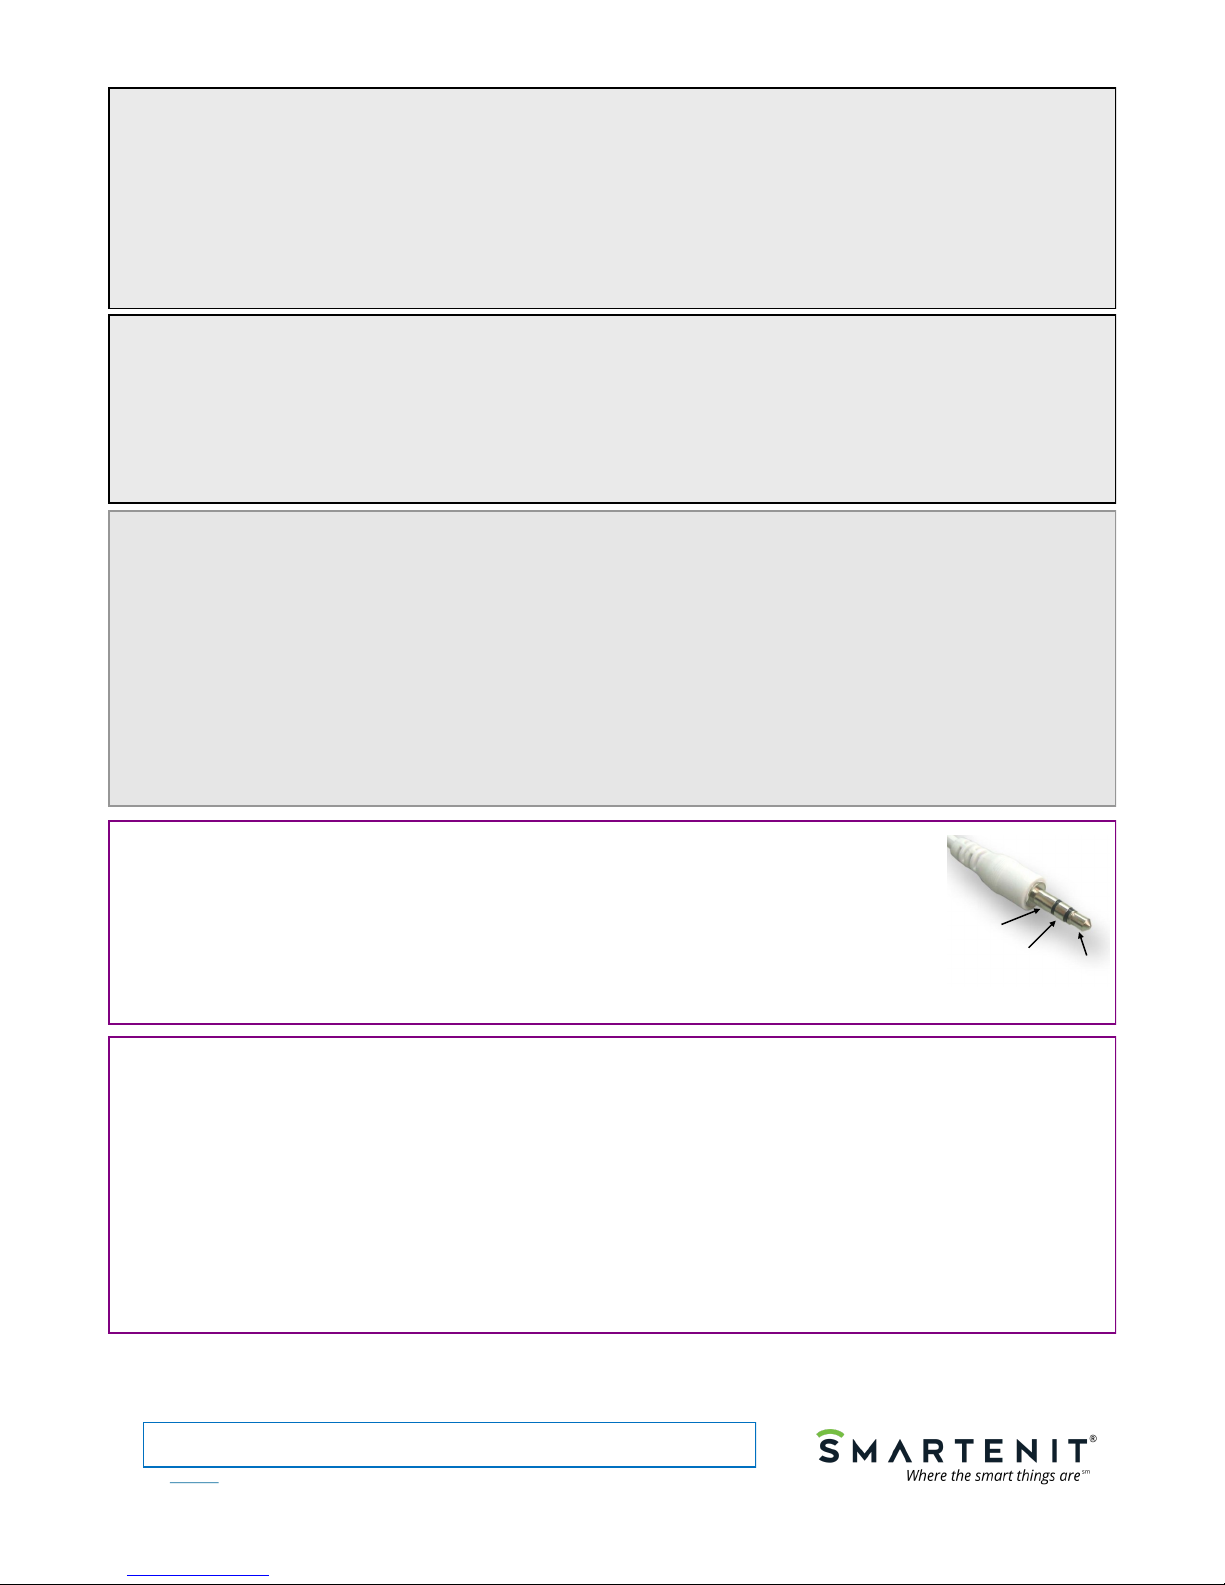
Should an external receiver be used in place of the internal one, please follow the pin-out shown on the
picture on the right. Note carefully the polarity on this plug or damage will occur to your EZUIRT or external
receiver.
Groun
+5V
Signal
1-949-429-3303 smartenit.com © 2015 Compacta International, Ltd. EZUI RT and Smar tenit ar e tr ademar ks of Compacta Inter nation al Ltd. Rev 2—3/2015; Applies to firmware 2.8 and above
Insteon is a trademark of SmartLabs, Inc. and the Insteon networking technology is covered by pending U.S. and foreign pate nts.
See our products in action at http://video.Smartenit.com
Table of contents


