Smeg CR329APLE User manual

Gebrauchsanweisung
Instructions for use
Mode d’emploi
Gebruiksaanwijzing
Istruzioni per l’uso
Brugsanvisning
Bruksanvisning
Käyttöohje
Manual de utilização
Instrucciones para el uso
Instrukcje użytkowania
Használati utasítás
ИнструкциЯза употреба
Návod k použití
Návod na použitie
Instruc∑iuni de utilizare
Инструкции по эксплуатации


3
DEUTSCH Gebrauchsanweisung Seite 4
ENGLISH Instructions for use Page 10
FRANÇAIS Mode d’emploi Page 16
NEDERLANDS Gebruiksaanwijzing Pagina 22
ESPAÑOL Instrucciones para el uso Página 28
PORTUGUÊS Manual de utilização Página 34
ITALIANO Istruzioni per l’uso Pagina 40
ΕΛΛΑΣ Οδηγίες χρήοης Σελίδα 46
SVENSKA Bruksanvisning Sidan 52
NORSK Bruksanvisning Side 58
DANSK Brugsanvisning Side 64
SUOMI Käyttöohje Sivu 70
POLSKI Instrukcje użytkowania Strona 76
ČESKY Návod k použití Strana 82
SLOVENSKY Návod na použitie Strana 88
MAGYAR Használati utasítás Oldal 94
РУCCКИЙ
Инcтpyкции по экcплyaтaции Cтpaницa
100
БЪЛГAРCКИ
Инcтpyкция зa yпoтpeбa Cтpaницa
106
ROMANA Instrucţiuni de utilizare Pagina 112
УКРАЇНСЬКА Інструкції щодо установлення Сторінка 118

Always unplug the refrigerator before replacing any light bulbs, then follow the relevant instructions in
accordance with the type of lighting fitted in your appliance.
Only use bulbs of the same type, which can be requested from the After-Sales Service and authorised
dealers.
Lighting type 1)
1. Loosen the screws and take off the lamp cover.
2. The lamp has a bayonet bulb and needs to be pulled out, not
unscrewed, following the directions of the arrows as
indicated.
3. After the new bulb has been inserted, replace the lamp cover
and wait five minutes before plugging the appliance back in.
Lighting type 2)
To remove the light bulb, turn anticlockwise as shown in the figure.
Wait for 5 minutes before reconnecting the appliance.
Lighting type 3)
If the product has LED lighting which is in need of
replacing, contact the After-Sales Service for assistance.
LED lights last longer than normal bulbs, they illuminate
better and are more environmentally friendly
10
Clean the appliance regularly using a cloth and a solution of lukewarm
water and neutral detergent specifically formulated for refrigerator
interiors. Never use abrasive detergents. Clean inside the defrost water
drain outlet on the rear wall of the refrigerator (near the fruit and
vegetable crisper drawer) regularly, using the tool supplied with the
appliance so as to ensure defrost water is removed correctly (see figure).
Before all cleaning or maintenance procedures, unplug the appliance from
the mains or disconnect the electricity supply.
2
1
Connect the appliance to the mains power supply.
A beep may be emitted by some models, to indicate that the temperature alarm has intervened: press and
hold the button to switch off acoustic alarms. As applicable, insert the anti-bacterial/anti-odour filter into
the fan as indicated on the filter package.
Note: after switching on, the refrigerator needs approximately 4/5 hours to reach the correct
temperature for storing a normal fridge load of food.
FIRST USE
APPLIANCE MAINTENANCE
AND CLEANING
CHANGING THE BULB OR LED(depending on the model)

11
Unplug the appliance from the mains, then empty, defrost (if necessary) and clean it. Leave the doors ajar,
so that air can circulate inside the compartments. This will prevent the formation of mould and bad
odours.
WHEN THE APPLIANCE IS NOT IN USE
Keep the doors closed to allow the stored food to stay cold as long as possible. Do not refreeze partially
thawed food. If the blackout persists, the blackout alarm may sound (depending on the model).
DURING BLACKOUTS
The refrigerator compartment is designed for the storage of fresh food and beverages.
Refrigerator compartment defrosting is completely automatic.
Droplets of water on the rear wall of the compartment indicate that the periodic automatic defrost cycle
is in progress. The defrost water is automatically routed to a drain outlet and into a container from which
it evaporates.
Depending on the model, the appliance may have a special box ("Meat & Fish" or "Zero Degrees") which is
ideal for the storage of fresh meat and fish.
Important: refrigerator accessories must not be washed in a dishwasher.
Note: the ambient temperature, the door opening frequency and the position of the appliance may affect
temperatures inside the two compartments. Set the temperature in accordance with these factors.
Note: when there is a lot of moisture inside the refrigerator compartment and on the glass shelves in
particular, condensation may form. In this case, we recommend closing any liquid-filled containers (e.g.:
saucepans full of stock), wrapping foods with a high liquid content (e.g.: vegetables) and setting the
temperature to a warmer value.
Removing the crisper drawer (depending on the model)
If your product only has a crisper drawer, to facilitate its removal we recommend emptying (and, if
necessary, removing) the two lower door trays beforehand.
Fan and anti-bacterial/anti-odour filter (depending on the model)
The fan will ensure uniform air circulation inside the compartment, for improved food storage and excess
moisture reduction. Do not obstruct the fan inlet. The fan can be activated/deactivated manually (see
Quick Start Guide); when activated, it works automatically as necessary.
REFRIGERATOR COMPARTMENT

The freezer compartment stores frozen food (for the period indicated on the package) and freezes
fresh food. The amount of fresh food that can be frozen in 24 hours is shown on the rating plate; place the
food in the freezer compartment (see Quick Start Guide), leaving leaving enough space around the packages
to allow air to circulate. Refreezing partially thawed food is not recommended. It is important to wrap food so
that no water, moisture, or vapour may penetrate.
To save energy and prolong the life of the appliance, make sure hot foods are never placed inside it.
Note: the ambient temperature, door opening frequency and position of the appliance can affect the
temperatures inside the two compartments. Set the temperature based on these factors.
Making ice cubes
Fill the ice cube tray (where provided) 2/3 full and place it in the freezer compartment. Never use sharp
or pointed objects to remove the ice.
Removing drawers (depending on model)
Pull the drawers all the way out, lift them up a little and remove. To create more space, the freezer
compartment can also be used as follows:
A) If the freezer compartment base resembles figure A, remove the
upper drawers and/or lids. The lower drawer should be left in position.
Make sure that, once the food has been placed on the racks/shelves, the
door closes properly.
B) If the freezer compartment base resembles figure B, remove all
drawers or lids. Make sure that, once the food has been placed on the
racks/shelves, the door closes properly.
Removing the lid (if present)
Open the lid and remove the pin, as illustrated in figure C.
12
No Frost models do not need defrosting.
For other models, if frost forms in the freezer compartment, we
recommend it is defrosted twice a year or whenever an excessive
amount of frost has formed (3 mm thickness).
It is perfectly normal for frost to form.
The amount of frost which forms and the rate at which it builds up
depends on room temperature and humidity, and on how often the door
is opened. To defrost, unplug the appliance and remove all foodstuffs.
Leave the door ajar to allow the frost to melt. For products with a
freezer compartment below the refrigerator compartment, the defrost
water drain pipe can be removed (see figure) and a recipient placed
underneath.
After defrosting, replace the drain pipe, making sure that no water is left in it. Clean inside the freezer
compartment and dry carefully.
Switch the appliance back on and place the food back inside.
DEFROSTING THE FREEZER
COMPARTMENT (depending on the model)
FREEZER COMPARTMENT
A
B
C

13
The Meat & Fish box was designed specially to keep foods fresher for
longer, without altering nutritional values or original freshness.
Do not store fruit or vegetables in this box, as the temperature may
drop below 0°C, causing water contained in the food to freeze.
Temperature Adjustment
The temperature inside the Meat & Fish box is indicated by the position
of the arm on the door of the box, and depends on the general temperature of the refrigerator
compartment.
We recommend setting the temperature of the refrigerator compartment between +2° and +6°.
To work out if the temperature inside the Meat & Fish box is correct, refer to the pictures below:
Important: when the function is activated and foods with a high water content are present, condensation
may form on the shelves. In this case, disable the function temporarily.
Removing the Meat & Fish box:
The Meat & Fish box can be removed to create more space inside the refrigerator. In this case proceed as
follows:
1. Remove the drawer from the compartment (Figure 1).
2. Remove the drawer lid by loosening the hooks on the bottom of the
lid (Figure 2).
To restore Meat & Fish box operation, make sure the lid is re-attached
before inserting the drawer and reactivating the function.
3. Press and hold the "Meat & Fish box" button for three seconds until
the yellow light goes out.
To optimise energy consumption, disable the Meat & Fish box and
remove its components (except the shelf above the Crisper drawers).
IMPORTANT
If the control panel does not show the symbol (see Quick Start
Guide), to guarantee correct appliance operation and adequate food
storage conditions, and to optimise energy consumption, do not remove
the Meat and Fish box.
MEAT & FISH BOX (depending on model)
When the arm points to the left, you need to
raise the temperature in the refrigerator
compartment.
When the arm is in the middle, the
temperature is ok.
When the arm points to the right, you need
to lower the temperature in the refrigerator
compartment.
Fig. 1
Fig. 2

14
The "Zero Degrees" box is specifically designed to maintain a low
temperature and a suitable humidity level, in order to keep foods fresher
for longer (e.g. meat, fish, fruit and winter vegetables).
Activating and deactivating the box
The temperature inside the box, when active, is
approximately 0°.
as illustrated in the figure.
When the box has been activated, the symbol lights up.
The following factors are vital for the "Zero Degrees" box to work properly:
- the refrigerator compartment must be switched on
- the temperature of the refrigerator compartment must be between +2°C and +6°C
- the box must be inserted to enable activation
- no special functions must have been selected (Standby, Cooling-Off, Vacation – where applicable).
If one of these special functions has been selected, the "Zero Degrees" box must be deactivated
manually, and any fresh food inside it removed. If manual deactivation does not take place, the box will be
deactivated automatically after 8 hours.
Note:
- if the symbol does not light up when the box is activated, check that the box is properly inserted; if the
problem persists, contact your nearest authorized After-sales Service
- if the box is active and the drawer open, the symbol on the control panel may be deactivated
automatically. If the drawer is inserted, the symbol will become active again
- irrespective of the state of the box, a slight noise may be heard: this is normal and is not a cause for
concern.
- when the box is not active, the temperature inside it depends on the general temperature inside the
refrigerator compartment. In this case, we recommend it is used to store fruit and vegetables which are
not sensitive to cold temperatures (fruits of the forest, apples, apricots, carrots, spinach, lettuce, etc.).
Important: when the function is activated and there are foodstuffs with a high water content,
condensation may form on shelves. In this case, disable the function temporarily.
Removing the "Zero Degrees" box:
The "Zero Degrees" box can be removed to create more space inside the refrigerator. In this case
proceed as follows:
- to facilitate removal, we recommend emptying (and if necessary, removing) the two lower door trays
- switch off the box
- pull out the drawer and the white plastic shelf underneath the box.
Note: the upper shelf and the side supports cannot be removed.
To restore "Zero Degrees" box operation, make sure you replace the white plastic shelf underneath the
box before inserting the drawer and reactivating the function. To optimise energy consumption, we
recommend you deactivate the "Zero Degrees" box and remove it.
Clean the box and all its parts regularly, using a cloth and a solution of warm water and neutral detergent
specifically formulated for refrigerator interiors (take care not to immerse the white plastic shelf
underneath the box in water).
Before cleaning the box (including the outside), remove the drawer so as to disconnect the box
from the electricity supply.
Never use abrasive detergents.
“ZERO DEGREES” BOX (depending on the model)
To activate/deactivate the box, press the button

15
Before contacting the After-Sales Service:
Switch the appliance on again to see if the problem
has been solved. If it has not, unplug the appliance
and wait for about an hour before switching on
again.
If the appliance is still not working after you have
gone through all the checks listed in the
troubleshooting guide and switched it off then on
again, contact the After-Sales Service to explain the
problem and have the following information ready:
• the type of fault
• the model
• the type and serial number of the appliance
(given on the rating plate)
• the Service number (the number after the word
SERVICE on the rating plate inside the
appliance)
Note:
the door opening direction can be changed. If
this operation is performed by the After-Sales
Service it is not covered by the warranty.
AFTER-SALES SERVICE
Warning - this appliance must be earthed
Fuse replacement
If the mains lead of this appliance is fitted with a BS 1363A
13amp fused plug, to change a fuse in this type of plug use an
A.S.T.A. approved fuse to BS 1362 type and proceed as follows:
1. Remove the fuse cover (A) and fuse (B).
2. Fit replacement 13A fuse into fuse cover.
3. Refit both into plug.
Important:
The fuse cover must be refitted when changing a fuse and if the
fuse cover is lost the plug must not be used until a correct
replacement is fitted.
Correct replacement are identified by the colour insert or the
colour embossed in words on the base of the plug.
Replacement fuse covers are available from your local electrical
store.
For the Republic of Ireland only
The information given in respect of Great Britain will frequently
apply, but a third type of plug and socket is also used, the 2-pin,
side earth type.
Socket outlet / plug (valid for both countries)
If the fitted plug is not suitable for your socket outlet, please
contact After-sales Service for further instruction. Please do not
attempt to change plug yourself. This procedure needs to be
carried out by a qualified technician in compliance with the
manufactures instructions and current standard safety
regulations.
ELECTRICAL CONNECTION FOR GREAT
BRITAIN AND IRELAND ONLY

QUICK START GUIDE GB
5019 608 01082
Printed in Italy 01/11 - © Copyright Whirlpool Europe s.r.l. 2011. All rights reserved
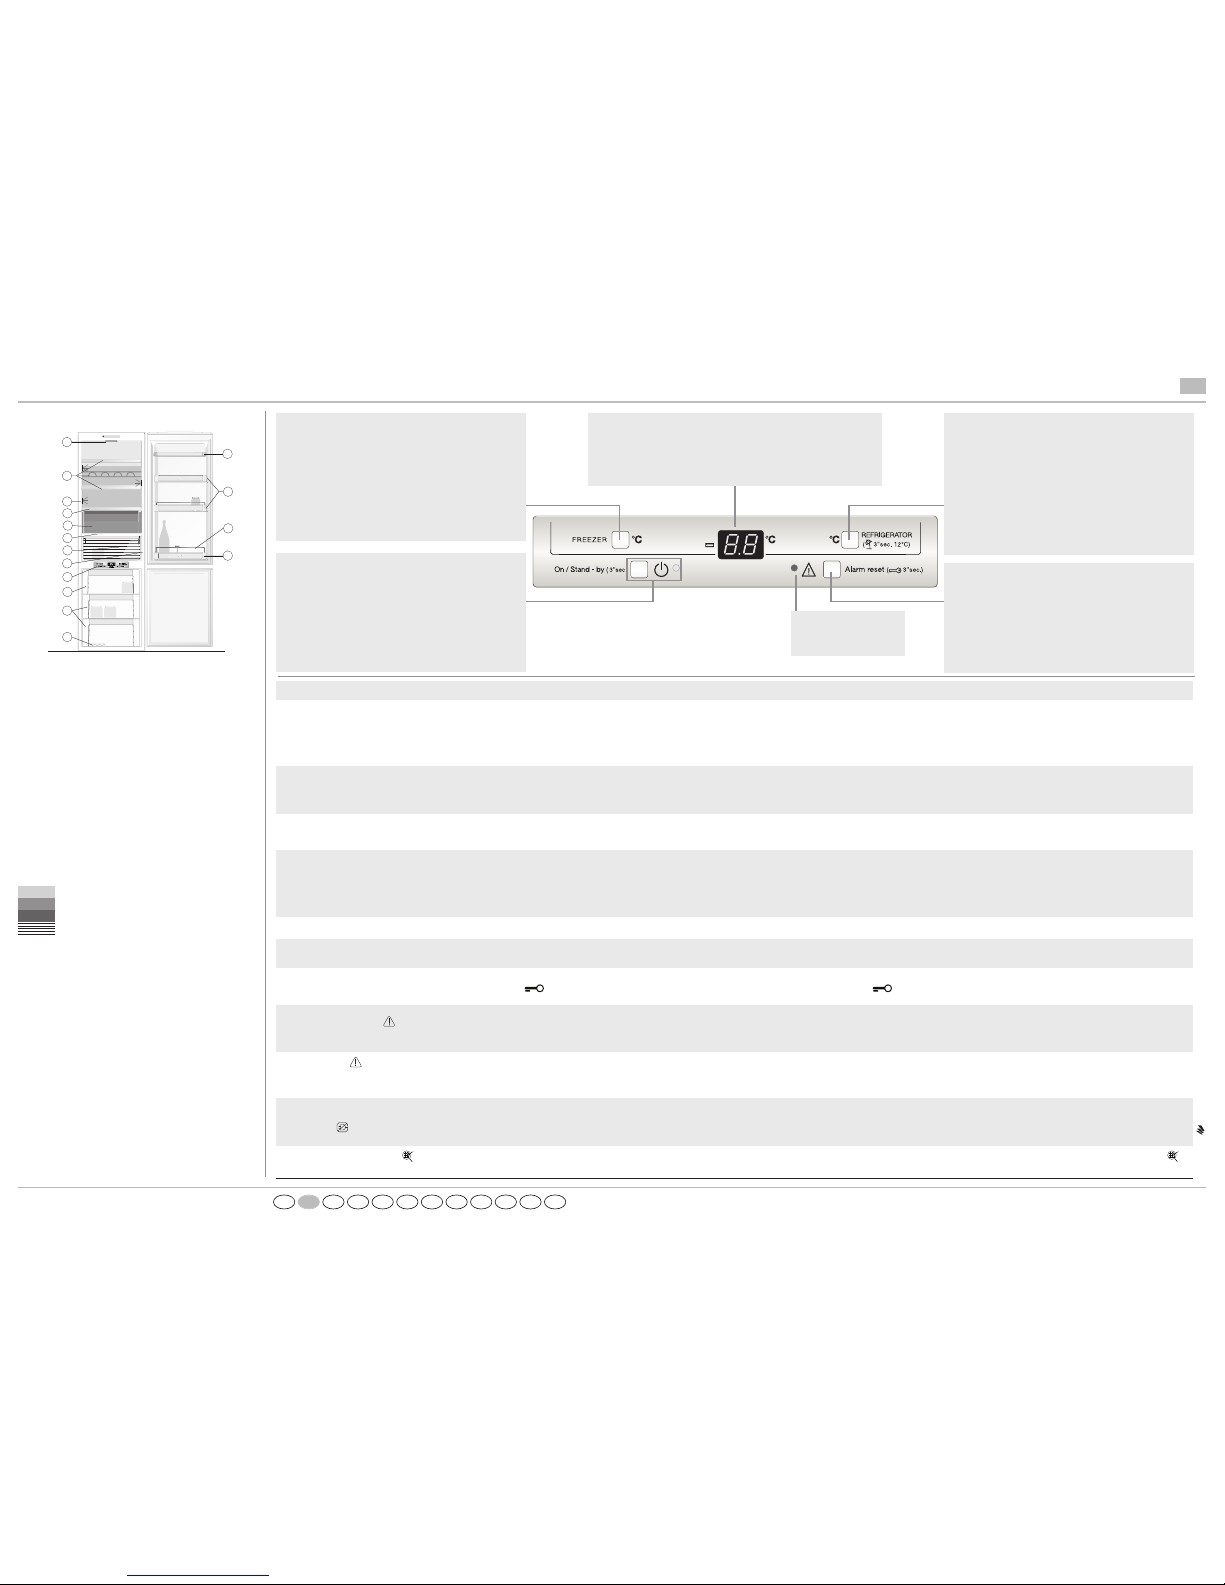
The display can show either the temperature in the refrigerator compartment (from
2°C to 8° C) or the temperature in the freezer compartment (between -17°C and -
24°C). When "FF" is shown on the display, the "Fast Freezing" function is enabled.
Refrigerator compartment temperature
A different temperature can be set using the "REFRIGERATOR" button.
Vacation Function
This function can be used during extended absences. Press and hold the
"REFRIGERATOR"button for 3 seconds to enable/disable the function.
The display will show the refrigerator compartment temperature
(+12°C). On activating the function, remove all food from the
refrigerator compartment and keep both doors closed: the refrigerator
will maintain the right temperature to prevent odours from forming.
The freezer remains enabled.
Switching off acoustic alarms
To switch off acoustic alarms, press the "Reset Alarm" button.
Key Lock
The key lock can be enabled/disabled by pressing and holding the "Reset
Alarm" key for three seconds until a beep sounds to confirm your
selection: "LO" appears on the display for a few seconds. A beep will
sound and "LO" will appear on the display for a few seconds if a key is
pressed while the key lock is enabled.
Freezer compartment temperature
A different temperature can be set using the "FREEZER" button.
Fast Freezing
o be activated 24 hours before large quantities of food to be frozen are placed in
the freezer compartment. Press the "FREEZER"button repeatedly until "FF"
appears on the display. The function disables automatically after 48 hours or can be
switched off manually by pressing the button again. Do not place food to be frozen
beside food that is already frozen. When freezing large quantities of food, a
temperature alarm may occur (depending on the model).
On / Stand-by
Press and hold for three seconds to enable/disable the appliance.
The lamp lights up in stand-by mode.
Notes: This operation will not disconnect the appliance from the power
supply. Temperature or
Malfunction Alarm
See table below.
What to do if… Possible causes: Solutions:
The control panel is off and the appliance is not working. There might be a problem with the electric power supply to the appliance.
Check:
- There isn't a power supply failure.
- If the plug is inserted properly into the power socket and the bipolar mains switch is in the right position (i.e. power
supplied to the appliance).
- The electric circuit safety devices installed in the house are fully functional.
- The power cable isn't broken.
Only for the version with double display: the control panel
remains lit up (even with the door closed), the internal light is
not working (or flashes) and a beep sounds (if not previously
disabled).
Refrigerator door open alarm
This activates when the refrigerator door is left open at length. To switch off the acoustic alarm, press the mute alarm button and to remove an alarm completely, close the refrigerator
door. On re-opening the door, check the light is working properly.
The internal light is not working. If the control panel has 2 displays, check for a refrigerator door open alarm (see previous line).
In all other cases, you may need to replace the light.
Models with standard lights: unplug the appliance from the mains power supply, check the bulb and replace it if necessary
with a new one (see section entitled "Changing bulb or LED").
Models with LED lights: contact an authorized After-Sales Service.
It is not cold enough inside the compartments. There could be various causes (see "Solutions" column).
Check:
- The doors close properly.
- The appliance is not placed near a heat source.
- The right temperature has been set.
- The circulation of air through the fan grilles at the bottom of the appliance is not obstructed.
Water collects at the bottom of the refrigerator compartment. The defrost water drain is obstructed. Clean the defrost water drain hole (see "Maintenance and Cleaning" section).
The front edge of the appliance near where the door seal
strikes is warm. This is not a defect. It is a design feature to prevent condensation from forming. No action is required.
The control panel won't do anything: Every time a key is pressed,
"CL" or "LO" appear on one or both displays. The "Key Lock" function has been enabled. Disable the function as explained in the Quick Start Guide.
The red indicator lamp will light up and a beep will sound
(if not previously disabled).
Temperature Alarm Freezer Compartment
The temperature alarm indicates that the temperature in the compartment is not ideal. This can happen: When it is first
used after defrosting and/or cleaning, when freezing large quantities of food or when the freezer door doesn't close
properly.
Press the mute acoustic alarm button to switch off the sound signal. The red indicator lamp goes off automatically
when an optimal temperature has been reached. If the temperature alarm persists, contact an authorized After-Sales
Service.
The red indicator lamp is flashing, there are letters on
the single display, and a buzzer is sounding (if not previously
disabled).
Malfunction Alarm
The alarm indicates that a technical component has malfunctioned. Call an authorized After-Sales Service. Press the mute acoustic alarm button to switch off the sound signal.
A buzzer sounds, and the freezer temperature display and the
red indicator lamp (if installed) flash.
Blackout Alarm (where provided)
This alarm activates when there has been an extended power failure causing the freezer compartment temperature to
rise. The value flashing on the freezer display is the highest temperature reached during the power failure. Press the mute alarm button to switch off the acoustic signal. Check the state of foodstuffs before consuming them.
A buzzer sounds. The red indicator lamp flashes or the
letters "AF" appear on the display (depending on the model).
Antibacterial and anti-odour filter exhausted (if installed).
Replace the antibacterial filter. After replacing the filter, press and hold the mute alarm button for at least three seconds: The red indicator lamp
will go off.
FINDKNSGRIPENLFGBD
Refrigerator Compartment
A. Bulb or LED light (depending on the model)
B. Shelves
C. LED lights (depending on the model)
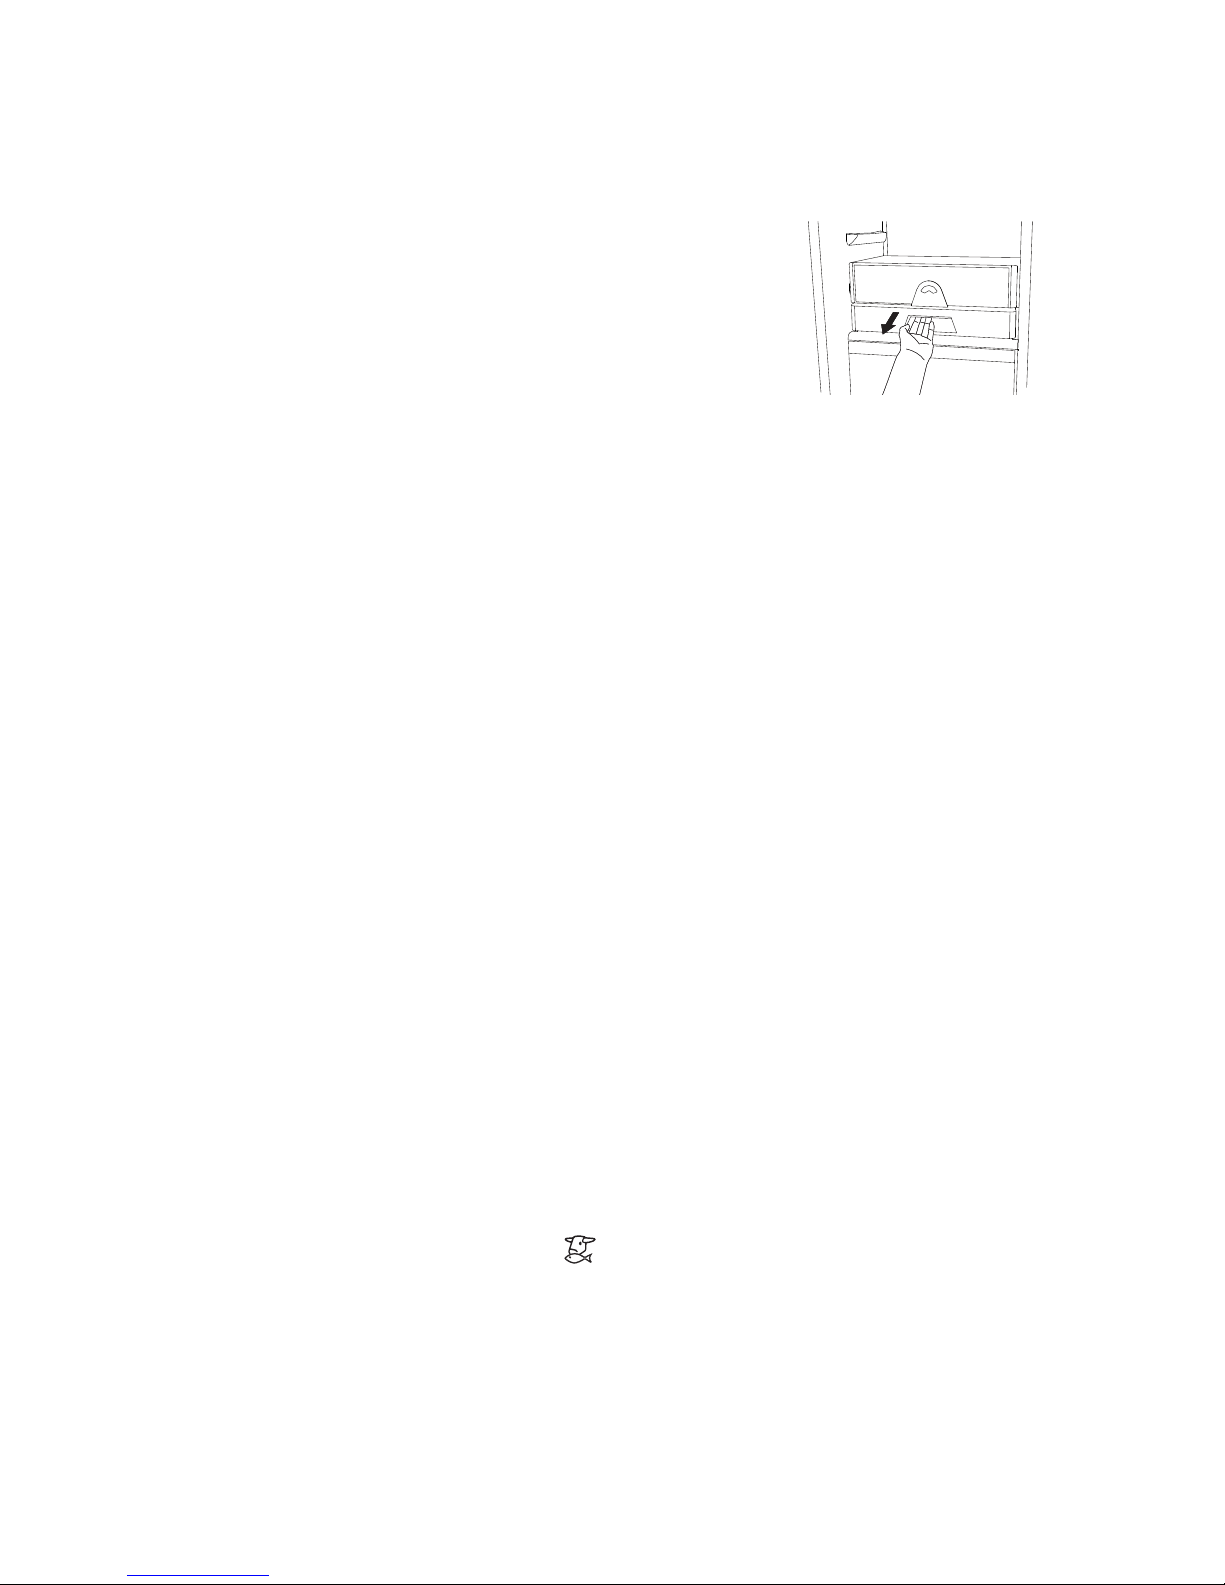
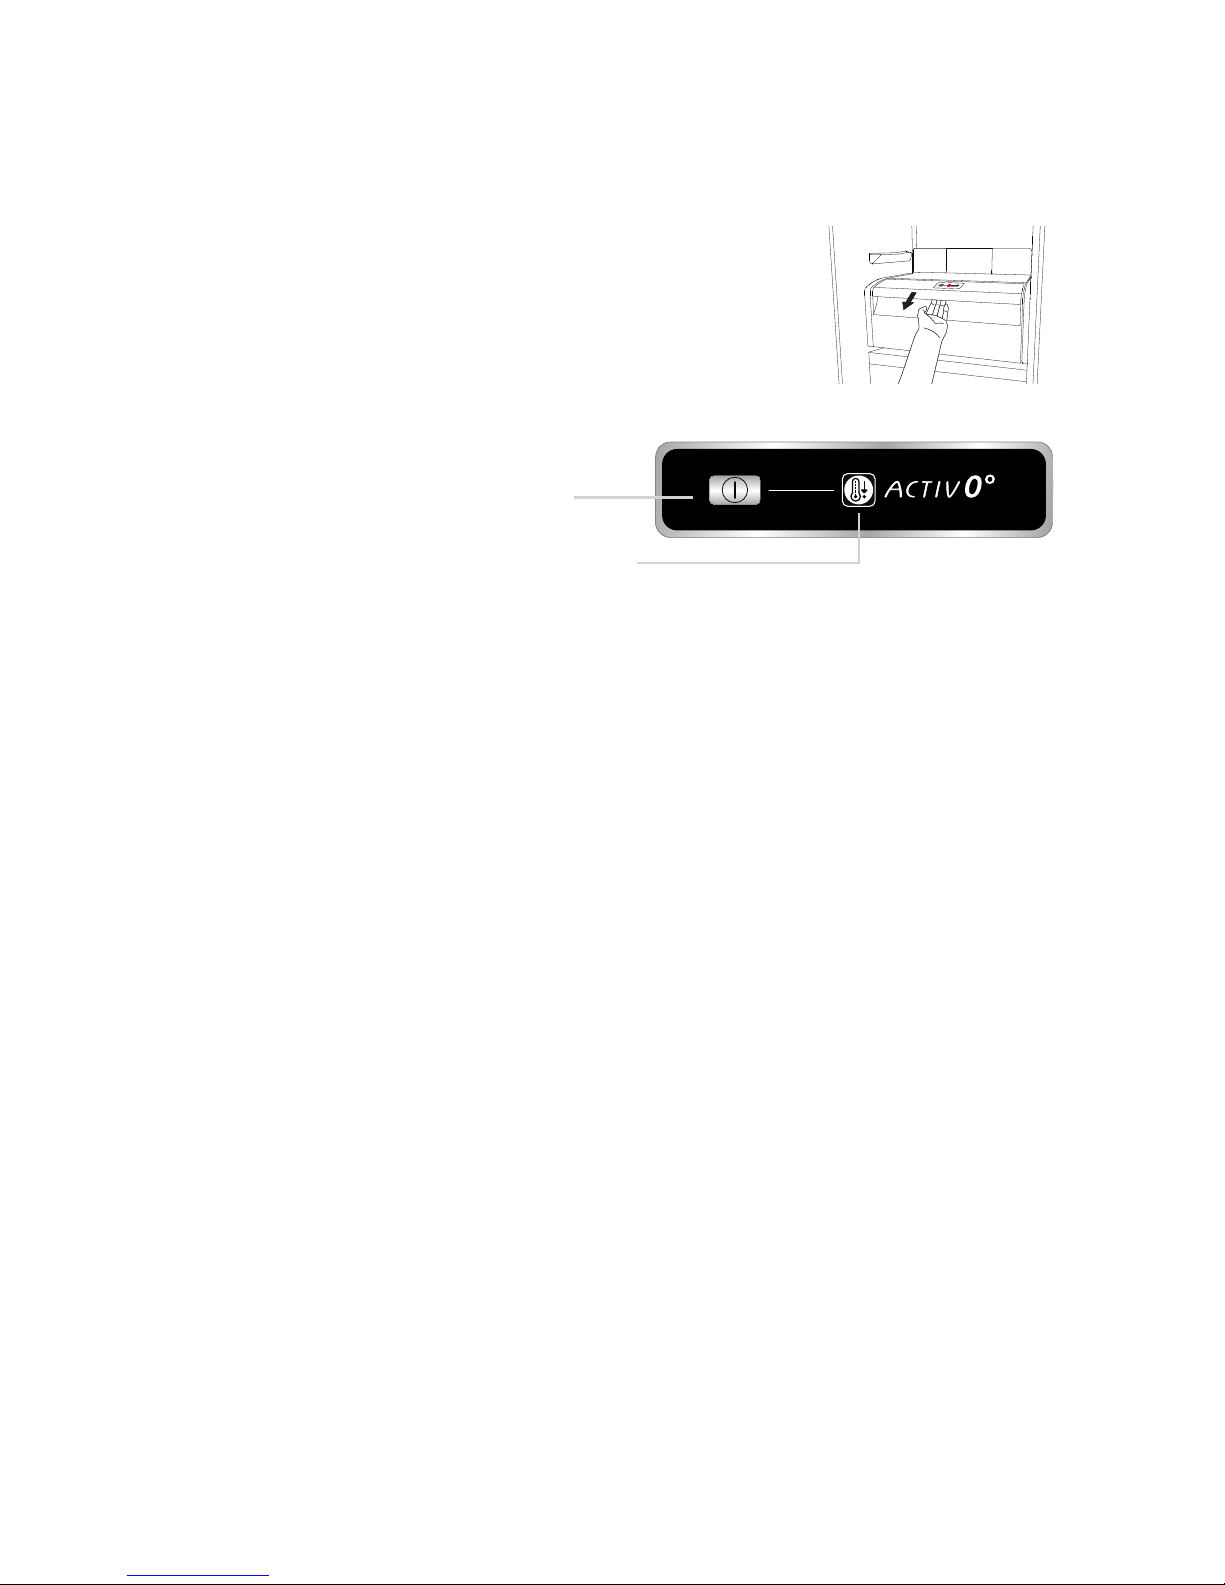
D. Lid for Special Box ("Meat &Fish" or "Zero Degrees")
(if included)
E. Special Box ("Meat & Fish" or "Zero Degrees") (if
included)
F. Crisper drawer(s) lid
G. Crisper drawer/drawers
H. Rating plate (at the side of crisper drawer)
I. Control panel
O. Dairy compartment
P. Door trays
Q. Bottle holder (if provided)
R. Bottle bin
Least cold zone
Intermediate temperature zone
Coldest zone
Fruit and vegetable crisper
Freezer Compartment
L. Upper basket or door (freezer compartment)
M. Middle and lower baskets (storage area for frozen and
deep-frozen food)
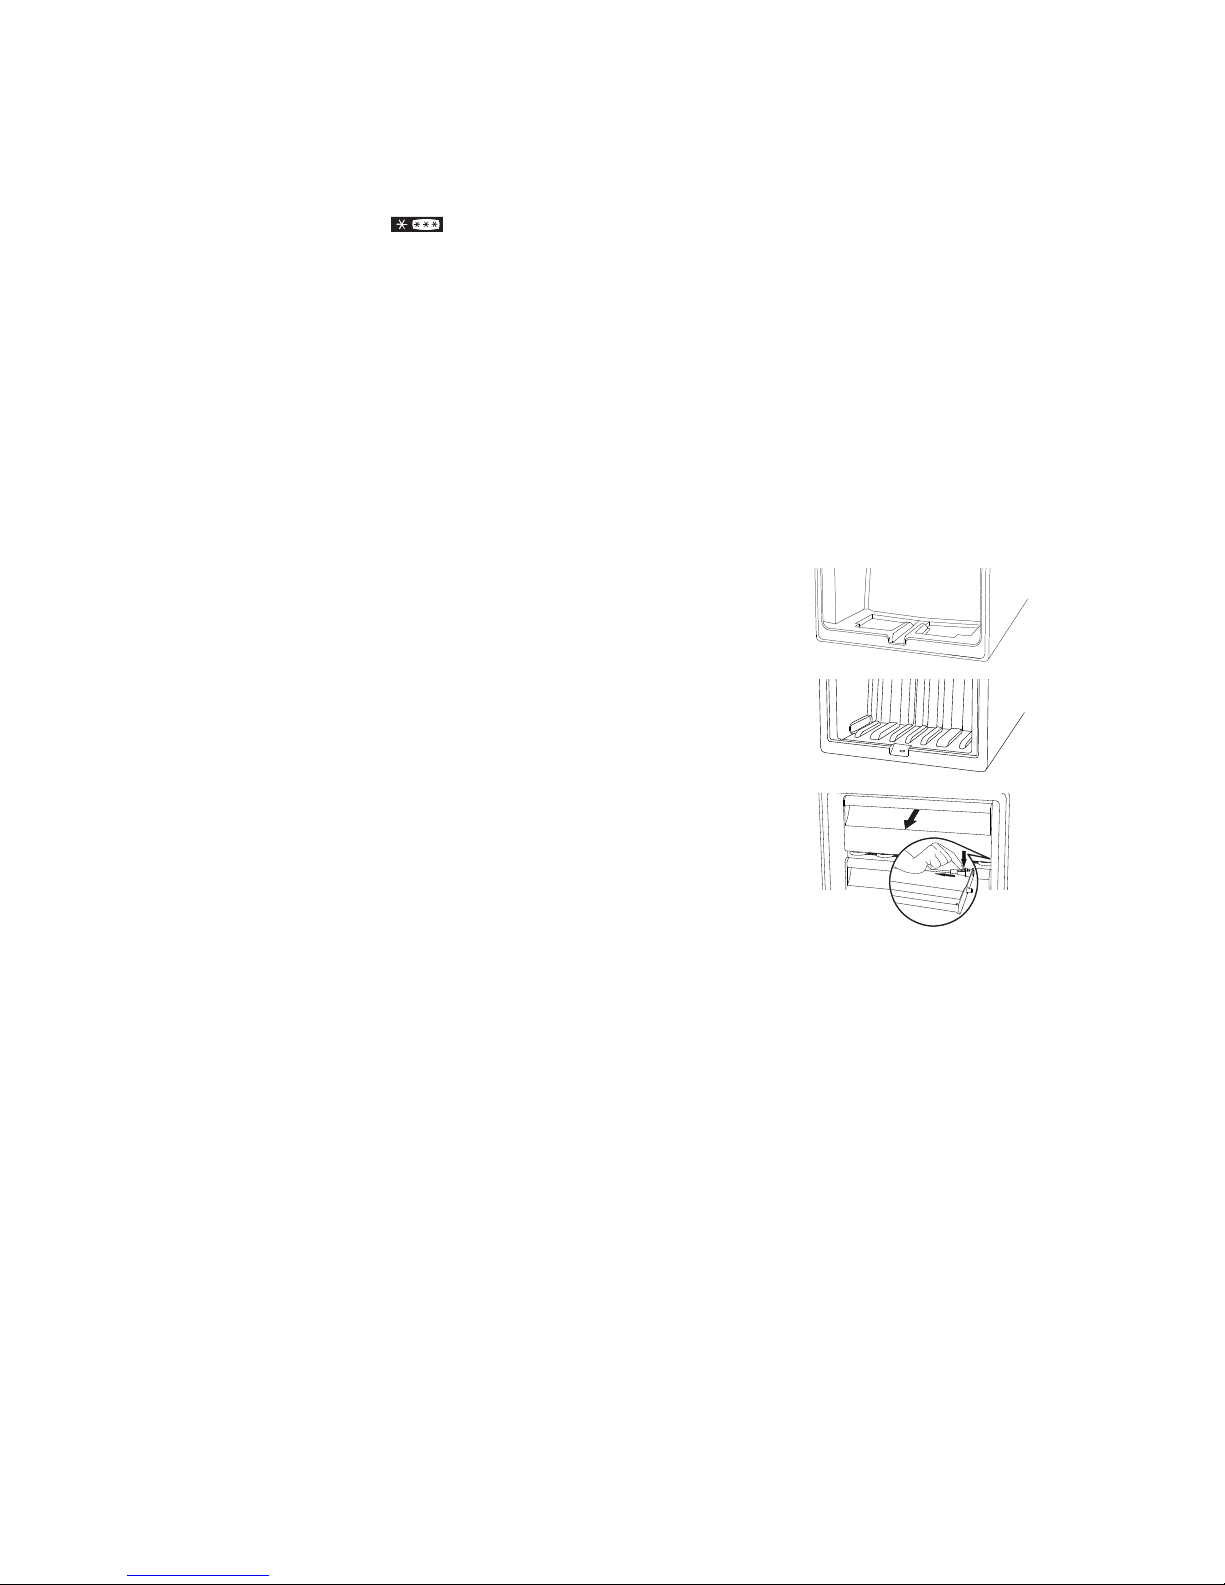
N. Ice cube tray (if provided)
Note: All shelves, door trays and racks are removable.
The right temperatures for the storage of foodstuffs are
preset in the factory.
P
Q
R
O
A
B
C
D
E
F
G
H
I
L
N
M
Read the user handbook carefully before using the
appliance.
Specifications, technical data and images may vary
from model to model.
Table of contents
Other Smeg Refrigerator manuals

Smeg
Smeg FR138B Operation instructions

Smeg
Smeg C8194TN2P User manual

Smeg
Smeg Universale C4173N1F User manual

Smeg
Smeg FAB28UROR User manual

Smeg
Smeg CR330SNF1 Quick start guide

Smeg
Smeg UKFC36RX2 User manual

Smeg
Smeg FD54PXNE4 User manual

Smeg
Smeg FAB32X User manual

Smeg
Smeg FAB32NES7 Manual

Smeg
Smeg CR330SE Quick start guide