SmokeCloak LED Strobe User guide

LED Strobe
INSTALLATION AND OPERATING INSTRUCTION

2 LED Strobe user manual
Every effort has been made to ensure that the contents of this
manual are correct. MSS Professional does not accept any liability
for loss or damage caused or alleged to be caused directly or indi-
rectly by this manual. The contents of the manual may be subject to
change without notice. MSS Professional A/S makes no warranty of
any kind with regards to this material
MSS Professional A/S
Reproduction in any matter whatsoever without the written permis-
sion of MSS Professional A/S is strictly forbidden.
Smokecloak is a registered trademark Smokecloak is protected by
Patent Nos. 2270396, 5394139, 0659293 and 93/6722.
February 2005. Ref. MSS590C
READ AND SAVE THESE
INSTRUCTIONS
MSS Professional A/S
Agerhatten 25
DK - 5220 Odense SØ
Danmark
Telefon: ++45 6473 1407
www.smokecloak.com

3
LED Strobe user manual
Contents
Safety information....................................................................... 4
Introduction ................................................................................ 8
Beforeusingtheproductforthersttime ................................. 8
Physical installation..................................................................... 9
Fasteningtheunittoaatsurface ........................................... 9
AC power ................................................................................. 10
Linking units to power in a chain ............................................ 10
Unit overview ........................................................................... 11
Triggering the LED Strobe .......................................................... 12
Maintenance ............................................................................ 13
Cleaning............................................................................. 13
Replacing the primary fuse.................................................... 14
Other service and repairs ...................................................... 14
Troubleshooting......................................................................... 15
Specications ........................................................................... 16

4 LED Strobe user manual
Safety information
Warning!
Read the safety precautions in this manual before installing, operating or
servicing this product.
Risk Group 1 product according to EN 62471. May be harmful to the
eyes. Do not stare at the light source and do not view the light output
with optical instruments or any device that may concentrate the beam.
The following symbols are used to identify important safety information
on the product and in this manual:
This lighting unit is for professional use only and must be installed by a
qualiedtechnician.Itisnotforhouseholduse.Itpresentsrisksofsevere
injury or death due to re hazards, electric shock, falls, and epileptic
seizureinpersonswhoareicker-sensitive.Itproducesapowerfullight
thatcancreatearehazardorariskofeyeinjuryifthesafetyprecautions
below are not followed.
Install, operate and service the LED Strobe only as directed in this user
manual,oryoumaycreateasafetyhazardorcausedamagethatisnot
covered by product warranties.
Follow the safety precautions listed below and observe all warnings in this
manual and printed on the product. Keep this user manual for future use.
Warning!
Safety
hazard.Risk
of severe
injury or
death.
Warning!
Powerful light
emission.
Risk of eye
injury.
Warning!
See user
manual for
important
safety
information.
Warning!
Hazardous
voltage. Risk
of lethal
or severe
electric
shock.
Warning!
Hot surfaces
andre
hazard.

5
LED Strobe user manual
For the latest user documentation and other information for this and all
SmokeCloak products, please visit the SmokeCloak website at http://
www.SmokeCloak.com
If you have any questions about how to install, operate or service the unit
safely, please contact your SmokeCloak distributor.
Respect all locally applicable laws, codes and regulations when installing,
operating or servicing the unit.
Protection from electric shock
Do not expose the unit to rain or moisture.
Disconnect the unit from AC power before carrying out any installation or
maintenance work and when the unit is not in use.
Ensure that the unit is electrically connected to ground (earth).
Use only a source of AC power that complies with local building and electrical
codes and has both overload and ground-fault (earth-fault) protection.
Socket outlets or external power switches used to supply the unit with
power must be located near the lighting unit and easily accessible so that
the lighting unit can easily be disconnected from power.
Replacedefectivefuseswithonesofthespeciedtypeandratingonly.
Isolate the unit from power immediately if the power plug or any seal,
cover, cable, or other component is damaged, defective, deformed, wet
or showing signs of overheating. Do not reapply power until repairs have
been completed.
Before using the unit, check that all power distribution equipment and
cables are in perfect condition and rated for the current requirements of
all connected devices.
Use only a Neutrik PowerCon cable connector to connect to the power
input socket.
The supplied power input cable is rated 6 A and can safely supply only one
unit with mains power. Do not connect any device to the unit’s MAINS
OUT connector when using this cable.

6 LED Strobe user manual
Protection from burns and re
Do not operate the unit if the ambient temperature (Ta) exceeds 40° C (104° F).
The surface of the product casing can reach up to 55° C (131° F) during
operation. Avoid contact by persons and materials. Allow the unit to cool
for at least 10 minutes before handling.
Keepammablematerialswell away fromtheunit.Keep all combustible
materials (e.g. fabric, wood, paper) at least 10 cm (4 in.) away from the unit.
Ensurethatthereisfreeandunobstructedairowaroundtheunit.Provide
a minimum clearance of 10 cm (4 in.) around fans and air vents.
Do not use the unit to illuminate surfaces within 20 cm (8 in.) of the unit.
Do not attempt to bypass thermostatic switches or fuses.
Donotsticklters,masksorothermaterialsontoanyopticalcomponent.
Protection from eye injury
ThelightfromtheLEDlampispossiblyhazardousandmaybeharmfulto
the eyes. Do not stare directly into the product’s light output.
Donotlookatthelightoutputwithmagniers,telescopes,binocularsor
similar optical instruments that may concentrate the light output.
Ensure that persons are not looking directly into the front of the unit when
the product lights up suddenly. This can happen when power is applied.
Protection from injury
Do not operate the unit near stairways or in other locations where there
is a risk of falls, in corridors or near public exits.
Fastentheunitsecurelytoaxedsurfaceorstructurewheninuse.The
unit is not portable when installed.
Ensure that any supporting structure and/or hardware used can hold at
least 10 times the weight of all the devices they support.
If the unit is installed in a location where it may cause injury or damage
if it falls, install a secondary attachment such as a safety cable that will
hold the unit if a primary attachment fails.

7
LED Strobe user manual
Thesecondaryattachmentmustbeapprovedbyanofcialbodysuchas
TÜV as a safety attachment for the weight that it secures, must comply
with EN 60598-2-17 Section 17.6.6 and must be capable of bearing
a static suspended load that is ten times the weight of the unit and all
installed accessories.
Check that all external covers and hardware are securely fastened.
Do not operate the unit with missing or damaged covers, shields or any
optical component.
In the event of an operating problem, stop using the unit immediately and
disconnect it from power. Never attempt to use a unit that is obviously
damaged.
Do not modify the unit in any way.
Referany service operationnotdescribed in thismanualtoa qualied
technician.
Protection from epileptic seizure
Flashinglightis known totriggerepilepticseizuresinpersonswhoare
icker-sensitive.
Display advisory notices at the point of Entry.
See label below

8 LED Strobe user manual
Introduction
The unit is supplied with this user manual, a 1.5 m (5 ft.) power
cable (local power plug not included on some versions), trigger cable
and connector and a mounting bracket.
Before using the product for the rst time
1. Read ’Safety information’ on page 4 before installing, operating
or servicing the unit.
2. Unpack and ensure that there is no transportation damage before
using the unit. Never attempt to operate a damaged unit.
3. If the unit is not going to be hard-wired to an AC mains power
source, install a suitable local power plug (not supplied) on the
end of the supplied power cable.
4. Before operating, ensure that the voltage and frequency of the
local power source match the power requirements of the unit.

9
LED Strobe user manual
Physical installation
Warning! Read ‘Safety information’ on page 4 before installing the unit.
The unit is designed for indoor use only and must be used in a dry location
with adequate ventilation. Ensure that none of the unit’s ventilation slots
are blocked.
Fasten the unit to a secure surface. Do not stand it on a surface or leave
it where it can be moved or fall over.
If you install the unit in a location where it may cause injury or damage if
it falls, install a safety cable that will hold the unit if the primary fastening
method fails.
Fasten the unit to a at surface
Theunitmountingbracketcanbefastenedtoahard,xed,atsurface.
The unit and surface can be oriented at any angle. Ensure that the
mounting surface and all fasteners used can support at least 10 times
the weight of all units and equipment they will support.

10 LED Strobe user manual
AC power
Warning! Read ‘Safety information’ on page 4 before connecting the
unit to AC mains power.
Warning! The mains power input cable supplied with the unit is rated 6
A and can supply only one unit with mains power. Do not connect any
device to the unit’s MAINS OUT power throughput socket when using
this input cable.
For protection from electric shock, the unit must be grounded (earthed).
The power distribution circuit must be equipped with a fuse or circuit
breaker and ground-fault (earth-fault) protection.
Socket outlets or external power switches used to supply the unit with
power must be located near the unit and easily accessible so that the
units can easily be disconnected from power.
Do not insert or remove live Neutrik PowerCon connectors to apply or cut
power, as this may cause arcing at the terminals that will damage the
connectors.
The unit can be hard-wired to a building electrical installation if you want
to install it permanently or a power plug that is suitable for the local
power outlets can be installed on the power cable.
If you install a power plug on the supplied power cable, install a grounding
type (earthed) plug with integral cable grip that is rated minimum 250 V,
6 A. Follow the plug manufacturer’s instructions and connect the wires in
the power cable as shown in this table:
The unit has an auto-ranging power supply that accepts AC mains power
at100-240Vat50/60Hz.DonotapplyACmainspoweratanyother
voltage or frequency to the unit.
Live or L Neutral or N Earth, Ground O
US system Black White Green
US system Brown Blue Yellow/green

11
LED Strobe user manual
Unit overview
1. 5-pin DMX input/output– AC mains power input/output
NeutrikPowerConsocketsareprovidedtoconnectthexturetomainspower.
2. Fuse
The main fuse is located on the rear panel in a fuse holder. Replace only
with one of the rating printed on the rear panel.
3. Microphone - Not used.
4. Secondary attachment point
An eyebolt is provided for attaching a safety cable (not supplied).
5. Status LEDs
The 4 rear panel LEDs indicate the following:
- The Slave LED will be lit when the unit is powered on and not active
-AllfourLEDswillashatapproximately1secintervalswhentheunitistriggered.
6. Display
The display shows LED Strobe only during normal operation.
When the unit is activated the screen goes dark.
7. Control buttons
The buttons located below the display do not have any functional use on
this product.
8. These connectors are not used.
9. 3-pin DMX input/output
The 3-pin XLR input socket is provided for triggering the unit using the
supplied connector and cable.

12 LED Strobe user manual
Triggering the LED Strobe
TheLEDStrobehasaxedmodeofoperationforthepulsedurationand
ashrate.
It is triggered by short circuiting the two prepared cables supplied with
the unit.
This can be achieved via a system active output on your SmokeCloak
device (programmed as N/O going closed when active) or via an active
output on your intruder alarm system whichever is more convenient.
SmokeCloak EASY 2200 example wiring diagram:
**Note. This diagram shows the EASY 2200 when the AUX out
(pins 23 and 24) is programmed as “Backstop” and “Normally open”.
1 2
3
LED Strobe 3
pin XLR input

13
LED Strobe user manual
Maintenance
Warning! Read ‘Safety information’ on page 4 before servicing the unit.
Referanyserviceoperationnotdescribedinthisusermanualtoaqualied
service technician.
Disconnect the unit from mains power and allow to cool completely
before cleaning or servicing.
Service units in an area where there is no risk of injury from failing parts,
tools or other materials.
Cleaning
Excessivedust,smokeuid,andparticlebuildupdegradesperformance,
causes overheating and will damage the unit. Damage caused by
inadequate cleaning or maintenance is not covered by the product
warranty.
Thecleaningofthefrontglassmustbecarriedoutperiodicallytooptimize
light output. Cleaning schedules for lighting units vary greatly depending
on the operating environment. It is therefore impossible to specify precise
cleaning intervals for the unit. Environmental factors that may result in a
need for frequent cleaning include:
• Use of smoke or fog machines.
• Highairowrates(nearairconditioningvents,forexample).
• Presence of cigarette smoke.
• Airbornedust(fromstageeffects, buildingstructuresandttingsor
the natural environment, for example).
Ifoneormoreofthesefactorsispresent,inspectunitswithintheirrst
100 hours of operation to see whether cleaning is necessary. Check again
at frequent intervals. This procedure will allow you to assess cleaning
requirements in your particular situation.
Use gentle pressure only when cleaning, and work in a clean, well-lit
area. Do not use any product that contains solvents or abrasives, as these
can cause surface damage.

14 LED Strobe user manual
To clean the unit:
1. Disconnect the unit from power and allow it to cool.
2. Vacuum or gently blow away dust and loose particles from the outside
of the unit and the air vents.
3. Clean glass by wiping gently with a soft, clean lint-free cloth moistened
with a weak detergent solution. Do not rub the surface hard: lift
particles off with a soft repeated press. Dry with a soft, clean, lint-
free cloth or low- pressure compressed air. Remove stuck particles
with an unscented tissue or cotton swab moistened with glass cleaner
or distilled water.
4. Check that the unit is dry before reapplying power.
Replacing the primary fuse
If the unit is completely dead, the unit’s primary fuse may have blown and
it may be necessary to install a new fuse. See ‘Unit overview’ on page 14
for the fuse location.
To replace the primary fuse:
1. Disconnect the unit from power and allow it to cool.
2. Usealargeat-bladedscrewdrivertounscrewthecapofthefuseholder.
3. Removetheblownfuse.Replacewithanewoneofthespeciedtype
and rating only.
4. Reinstall the fuse holder cap before reapplying power.
If the replacement fuse blows immediately, disconnect the unit from
powerandreferittoaqualiedservicetechnician.Donotattempttouse
the unit until it is repaired.
Other service and repairs
There are no user-serviceable parts inside the unit. Do not open the housing.
Do not try to carry out repairs yourself, as doing so may present a health
or safety risk. It may also cause damage or malfunction, and it may void
your product warranty.

15
LED Strobe user manual
Troubleshooting
This section describes some problems that may occur and provides
troubleshooting suggestions.
Symptom Potential cause Remedies
No light from
unit, fans not
working and unit
appears dead.
Power supply issue
such as blown fuse,
faulty connector or
damaged cable.
Ensure that the mains
supply is supplying
power to the unit.
Check all power con-
nections and cables.
Replace the unit fuse.

16 LED Strobe user manual
Specications
Physical
Length.............................................................. 505 mm (19.9 in.)
Width ................................................................. 140 mm (5.5 in.)
Height ................................................................ 226 mm (8.9 in.)
Weight.................................................................. 4.0 kg (8.8 lbs.)
Dynamic Effects
Strobe rate .......................................................................... 16Hz
Strobe duration...... 0-10ms(50Hzsupply),or0–8.3ms(60Hzsupply)
Control and Programming
Control options..............................Single O/C contact input activation
Optics
Beam angle.............................................................................87°
Light source....................................99 x 3 W CREE white XB-D LED
Color temperature ....................................................7000-8000 K
Minimum LED lifetime....... 50 000 hours (to >70% luminous output)*
*Figure obtained under test conditions
Construction
Color ................................................................................... Black
Housing ........................................................... Steel and aluminum
Protection rating ................................................................... IP 20
Installation
Mounting points....................................Bracket with 13.5 mm holes
Orientation ..............................................................................Any
Location.........Indoor use only, must be fastened to surface or structure
Minimum distance to illuminated surfaces ...................... 0.2 m (8 in.)
Minimum distance to combustible materials ................... 0.1 m (4 in.)
Minimum clearance around fans and vents ..................... 0.1 m (4 in.)
Electrical
AC power ......................................... 100-240Vnominal,50/60Hz
Power supply unit ........................................................ Diode bridge

17
LED Strobe user manual
Typical power and current
110V,60Hz....................................................................2.5A,
250 W, PF 0.9
230V,50Hz....................................................................2.7A,
380 W, PF 0.6
Measurements made at nominal voltage. Allow for a deviation of +/-
10%. PF = Power Factor
Thermal
Cooling .......................... Forced air (temperature regulated, low noise)
Maximum ambient temperature (Ta max.) ....................40° C (104° F)
Minimum ambient temperature (Ta min)........................... 0° C (32° F)
Approvals
EU safety ....................................... EN 60598-2-17 (EN 605981-1)
EU EMC...................................EN 55015, EN55032, EN 55103-2,
EN 61000-3-2, EN 61000-3-3, EN 61547
Ordering Information
LED Strobe.............................................................P/N 92622050
Disposing of this product
SmokeCloak products are supplied in compliance with Directive
2012/19/EC of the European Parliament and of the Council of the
European Union on WEEE (Waste Electrical and Electronic Equipment),
where applicable. Help preserve the environment! Ensure that this
product is recycled at the end of its life.
Specicationsaresubjecttochangewithoutnotice.Forthelatest
productspecicationspleasecontactMSSProfessionalA/S

Supplier:
Contact:
MSS Professional A/S
Agerhatten 25
DK - 5220 Odense SØ
Danmark
Telefon: +45 6473 1407
www.smokecloak.com
03 2017
Table of contents
Popular Floodlight manuals by other brands

Francis Searchlights
Francis Searchlights FH380 User instruction & installation manual
Leader Light
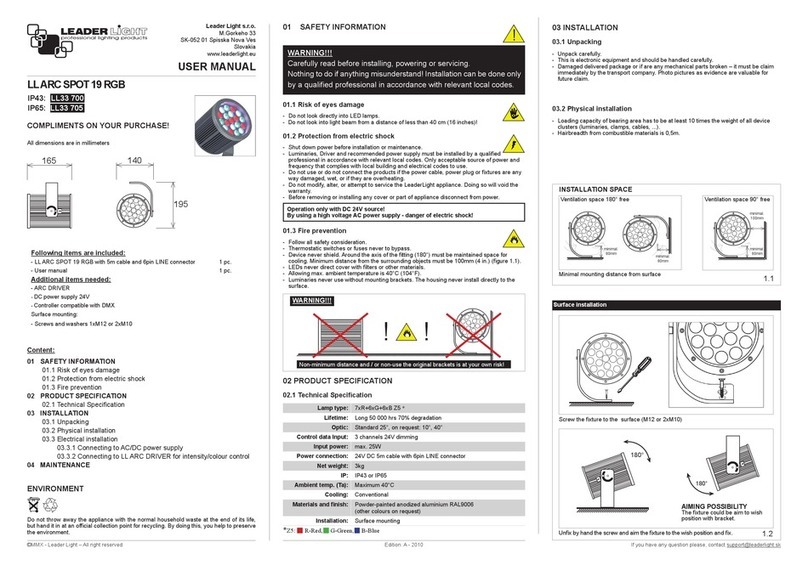
Leader Light LL ARC SPOT 19 RGB user manual

jobmate
jobmate JM18FL Safety and operating manual
Monacor
Monacor Security IR-48LED Mounting instructions

hylite
hylite Mightylite Pro MLP240B Installation & operating instructions
Colight
Colight Stryker Instruction guide
