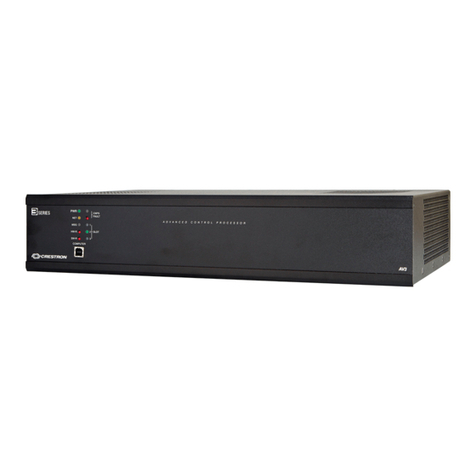
SNAP PAC BRAINS SNAP-PAC-EB1 User manual

SNAP PAC BRAINS
USER’S GUIDE
SNAP-PAC-EB1
SNAP-PAC-EB2
SNAP-PAC-EB1-FM
SNAP-PAC-EB2-FM
SNAP-PAC-EB1-W
SNAP-PAC-EB2-W
SNAP-PAC-SB1
SNAP-PAC-SB2
Form 1690


SNAP PAC BRAINS USER’S GUIDE
SNAP-PAC-EB1
SNAP-PAC-EB2
SNAP-PAC-EB1-FM
SNAP-PAC-EB2-FM
SNAP-PAC-EB1-W
SNAP-PAC-EB2-W
SNAP-PAC-SB1
SNAP-PAC-SB2
Form 1690-170719—July 2017
43044 Business Park Drive
•
Temecula
•
CA 92590-3614
Phone: 800-321-OPTO (6786) or 951-695-3000
Fax: 800-832-OPTO (6786) or 951-695-2712
www.opto22.com
Product Support Services
800-TEK-OPTO (835-6786) or 951-695-3080
Fax: 951-695-3017
Email: support@opto22.com
Web: support.opto22.com

SNAP PAC Brains User’s Guide
ii
SNAP PAC Brains User’s Guide
Form 1690-170719—July 2017
Copyright © 2007–2017 Opto 22.
All rights reserved.
Printed in the United States of America.
The information in this manual has been checked carefully and is believed to be accurate; however, Opto 22 assumes no
responsibility for possible inaccuracies or omissions. Specifications are subject to change without notice.
Opto 22 warrants all of its products to be free from defects in material or workmanship for 30 months from the
manufacturing date code. This warranty is limited to the original cost of the unit only and does not cover installation, labor,
or any other contingent costs. Opto 22 I/O modules and solid-state relays with date codes of 1/96 or newer are guaranteed
for life. This lifetime warranty excludes reed relay, SNAP serial communication modules, SNAP PID modules, and modules
that contain mechanical contacts or switches. Opto 22 does not warrant any product, components, or parts not
manufactured by Opto 22; for these items, the warranty from the original manufacturer applies. Refer to Opto 22 form
1042 for complete warranty information.
Wired+Wireless controllers and brains are licensed under one or more of the following patents: U.S. Patent No(s). 5282222,
RE37802, 6963617; Canadian Patent No. 2064975; European Patent No. 1142245; French Patent No. 1142245; British Patent
No. 1142245; Japanese Patent No. 2002535925A; German Patent No. 60011224.
Opto 22 FactoryFloor, groov, Optomux, and Pamux are registered trademarks of Opto 22. Generation 4, groov Server,
ioControl, ioDisplay, ioManager, ioProject, ioUtilities, mistic, Nvio, Nvio.net Web Portal, OptoConnect, OptoControl,
OptoDataLink, OptoDisplay, OptoEMU, OptoEMU Sensor, OptoEMU Server, OptoOPCServer, OptoScript, OptoServer,
OptoTerminal, OptoUtilities, PAC Control, PAC Display, PAC Manager, PAC Project, PAC Project Basic, PAC Project Professional,
SNAP Ethernet I/O, SNAP I/O, SNAP OEM I/O, SNAP PAC System, SNAP Simple I/O, SNAP Ultimate I/O, and Wired+Wireless
are trademarks of Opto 22.
ActiveX, JScript, Microsoft, MS-DOS, VBScript, Visual Basic, Visual C++, Windows, and Windows Vista are either registered
trademarks or trademarks of Microsoft Corporation in the United States and other countries. Linux is a registered
trademark of Linus Torvalds. ARCNET is a registered trademark of Datapoint Corporation. Modbus is a registered trademark
of Schneider Electric, licensed to the Modbus Organization, Inc. Wiegand is a registered trademark of Sensor Engineering
Corporation. Allen-Bradley, CompactLogix, ControlLogix, MicroLogix, SLC, and RSLogix are either registered trademarks or
trademarks of Rockwell Automation. CIP and EtherNet/IP are trademarks of ODVA. Raspberry Pi is a trademark of the
Raspberry Pi Foundation.
groov includes software developed by the OpenSSL Project for use in the OpenSSL Toolkit. (http://www.openssl.org)
All other brand or product names are trademarks or registered trademarks of their respective companies or organizations.
Opto 22
Automation Made Simple.

SNAP PAC Brains User’s Guide iii
iii
Table of Contents
Chapter 1: Introduction . . . . . . . . . . . . . . . . . . . . . . . . . . . . . . . . . . . . . . . . . . . . . . . . . . . . . . . . 1
About SNAP PAC Brains . . . . . . . . . . . . . . . . . . . . . . . . . . . . . . . . . . . . . . . . . . . . . . . . . . . . . . . . . . . . . . . . . . 1
I/O Processing . . . . . . . . . . . . . . . . . . . . . . . . . . . . . . . . . . . . . . . . . . . . . . . . . . . . . . . . . . . . . . . . . . . . . . . . 1
Communications . . . . . . . . . . . . . . . . . . . . . . . . . . . . . . . . . . . . . . . . . . . . . . . . . . . . . . . . . . . . . . . . . . . . . 2
Wired+Wireless Communication . . . . . . . . . . . . . . . . . . . . . . . . . . . . . . . . . . . . . . . . . . . . . . . . . 2
PAC Project Software Suite . . . . . . . . . . . . . . . . . . . . . . . . . . . . . . . . . . . . . . . . . . . . . . . . . . . . . . . 2
Other Communication Methods . . . . . . . . . . . . . . . . . . . . . . . . . . . . . . . . . . . . . . . . . . . . . . . . . .3
Custom Software . . . . . . . . . . . . . . . . . . . . . . . . . . . . . . . . . . . . . . . . . . . . . . . . . . . . . . . . . . . . . . . . 3
About this Guide. . . . . . . . . . . . . . . . . . . . . . . . . . . . . . . . . . . . . . . . . . . . . . . . . . . . . . . . . . . . . . . . . . . . . . . . . 3
Other Documents You May Need . . . . . . . . . . . . . . . . . . . . . . . . . . . . . . . . . . . . . . . . . . . . . . . . . . . . . 4
For Help . . . . . . . . . . . . . . . . . . . . . . . . . . . . . . . . . . . . . . . . . . . . . . . . . . . . . . . . . . . . . . . . . . . . . . . . . . . . . . . . . 5
Chapter 2: Installing a SNAP PAC Brain . . . . . . . . . . . . . . . . . . . . . . . . . . . . . . . . . . . . . . . . . . 7
What You Will Need. . . . . . . . . . . . . . . . . . . . . . . . . . . . . . . . . . . . . . . . . . . . . . . . . . . . . . . . . . . . . . . . . . . . . . 7
Installing Software . . . . . . . . . . . . . . . . . . . . . . . . . . . . . . . . . . . . . . . . . . . . . . . . . . . . . . . . . . . . . . . . . . . . . . . 8
Installing Hardware . . . . . . . . . . . . . . . . . . . . . . . . . . . . . . . . . . . . . . . . . . . . . . . . . . . . . . . . . . . . . . . . . . . . . . 8
Installing Modules on the Rack . . . . . . . . . . . . . . . . . . . . . . . . . . . . . . . . . . . . . . . . . . . . . . . . . . . . . . . . 8
Removing a Module . . . . . . . . . . . . . . . . . . . . . . . . . . . . . . . . . . . . . . . . . . . . . . . . . . . . . . . . . . . . . . 9
Installing the Brain . . . . . . . . . . . . . . . . . . . . . . . . . . . . . . . . . . . . . . . . . . . . . . . . . . . . . . . . . . . . . . . . . . . 10
Setting Up Ethernet Networking . . . . . . . . . . . . . . . . . . . . . . . . . . . . . . . . . . . . . . . . . . . . . . . . . . . . . 10
Setting Up Serial Networking . . . . . . . . . . . . . . . . . . . . . . . . . . . . . . . . . . . . . . . . . . . . . . . . . . . . . . . . . 11
Guidelines for Grounding SNAP PAC Brains and Controllers . . . . . . . . . . . . . . . . . . . . . . . . . . . . 12
Serial Wiring Diagrams . . . . . . . . . . . . . . . . . . . . . . . . . . . . . . . . . . . . . . . . . . . . . . . . . . . . . . . . . . . . . . .13
What’s Next?. . . . . . . . . . . . . . . . . . . . . . . . . . . . . . . . . . . . . . . . . . . . . . . . . . . . . . . . . . . . . . . . . . . . . . . . . . . . 16
Chapter 3: System Architecture . . . . . . . . . . . . . . . . . . . . . . . . . . . . . . . . . . . . . . . . . . . . . . . . 17
Communication Options . . . . . . . . . . . . . . . . . . . . . . . . . . . . . . . . . . . . . . . . . . . . . . . . . . . . . . . . . . . . . . . . 17
SNAP PAC Ethernet Brains . . . . . . . . . . . . . . . . . . . . . . . . . . . . . . . . . . . . . . . . . . . . . . . . . . . . . . . . . . . 17
Simultaneous Communication . . . . . . . . . . . . . . . . . . . . . . . . . . . . . . . . . . . . . . . . . . . . . . . . . . .18
SNAP PAC Serial Brains . . . . . . . . . . . . . . . . . . . . . . . . . . . . . . . . . . . . . . . . . . . . . . . . . . . . . . . . . . . . . . .19
Accessing SNAP PAC Brains Over the Internet . . . . . . . . . . . . . . . . . . . . . . . . . . . . . . . . . . . . . . . . . 19
Choosing Communication Methods . . . . . . . . . . . . . . . . . . . . . . . . . . . . . . . . . . . . . . . . . . . . . . . . . . 20
System Architecture. . . . . . . . . . . . . . . . . . . . . . . . . . . . . . . . . . . . . . . . . . . . . . . . . . . . . . . . . . . . . . . . . . . . . 21
SNAP PAC Brains as Part of a Distributed SNAP PAC System . . . . . . . . . . . . . . . . . . . . . . . . . . . .21

SNAP PAC Brains User’s Guide
iv
SNAP PAC Wired+Wireless Brains . . . . . . . . . . . . . . . . . . . . . . . . . . . . . . . . . . . . . . . . . . . . . . . . . . . . 22
SNAP PAC Ethernet Brain in an Allen-Bradley Logix System . . . . . . . . . . . . . . . . . . . . . . . . . . . . 23
SNAP PAC Ethernet Brain as an Independent I/O Processor . . . . . . . . . . . . . . . . . . . . . . . . . . . . 23
SNAP PAC Serial Brain as an Independent I/O Processor . . . . . . . . . . . . . . . . . . . . . . . . . . . . . . . 25
Ethernet Networking . . . . . . . . . . . . . . . . . . . . . . . . . . . . . . . . . . . . . . . . . . . . . . . . . . . . . . . . . . . . . . . . . . . . 26
Connecting Directly to a PC or Controller . . . . . . . . . . . . . . . . . . . . . . . . . . . . . . . . . . . . . . . . . . . . . 26
Attaching to an Existing Ethernet Network . . . . . . . . . . . . . . . . . . . . . . . . . . . . . . . . . . . . . . . . . . . 26
Developing an Independent Ethernet Network . . . . . . . . . . . . . . . . . . . . . . . . . . . . . . . . . . . . . . . 27
Using the Brain in a Wireless LAN . . . . . . . . . . . . . . . . . . . . . . . . . . . . . . . . . . . . . . . . . . . . . . . . . . . . 27
Using SNAP PAC Ethernet Brain Wired Network Interfaces . . . . . . . . . . . . . . . . . . . . . . . . . . . . . 28
Correct Connections for Daisy-Chaining . . . . . . . . . . . . . . . . . . . . . . . . . . . . . . . . . . . . . . . . . 29
Incorrect Network Connections . . . . . . . . . . . . . . . . . . . . . . . . . . . . . . . . . . . . . . . . . . . . . . . . . 29
Specifications . . . . . . . . . . . . . . . . . . . . . . . . . . . . . . . . . . . . . . . . . . . . . . . . . . . . . . . . . . . . . . . . . . . . . . . . . . . 30
Specifications . . . . . . . . . . . . . . . . . . . . . . . . . . . . . . . . . . . . . . . . . . . . . . . . . . . . . . . . . . . . . . . . . . . . . . . 30
LEDs and Network Interfaces—Wired Ethernet Brains . . . . . . . . . . . . . . . . . . . . . . . . . . . . . . . . . 31
LEDs and Network Interfaces—Wired+Wireless Brains . . . . . . . . . . . . . . . . . . . . . . . . . . . . . . . . 31
LEDs and Network Interfaces—Serial Brains . . . . . . . . . . . . . . . . . . . . . . . . . . . . . . . . . . . . . . . . . . 32
SNAP PAC Brain Comparison Chart . . . . . . . . . . . . . . . . . . . . . . . . . . . . . . . . . . . . . . . . . . . . . . . . . . . . . . . 33
Feature Descriptions . . . . . . . . . . . . . . . . . . . . . . . . . . . . . . . . . . . . . . . . . . . . . . . . . . . . . . . . . . . . . . . . 35
Chapter 4: Maintenance and Troubleshooting . . . . . . . . . . . . . . . . . . . . . . . . . . . . . . . . . .39
Introduction . . . . . . . . . . . . . . . . . . . . . . . . . . . . . . . . . . . . . . . . . . . . . . . . . . . . . . . . . . . . . . . . . . . . . . . . . . . . 39
Maintaining the SNAP PAC Brain . . . . . . . . . . . . . . . . . . . . . . . . . . . . . . . . . . . . . . . . . . . . . . . . . . . . . . . . . 39
Backup Battery . . . . . . . . . . . . . . . . . . . . . . . . . . . . . . . . . . . . . . . . . . . . . . . . . . . . . . . . . . . . . . . . . . . . . . 39
Changing the Ethernet Brain’s IP Address . . . . . . . . . . . . . . . . . . . . . . . . . . . . . . . . . . . . . . . . . . . . 40
Resetting the Brain . . . . . . . . . . . . . . . . . . . . . . . . . . . . . . . . . . . . . . . . . . . . . . . . . . . . . . . . . . . . . . . . . . 40
Loading New Firmware . . . . . . . . . . . . . . . . . . . . . . . . . . . . . . . . . . . . . . . . . . . . . . . . . . . . . . . . . . . . . 40
Setting Time and Date . . . . . . . . . . . . . . . . . . . . . . . . . . . . . . . . . . . . . . . . . . . . . . . . . . . . . . . . . . . . . . 40
Blink Codes . . . . . . . . . . . . . . . . . . . . . . . . . . . . . . . . . . . . . . . . . . . . . . . . . . . . . . . . . . . . . . . . . . . . . . . . . 41
Self-Test LED Sequence at Startup . . . . . . . . . . . . . . . . . . . . . . . . . . . . . . . . . . . . . . . . . . . . . . . 41
Normal LED Behavior: MS, NS, and WLAN LEDs . . . . . . . . . . . . . . . . . . . . . . . . . . . . . . . . . . . 41
STAT LED—Green . . . . . . . . . . . . . . . . . . . . . . . . . . . . . . . . . . . . . . . . . . . . . . . . . . . . . . . . . . . . . . 42
STAT LED—Orange . . . . . . . . . . . . . . . . . . . . . . . . . . . . . . . . . . . . . . . . . . . . . . . . . . . . . . . . . . . . . 42
STAT LED—Red and Green . . . . . . . . . . . . . . . . . . . . . . . . . . . . . . . . . . . . . . . . . . . . . . . . . . . . . 42
STAT LED—Red . . . . . . . . . . . . . . . . . . . . . . . . . . . . . . . . . . . . . . . . . . . . . . . . . . . . . . . . . . . . . . . . 42
Getting Device and Firmware Information . . . . . . . . . . . . . . . . . . . . . . . . . . . . . . . . . . . . . . . . . . . . . . . . 43
Troubleshooting SNAP PAC Brains. . . . . . . . . . . . . . . . . . . . . . . . . . . . . . . . . . . . . . . . . . . . . . . . . . . . . . . . 46
Communicating with a Wired EB Brain . . . . . . . . . . . . . . . . . . . . . . . . . . . . . . . . . . . . . . . . . . . . . . . 46
Pinging the Brain . . . . . . . . . . . . . . . . . . . . . . . . . . . . . . . . . . . . . . . . . . . . . . . . . . . . . . . . . . . . . . . 46
Accessing the Ethernet Brain with PAC Manager . . . . . . . . . . . . . . . . . . . . . . . . . . . . . . . . . 47
Solving Ethernet Network Problems . . . . . . . . . . . . . . . . . . . . . . . . . . . . . . . . . . . . . . . . . . . . . 48
Communicating with the SB Brain . . . . . . . . . . . . . . . . . . . . . . . . . . . . . . . . . . . . . . . . . . . . . . . . . . . 49
Timeout Errors when Communicating via a Controller . . . . . . . . . . . . . . . . . . . . . . . . . . . . 50
Turning on Communication Error Blink Codes (Serial Brain) . . . . . . . . . . . . . . . . . . . . . . . 50
Additional Troubleshooting Tools . . . . . . . . . . . . . . . . . . . . . . . . . . . . . . . . . . . . . . . . . . . . . . . . . . . . . . . . 52
Making Sure the Brain is in Normal Mode . . . . . . . . . . . . . . . . . . . . . . . . . . . . . . . . . . . . . . . . . . . . 52
TCP Settings (Ethernet Brains) . . . . . . . . . . . . . . . . . . . . . . . . . . . . . . . . . . . . . . . . . . . . . . . . . . . . . . . 52

SNAP PAC Brains User’s Guide v
v
Appendix A: Serial Cables and Addressing . . . . . . . . . . . . . . . . . . . . . . . . . . . . . .55
Serial Cables . . . . . . . . . . . . . . . . . . . . . . . . . . . . . . . . . . . . . . . . . . . . . . . . . . . . . . . . . . . . . . . . . . . . . . . . . . . . 55
Address Table. . . . . . . . . . . . . . . . . . . . . . . . . . . . . . . . . . . . . . . . . . . . . . . . . . . . . . . . . . . . . . . . . . . . . . . . . . . 55
Index . . . . . . . . . . . . . . . . . . . . . . . . . . . . . . . . . . . . . . . . . . . . . . . . . . . . . . . . . . . . . . . . . .57

SNAP PAC Brains User’s Guide
vi

SNAP PAC Brains User’s Guide
1
1
Chapter 1
1: Introduction
About SNAP PAC Brains
SNAP PAC brains are powerful and versatile I/O and network communications processors for your
SNAP PAC System
™
. These brains are designed primarily to work in distributed systems controlled by
a SNAP PAC programmable automation controller, but SNAP PAC Ethernet brains can also be used as
intelligent remote I/O in an Allen-Bradley
®
Logix-based PLC system.
All SNAP PAC brains provide local intelligence that frees the controller for supervisory tasks. SNAP
PAC brains can also be used independently for standalone I/O processing and communication.
SNAP PAC brains use either Ethernet networks or serial networks.
•The Ethernet Brains—SNAP-PAC-EB1 and SNAP-PAC-EB2—share the same functions and
features except that the SNAP-PAC-EB1 provides high-speed digital functions. The
SNAP-PAC-EB2 does not offer high-speed digital. SNAP-PAC-EB1-FM and
SNAP-PAC-EB2-FM are Factory Mutual-approved versions of these two brains.
The SNAP-PAC-R1-W and SNAP-PAC-R2-W are Wired+Wireless® models, which retain all the
same features and add a wireless LAN interface. For more information on Wired+Wireless, see
page 2.
•The two Serial Brains—SNAP-PAC-SB1 and SNAP-PAC-SB2—are like each other in their
functions and features except that the SNAP-PAC-SB1 provides high-speed digital functions.
The SNAP-PAC-SB2 does not offer high-speed digital.
Because the EB brains and SB brains run on different networks, some of their features differ. For a
comparison of brain features, see page 33.
I/O Processing
As an I/O processor, the SNAP PAC brain provides the local intelligence to independently handle
functions such as latching, counting, thermocouple linearization, watchdog timers, and PID loop
control. These functions continue to work on the brain even if communication with the controller is
lost.
Each SNAP PAC brain mounts on a SNAP PAC rack with up to 4, 8, 12, or 16 SNAP I/O
™
modules. Each
module provides from 1 to 32 I/O points, depending on the module.
SNAP PAC Ethernet brains, both wired and Wired+Wireless, support all the SNAP I/O analog,
digital, serial, and special-purpose input and output modules available on the Opto 22 website.
SNAP PAC Serial brains support all analog and digital SNAP I/O modules (including high-density).

ABOUT SNAP PAC BRAINS
SNAP PAC Brains User’s Guide
2
All SNAP I/O modules can be mixed on the same mounting rack and placed in any position on the
rack, to accommodate the required mix of signals at any location. For more information on
mounting racks, see Opto 22 form #1684, the SNAP PAC Racks Data Sheet. For more information on
I/O modules, visit our website at www.opto22.com.
Communications
In addition to I/O processing, SNAP PAC brains provide communication through a choice of
networks:
• Wired Ethernet—SNAP-PAC-EB1, SNAP-PAC-EB1-FM, SNAP-PAC-EB2, and
SNAP-PAC-EB2-FM brains communicate over a standard 10/100 Mbps Ethernet network.
Each brain is equipped with two switched Ethernet network interfaces. Because these
interfaces share a single IP address and act just like an Ethernet switch, SNAP PAC brains can be
installed in a multi-drop (daisy-chain) configuration, extending the control network without
the expense of additional Ethernet network hardware. SNAP PAC brains can also be installed in
a star configuration using standard, off-the-shelf Ethernet network components.
• Wired+Wireless Ethernet—SNAP-PAC-EB1-W and SNAP-PAC-EB2-W, like their wired
counterparts, communicate over a standard 10/100 Mbps Ethernet network and are equipped
with two switched Ethernet network interfaces. In addition, they have a wireless LAN interface,
which is a separate interface card with its own IP address. See “Wired+Wireless
Communication,”below, for more information.
• Serial—SNAP-PAC-SB1 and SNAP-PAC-SB2 brains communicate over a standard RS-485
network, either two-wire or four-wire, using a binary protocol. Baud rates from 300 to
230,400 bps are supported. There are 256 possible multidrop addresses.
Wired+Wireless Communication
SNAP-PAC-EB1-W and SNAP-PAC-EB2-W brains offer a choice of networks. They can be used on a
wired network, on a wireless LAN, or on both at the same time. For flexibility in designing your
wireless network, 802.11a, b, and g standards are supported.
Wired+Wireless EB brains can be used with Wired+Wireless SNAP PAC S-series and R-series
controllers and a variety of wireless switches and other infrastructure hardware. For the best
security, the 802.11i WPA2/AES standard is supported, while older WPA and WEP security
standards are included for backwards compatibility.
Because wireless functionality is in the brain itself, no additional parts are required for wireless
I/O processing or communication. All SNAP PAC racks and SNAP I/O modules can be used
either wired or wirelessly. You can switch from one network to the other without
reconfiguring I/O or changing field wiring. All features work the same on both
networks. See the feature chart on page 33.
PAC Project Software Suite
SNAP PAC brains are most often used as part of a SNAP PAC System,
communicating primarily with a SNAP PAC programmable automation
controller. SNAP PAC R-series controllers can communicate with Ethernet
brains only; SNAP PAC S-series controllers can communicate with both
serial and Ethernet brains at the same time. The controller runs a control
program, called a strategy, which you develop using PAC Project
™
software.

CHAPTER 1: INTRODUCTION
SNAP PAC Brains User’s Guide
3
3
The PAC Project Software Suite comes in two forms, Basic and Professional:
• PAC Project Basic™, which is included in the purchase of a SNAP PAC controller, consists of
control programming, human-machine interface (HMI) creation, and configuration software.
• PAC Project Professional™ is available for purchase and adds OptoOPCServer
™
for OPC
communications, OptoDataLink
™
for database connectivity, and additional features.
For more information about PAC Project, see form #1699, the PAC Project Data Sheet, available on our
website, www.opto22.com.
Other Communication Methods
While most customers use the PAC Project software suite for control, monitoring, and data
acquisition, SNAP PAC brains can communicate using other several other methods.
SNAP PAC EB brains can be used as intelligent remote I/O in an Allen-Bradley
®
RSLogix
®
PLC system,
and both EB and SB brains can be used as standalone I/O and communications processors for
PC-based I/O.
SNAP PAC Ethernet brains support communication using multiple protocols running
simultaneously over Ethernet. You can communicate with SNAP PAC Ethernet brains using
EtherNet
™
/IP for Allen-Bradley systems, Modbus
®
/TCP, SNMP for network management, FTP for the
brain’s built-in file system, SMTP (email client), and Opto 22’s own memory-mapped OptoMMP
protocol. Communication with OPC 2.0-compliant clients is available through OptoOPCServer.
•For EtherNet/IP, see Opto 22 form #1770, the EtherNet/IP for SNAP PAC Protocol Guide.
•For Modbus/TCP, see form #1678, the Modbus/TCP Protocol Guide.
•For SNMP, FTP, and SMTP, see form #1704, the PAC Manager User’s Guide.
•For OptoMMP, see form #1465, the OptoMMP Protocol Guide.
•For OPC connectivity, use OptoOPCServer, available either as part of PAC Project Professional or
for separate purchase. See our website for more information.
SNAP PAC serial brains support communication using OptoMMP, Opto 22’s open and
documented memory-mapped protocol. See form #1465, the OptoMMP Protocol Guide.
Custom Software
If you are not using PAC Project and want to develop custom software to communicate with the
brain, the OptoMMP Communication Toolkit is available for free on our website,
www.opto22.com. The toolkit includes ActiveX components and C++ classes, so you can use
programming tools such as Visual Basic or Visual C++ to communicate with the brain. See form
#1465, the OptoMMP Protocol Guide, for more information.
About this Guide
This guide shows you how to install and use SNAP PAC brains. This guide assumes that you are
already familiar with networking (serial, wired Ethernet, or wireless LAN) for the types of brains you’ll
be using. If you are not familiar with these subjects, we strongly suggest you consult commercially
available resources to learn about them before attempting to install or use SNAP PAC brains.
The following sections are included in this user’s guide:

ABOUT THIS GUIDE
SNAP PAC Brains User’s Guide
4
Chapter 1: Introduction—information about the guide and how to reach Opto 22 Product
Support.
Chapter 2: Installing a SNAP PAC Brain—quick-start steps to get SNAP PAC brains up and
running quickly.
Chapter 3: System Architecture—conceptual information on networking and communicating
with SNAP PAC brains, and brain specifications.
Chapter 4: Maintenance and Troubleshooting—changing IP addresses, resetting the brain to
factory defaults, and upgrading firmware; blink codes and other troubleshooting assistance.
Appendix A: Serial Cables and Addressing—for SNAP PAC serial brains, shows how to set
address switches for all possible brain addresses.
Other Documents You May Need
See the following additional guides for the information listed. All guides are available on the
Opto 22 website, www.opto22.com; some are included on the CD that came with the SNAP PAC
brain.
For this information See this guide Form #
Assigning IP address, loading new firmware, etc. PAC Manager User’s Guide 1704
Designing flowchart-based control programs for
the system (requires a SNAP PAC S-series or
R-series industrial controller)
PAC Control User’s Guide 1700
PAC Control Command Reference 1701
PAC Control Commands Quick Reference Card 1703
Communicating with SNAP PAC brains using
OPC* OptoOPCServer User’s Guide 1439
Connecting the SNAP PAC System with data-
bases OptoDataLink User’s Guide 1705
Communicating between SNAP PAC Ethernet
brains and Allen-Bradley Logix PLCs EtherNet/IP for SNAP PAC Protocol Guide 1770
Communicating with SNAP PAC Ethernet brains
using Modbus/TCP Modbus/TCP Protocol Guide 1678
Programming your own applications for SNAP
PAC brains using the OptoMMP Communication
Toolkit or the OptoMMP memory-mapped protocol
OptoMMP Protocol Guide 1465
*OptoOPCServer communication with SNAP PAC Serial brains requires a SNAP PAC controller.

CHAPTER 1: INTRODUCTION
SNAP PAC Brains User’s Guide
5
5
For Help
If you have problems installing or using SNAP PAC brains and cannot find the help you need in this
guide or on our website, contact Opto 22 Product Support.
Phone: 800-TEK-OPTO (800-835-6786
toll-free in the U.S. and Canada)
951-695-3080
Monday through Friday,
7 a.m. to 5 p.m. Pacific Time
Fax: 951-695-3017
Email: suppor[email protected]
Opto 22 website: www.opto22.com
When calling for technical support, you can help us help you faster if you can provide the following
information to the Product Support engineer:
•
Software product and version (available by clicking Help > About in the application’s menu bar).
(When contacting us, please send a screen capture of the Help > About dialog box.)
•Opto 22 hardware part numbers or models that you’re working with.
•Firmware version (available in PAC Manager by clicking Tools > Inspect).
•Specific error messages you saw.
•Version of your computer’s operating system.
NOTE: Email messages and phone
calls to Opto 22 Product Support
are grouped together and
answered in the order received.

FOR HELP
SNAP PAC Brains User’s Guide
6

SNAP PAC Brains User’s Guide
7
7
Chapter 2
2: Installing a SNAP PAC Brain
If you already know how you will use the SNAP PAC brain and want to get it running quickly, follow
the sections in this chapter.
To learn about communication options and networking, start on page 17. Specifications are listed
on page 30.
What You Will Need
You’ll need the following items to install a SNAP PAC brain:
•A PC running any of the following operating systems:
– Microsoft® Windows® 10 Professional (32-bit or 64-bit)
– Microsoft Windows 8.1 Professional (32-bit or 64-bit)
– Microsoft Windows 7 Professional (32-bit or 64-bit)
– Microsoft Windows Vista® Business (32-bit only)
• For an Ethernet connection, the PC also needs a 10/100 MB Ethernet adapter card, the
TCP/IP protocol installed, and a valid IP address, on the same subnet as the brain. (For more
information, see “Ethernet Networking”on page 26.) In addition, you need a standard Ethernet
cable for direct connection to the PC (recommended), or an available connection to a standard
10BASE-T or 100BASE-TX Ethernet network.
NOTE: Wired+Wireless models must be initially configured using a wired interface. Once IP addresses
and wireless communication parameters are set, the brain can be used wirelessly.
• For a serial connection, RS-485 (2-wire or 4-wire) connection to a SNAP PAC S-series
controller or to a PC with an Opto 22 PCI-AC48 adapter card. (See “Setting Up Serial
Networking” on page 11 for more information and wiring diagrams.)
•SNAP PAC brain (See page 33 for a chart comparing models.)
•SNAP PAC mounting rack and SNAP I/O modules chosen for your application.
•A SNAP-PS5 or SNAP-PS5U power supply or other 5 VDC power supply (-0/+0.1 VDC at 4.0 A)
applied to the rack. (Additional power may be required for SNAP I/O modules depending on
the number and type of modules used. See the module data sheets on our website,
www.opto22.com, for information.)

INSTALLING SOFTWARE
SNAP PAC Brains User’s Guide
8
Installing Software
In your CD-ROM drive, insert the CD that came with the brain. The installation wizard should start
automatically. If it doesn’t, use Windows Explorer to navigate to your CD-ROM drive and then
double-click setup.exe. Follow directions to install the software.
Installing Hardware
Assemble the rack and power supply according to the directions that came with them.
Installing Modules on the Rack
Modules snap into place in the row of connectors on the rack. Each module connector has a
number. Ethernet-based brains, both standard wired and Wired+Wireless models) support all SNAP
I/O modules. Serial-based brains support all SNAP I/O analog and digital modules (including
high-density modules).
NOTE: Any type of module can be placed in any position on the rack. Check module data sheets for power
requirements and any quantity limitations. See the chart on page 33 for brain compatibility.
1. Place the rack so that the module connector numbers are right-side up, with zero on the left.
2. Position the module over the module connector, aligning the small slot at the base of the
module with the retention bar on the rack.
Module
position zero
Module connectors
Brain connector Retention bar

CHAPTER 2: INSTALLING A SNAP PAC BRAIN
SNAP PAC Brains User’s Guide
9
9
3. With the module correctly aligned
over the connector, push on the
module to snap it into place.
When positioning modules next to
each other, be sure to align the male
and female module keys (shown in
the detailed view in the illustration at
right) before snapping a module into
position.
Modules snap securely into place and
require a special tool (provided) for
removal. To remove a module, see
page 9.
4. (Optional) Use standard 4-40 x 1/2
truss-head Phillips hold-down screws
to secure both sides of each module.
CAUTION: Do not over-tighten screws.
5. Plug the wiring connector into each module to attach modules to the devices they monitor.
Wiring diagrams are in the module’s data sheet.
Removing a Module
If you need to remove a module, follow these
steps.
1. If the modules are held in place with
screws, remove them.
2. Holding the SNAP module tool
(provided) as shown in the illustration at
right, insert it into the notch at the base
of the module.
3. Squeeze the module tool against the
module to open the release latch, and
pull straight up on the module to remove
it.
4. Continue with “Installing the Brain”on
page 10.
Optional hold-
down screws
Module keys

INSTALLING HARDWARE
SNAP PAC Brains User’s Guide
10
Installing the Brain
1. Remove the brain from its packaging.
2. Turn off power to the rack assembly.
3. Align the brain connector with the mating
connector on the mounting rack.
4. Seat the brain onto the connector and use
the hold-down screw to secure the brain in
position. Do not overtighten.
5. To attach network cabling and configure
addressing, skip to one of the following:
–“Setting Up Ethernet Networking”on
page 10.
–“Setting Up Serial Networking” on
page 11.
Setting Up Ethernet Networking
NOTE: Wired+Wireless models must be initially configured using a wired interface.
1. For an Ethernet brain (either a standard wired or Wired+Wireless model), use Category 5 or
superior solid unshielded twisted-pair cable to connect the brain in one of the following ways:
– (Recommended for initial configuration) Connect to a PC directly, using a standard
Ethernet cable.
– Connect to a standard 10BASE-T or 100BASE-TX Ethernet network that has a PC on the
same subnet as the brain and does NOT have a Dynamic Host Configuration Protocol
(DHCP) server.
Maximum cable or segment length is 100 meters; minimum cable length is one meter.
NOTE: When connecting the controller to a managed switch, make sure the managed switch's port
configuration is set to Auto for the Duplex setting and Auto for the Speed setting.
2. Before turning on power to the rack, follow instructions in Opto 22 form #1704, the PAC
Manager User’s Guide, to assign an IP address to the brain. Exception: If you are using the brain
with an Allen-Bradley Logix system, follow instructions in form #1770, the EtherNet/IP for SNAP
PAC Protocol Guide.
These guides are in Adobe Acrobat PDF format on the CD that came with the brain and are also
available from our website, www.opto22.com.

CHAPTER 2: INSTALLING A SNAP PAC BRAIN
SNAP PAC Brains User’s Guide
11
11
Setting Up Serial Networking
The serial brain can be connected to a
SNAP PAC S-series controller or to a PC
equipped with an Opto 22 PCI-AC48
adapter card, which provides an RS-485
serial converter.
If you are using PAC Control software,
connect the brain to an S-series
controller.
Follow the diagram at right and the steps
below to set up serial networking.
1. Attach an RS-485 serial cable to the
serial port. (See Appendix A: Serial
Cables and Addressing for cable
recommendations).
2. Follow the wiring diagrams
beginning on page 13 for the serial
network.
3. Rotate the baud rate switch to set the desired baud rate,
as follows:
4. Set termination and biasing:
Termination: RS-485 Termination should be applied at the first
device (typically a SNAP PAC S-series controller or PCI-AC48) and at
the last SB brain on the RS-485 communication link. For proper
termination settings, see the wiring diagrams starting on page 13.
Biasing: Biasing should be applied at one location on the RS-485
communication link. Each SB brain has a very small amount of fixed
bias. Be sure to apply biasing at the host device, which is typically a
SNAP PAC S-series controller or a PCI-AC48.
NOTE: Bias on a SNAP PAC SB brain is always ON.
Baud rate Switch
position Baud rate Switch
position
(Reserved) F 4800 bps 7
230400 bps E 2400 bps 6
115200 bps D 1200 bps 5
76800 bps C 600 bps 4
57600 bps B 300 bps 3
38400 bps A (Reserved) 2
19200 bps 9 (Reserved) 1
9600 bps 8 (Reserved) 0
Baud rate
switch
Serial
connector
Termination
switches
Address upper
Reserved LED
Reset switch
TX/RX LED
STAT LED
SNAP PAC serial brain—top view
Pin 1
Address lower
Baud Rate Switch
8
9
A
B
C
D
E
F
7
6
5
4
3
2
1
0
1 2 3
ON
IRQ
RX
TX/RX
See the wiring
diagrams starting on
page 13.

INSTALLING HARDWARE
SNAP PAC Brains User’s Guide
12
5. Use the two rotary address switches to set the unit’s address.
There are 256 possible addresses, 0–255. See Appendix A: Serial Cables and Addressing for a
table of addresses and how to set them using the two 16-position rotary address switches.
Guidelines for Grounding SNAP PAC Brains and Controllers
Power supply side: The DC output of the power supply to the I/O unit (or controller) should be
"floating,”which means the negative output terminal is not tied to ground.
RS-485 serial cable side: Connect the signal common from the controller to the signal common
on each of the I/O units using an insulated wire that is part of the serial cable. Though sometimes
hard to find, there are cables that have a twisted pair for serial communication plus an additional
insulated wire for common. However, it might be easier to obtain a cable that has an extra twisted
pair and then use one of the wires from this extra pair for the signal common connections.
NOTE: Make sure there are enough wires in the cable for a separate insulated signal common wire. Do not
connect the signal common wire to chassis ground. Do not use the overall cable shield drain wire as the
signal common.
Connect the cable shield drain wire of the serial cable to chassis ground at one location only. If the
shield is not continuous from one I/O unit to the next, then the shield of each segment will need to
be tied to chassis ground at one location only per segment.
Use one of the wires from an
extra twisted pair for the
signal common
Connect the cable
shield drain wire to
chassis ground
RS-485 data pair
This manual suits for next models
7
Table of contents
