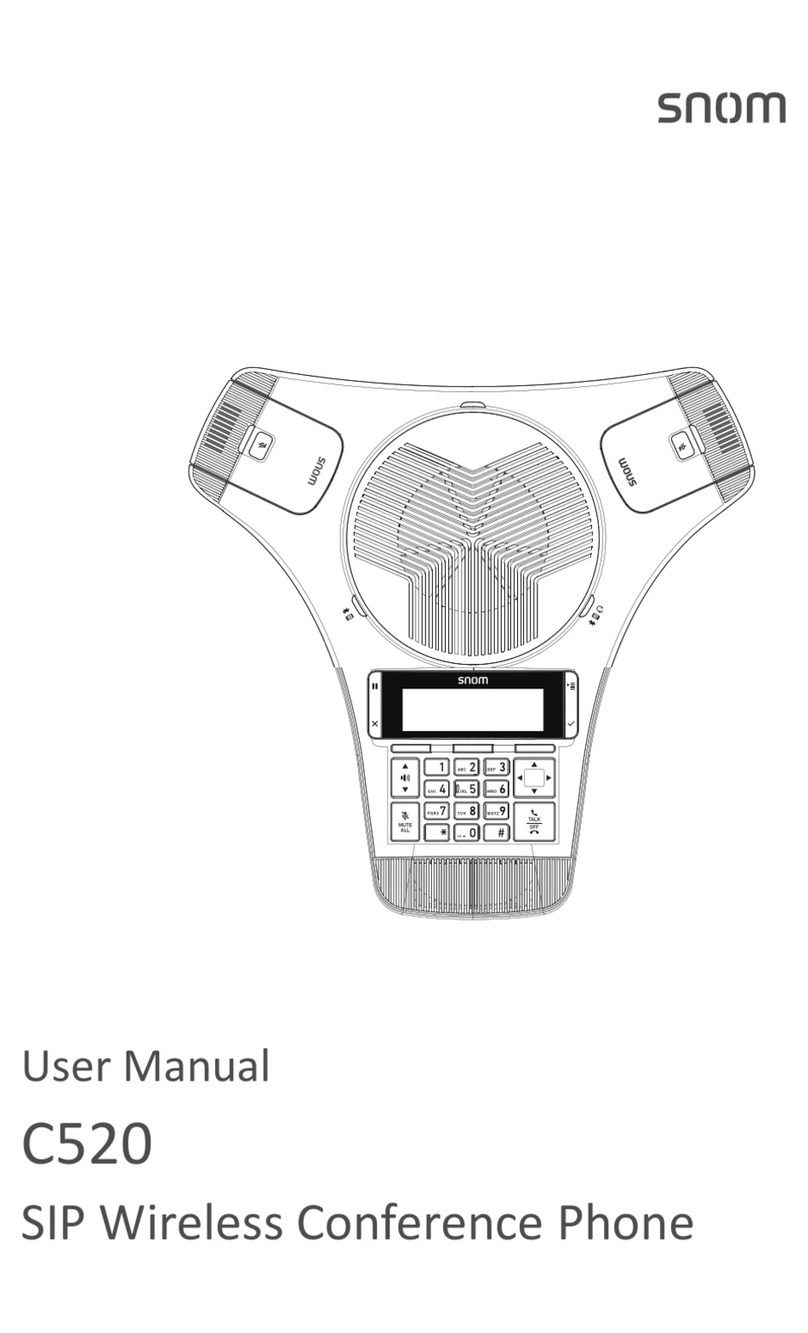
Snom C520 WiMi User manual

C520
SIP Conference
Quick Installa on Guide
0
1
6
MNO
9
WXYZ
3
DEF
#
5
JKL
8
TUV
2
ABC
4
GHI
7
PQRS
a » A

2
Quick Installation Guide
C520
SIP Conference
Table of Contents
Copyright, Trademarks, Legal
Disclaimers 3
Parts checklist 4
Status Indicators Overview 5
Status indicators on the base unit ������ 5
Status indicators on the wireless
microphones��������������������������������������� 6
Connect the base unit 7
Install the wireless microphone
battery 9
Register the wireless microphones
10
Deregister the wireless
microphones 11
Register a cordless headset 12
Deregister a cordless headset 13
Register a wireless speakerphone 14
Manually register the C52-SP to the
C520������������������������������������������������� 14
Deregister a wireless speakerphone
15
Technical Specications 16
California Energy Commission
(CEC) battery charging testing
instructions 17
Important Battery Information 18
Charging and Discharging, Storage � 18
Disposal of the device and batteries 19
Cleaning ������������������������������������������� 19
Important safety instructions 19
Battery ���������������������������������������������� 21
Precautions for users of implanted
cardiac pacemakers ������������������������� 21
About wireless mics�������������������������� 21
For C-UL compliance only 22
Mesures de sécurité importantes 22
Compliance 26
FCC part 15�������������������������������������� 26
Industry Canada ������������������������������� 27

3
Copyright, Trademarks, Legal Disclaimers
Copyright © 2022 Snom Technology GmbH� All Rights Reserved�
Snom, the names of Snom products, and Snom logos are trademarks owned by
Snom Technology GmbH�
All product specications are subject to change without notication. Snom
Technology GmbH� reserves the right to revise and change this document at any
time,
without being obliged to announce such revisions or changes beforehand or after
the fact�
Although due care has been taken in the compilation and presentation of the
information in this document, the data upon which it is based may have changed
in the meantime� Snom therefore disclaims all warranties and liability for the
accurateness, completeness, and currentness of the information published,
except in the case of intention or gross negligence on the part of Snom or
where liability arises due to binding legal provisions�
Important Information
Please read the instructions on safety and disposal and on how to set up and
use the device before using it and also give them to other users to read or inform
those users of their contents� Save this manual and do not give the device to
third parties without it�

4
Parts checklist
Your product package contains the following items� Save your sales receipt and
original packaging in the event warranty service is necessary�
0
1
6
MNO
9WXYZ
3
DEF
#
5
JKL
8TUV
2
ABC
4
GHI
7PQRS
a » A
Conference Phone
Wireless
Mic x2
Wireless Mic
battery x2
Wireless Mic
battery door x2
Quick
Installaon
Guide
C520
Power
Adapter
AC Power Cord
DC Power Cable
(with yellow plugs)
Ethernet Cable
2
1

5
Status Indicators Overview
Status indicators on the base unit
0
1
6
MNO
9
WXYZ
3DEF
#
5
JKL
8
TUV
2
ABC
4
GHI
7
PQRS
a » A
23
1
LED ①
Power Up • Green for about two seconds�
On a call • Steady Green during a call�
• Flashes Green slowly when a call is on hold�
• Steady Red when a call is muted�
Incoming Call • Flashes Green quickly when there is an incoming call�
LED ②()and LED ③()
Bluetooth device connected • Steady
Incoming call on Bluetooth device • Flashing
Held call on Bluetooth device • Slow ashing
Base unit is in discoverable mode • Flashing alternately /

6
Status indicators on the wireless microphones
On the cradle • Steady Orange when charging in the cradle except during
registration
• Flashes Red and Green alternately when the non-
registered wireless microphone is charging on the cradle�
O the cradle • Steady Green during a call
• Steady Red when the system is muted during a call�
• O when the wireless microphone is in idle mode or
without a battery�
• Flashes Orange when the wireless microphone’s battery
is low�
• Flashes Green when there is an incoming call�
• Flashes Red slowly when the wireless microphone is:
• out of range; or
• not registered; or
• o cradle during paging (with a paging tone).
During
registration
• Flashes Red and Green alternately�

7
Connect the base unit
The C520 can be powered by AC power or Power over Ethernet (PoE—Class 0).
To power the base unit with PoE:
1� Plug one end of the Ethernet cable into the Ethernet port on the bottom of the
unit�
2� Plug the other end of the cable into your network router or switch�
When the base unit is powered up, the status indicators turn green for about
two seconds�
NOTE: You can connect the C520 to both PoE and AC power� Ensure that
you connect the cables in the order described in “To power the C520
using AC power:” on page 8� Once connected, the unit will use
PoE� If PoE fails, the unit will use AC power as a backup�

8
To power the C520 using AC power:
1� Plug one end of the DC power cable into the power jack of the base unit, and
plug the other end into the C520 jack of the power adapter. Route the cord
through the slots�
2� Plug one end of the Ethernet cable into the LAN jack of the power adapter,
and plug the other end into a network switch or router�
3� Plug the small end of the AC power cord into the power jack of the adapter,
and plug the large end into a wall outlet not controlled by a switch�
NOTE:
• Use only the power adapter provided with the product� To order a
replacement power adapter, visit our website at www.snomamericas.com�
• The supplied power adapter is designed for use with only the C520 SIP
Conference Phone� It is not designed to power other network devices� Do not
connect the supplied power adapter to any other network devices through the
supplied DC power cable or any other Cat5e ethernet cable�
• The C520 SIP Conference Phone requires a network connection to an IP
PBX to operate� This quick installation guide assumes that your network
infrastructure is established and that your IP PBX phone service has been
ordered and congured for your location.
• The AC power cord is intended for a vertical or oor mount position. The
prongs are not designed to hold the plug in place if it is plugged into a ceiling
or cabinet outlet�

9
Install the wireless microphone battery
• Risk of explosion! Batteries should not be exposed to
excessive heat such as bright sunlight or re.
• Use only the supplied battery�
1� Plug the battery connector securely into the socket inside the battery
compartment. Insert the battery (with the label THIS SIDE UP facing up) into
the battery compartment�
2� Slide the battery door until it clicks into place�
3� Place the wireless mics into the charging cradles until they are ush.
NOTE: Charge the battery for 8 hours before use� The status indicator on
the wireless microphone turns orange when charging, and turns o when the
wireless microphone is fully charged�
3
AC power cord
12
LAN
VCS752
Wall outlet
Network switch
or router
DC power cable
(with yellow plugs) Ethernet cable
Slots
To Adapter
Adapter
Network switch
or router
Ethernet cable
Slots
Battery X2

10
Register the wireless microphones
Your wireless microphones are preregistered� You can register up to two wireless
microphones to the base unit�
Before you register any new wireless microphones, you must rst deregister the
wireless microphones from the base unit�
During registration, incoming calls will not have any audio after being answered�
Audio connection will resume when registration is complete�
To register the wireless microphones:
1� Press �
2� On the Main Menu, press qto select 3. User Settings, and then press �
3� On the User Settings menu, press qto select 4. Wireless microphone, and
then press �
4� On the Wireless Microphone menu, with 1. Register selected, press
The screen displays “Registering���”
• If registration is successful, the screen displays “Registration
succeeded.” The base unit plays a conrmation tone. The registered
microphone LED stops ashing red and green.
• If registration fails, the screen displays “Registration failed�” Remove the
unregistered microphone from the charging cradle and put it back in�
Repeat step 4 to try the registration process again�
5� To register the second wireless microphone, repeat step 4�
NOTE: All wireless microphones should always be kept on the charging cradles
during the registration process� Any wireless microphone that was deregistered,
but not put into the charging cradle will remain deregistered after the above
operations�
Status indicators on the wireless microphones ash red and green alternately
during registration�
To cancel registration, press �

11
Deregister the wireless microphones
1� Place the wireless microphones into the charging cradles�
2� When the base unit has no active calls, press �
3� On the Main Menu, press qto select 3. User Settings, and then press �
4� On the User Settings menu, press qto select 4. Wireless microphone, and
then press �
5� On the Wireless Microphone menu, press qto select 2. Deregister,
and press
The screen displays “Deregister all wireless microphones?”
6� Press Yes �
The screen displays “Deregistering���” and then “Wireless microphones
are deregistered.” The microphone status indicators ash red and green to
indicate they are awaiting registration�

12
Register a cordless headset
You can register one cordless headset to a C520� When the conference phone
has a cordless accessory, the conference phone and headset are all part of the
same extension, and only one device can be used at a time�
Note: The headset must be in the charger, otherwise registration cannot proceed�
To register the cordless headset:
1� When the C520 is idle, press �
2� On the Main Menu, press qto select 3. User Settings, and then press �
3� On the User Settings menu, press qto select 5. DECT headset, and then
press �
4� Lift the cordless headset out of its charging base, and then place it back in
the charger�
5� On the DECT headset menu, with 1. Register selected, press �
The screen displays “Registering���” while the C520 searches for the headset�
• If registration is successful, the screen displays
“Registration succeeded�”
• If registration fails, the screen displays “Registration failed�”
Note: To cancel registration, press �
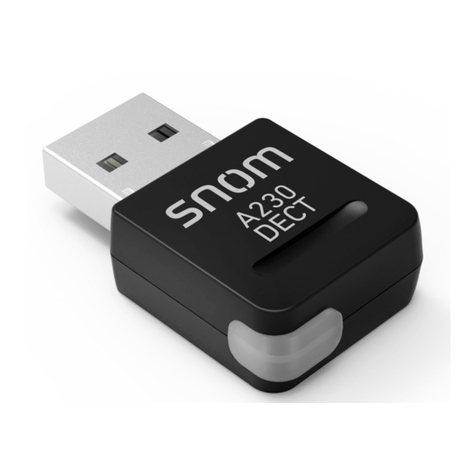
If the cordless headset was registered to another phone, it must be deregistered
rst. See “Deregister a cordless headset” on page 13.

13
Deregister a cordless headset
You must deregister a cordless headset from its original phone before you can
register it to a dierent phone.
To deregister a cordless headset:
1� When the base unit has no active calls, press �
2� On the Main Menu, press qto highlight 3. User Settings, and then
press �
3� On the User Settings menu, press qto highlight 5. DECT Headset, and then
press �
4� On the DECT headset menu, press qto highlight 2. Deregister, and then
press �
The screen displays “Deregister DECT headset?”
5� Press Yes �
The phone screen displays “Deregistering���” and then “DECT headset is
deregistered�”

14
Register a wireless speakerphone
You can register up to three C52-SP DECT Expansion Speakerphones to your
C520 SIP Conference phone�
If your organization uses DECT auto registration:
The C52-SP will automatically register to the C520� You do not need to take
any further action�
If your organization does NOT use DECT auto registration (or if you are not
sure):
You must rst turn o auto registration by performing the following steps:
1� Press and hold the MUTE ALL button on the C52-SP for ve seconds.
2� Press and hold the TALK/OFF button on the C52-SP for ve seconds.
The C52-SP LEDs turn steady orange for ve seconds, then slowly ash
orange�
At this point, you can manually register the C52-SP to the C520 by
following the instructions below�
Manually register the C52-SP to the C520
1� Place the C52-SP near the C520 SIP Conference phone�
2� Press and hold the REGISTRATION button on the bottom of the C52-SP
speakerphone for ve seconds.
When you release the button, the C52-SP LEDs will ash red and green
alternatingly� This indicates the C52-SP is ready for registration�
3� On the C520, press �
4� On the Main Menu, press qto select 3. User Settings, and then press �
5� On the User Settings menu, press qto select 6. Wireless speaker, and
then press �
6� On the Wireless Speaker menu, with 1. Register selected, press
The screen displays “Registering���”
• If registration is successful, the screen displays “Registration
succeeded.” The base unit plays a conrmation tone. The registered
speakerphone LEDs stop ashing red and green. The LEDs turn green
briey, and then turn o.
• If registration fails, the screen displays “Registration failed�”
• To cancel registration, press �
7� To register an additional C52-SP speakerphone, follow the instructions in
“Register a wireless speakerphone”, above�

15
Deregister a wireless speakerphone
1� Press �
2� On the Main Menu, press qto select 3. User Settings, and then press �
3� On the User Settings menu, press qto select 6. Wireless speaker, and
then press �
4� On the Wireless Speaker menu, press qto select 2. Deregister, and then
press �
The screen displays “Deregister all wireless speakers?”
5� Press Yes �
The screen displays “Deregistering���” and then “Wireless speakers are
deregistered�”

16
Technical Specications
Connector 1 x RJ45 (Ethernet) - LAN
Ethernet 10/100 MB
Power
requirements
Base Unit Power over Ethernet (PoE): IEEE 802.3af,
Class 0
If PoE not available:
Power adapter (included in delivery):
S018AGP0900150 Input: 100-240V AC
50/60Hz 500mA Output: 9�0V DC @ 1500mA
Wireless
Microphones
Battery: (BT183642/BT283642) 2.4V,
400mAh Ni-MH
Optimal distance between conference phone or wireless microphone and
participant: 60 cm (24 inches)
Minimum distance between microphones: 30 cm
(12 inches)

17
California Energy Commission (CEC) battery charging
testing instructions
This telephone is set up to comply with the energy-conserving standards right
out of the box� These instructions are intended for CEC compliance testing
only� When the CEC battery charging testing mode is activated, all telephone
functions, except battery charging, will be disabled�
To activate the CEC battery charging testing mode:
1� Place all wireless microphones (with batteries inserted) into the base unit to
make sure they can work normally with the base unit�
2� Turn the base unit upside down� The end with the display screen and dial
pad should be closest to you�
3� Access the battery testing switch, which is located beneath the base unit,
midway up and to the right� The switch is hidden beneath an adhesive cover�
Use a pen knife or another small blade to lift o the cover and access the
switch�
4� Use a small screwdriver or another instrument to slide the switch from
right to left�
5� Turn the base unit right side up�
6� Remove the batteries from each wireless microphone�
7� Insert the battery back into a wireless microphone while holding the key
on the microphone until the microphone’s status indicator shows steady red�
8� Release the key and then press it again immediately�
9� Place the microphone in its charging cradle on the base unit�
The microphone status indicator should ash red and green.
10� Repeat steps 6 through 8 for the remaining wireless microphones�
After about one minute, the base unit will enter the CEC battery charging testing
mode. The base indicators turn o and all wireless microphones are will be
deregistered� All telephone functions, except battery charging will be disabled�
If the base unit has failed to enter this mode, repeat step 5 through step 9 above�
To deactivate the CEC battery charging testing mode:
1� Turn the base unit upside down and slide the switch back to its original
position�
The base unit is powered up as normal�
2� Register the wireless microphones� Follow the steps described in “Register
the wireless microphones” on page 10�

18
Important Battery Information
The detachable wireless microphones of this product use rechargeable Ni-MH
400 mAh 2�4V batteries� Use only the batteries that came with the product or
contact Snom if you need replacement batteries� Contact information is available
at www.snomamericas.com� Do not use any other type of battery since this
may lead to leakage, re, explosion, or other dangerous situations.
Never disassemble, alter, or short-circuit batteries or use them for purposes
other than the intended one� Charge batteries only within the detachable wireless
microphones placed in the chargers on the product�
Charging and Discharging, Storage
• The full performance of a new batteries is achieved only after two or three
complete charge and discharge cycles�
• The batteries can be charged and discharged hundreds of times, but they
will eventually wear out� Contact Snom if you need to replace the batteries�
Contact information is available at www�snomamericas�com �
• If left unused, a fully charged battery will lose its charge over time�
• Use the batteries only for their intended purpose�
Do not short-circuit the batteries� Short-circuiting the terminals may damage
the batteries or the connecting object. Do not use a damaged charger or
battery� Using a damaged battery may cause it to explode�
• Do not place or store the batteries, inside or outside the microphone, in the
immediate vicinity of open re or other heat sources.
• Leaving the batteries in hot or cold places will reduce their capacity and
lifetime� Charge batteries within an ambient temperature range of +5° C to
+40° C (+41° F to +104° F), max. humidity 85%. A device with a hot or cold
battery may not work temporarily, even when the battery is fully charged�
• Avoid overcharging� Repeated overcharging can lead to deterioration in
batteries performance� Never attempt charging the batteries with reversed
polarity as this may cause the gas pressure inside the batteries to rise and
lead to leakages�
• Remove batteries if storing product for more than 1 month�
• Store batteries in a cool, dry place without corrosive
gases� Temperature range for storage of charged batteries up to 6 months:
-20° C to +45° C (-4° F to 113° F); up to 2 years: -20° C to +35° C (-4° F to
95° F); humidity 65±20%. Discharge and charge batteries every 3 months.

19
Disposal of the device and batteries
Disposal of electrical and electronic products and batteries should be done in line
with local regulations� Please contact local authorities for further information�
Cleaning
To clean the device, use an anti-static cloth� Please avoid cleaning liquids as they
might damage the surface or internal electronics of the device�
Important safety instructions
When using your C520 SIP Conference phone, basic safety precautions should
always be followed to reduce the risk of re, electric shock and injury to persons,
including the following:
1� Read and understand all instructions�
2� Follow all warnings and instructions marked on the product�
3� This product should only be connected to the host equipment and never
directly to the network such as Public Switch Telephone Network (PSTN) or
Plain Old Telephone Services (POTS).
4� Unplug this product from the wall outlet before cleaning� Do not use liquid or
aerosol cleaners� Use a damp cloth for cleaning�
5� Do not use this product near water such as near a bathtub, wash bowl,
kitchen sink, laundry tub or swimming pool, or in a wet basement or shower�
6� Do not place this product on an unstable table, shelf, stand or other unstable
surfaces�
7� Slots and openings in the back or bottom of the base unit and wireless
mic are provided for ventilation� To protect them from overheating, these
openings must not be blocked by placing the product on a soft surface such
as a bed, sofa or rug� This product should never be placed near or over a
radiator or heat register� This product should not be placed in any area where
proper ventilation is not provided�
8� This product should be operated only from the type of power source
indicated on the marking label� If you are not sure of the type of power supply
in your oce, consult your dealer or local power company.
9� Do not allow anything to rest on the power cord� Do not install this product
where the cord may be walked on�
10� Never push objects of any kind into this product through the slots in the base
unit or wireless mic because they may touch dangerous voltage points or
create a short circuit� Never spill liquid of any kind on the product�
11� To reduce the risk of electric shock, do not disassemble this product, but take
it to an authorized service facility� Opening or removing parts of the base
unit or wireless mic other than specied access doors may expose you to
dangerous voltages or other risks� Incorrect reassembling can cause electric

20
shock when the product is subsequently used�
12� Do not overload wall outlets and extension cords�
13� Unplug this product from the wall outlet and refer servicing to an authorized
service facility under the following conditions:
A� When the power supply cord or plug is damaged or frayed�
B� If liquid has been spilled onto the product�
C� If the product has been exposed to rain or water�
D� If the product does not operate normally by following the operating
instructions. Adjust only those controls that are covered by the operation
instructions. Improper adjustment of other controls may result in damage
and often requires extensive work by an authorized technician to restore
the product to normal operation�
E� If the product has been dropped and the base unit and/or wireless mic
has been damaged�
F� If the product exhibits a distinct change in performance�
14� Avoid using the C520 SIP Conference phone during an electrical storm�
There is a remote risk of electric shock from lightning�
15� Do not use the C520 SIP Conference phone to report a gas leak in the
vicinity of the leak� Under certain circumstances, a spark may be created
when the adapter is plugged into the power outlet, or when the wireless
mic is replaced in its cradle� This is a common event associated with the
closing of any electrical circuit� The user should not plug the phone into a
power outlet, and should not put a charged wireless mic onto the charging
cradle, if the phone is located in an environment containing concentrations of
ammable or ame-supporting gases, unless there is adequate ventilation.
A spark in such an environment could create a re or explosion. Such
environments might include: medical use of oxygen without adequate
ventilation; industrial gases (cleaning solvents; gasoline vapors; etc.); a leak
of natural gas; etc�
16� Only put the wireless mic next to your mouth when it is in normal talk mode�
17� The power cables are intended to be correctly oriented in a vertical or oor
mount position� The prongs are not designed to hold the plug in place if it is
plugged into a ceiling or cabinet outlet�
18� Use only the adapter included with this product� Incorrect adapter polarity or
voltage can seriously damage the product�
19� For pluggable equipment, the socket-outlet shall be installed near the
equipment and shall be easily accessible�
20� CAUTION: Use only the batteries indicated in this manual� There may be
a risk of explosion if a wrong type of battery is used� Use only the supplied
rechargeable battery or replacement battery pack� Do not dispose of
batteries in a re. They may explode. Dispose of used battery according to
the information in The RBRC®seal�
Other manuals for C520 WiMi
3
Table of contents
Other Snom Conference System manuals