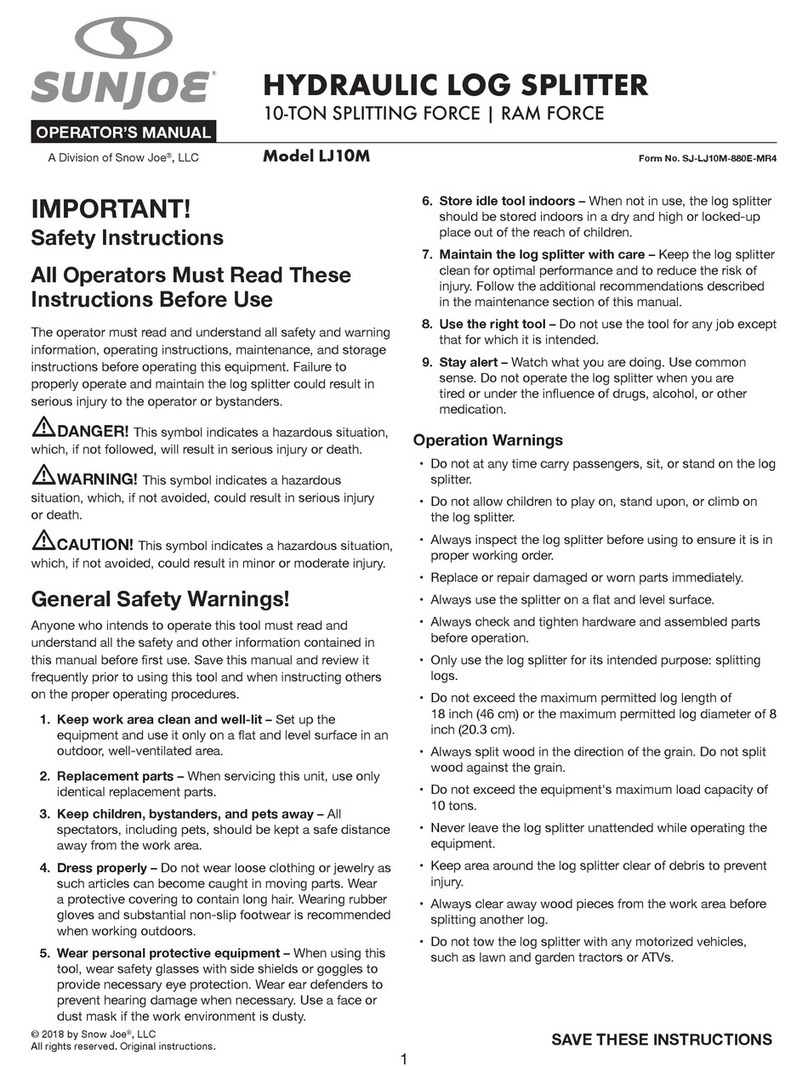
SNOWJOE Sunjoe LJ10M User manual

© 2020 by Snow Joe®, LLC
All rights reserved. Original instructions. SAVE THESE INSTRUCTIONS
1
EN
A Division of Snow Joe®, LLC
OPERATOR’S MANUAL
Model LJ10M Form No. SJ-LJ10M-880E-MR7
RHYDRAULIC LOG SPLITTER
10-TON SPLITTING FORCE | RAM FORCE
IMPORTANT!
Safety Instructions
All Operators Must Read These
Instructions Before Use
The operator must read and understand all safety and warning
information, operating instructions, maintenance, and storage
instructions before operating this equipment. Failure to
properly operate and maintain the log splitter could result in
serious injury to the operator or bystanders.
mDANGER! This symbol indicates a hazardous situation,
which, if not followed, will result in serious injury or death.
mWARNING! This symbol indicates a hazardous
situation, which, if not avoided, could result in serious injury
or death.
mCAUTION! This symbol indicates a hazardous situation,
which, if not avoided, could result in minor or moderate injury.
General Safety Warnings!
Anyone who intends to operate this tool must read and
understand all the safety and other information contained in
this manual before rst use. Save this manual and review it
frequently prior to using this tool and when instructing others
on the proper operating procedures.
1. Keep work area clean and well-lit – Set up the
equipment and use it only on a at and level surface in an
outdoor, well-ventilated area.
2. Replacement parts – When servicing this unit, use only
identical replacement parts.
3. Keep children, bystanders, and pets away – All
spectators, including pets, should be kept a safe distance
away from the work area.
4. Dress properly – Do not wear loose clothing or jewelry as
such articles can become caught in moving parts. Wear
a protective covering to contain long hair. Wearing rubber
gloves and substantial non-slip footwear is recommended
when working outdoors.
5. Wear personal protective equipment – When using this
tool, wear safety glasses with side shields or goggles to
provide necessary eye protection. Wear ear defenders to
prevent hearing damage when necessary. Use a face or
dust mask if the work environment is dusty.
6. Store idle tool indoors – When not in use, the log splitter
should be stored indoors in a dry and high or locked-up
place out of the reach of children.
7. Maintain the log splitter with care – Keep the log splitter
clean for optimal performance and to reduce the risk of
injury. Follow the additional recommendations described
in the maintenance section of this manual.
8. Use the right tool – Do not use the tool for any job except
that for which it is intended.
9. Stay alert – Watch what you are doing. Use common
sense. Do not operate the log splitter when you are
tired or under the inuence of drugs, alcohol, or other
medication.
Operation Warnings
• Do not at any time carry passengers, sit, or stand on the log
splitter.
• Do not allow children to play on, stand upon, or climb on
the log splitter.
• Always inspect the log splitter before using to ensure it is in
proper working order.
• Replace or repair damaged or worn parts immediately.
• Always use the splitter on a at and level surface.
• Always check and tighten hardware and assembled parts
before operation.
• Only use the log splitter for its intended purpose: splitting
logs.
• Do not exceed the maximum permitted log length of
18 inch (46 cm) or the maximum permitted log diameter of 8
inch (20.3 cm).
• Always split wood in the direction of the grain. Do not split
wood against the grain.
• Do not exceed the equipment's maximum load capacity of
10 tons.
• Never leave the log splitter unattended while operating the
equipment.
• Keep area around the log splitter clear of debris to prevent
injury.
• Always clear away wood pieces from the work area before
splitting another log.
• Do not tow the log splitter with any motorized vehicles,
such as lawn and garden tractors or ATVs.
2
Crush + Cut Hazards
• Always keep hands and feet clear from moving and cutting
parts while operating the equipment.
• Always clear the work area and keep it clean and free of
debris when operating the log splitter.
• Always wear safety gear, including eye protection, heavy-
duty gloves, and steel-toed boots, when operating the log
splitter.
mWARNING! The warnings, cautions, and instructions
outlined in this instruction manual cannot cover all possible
conditions or situations that may occur. It must be understood
by the operator that common sense and caution are factors
that cannot be built into this product and must be supplied by
the operator.
Wood Condition
• This log splitter is designed to split standard size logs
[max log diameter: 8 inch (20.3 cm); max log length 18 inch
(46 cm); min log length: 13.5 inch (34.3cm)]. Do not split
oversized logs.
• Do not attempt to split “hard” wood that requires more than
5 seconds to split.
• Check the log prior to splitting to ensure it is free from
foreign objects that may be projected or cause damage to
the machine (ie.: nails, wire, etc.).
• Ensure that the end of the log is cut square and all
branches have been cut ush.

3
Safety Symbols
The following table depicts and describes safety symbols that may appear on this product. Read, understand, and follow all
instructions on the machine before attempting to assemble and operate.
READ THE OPERATOR'S
MANUAL(S) – Read, understand,
and follow all instructions in the
user manual(s) before attempting
to assemble and operate.
SAFETY ALERT – Indicates
a precaution, a warning, or
a danger.
WARNING! Do not expose the unit
to rain or wet conditions.
WEAR EYE AND HEARING
PROTECTION – For protection
against injury, wear ear defenders
and safety goggles.
Wear heavy-duty gloves and steel-
toed boots when using the machine
and handling debris.
WARNING! Always be aware of the
movement of the log splitter.
Keep bystanders and children
a safe distance away.
Symbols SymbolsDescriptions Descriptions
Moving parts can crush
and cut hands and ngers.
Keep hands clear of the ram
plate, wedge, and logs while
splitting.

4
Know Your Log Splitter
Read the owner’s manual and safety instructions carefully before operating the log splitter. Compare the illustration below to the
log splitter in order to familiarize yourself with the location of the various controls and adjustments. Save this manual for future
reference.
Technical Data
Splitting Force Max ...........................................................10 ton
Ram Force/Continuous Force ...........................................10 ton
Material................................................................................Steel
Log Length Max .................................................... 18 in. (46 cm)
Log Length Min ............................................... 13.5 in. (34.3 cm)
Log Diameter Max................................................ 8 in. (20.3 cm)
Wedge Height....................................................... 3.9 in. (10 cm)
Beam Height......................................................... 5.5 in. (14 cm)
Hydraulic Cylinder Size ........................................9.9 in. x 2.1 in.
(Length x Diameter) (25.2 cm x 5.2 cm)
Hydraulic Rod Size.............................................11.6 in. x 1.7 in.
(Length x Diameter) (29.3 cm x 4.3 cm)
Hydraulic Capacity .............................................22 . oz. (0.65 l)
Wheel Size......................................................... 2.48 in. (6.3 cm)
Net Weight...........................................................87 lbs (39.5 kg)
1. Operating handles
2. Hand wheel
3. Oil plug
4. Hydraulic pump
5. Piston rod
6. Ram plate
7. Log cradle
8. Wedge
9. Beam
10. Log splitter handle
11. Socket
12. Wheels
R
1
2
3
11
12
4
5
6
7
8
10
9

5
Unpacking
Carton Contents
• Log splitter
• Operating handles (2)
• Manuals with registration card
1. Carefully remove the log splitter and check to see that all
of the above items are supplied.
2. Inspect the product carefully to make sure no breakage or
damage occurred during shipping. If you nd damaged or
missing parts, DO NOT return the unit to the store. Please
call the Snow Joe® + Sun Joe®customer service center at
1-866-SNOWJOE (1-866-766-9563).
NOTE: Do not discard the shipping carton and packaging
material until you are ready to use the log splitter. The
packaging is made of recyclable materials. Properly
dispose of these materials in accordance with local
regulations.
IMPORTANT! The equipment and packaging material are not
toys. Do not let children play with plastic bags, foils, or small
parts. These items can be swallowed and pose a suocation
risk!
Assembly
IMPORTANT! This product requires some assembly before
use. Due to the weight and/or size of the log splitter, it is
recommended that another adult be present to assist with the
assembly.
mCAUTION! Read and follow all instructions for assembly
and operation. Failure to properly assemble this log splitter
could result in serious injury to the user or bystanders, or
cause equipment damage.
Attaching the Handles
1. Insert the operating handles into the sockets on the
hydraulic pump (Fig. 1).
Operation
mWARNING! Before using the log splitter, review the
instructions below and all safety information. Failure to follow
these instructions may result in property damage or injury to
the operator or bystanders.
Splitting Operation + Additional Safety
Instructions
Follow these instructions to operate the log splitter:
1. Ensure all logs meet the proper size requirements
[(max log diameter: 8 inch (20.3 cm); max log length:
18 inch (46 cm); min log length: 13.5 inch (34.3 cm)].
IMPORTANT! Logs vary in hardness and structure. Small
logs with knots or harder wood may be more dicult to
split. Larger logs with less hardness may not be dicult to
split. Do not force the log splitter if the log fails to split on
the rst attempt.
2. When loading or positioning a log, always handle the bark
side; never handle the ends. Never place your hands or
body parts between the log and the splitter.
3. Never load or unload logs while the ram is moving.
4. Do not pile logs to be split in a place where you need to
reach across the splitter in order to load them.
5. Log ends need to be cut square (at a 90° angle) so that
they do not slide out when splitting and cause a safety
hazard, and so that they do not exert excessive force
on the log splitter components. Use a chain saw (not
included), like the Sun Joe®electric chain saws (models
SWJ698E, SWJ699E, SWJ700E, SWJ701E; visit sunjoe.
com to purchase online), to cut the logs ends square
before attempting to split them.
6. Never attempt to split more than one log at a time. A piece
of a log can unexpectedly be thrown from the machine,
which can result in severe personal injury.
7. Do not use if there is any indication of damage to the
hydraulic cylinder.
8. Do not use the splitter to split logs across the grain or
against the bark. Doing so will damage the log splitter and
could cause log pieces to be thrown, injuring the operator
or bystanders.
Fig. 1
Operating handle
Socket
Hydraulic pump
8 in. (20.3 cm)
18 in. (46 cm)

6
mWARNING! Accidents occur when there is more than
one person involved in loading and operating the log splitter;
only one person should operate the splitter. If a second person
is assisting in loading the splitter, NEVER allow an assistant to
hold the log in place while the operator is using the unit.
Using the 10-Ton Log Splitter
1. Load the log lengthwise into the unit between the wedge
and the ram plate. Be sure that the split will be along
the grain.
2. Grip one handle in each hand and pump the handles back
and forth in opposite directions. This contrary motion will
force the log against the wedge (Fig. 2).
mDANGER! Always operate the unit from the side of the
operation handles, furthest from the wedge and the
splitting log.
3. Remove the split pieces.
4. Turn the hand wheel counterclockwise no more than one
full turn to relieve the pressure and retract the ram (Fig. 3).
5. Turn the hand wheel clockwise until it is snug (Fig. 3). You
are now ready to split the next log.
mWARNING! NEVER attempt to remove a stuck log from
the splitter by forcing the use of the hydraulic ram to split the
log.
mWARNING! NEVER modify the log splitter.
Splitting a Short Log
This log splitter is designed to split logs between 13.5 inch
(34.3 cm) and 18 inch (46 cm) in length. When the log is shorter
than 13.5 inch, the ram plate may not be able to reach the log.
In this case, place a wood block with at surfaces in front of
the ram plate before operating (Fig. 4). Very short logs may
require an additional block.
Fig. 2
Operating
handle
Wedge Ram plate
R
Fig. 3
Hand wheel
Ram plate
Fig. 4
Ram plate
Block

7
NOTE: The block(s) used for extending the piston rod must be
at on all surfaces.
Removing a Jammed Log
If the log gets stuck on the wedge base, or the wedge
becomes embedded in the log and will not completely split or
separate from the log, follow the directions below to remove
the log:
1. Fully retract the ram.
2. Remove the jammed log from the wedge manually with a
pry bar.
mCAUTION! Be extremely careful as log pieces may y
o as they separate from the wedge.
3. Do not attempt to re-split a jammed log once it has been
removed from the wedge.
4. Manually split the log with a maul or cut it with a chain
saw.
Bleeding the Log Splitter
1. Extend the ram to its maximum length.
2. Remove the oil plug and make sure the oil level is full.
If needed, add more hydraulic oil to the hydraulic pump
(Fig. 4).
3. Turn the hand wheel counterclockwise as fast as possible.
The piston rod will retract into the hydraulic pump and
push the air out of the cylinder via the oil plug hole.
4. Check the oil level again, and if needed, add more
hydraulic oil.
5. Replace the oil plug and repeat steps 1-3 as needed.
6. To add oil, remove the oil plug and add oil to just below
the ll plug.
7. Replace the oil plug completely.
Maintenance
mWARNING! Periodically apply a light coat of rust-
resistant oil, such as 3-in-1 oil or WD-40, to the springs to
keep them in proper working order.
• Periodically check all fasteners for tightness.
• Annually clean and lightly lubricate parts.
• Use a glossy enamel spray paint to touch up scratched or
worn painted metal surfaces.
• Never exceed the load capacity rating of 10 tons; doing so
will damage the log splitter and void the manufacturer's
warranty.
IMPORTANT! If a part needs replacement, only use parts
that are specically recommended by the manufacturer.
Replacement parts that do not meet these specications
may result in a safety hazard, may compromise the tool's
performance, and will void the manufacturer's warranty.
Storage
• Before storing, make sure the log splitter is clean and dry.
Such upkeep is necessary to ensure years of trouble-free
performance.
• Make sure the ram is completely retracted prior to storing
the unit. Relieve any pressure by turning the hand wheel
counterclockwise, then retighten by turning the hand
wheel clockwise.
• Lightly lubricate all metal surfaces before storing.
• Store indoors or in a dry, protected area during severe
weather and during the winter months.
• Examine the log splitter thoroughly for worn, loose, or
damaged parts. Should you need to repair or replace a
part, contact an authorized Snow Joe® + Sun Joe®dealer
or call the Snow Joe® + Sun Joe®customer service center
at 1-866-SNOWJOE (1-866-766-9563) for assistance.
Service and Support
If your Sun Joe® LJ10M log splitter requires service or
maintenance, please call the Snow Joe® + Sun Joe®customer
service center at 1-866-SNOWJOE (1-866-766-9563).
Model and Serial Numbers
When contacting the company, reordering parts, or arranging
service from an authorized dealer, you will need to provide the
model and serial numbers, which can be found on the decal
located on the housing of the unit. Copy these numbers into
the space provided below.
R
Fig. 4
Hand wheel
Oil plug
Piston rod
Record the following numbers from the housing or handle of your
new product: Model #:
Serial #:
L J 1 0 M

8
Troubleshooting
Ram will not
move.
Slow ram speed
when extending
or retracting.
Wood will not
split, or splits
extremely slowly.
1. Hand wheel is open.
2. Wedged wood under ram.
3. Blocked hydraulic lines.
4. Blocked control valve.
5. Damaged control valve.
6. Damaged cylinder piston.
1. Slow pumping of the operating handles.
2. Air or air bubbles in oil reservoir.
3. Damaged control valve.
4. Internal control valve leak.
5. Internally damaged cylinder.
1. Air or air bubbles in oil reservoir.
2. Excessive control valve inlet vacuum.
3. Low control valve setting.
4. Internal control valve leak.
5. Internally damaged cylinder.
1. Turn hand wheel clockwise until snug.
2. Remove any foreign objects from below the ram.
3. Flush and clean the splitter's hydraulic system.
4. Flush and clean the splitter's control valve.
5. Contact an authorized Snow Joe® + Sun Joe®
dealer or call the Snow Joe® + Sun Joe®
customer service center at 1-866-SNOWJOE
(1-866-766-9563).
6. Contact an authorized Snow Joe® + Sun Joe®
dealer or call the Snow Joe® + Sun Joe®
customer service center at 1-866-SNOWJOE
(1-866-766-9563).
1. Move operating handles at a faster pace.
2. Purge air from the splitter's hydraulic system.
3. Contact an authorized Snow Joe® + Sun Joe®
dealer or call the Snow Joe® + Sun Joe®
customer service center at 1-866-SNOWJOE
(1-866-766-9563).
4. Contact an authorized Snow Joe® + Sun Joe®
dealer or call the Snow Joe® + Sun Joe®
customer service center at 1-866-SNOWJOE
(1-866-766-9563).
5. Contact an authorized Snow Joe® + Sun Joe®
dealer or call the Snow Joe® + Sun Joe®
customer service center at 1-866-SNOWJOE
(1-866-766-9563).
1. Check for excessive air in hydraulic reservoir.
2. Check control valve inlet hose for blockage or
kinks.
3. Contact an authorized Snow Joe® + Sun Joe®
dealer or call the Snow Joe® + Sun Joe®
customer service center at 1-866-SNOWJOE
(1-866-766-9563).
4. Contact an authorized Snow Joe® + Sun Joe®
dealer or call the Snow Joe® + Sun Joe®
customer service center at 1-866-SNOWJOE
(1-866-766-9563).
5. Contact an authorized Snow Joe® + Sun Joe®
dealer or call the Snow Joe® + Sun Joe®
customer service center at 1-866-SNOWJOE
(1-866-766-9563).
Problem Possible Cause Solution

R4_01282020
SNOW JOE®+ SUN JOE®CUSTOMER PROMISE
OUR WARRANTY:
Snow Joe warrants new, genuine, powered and non-powered Products to be free from defects in material or workmanship when used
for ordinary household use for a period of two years from the date of purchase by the original, end-user purchaser when purchased
from Snow Joe or from one of Snow Joe’s authorized sellers with proof of purchase. Because Snow Joe is unable to control the quality
of its Products sold by unauthorized sellers, unless otherwise prohibited by law, this Warranty does not cover Products purchased from
unauthorized sellers. If your Product does not work or there’s an issue with a specic part that is covered by the terms of this Warranty,
Snow Joe will elect to either (1) send you a free replacement part, (2) replace the Product with a new or comparable product at no
charge, or (3) repair the Product. How cool is that!
This Warranty gives you specific legal rights, and you may also have other rights which vary from State to State.
PRODUCT REGISTRATION:
Snow Joe strongly encourages you to register your Product. You can register online at snowjoe.com/register, or by printing and
mailing in a registration card available online from our website, or calling our Customer Service Department at 1-866-SNOWJOE
(1-866-766-9563), or by e-mailing us at [email protected]. Failure to register your Product will not diminish your warranty
rights. However, registering your Product will allow Snow Joe to better serve you with any of your customer service needs.
WHO CAN SEEK LIMITED WARRANTY COVERAGE:
This Warranty is extended by Snow Joe to the original purchaser and original owner of the Product.
WHAT IS NOT COVERED?
This Warranty does not apply if the Product has been used commercially or for non-household or rental applications. This Warranty also
does not apply if the Product was purchased from an unauthorized seller. This Warranty also does not cover cosmetic changes that do
not aect performance. Wearing parts like belts, augers, chains and tines are not covered under this Warranty, and can be purchased
at snowjoe.com or by calling 1-866-SNOWJOE (1-866-766-9563).
ABOVE ALL ELSE, Snow Joe, LLC (“Snow Joe”) is dedicated to you, our customer. We strive to make your experience as pleasant as
possible. Unfortunately, there are times when a Snow Joe®, Sun Joe®, or Aqua Joe®product (“Product”) does not work or breaks under
normal operating conditions. We think it’s important that you know what you can expect from us. That’s why we have a Limited Warranty
(“Warranty”) for our Products.
9
EN


SP
© 2020 Snow Joe®, LLC
Derechos reservados. Instrucciones originales. GUARDE ESTAS INSTRUCCIONES
11
Una división de Snow Joe®, LLC
MANUAL DEL OPERADOR
Modelo LJ10M Forma No. SJ-LJ10M-880S-MR7
RPARTIDOR DE TRONCOS HIDRÁULICO
9 TONELADAS MÉTRICAS DE FUERZA DE PARTICIÓN | EMPUJE
¡IMPORTANTE!
Instrucciones de seguridad
Todos los operadores deberán leer
estas instrucciones antes del uso
El operador debe leer y entender toda la información y
advertencias de seguridad, instrucciones de operación,
mantenimiento e instrucciones de almacenamiento antes de
operar este equipo. No operar ni mantener de forma apropiada
este partidor de troncos puede resultar en lesiones severas al
operador o a los espectadores.
m¡PELIGRO! Este símbolo indica una situación peligrosa
que puede resultar en lesiones severas o la muerte.
m¡ADVERTENCIA! Este símbolo indica una situación
peligrosa, la cual, de no evitarse, puede resultar en lesiones
severas o la muerte.
m¡PRECAUCIÓN! Este símbolo indica una situación
peligrosa, la cual, de no ser evitada, puede resultar en lesiones
menores o moderadas.
¡Advertencias generales de
seguridad!
Cualquier persona que vaya a operar esta herramienta debe
leer y entender toda la información adicional y de otro tipo
contenida en este manual antes del uso del partidor. Guarde
este manual y revíselo con frecuencia antes de usar este
partidor y al instruir a otras personas sobre cómo operarlo
apropiadamente.
1. Mantenga el área de trabajo limpia y bien iluminada:
prepare el equipo y úselo solo sobre una supercie plana
y nivelada, en un área de exteriores también nivelada
apropiadamente.
2. Piezas de repuesto: al reparar esta unidad, use solo
piezas de repuesto idénticas.
3. Mantenga alejados a los transeúntes, niños y
mascotas: todos los espectadores, incluidas las
mascotas, deberán estar a una distancia segura del área
de trabajo.
4. Vístase adecuadamente: no use ropa suelta o joyería,
ya que dichos objetos pueden engancharse en las piezas
móviles. Utilice una cubierta protectora para contener
cabellos largos. Al trabajar en exteriores, se recomienda
usar guantes de hule y calzado protector anti-deslizante.
5. Use equipos de protección personal: al usar esta
herramienta, use gafas protectoras con cubiertas laterales
o gafas de seguridad para entregar una protección ocular
adecuada. De ser necesario, use protección auditiva
con el n de evitar daños a sus oídos. Use una máscara
antipolvo o para el rostro si el entorno de trabajo es
polvoriento.
6. Guarde la herramienta inactiva en interiores: cuando
no esté en uso, el partidor de troncos debe almacenarse
bajo techo, en un lugar seco, alto o bajo llave, lejos del
alcance de los niños.
7. Cuide el partidor de troncos: manténgalo limpio para un
óptimo rendimiento y reducir el riesgo de lesiones. Siga
las recomendaciones adicionales descritas en la sección
de mantenimiento de este manual.
8. Utilice la herramienta correcta: no utilice la herramienta
para ningún otro trabajo excepto para el cual está
destinada.
9. Manténgase alerta: vea lo que está haciendo. Utilice su
sentido común. No opere el partidor de troncos cuando
usted esté cansado o bajo la inuencia de drogas o
alcohol.
Advertencias de operación
• No se pare, siente, ni transporte pasajeros sobre el partidor
de troncos en ningún momento.
• No permita que los niños jueguen sobre, se paren encima
de, o trepen al partidor de troncos.
• Inspeccione siempre el partidor de troncos antes de usarlo
para asegurarse de que funcione correctamente.
• Reemplace o repare inmediatamente las partes dañadas o
gastadas.
• Use siempre el partidor en una supercie plana y nivelada.
• Verique y ajuste siempre los accesorios de montaje y
partes ensambladas antes de la operación.
• Use el partidor de troncos únicamente para el propósito al
que está destinado: partir troncos.
• No exceda la máxima longitud permitida de
18 plg (46 cm) o el máximo diámetro permitido de
8 plg (20.3 cm) del tronco.
• Siempre parta la madera siguiendo la dirección de la bra.
No parta la madera en contra de la dirección de la bra.

12
• No exceda la máxima capacidad de fuerza de 9 toneladas
métricas del partidor de troncos.
• Durante la operación del partidor de troncos, nunca lo deje
sin atender.
• Mantenga el área alrededor del partidor de troncos sin
ningún escombro para evitar lesiones.
• Retire siempre del área de trabajo pedazos de madera
antes de partir otro tronco.
• No remolque el partidor de troncos con vehículos
motorizados tales como tractores de jardín o vehículos
todo-terreno.
Peligros de trituración y corte
• Mantenga siempre las manos y pies alejados de las partes
móviles y cortantes durante la operación del equipo.
• Limpie siempre el área de trabajo y manténgala libre de
residuos al operar el partidor de troncos.
• Al operar el partidor de troncos, use siempre equipos
protectores tales como protección ocular, guantes
resistentes y botas con punta de acero.
m¡ADVERTENCIA! Las advertencias, precauciones
e instrucciones descritas en este manual de seguridad no
pueden cubrir todas las posibles condiciones o situaciones
que puedan darse. El operador debe entender que el sentido
común y la precaución son factores que no pueden ser
incorporados en este producto, y deben ser suministrados por
el operador.
Condición de la madera
• Este partidor de troncos está diseñado para partir troncos
de tamaño estándar (diámetro máximo de tronco: 8 plg
[20.3 cm]; longitud máxima de tronco: 18 plg [46 cm];
longitud mínima de tronco: 13.5 plg [34.3 cm]). No parta
troncos demasiado grandes.
• No intente partir madera “dura” que requiera más de cinco
segundos para ser partida.
• Verique el tronco antes de partirlo para asegurarse de que
esté libre de objetos extraños que puedan ser disparados o
dañar la máquina (es decir, clavos, alambres, etc.).
• Asegúrese de que el extremo del tronco esté cortado de
forma recta (en un ángulo de 90º) y todas las ramas hayan
sido cortadas al ras.

13
Símbolos de seguridad
La siguiente tabla muestra y describe los símbolos de seguridad que pueden aparecer en este producto. Lea, comprenda y siga
todas las instrucciones relacionadas a la unidad antes de intentar ensamblarla y operarla.
LEA EL(LOS) MANUAL(ES) DEL
OPERADOR: lea, comprenda y
siga todas las instrucciones en
el(los) manual(es) antes de intentar
ensamblar y operar la unidad.
ALERTA DE SEGURIDAD: indica
una precaución, advertencia o
peligro.
¡ADVERTENCIA! No exponga la
unidad a la lluvia o a condiciones
húmedas.
USE PROTECCIÓN OCULAR Y
AUDITIVA: para protegerse contra
lesiones, use protectores auditivos y
gafas protectoras.
Use guantes de alta resistencia y
botas con punta de acero al usar la
máquina y manipular escombros.
¡ADVERTENCIA! Esté siempre
atento al movimiento del partidor
de troncos.
Mantenga a los transeúntes y niños
alejados a una distancia segura.
Símbolo Símbolo
Descripción Descripción
Las partes móviles pueden triturar
y cortar manos y dedos. Mantenga
las manos alejadas de la placa del
gato, cuña y troncos durante la
partición.

14
Conozca su partidor de troncos
Lea detenidamente el manual del propietario y las instrucciones de seguridad antes de operar el partidor de troncos. Compare
la siguiente ilustración con el partidor de troncos para familiarizarse con la ubicación de los diversos controles y ajustes. Guarde
este manual para futuras referencias.
R
Datos técnicos
Fuerza de partición máxima.......................9 toneladas métricas
Fuerza de empuje/continua........................9 toneladas métricas
Material...............................................................................Acero
Longitud de tronco máxima ................................. 18 plg (46 cm)
Longitud de tronco mínima ............................ 13.5 plg (34.3 cm)
Diámetro de tronco máximo................................ 8 plg (20.3 cm)
Altura de cuña ..................................................... 3.9 plg (10 cm)
Altura de ariete .................................................... 5.5 plg (14 cm)
Tamaño de cilindro hidráulico............................ 9.9 plg x 2.1 plg
(largo x diámetro) (25.2 cm x 5.2 cm)
Tamaño de pistón hidráulico ........................... 11.6 plg x 1.7 plg
(largo x diámetro) (29.3 cm x 4.3 cm)
Capacidad hidráulica ..........................................22 oz (0.65 L)
Tamaño de rueda.............................................. 2.48 plg (6.3 cm)
Peso neto ............................................................87 lbs (39.5 kg)
1. Palancas de operación
2. Rueda de ajuste manual
3. Tapón de aceite
4. Bomba hidráulica
5. Vástago del pistón
6. Placa del gato
7. Soporte de tronco
8. Cuña
9. Ariete
10. Mango de partidor de troncos
11. Sujetador
12. Ruedas
1
2
3
11
12
4
5
6
7
8
10
9

15
Desembalaje
Contenido del paquete
• Partidor de troncos
• Palancas de operación (2)
• Manuales con tarjeta de registro
1. Retire cuidadosamente el partidor de troncos y
compruebe que todos los artículos anteriores estén
incluidos.
2. Inspeccione cuidadosamente el producto para asegurarse
de que no haya ocurrido ningún daño o ruptura durante
el transporte. Si alguna parte está dañada o extraviada,
NO DEVUELVA la unidad a la tienda. Comuníquese con
la central de servicio al cliente Snow Joe® + Sun Joe®
llamando al 1-866-SNOWJOE (1-866-766-9563).
NOTA: no se deshaga de la caja de transporte ni de las
partes de embalaje hasta que usted esté listo para usar
su partidor de troncos. La caja y el embalaje están hechos
de materiales reciclables. Deseche estos materiales en
conformidad a los reglamentos locales.
¡IMPORTANTE! El equipo y los materiales de embalaje no son
juguetes. No deje que los niños jueguen con bolsas plásticas,
láminas o piezas pequeñas. ¡Estos objetos pueden ser
tragados y representan un riesgo de asxia!
Ensamblado
¡IMPORTANTE! Este producto requiere ser ensamblado antes
de su uso. Debido al peso y/o tamaño del partidor de tronco,
se recomienda que otro adulto esté presente para ayudar con
el ensamblado.
m¡PRECAUCIÓN! Lea y siga todas las instrucciones
para el ensamblado y operación. No ensamblar
adecuadamente este partidor de troncos puede resultar en
lesiones severas al usuario o a los transeúntes, o causar
daños al equipo.
Conexión de las palancas
1. Inserte las palancas de operación en los encajes de la
bomba hidráulica (Fig. 1).
Operación
m¡ADVERTENCIA! Antes de usar el partidor de
troncos, revise las siguientes instrucciones y toda la
información de seguridad. No seguir estas instrucciones
puede resultar en daños a la propiedad o lesiones al operador
o a los espectadores.
Operación de partición e instrucciones
adicionales de seguridad
Siga estas instrucciones para la operación del partidor de
troncos:
1. Asegúrese de que todos los troncos tengan las medidas
apropiadas (diámetro máximo: 8 plg [20.3 cm]; longitud
máxima: 18 plg [46 cm]; longitud mínima: 13.5 plg [34.3
cm]).
¡IMPORTANTE! Los troncos varían en dureza y
estructura. Los troncos pequeños con nudos o de madera
más dura pueden ser más difíciles de partir. Los troncos
más grandes, menos duros, pueden no ser difíciles de
partir. No fuerce el partidor de troncos si el tronco no se
parte al primer intento.
2. Al cargar o colocar un tronco, manipule siempre el lado de
la corteza, nunca los extremos. Nunca coloque sus manos
o partes del cuerpo entre el tronco y el partidor.
3. Nunca cargue o descargue troncos mientras el gato esté
en movimiento.
4. No acumule troncos a ser partidos en un lugar donde
usted tenga que alcanzar troncos por encima del partidor
para cargarlos.
5. Los extremos del tronco tienen que ser cortados de forma
recta (en un ángulo de 90°), de manera que no se resbalen
hacia afuera durante el proceso de partición y causen
un peligro de seguridad, y de manera que no ejerzan
una fuerza excesiva en los componentes del partidor
de troncos. Use una motosierra (no incluida), tal como
una de las motosierras eléctricas de Sun Joe®(modelos
SWJ698E, SWJ699E, SWJ700E, SWJ701E; visite sunjoe.
com para comprarlas) para cortar de forma recta los
extremos del tronco antes de intentar partirlo.
6. Nunca intente partir más de un tronco a la vez. Un pedazo
de tronco puede ser lanzado de forma inesperada desde
la máquina, resultando en lesiones personales severas.
Fig. 1
Palancas de
operación
Sujetador
Bomba hidráulica
8 plg (20.3 cm)
18 plg (46 cm)

16
7. No use el partidor si hay algún indicio de daños al cilindro
hidráulico.
8. No use el partidor para partir troncos a través de la bra
o contra la corteza. El hacerlo dañará el partidor de
troncos y puede causar que los pedazos de tronco sean
lanzados violentamente, lesionando al operador o a los
espectadores.
m¡ADVERTENCIA! Los accidentes ocurren cuando hay
más de una persona involucrada en la carga y operación del
partidor de troncos. El partidor debe ser operado solo por una
persona. Si una segunda persona ayuda a cargar troncos al
partidor, NUNCA permita que un asistente sujete el tronco en
su lugar mientras que el operador use la unidad.
Uso del partidor de troncos de 9
toneladas métricas de fuerza
1. Cargue el tronco de forma longitudinal en la unidad, entre
la cuña y la placa del gato. Asegúrese de que la partición
se haga a lo largo de la bra.
2. Agarre las dos palancas, una con cada mano, y bombee
las palancas hacia atrás y hacia adelante, en direcciones
opuestas. Este movimiento contrario empujará el tronco
contra la cuña (Fig. 2).
m¡ADVERTENCIA! Opere siempre la unidad desde el
lado de las palancas de operación, lo más alejado de la cuña y
del tronco a ser partido.
3. Retire los pedazos de tronco partidos.
4. Gire la rueda de ajuste manual en sentido antihorario,
no más de una vuelta completa, para liberar la presión y
retraer el gato (Fig. 3).
5. Gire la rueda de ajuste manual en sentido horario hasta
que esté bien ceñida (Fig. 3). Usted está ahora listo para
partir el siguiente tronco.
m¡ADVERTENCIA! NUNCA intente retirar un tronco
atascado en el partidor forzando el uso del gato hidráulico
para partir el tronco.
m¡ADVERTENCIA! NUNCA modique el partidor de
troncos.
Partir un tronco corto
Este partidor de troncos está diseñado para partir troncos
entre 13.5 plg (34.3 cm) y 18 plg (46 cm) de largo. Cuando el
tronco es más corto que 13.5 plg (34.3 cm), la placa de gato
puede no alcanzar el tronco. Si esto ocurre, coloque un bloque
de madera con supercies planas frente a la placa de gato
antes de operar la unidad (Fig. 4). Los troncos muy cortos
pueden requerir un bloque adicional.
Fig. 2
Palanca de
operación
Cuña Placa de gato
R
Fig. 3
Rueda de
ajuste manual
Placa de gato
Fig. 4
Placa de gato
Bloque

17
Retiro de un tronco atascado.
Si el tronco se atasca en la base de la cuña, o si la cuña se
entierra en el tronco y no parte por completo el tronco, ni se
separa de éste, siga las siguientes instrucciones para retirar el
tronco:
1. Retraiga por completo el gato.
2. Retire de forma manual el tronco atascado de la cuña,
usando una barra de apalancamiento.
m¡PRECAUCIÓN! Tenga mucho cuidado: las piezas del
tronco pueden salir disparadas violentamente al ser separadas
de la cuña.
3. No intente volver a partir un tronco atascado una vez que
ha sido retirado de la cuña.
4. Parta el tronco de forma manual con un mazo, o córtelo
con una motosierra.
Purgado del partidor de troncos
1. Extienda el gato a su máxima longitud.
2. Retire el tapón de aceite y asegúrese de que el nivel de
aceite esté al máximo. De ser necesario, agregue más
aceite hidráulico a la bomba hidráulica (Fig. 5).
3. Gire la rueda de ajuste manual en sentido antihorario y tan
rápido como sea posible. El vástago del pistón se retraerá
hacia dentro de la bomba hidráulica y empujará el aire
hacia fuera del cilindro, a través del oricio del tapón de
aceite.
4. Vuelva a revisar el nivel de aceite. De ser necesario,
agregue más aceite hidráulico.
5. Vuelva a colocar el tapón de aceite y repita los pasos 1, 2
y 3 de ser necesario.
6. Para añadir aceite, retire el tapón de aceite y eche aceite
hasta casi llegar al tope de llenado.
7. Vuelva a colocar el tapón de aceite de forma segura.
Mantenimiento
m¡ADVERTENCIA! Aplique de forma periódica a
los resortes una capa ligera de aceite contra el óxido, tal
como 3-in-1 o WD-40, con el n de mantenerlos en buenas
condiciones de operación.
• Compruebe periódicamente que todos los sujetadores
estén bien ajustados.
• Una vez al año, limpie y lubrique ligeramente las partes.
• Use pintura en aerosol de esmalte brillante para retocar
las supercies de metal rasguñadas o con la pintura
gastada.
• Nunca exceda la capacidad nominal estándar de 9
toneladas métricas. Hacerlo dañará al partidor de troncos
e invalidará la garantía del fabricante.
¡IMPORTANTE! Si una parte necesita ser reemplazada,
use solo partes especícamente recomendadas por el
fabricante. Las partes de repuesto que no cumplan con estas
especicaciones pueden resultar en un peligro de seguridad
y comprometer el rendimiento de la herramienta, además de
invalidar la garantía del fabricante.
Almacenamiento
• Antes de almacenar el partidor de troncos, asegúrese de
que éste se encuentre limpio y seco. Dicha manutención
es necesaria para garantizar años de funcionamiento sin
problemas.
• Antes de guardar la unidad, asegúrese de que el gato esté
completamente retraído. Libere cualquier presión girando
la rueda de ajuste manual en sentido antihorario, y luego
reajústela girándola en sentido horario.
• Lubrique ligeramente todas las supercies de metal antes
de almacenar el partidor.
• Guarde la unidad en interiores o en un área seca y
protegida contra condiciones climáticas severas y
durante el invierno.
• Examine cuidadosamente el partidor de troncos en
búsqueda de partes gastadas, perdidas o dañadas.
En caso de necesitar una reparación o reemplazar una
de las partes, contacte a un concesionario autorizado
Snow Joe® + Sun Joe®, o comuníquese con la central
de servicio al cliente Snow Joe® + Sun Joe®llamando
al 1-866-SNOWJOE (1-866-766-9563) para obtener
asistencia.
R
Fig. 5
Rueda de
ajuste
manual
Tapón de
aceite
Vástago del
pistón

18
Asistencia y servicio
Si su partidor de troncos LJ10M de Sun Joe®requiere servicio
o mantenimiento, comuníquese con la central de servicio al
cliente Snow Joe® + Sun Joe® llamando al 1-866-SNOWJOE
(1-866-766-9563).
Modelo y número de serie
Al contactar a la empresa, ordenar piezas de repuesto o
programar una reparación en un centro autorizado, usted
necesitará proporcionar el modelo y número de serie del
producto, los cuales se encuentran en la etiqueta ubicada en
la carcasa de la unidad. Copie estos números en el espacio
proporcionado a continuación.
Registre los siguientes números que se encuentran en la carcasa o
mango de su nuevo producto:
Nº de modelo:
Nº de serie:
L J 1 0 M

19
Solución de problemas
El gato no se
mueve.
Baja velocidad del
gato al extenderse
o retraerse.
La madera no
se parte, o se
parte de forma
extremadamente
lenta.
1. La rueda de ajuste manual está abierta.
2. Madera atascada debajo del gato.
3. Líneas hidráulicas bloqueadas.
4. Válvula de control bloqueada.
5. Válvula de control dañada.
6. Pistón de cilindro dañado.
1. Bombeo lento de las palancas de
operación.
2. Aire o burbujas de aire en tanque de
aceite.
3. Daños en la válvula de control.
4. Fuga interna en válvula de control.
5. Daño interno del cilindro.
1. Aire o burbujas de aire en el tanque de
aceite.
2. Vacío excesivo en la entrada de la válvula
de control.
3. Ajuste bajo para la válvula de control.
4. Fuga interna en válvula de control.
5. Daño interno del cilindro.
1. Gire la rueda de ajuste manual en sentido horario
hasta que esté bien ceñida.
2. Retire cualquier objeto extraño que se encuentre
debajo del gato.
3. Enjuague y limpie el sistema hidráulico del partidor.
4. Enjuague y limpie la válvula de control del partidor.
5. Contacte a un concesionario autorizado
Snow Joe® + Sun Joe®, o comuníquese con la
central de servicio al cliente Snow Joe® + Sun Joe®
llamando al 1-866-SNOWJOE (1-866-766-9563).
6. Contacte a un concesionario autorizado
Snow Joe® + Sun Joe®, o comuníquese con la
central de servicio al cliente Snow Joe® + Sun Joe®
llamando al 1-866-SNOWJOE (1-866-766-9563).
1. Mueva las palancas de operación de forma más
rápida.
2. Purgue el aire del sistema hidráulico del partidor.
3. Contacte a un concesionario autorizado
Snow Joe® + Sun Joe®, o comuníquese con la
central de servicio al cliente Snow Joe® + Sun Joe®
llamando al 1-866-SNOWJOE (1-866-766-9563).
4. Contacte a un concesionario autorizado
Snow Joe® + Sun Joe®, o comuníquese con la
central de servicio al cliente Snow Joe® + Sun Joe®
llamando al 1-866-SNOWJOE (1-866-766-9563).
5. Contacte a un concesionario autorizado
Snow Joe® + Sun Joe®, o comuníquese con la
central de servicio al cliente Snow Joe® + Sun Joe®
llamando al 1-866-SNOWJOE (1-866-766-9563).
1. Vea si hay exceso de aire en el depósito hidráulico.
2. Busque obstrucciones o torceduras en la
manguera de entrada de la válvula de control.
3. Contacte a un concesionario autorizado
Snow Joe® + Sun Joe®, o comuníquese con la
central de servicio al cliente Snow Joe® + Sun Joe®
llamando al 1-866-SNOWJOE (1-866-766-9563).
4. Contacte a un concesionario autorizado Snow
Joe® + Sun Joe®, o comuníquese con la central de
servicio al cliente Snow Joe® + Sun Joe®llamando
al 1-866-SNOWJOE (1-866-766-9563).
5. Contacte a un concesionario autorizado
Snow Joe® + Sun Joe®, o comuníquese con la
central de servicio al cliente Snow Joe® + Sun Joe®
llamando al 1-866-SNOWJOE (1-866-766-9563).
Problema Causa posible Solución

LA PROMESA DE SNOW JOE®+ SUN JOE®AL CLIENTE
NUESTRA GARANTÍA:
Snow Joe garantiza que sus Productos motorizados y no motorizados, nuevos y genuinos, están libres de defectos materiales o de
mano de obra al ser usados en tareas domésticas normales durante un periodo de dos (2) años a partir de la fecha de compra por parte
del comprador original y usuario nal, cuando este último los compra a través de Snow Joe o un vendedor autorizado por Snow Joe y
ha obtenido un comprobante de compra. Ya que Snow Joe no puede controlar la calidad de sus Productos vendidos por vendedores
no autorizados, a menos que la ley lo prohíba esta Garantía no cubre Productos adquiridos a través de vendedores no autorizados.
Si su Producto no funciona, o hay un problema con una parte especíca que está cubierta por los términos de esta Garantía, Snow
Joe elegirá entre: (1) enviarle una parte de repuesto gratuita; (2) reemplazar el Producto con uno nuevo o similar sin costo alguno; o (3)
reparar el Producto. ¡Un excelente soporte!
Esta Garantía le da derechos legales específicos, y usted puede también tener otros derechos según el Estado.
REGISTRO DEL PRODUCTO:
Snow Joe le recomienda enfáticamente registrar su Producto. Usted puede registrar su Producto en línea visitando
snowjoe.com/register, imprimiendo y enviando por correo una tarjeta de registro disponible en línea en nuestro sitio
Web, llamando a nuestra central de servicio al cliente al 1-866-SNOWJOE (1-866-766-9563), o enviándonos un e-mail a
[email protected]. Si usted no registra su Producto sus derechos de garantía no disminuirán; sin embargo, registrar su Producto
permitirá que Snow Joe le pueda atender mejor si usted tiene alguna necesidad como cliente.
¿QUIÉN PUEDE SOLICITAR COBERTURA DE GARANTÍA LIMITADA?
Esta Garantía es otorgada por Snow Joe al comprador original y propietario original del Producto.
¿QUÉ NO ESTÁ CUBIERTO?
Esta Garantía no se aplica si el Producto ha sido usado de forma comercial o en aplicaciones no domésticas o de alquiler. Esta Garantía
tampoco se aplica si el Producto fue adquirido desde un vendedor no autorizado. Esta garantía tampoco cubre cambios cosméticos
que no afecten el funcionamiento del Producto. Las partes desgastables como correas, brocas y cuchillas no están cubiertas por esta
Garantía, y pueden ser compradas visitando snowjoe.com o llamando al 1-866-SNOWJOE (1-866-766-9563).
POR SOBRE TODO, en Snow Joe, LLC (“Snow Joe”) estamos dedicados a usted, nuestro cliente. Nos esforzamos por hacer
que su experiencia sea lo más placentera posible. Desafortunadamente, hay veces en que un producto Snow Joe®, Sun Joe®,
o Aqua Joe®(el “Producto”) no funciona o sufre un desperfecto bajo condiciones normales de operación. Creemos que es importante
que usted sepa que puede conar en nosotros. Es por eso que tenemos esta Garantía Limitada (la “Garantía”) para nuestros Productos.
R4_01282020
20
SP
Other manuals for Sunjoe LJ10M
1
Table of contents
Languages:
Other SNOWJOE Log Splitter manuals