SNOWJOE SUNJOE 24V-HCSWP-LTE User manual

© 2022 by Snow Joe®, LLC
All rights reserved. Original instructions. SAVE THESE INSTRUCTIONS
1
A Division of Snow Joe®, LLC Model 24V-HCSWP-LTE Form No. SJ-24V-HCSWP-LTE-880E-M
R
OPERATOR’S MANUAL
CORDLESS TELESCOPING
POLE + PRUNING SAW
250W | 4000 RPM | 5" BAR + CHAIN LENGTH
EN
IMPORTANT!
Safety Instructions
All Operators Must Read These
Instructions Before Use
Always follow these safety guidelines. Failure to do so may
result in serious bodily injury or death.
General Safety
mWARNING! This appliance is not intended for use
by children or by unassisted, unsupervised persons whose
physical, sensory or mental capabilities prevent them from
using it safely. Children should be supervised to ensure that
they do not play with the appliance.
Before starting up your machine, please check it carefully for
any defects. If you nd any, do not start up your machine.
Contact your authorized Snow Joe®+ Sun Joe®dealer or
call the Snow Joe®+ Sun Joe®customer service center at
1-866-SNOWJOE (1-866-766-9563).
mWARNING! When using the power tool, basic safety
precautions should always be followed to reduce the risk of
re, electric shock, and personal injury. These include:
1. Keep work area clean and well-lit – Cluttered, dark
areas invite accidents. Always inspect the area where the
pole + pruning saw is to be used.
2. Avoid dangerous environments – Do not use the power
tool in rain, in damp or wet locations, or in bad weather,
especially when there is a risk of lighting. This decreases
the risk of being struck by lighting. Do not operate the
power tool in gaseous or explosive atmospheres or use
the power tool near ammable or combustible liquids.
Motors in these tools may spark, and the sparks might
ignite fumes.
3. Know your product – Know how to start and stop the
machine. Be thoroughly familiar with the controls.
4. Keep children, bystanders, and pets away –
All spectators, including pets, should be kept a safe
distance away from the work area.
5. Dress properly – Do not wear loose clothing or jewelry.
They can get caught in moving parts. Protective rubber
gloves and non-slip footwear are recommended when
working outdoors.
6. Avoid Slipping – Exercise caution to avoid slipping or
falling. Wear protective footwear that will protect your feet
and improve your footing on slippery surfaces.
7. Stay alert – Watch what you are doing. Use common
sense. Do not operate the power tool when you are tired,
or under the inuence of alcohol or drugs.
8. Do not overreach – Keep proper footing and balance at
xall times.
9. Prevent unintentional starting – Do not pull the trigger
before connecting to battery pack, picking up or carrying
the appliance. Do not carry the pole + pruning saw with
your nger on the trigger.
10.
Use the right appliance – Do not use the power tool for
any applications other than those for which it was intended.
11. The chain is sharp – Don't grasp the exposed chain or
cutting edges when picking up or holding the power tool.
12. Use two hands – Hold the telescoping pole and handle
with both hands to avoid loss of control.
13. Remove the battery – Remove the battery from the
power tool when it is not in use, before servicing it, when
changing accessories, and when performing any other
maintenance task.
14.
Use safety glasses – Also use safety footwear, snug-tting
clothing, protective gloves, hearing and head protection.
15. Use head protection – Always use head protection when
operating the power tool overhead. Falling debris can
result in serious personal injury.
16. Do not force the tool – It will perform better with less
likelihood of personal or mechanical injury if it is used at
the rate for which it was designed.
17. Check for damaged parts – Before further use of the
appliance, all guards and parts should be carefully
checked to determine that it will operate properly and
perform its intended function. Check for alignment of
moving parts, binding of moving parts, breakage of parts,
mounting, and any other condition that may aect its
operation. A guard or other part that is damaged should
be properly repaired or replaced. Contact the Snow Joe®
+ Sun Joe®customer service center at 1-866-SNOWJOE
(1-866-766-9563) for assistance.
18. Maintain the power tool with care – Keep the cutting
edges sharp and clean for optimal performance and to
reduce the risk of injury. Keep the handles dry, clean,
and free from oil and grease. Follow the additional
recommendations described in the maintenance section
of this manual.

2
19. Store indoors – When not in use, the power tool should
be stored indoors in a dry and high or locked-up place out
of the reach of children.
20. Do not use the power tool if the trigger does not turn it
on and o. Any power tool that cannot be controlled is
dangerous and must be repaired.
21. Keep all parts of the body away from the chain. Do not
remove cut material or hold material to be cut while the chain
is moving. Make sure the switch is o when clearing jammed
material. The chain will continue moving for a while after the
tool is turned o. A moment of inattention while operating the
power tool may result in serious personal injury.
22. Carry the power tool by the handle with the chain
stopped. When transporting or storing the power tool,
always keep the chain and guide bar in the bar sheath.
Proper handling of the pole + pruning saw will reduce the
chance of personal injury.
23. Hold the product by insulated surfaces only. In the event
that the chain comes into contact with hidden wiring,
exposed metal parts of the product may become “live”
and give the operator an electric shock.
24. The unit has not been designed to provide protection
from electric shock in the event of contact with overhead
electric lines. Never use the power tool near any electrical
power lines. Contact with or use near power lines may
cause serious injury or electric shock resulting in death.
Maintain a minimum clearance of 50 ft (15 m) from all
power lines.
mWARNING! Before inspecting, cleaning, or servicing
the machine, remove the battery and wait for all moving parts
to stop. Failure to follow these instructions can result in serious
personal injury or property damage.
mWARNING! Do not use this appliance without reading
this instruction manual.
mWARNING! Do not use the appliance within range of
persons unless they are wearing protective clothing.
mWARNING! Do not operate the cordless power tool in a
tree, on a ladder, or on scaolding. Using the tool under such
circumstances is extremely dangerous.
mWARNING! Do not let familiarity with this type of tool
prevent you from taking all necessary precautions. Remember
that a careless fraction of a second is sucient to inict
serious injury.
mWARNING! The cordless pole + pruning saw must be
fully assembled before operation! Do not use the tool that is
only partly assembled or assembled with damaged parts!
mWARNING! Starting, stopping, and restarting an electric
motor repeatedly within a few seconds can generate a great
deal of heat and damage the motor. To protect the life of your
cordless power tool, always wait at least ve seconds after
stopping before restarting the unit.
mWARNING! Electrical Shock Hazard – Before starting
up your machine, please check it carefully for any defects. If
you nd any, do not start up your machine and contact your
distributor.
NOTE: Take care of small parts that are removed during
assembly or when making adjustments. Keep them secure to
avoid loss.
Please contact an authorized Snow Joe®+ Sun Joe®dealer
or call the Snow Joe®+ Sun Joe®customer service center
at 1-866-SNOWJOE (1-866-766-9563) for all maintenance
or operations not foreseen in this manual. Any operation
performed in an unauthorized service center or by unqualied
personnel will completely invalidate the warranty.
mWARNING! For your safety and that of others:
• Correct maintenance is essential to maintain the original
eciency and safety of the machine over time.
• Keep all nuts, bolts, and screws tight to be sure the
equipment is in safe working condition.
• Never use the machine with worn or damaged parts.
Damaged parts are to be replaced and never repaired.
mWARNING! Always wear protective gloves during
maintenance operations.
mWARNING! Use only original manufacturer’s
replacement parts, accessories and attachments. Failure to do
so can cause possible injury and poor performance. To order
genuine replacement parts or accessories for the Sun Joe®
iON+ cordless pole + pruning saw, please visit sunjoe.com or
contact the Snow Joe®+ Sun Joe®customer service center at
1-866-SNOWJOE (1-866-766-9563).
Cleaning the Tool
mWARNING! Never let any liquid get inside the motor
housing and NEVER immerse any part of the housing in liquid.
1. Stop the motor and remove the battery.
2. Clean dirt and debris from the body of the tool, using a
damp cloth with a mild detergent.
NOTE: Do not use any strong detergents on the plastic
housing or the handle, as they can be damaged by certain
aromatic oils such as pine and lemon, and by solvents
such as acetone.
Storage
mWARNING! Do not at any time let brake uids, gasoline,
petroleum-based products, penetrating oils, solvents, etc.,
come in contact with plastic parts. Chemicals can damage,
weaken, or destroy plastic which may result in serious
personal injury.
1. Stop the motor and remove the battery.
2. Clean the pole + pruning saw thoroughly before storing.

3
3. Always place the bar sheath on the guide bar before
storing or transporting the pole + pruning saw. Use
caution to avoid the sharp chain.
4. Store the pole + pruning saw indoors, in a dry place that is
inaccessible to children. Keep away from corrosive agents
such as garden chemicals and de-icing salts.
5. We recommend using the original package for storage or
covering the product with a suitable cloth or enclosure to
protect it against dust.
Specic Safety Warnings
for Pole + Pruning saw
1. Only the pole + pruning saw operator should be in the
work area.
2. Do not use the pole + pruning saw to cut down trees.
3. Always use two hands when operating the pole + pruning
saw. Grip the pole + pruning saw securely with one hand
on the trigger and the other hand on the pole.
4. Before starting the pole + pruning saw, make sure that the
saw chain is not in contact with any object.
5. Do not allow the pole + pruning saw to make contact with
grounded objects such as pipes, fences, and metal posts.
6. Do not force the pole + pruning saw while cutting. Apply
light pressure. It will perform more eectively and safely if
it is used at the rate for which it was designed.
7. Use extreme caution when cutting a limb that is under
tension. When wood tension is released, the limb could
spring back and strike the operator, causing severe injury
or death.
8. During transport, hold the pole at its balance point, with
the guide bar and chain facing to the rear.
9. Do not cut small brush and saplings with the pole +
pruning saw. Small branches may catch in the chain and
be whipped towards the operator, which could pull the
operator o balance.
10. Never stand directly under the limb you are trimming.
Always position yourself outside the path of falling debris.
11. Keep a rm, steady pressure on the pole + pruning saw
while cutting. Do not try to cut limbs larger in diameter
than the length of the guide bar.
12. Keep other people and pets away from the cutting end of
the pole + pruning saw and at a safe distance away from
the work area.
Kickback
mWARNING!Kickback may occur when the nose or tip
of the guide bar touches an object, or when the wood closes
in and pinches the saw chain in the cut.
AVOID CONTACTING THE GUIDE BAR TIP WITH ANY
OBJECT. In some cases, when the tip makes contact with
an object, the saw may rapidly kick up and back towards the
operator. Material pinching the chain may also push the saw
back rapidly towards the operator. Either of these reactions
may cause you to lose control of the pole + pruning saw, which
could result in serious personal injury. Follow the necessary
precautions indicated below to avoid kickbacks.
• Always use two hands when operating the pole + pruning
saw, one hand gripping the trigger and the other hand
gripping the pole. Use a rm grip. Thumbs and ngers
must wrap around the trigger and the pole.
• Keep all guards in place on the pole + pruning saw. Make
sure they are in proper working order.
• Do not overreach or extend arms above shoulder height.
• Keep solid footing and balance at all times.
• Never try cutting through two branches at the same time.
Only cut one at a time.
• Do not bury the guide bar nose or try to cut by boring the
guide bar nose into the wood.
• Watch for shifting of wood or other forces that may pinch
the chain.
• Use extreme caution when re-entering a previous cut.
• Use the chain and guide bar supplied with this pole +
pruning saw. Only use genuine Snow Joe®+ Sun Joe®
replacement parts designed specically for use with this
pole + pruning saw.
• Never use a dull or loose chain. Keep the chain sharp and
properly tensioned.
Battery & Charger
Safety Instructions
We pay a great deal of attention to the design of every battery
pack to ensure that we supply you with batteries that are safe,
durable and have a high energy density. The battery cells have
a wide range of safety devices. Each individual cell is initially
formatted and its electrical characteristic curves are recorded.
This data is then used exclusively to be able to assemble the
best possible battery packs.
Despite all the safety precautions, caution must always be
exercised when handling batteries. The following points must
be obeyed at all times to ensure safe use. Safe use can only
be guaranteed if undamaged cells are used. Incorrect handling
of the battery pack can cause cell damage.
IMPORTANT! Analyses conrm that incorrect use and poor
care of high-performance batteries are the main factors
responsible for personal and/or product damage.
mWARNING! Use only approved replacement batteries;
other batteries may damage the power tool and cause it to
malfunction, which can lead to serious personal injury.

4
mWARNING!
Do not use a battery pack or appliance that is
damaged or modied. Damaged or modied batteries may exhibit
unpredictable behavior resulting in re, explosion or risk of injury.
Have your battery pack serviced by a qualied repair person
using only identical replacement parts. This will ensure that the
safety of the battery pack is maintained.
mCAUTION! To reduce the risk of injury, use only ocial
iON+ 24V designated chargers with the iON+ 24V battery
pack. The use of other batteries or chargers poses a risk of
re, personal injury and damage. Do not wire a battery pack to
a power supply plug or car cigarette lighter, such misuse will
permanently disable or damage the battery pack.
• Avoid dangerous environments – Do not charge the
battery pack in rain, snow or in damp or wet locations.
Do not use the battery pack or charger in the presence of
explosive atmospheres (gaseous fumes, dust or ammable
materials) because sparks may be generated when inserting
or removing the battery pack, which could lead to a re.
• Charge in a well-ventilated area – Do not block the
charger vents. Keep them clear to allow for proper
ventilation. Do not allow smoking or open ames near a
charging battery pack. Vented gases may explode.
NOTE: The safe temperature range for the battery is 41°F –
105ºF (5°C – 40.5°C). Do not charge the battery outside in
freezing weather; charge it at room temperature.
• Maintain charger cord – When unplugging the charger, pull
the plug, not the cord, from the receptacle to reduce the
risk of damage to the electrical plug and cord. Never carry
the charger by its cord or yank it by the cord to disconnect
it from the receptacle. Keep the cord away from heat, oil
and sharp edges. Make sure the cord will not be stepped
on, tripped over or subjected to damage or stress when the
charger is in use. Do not use the charger with a damaged
cord or plug. Replace a damaged charger immediately.
• Do not use an extension cord unless it is absolutely
necessary – Using the wrong, damaged or improperly
wired extension cord poses a risk of re and electric shock.
If an extension cord must be used, plug the charger into a
properly wired 16 gauge or larger extension cord with the
female plug matching the male plug on the charger. Make
sure that the extension cord is in good electrical condition.
• Charger XZ2600-0450 is rated for 100 – 240 volt AC
only – The charger must be plugged into an appropriate
receptacle.
• Do not use an electrical adapter – Use of an adapter is
not recommended or sold by the battery charger or battery
pack manufacturer.
• Unplug charger when not in use – Make sure to remove
battery packs from unplugged chargers.
mWARNING! To reduce the risk of electric shock,
always unplug the charger before performing any cleaning
or maintenance. Do not allow water to ow into the charger.
Use a Ground Fault Circuit Interrupter (GFCI) to reduce shock
hazards.
• Do not burn or incinerate battery packs – Battery packs
may explode, causing personal injury or damage. Toxic
fumes and materials are created when battery packs are
burned.
• Do not crush, drop or damage battery packs – Do not
use the battery pack or charger if they have sustained a
sharp blow, been dropped, run over or have been damaged
in any way (i.e. pierced with a nail, hit with a hammer,
stepped on, etc.).
• Do not disassemble – Incorrect reassembly may pose
a serious risk of electric shock, re or exposure to toxic
battery chemicals. If the battery or charger are damaged,
contact an authorized Snow Joe®+ Sun Joe®dealer or
call the Snow Joe®+ Sun Joe®customer service center at
1-866-SNOWJOE (1-866-766-9563) for assistance.
• Battery chemicals cause serious burns – Never let a
damaged battery pack contact the skin, eyes or mouth. If
damaged, battery chemicals will react violently with air, use
rubber or neoprene gloves to safely dispose of it. If skin is
exposed to battery chemicals, wash the aected area with
soap and water. If eyes are exposed to battery chemicals,
immediately ush with water for 20 minutes and seek
medical attention. Remove and dispose of contaminated
clothing.
• Do not short circuit – When battery pack is not in use,
keep it away from other metal objects, like paper clips,
coins, keys, nails, screws or other small metal objects,
that can make a connection from one terminal to another.
Shorting the battery terminals together may cause burns or
a re.
• Store your battery pack and charger in a cool, dry
place – Do not store the battery pack or charger where
temperatures may exceed 105ºF (40.5ºC), such as in direct
sunlight or inside a vehicle or metal building during the
summer.
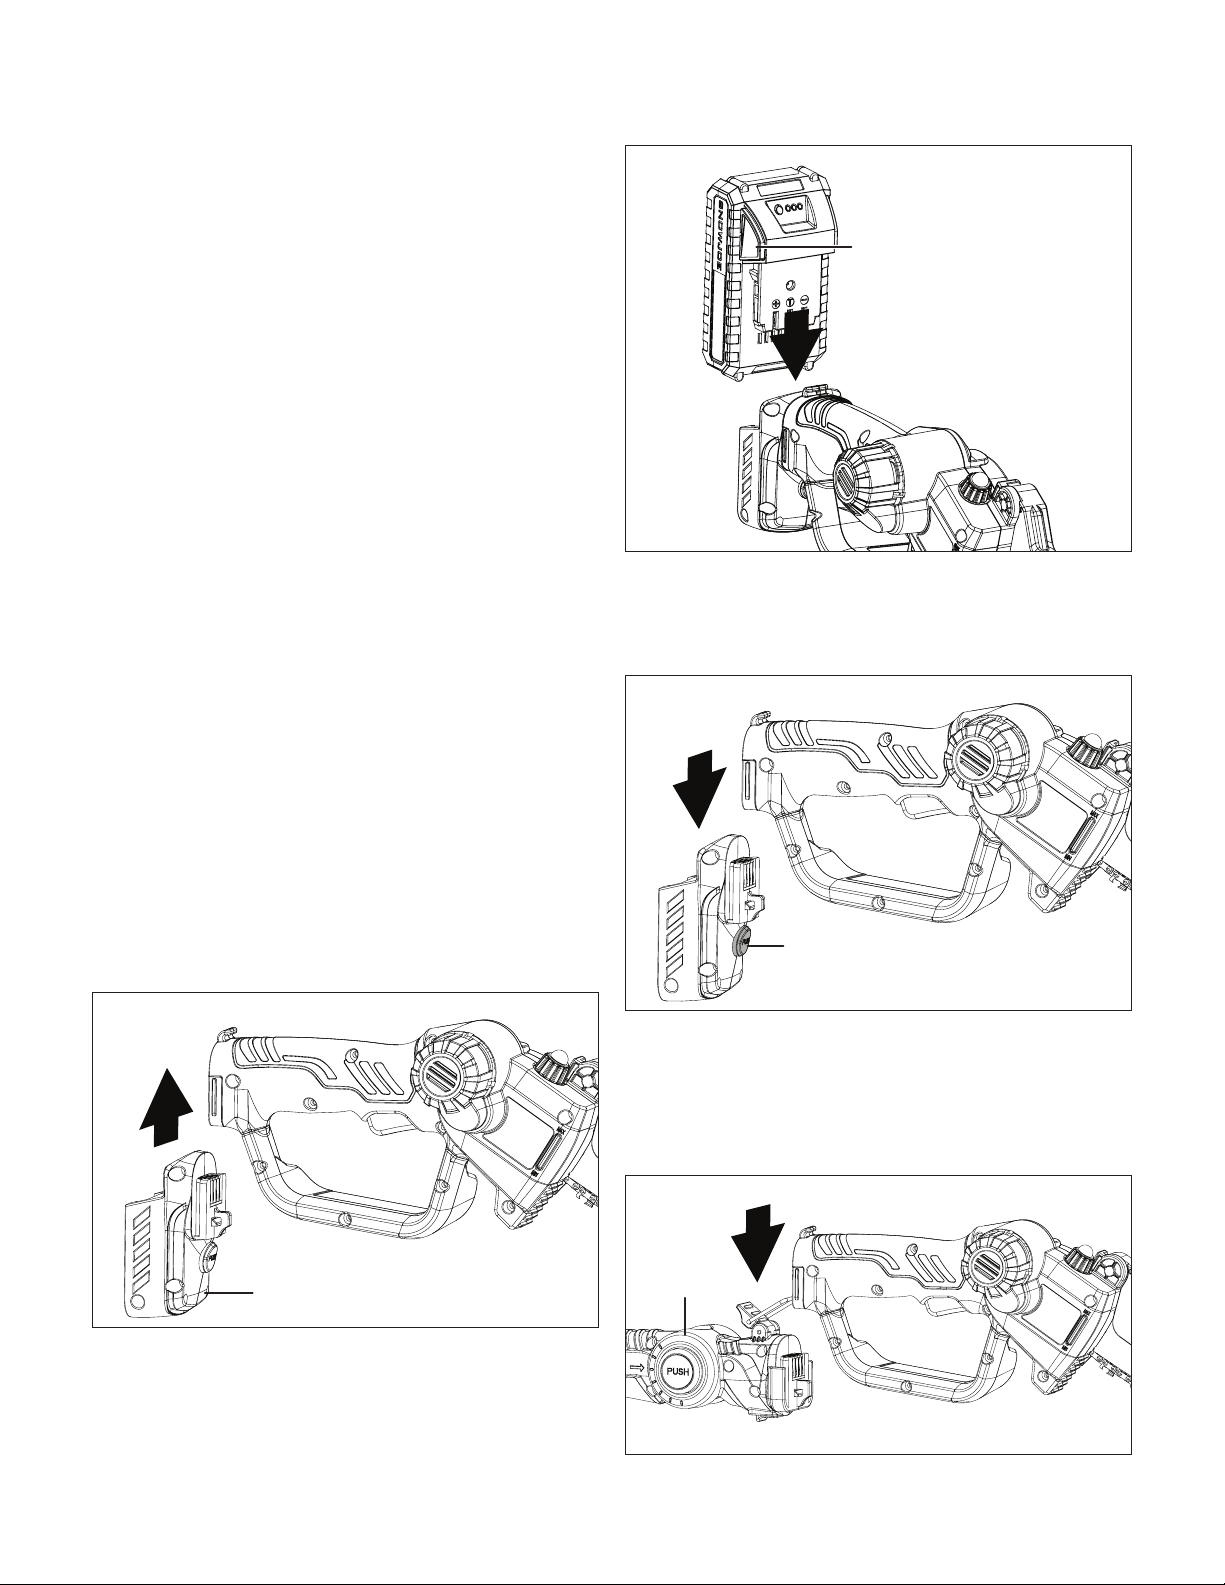
Information about the battery
1. The battery pack supplied with your cordless power tool is
only partially charged. The battery pack has to be charged
completely before you use the tool for the rst time.
2. For optimum battery performance, avoid low discharge
cycles by charging the battery pack frequently.
3. Store the battery pack in a cool place, ideally at 77°F
(25°C) and charged to at least 40%.
4. Lithium-ion batteries are subject to a natural aging
process. The battery pack must be replaced at the latest
when its capacity falls to just 80% of its capacity when
new. Weakened cells in an aged battery pack are no

5
longer capable of meeting the high power requirements
needed for the proper operation of your cordless pole +
pruning saw, and therefore pose a safety risk.
5. Do not throw battery packs into an open re as this poses
a risk of explosion.
6. Do not ignite the battery pack or expose it to re.
7. Do not exhaustively discharge batteries. A complete
discharge will damage the battery cells. The most
common cause of exhaustive discharge is lengthy
storage. Stop working as soon as the performance of the
battery falls noticeably or the electronic protection system
triggers. For optimum battery performance, charge the
battery pack frequently. Place the battery pack in storage
only after it has been fully charged.
8. Protect batteries and the tool from overloads. Overloads
will quickly result in overheating and cell damage inside
the battery housing even if this overheating is not
apparent externally.
9.
Avoid damage and shocks. Immediately replace batteries
that have been dropped from a height of more than 3 feet
(1 meter) or those that have been exposed to violent shocks,
even if the housing of the battery pack appears to be
undamaged. The battery cells inside the battery may have
suered serious damage. In such instances, please read the
waste disposal information for proper battery disposal.
10. If the battery pack suers overloading and overheating,
the integrated protective cuto will switch o the
equipment for safety reasons.
IMPORTANT! Do not press the ON/OFF trigger switch any
more if the protective cut-o has been activated. This may
damage the battery pack.
11. Recharge only with the charger specied by the
manufacturer. A charger that is suitable for one type of
battery pack may create a risk of re when used with
another battery pack.
12. Use appliances only with specically designated battery
packs. Use of any other battery packs may create a risk of
injury and re.
13. Under abusive conditions, liquid may be ejected from
the battery; avoid contact. If contact accidentally occurs,
ush with water. If liquid contacts eyes, additionally seek
medical help. Liquid ejected from the battery may cause
irritation or burns.
14. Do not use a battery pack or appliance that is damaged
or modied. Damaged or modied batteries may exhibit
unpredictable behavior resulting in re, explosion or risk of
injury.
15. Do not expose a battery pack or appliance to re or
excessive temperature. Exposure to re or temperature
above 266ºF (130°C) may cause explosion.
16. Follow all charging instructions and do not charge the
battery pack or appliance outside of the temperature
range specied in the instructions. Charging improperly
or at temperatures outside of the specied range may
damage the battery and increase the risk of re.
Information about the charger and the
charging process
1. Please check the data marked on the rating plate of the
battery charger. Be sure to connect the battery charger
to a power supply with the voltage marked on the rating
plate. Never connect it to a dierent mains voltage.
2. Protect the battery charger and its cord from damage.
Keep the charger and its cord away from heat, oil and
sharp edges. Have damaged cords repaired without delay
by a qualied technician at an authorized Snow Joe®+
Sun Joe®dealer or call the Snow Joe®+ Sun Joe®
customer service center at 1-866-SNOWJOE
(1-866-766-9563).
3. Electrical plugs must match the outlet. Never modify
the plug in any way. Do not use any adapter plugs with
grounded appliances. Unmodied plugs and matching
outlets will reduce the risk of electric shock.
4. Keep the battery charger, battery pack(s) and the cordless
tool out of the reach of children.
5. Do not use the supplied battery charger to charge other
cordless tools.
6. During periods of heavy use, the battery pack will become
warm. Allow the battery pack to cool to room temperature
before inserting it into the charger to recharge.
7. Do not overcharge batteries. Do not exceed the maximum
charging times. These charging times only apply to
discharged batteries. Frequent insertion of a charged or
partially charged battery pack will result in overcharging
and cell damage. Do not leave batteries in the charger for
days on end.
8.
Never use or charge batteries if you suspect that it has been
more than 12 months since the last time they were charged.
There is a high probability that the battery pack has already
suered dangerous damage (exhaustive discharge).
9. Charging batteries at a temperature below 41°F (5°C) will
cause chemical damage to the cells and may cause a re.
10. Do not use batteries that have been exposed to heat
during the charging process, as the battery cells may have
suered dangerous damage.
11. Do not use batteries that have suered swelling or
deformation or those that exhibit other atypical symptoms
(gassing, hissing, cracking, etc.).

6
Protection from environmental
inuences
1. Wear suitable work clothes. Wear safety goggles.
2. Protect your cordless tool and the battery charger from
moisture and rain. Moisture and rain can cause dangerous
cell damage.
3. Do not use the cordless tool or the battery charger near
vapors and ammable liquids.
4. Use the battery charger and cordless tools only in dry
conditions and at an ambient temperature of 41ºF – 105°F
(5°C – 40.5°C).
5. Do not keep the battery charger in places where the
temperature is may to reach over 105°F (40.5°C). In
particular, do not leave the battery charger in a car that is
parked in the sunshine.
6. Protect batteries from overheating. Overloads,
overcharging and exposure to direct sunlight will result
in overheating and cell damage. Never charge or work
with batteries that have been overheated – replace them
immediately, if possible.
7. Store the charger and your cordless tool only in dry
locations with an ambient temperature of 41ºF – 105°F
(5°C – 40.5°C). Store your lithium-ion battery pack in a
cool, dry place at a temperature of 77°F (25°C). Protect
the battery pack, charger and cordless tool from humidity
and direct sunlight. Only place fully charged batteries in
storage (charged to at least 40%).
8. Prevent the lithium-ion battery pack from freezing. Battery
packs that were stored below 32°F (0°C) for more than
60 minutes must be discarded.
9. When handling batteries, be wary of electrostatic charge.
Electrostatic discharges can damage the electronic
protection system and the battery cells. To avoid
electrostatic discharges never touch the battery terminals.

7
Safety Symbols
The following table depicts and describes safety symbols that may appear on this product. Read, understand, and follow all
instructions on the machine before attempting to assemble and operate.
Symbols Descriptions Symbols Descriptions
READ THE OPERATOR'S
MANUAL – Read, understand,
and follow all instructions in the
user manual before attempting to
assemble and operate.
SAFETY ALERT – Indicates a
precaution, a warning, or a danger.
WEAR EYE AND HEARING
PROTECTION – For protection
against injury, wear ear defenders
and safety goggles.
WARNING! Do not expose the unit
to rain or wet conditions. Keep dry.
Wear protective gloves and non-slip
footwear when using the machine
and handling debris. m
CAUTION! Avoid contact between
the tip of the guide bar with any
object. Contact with the tip of the
guide bar may cause the chain
saw to kickback, which may cause
serious injury to the user.
The moving part will continuously
run for several seconds after you
turn o the machine.
Correct direction of cutters.
50 ft
(15 m)
WARNING! SHOCK HAZARD –
Keep at least 50 ft (15 m) away
from power lines. Do not overreach.
Keep proper footing and balance at
all times.
DANGER! ROTATING BLADES
–Keep hands and feet away from
openings while the saw is running.
Only use the battery
charger indoors.
Keep bystanders a minimum
distance of 50 ft (15 m) away from
the work area.

8
Know Your Cordless Pole + Pruning Saw
Read the owner’s manual and safety instructions carefully before operating the cordless pole + pruning saw. Compare the
illustration below to the cordless pole + pruning saw in order to familiarize yourself with the location of the various controls and
adjustments. Save this manual for future reference.
1. Bar sheath
2. 5 in. (12.7 cm) chain
3. Guide bar
4. Chain guard
5. Tensioning wheel
6. Sprocket cover
7. Oil tank cap
8. Compression cap
9. Safety lock (pruning saw)
Technical Data
Motor................................................................................ 250 W
No Load Speed ........................................................... 4000 rpm
Battery Voltage Max*.................................................... 24V D.C.
Battery Capacity............................................................... 2.0 Ah
Charger Input .........................100 – 240V AC | 50/60 Hz | 0.4 A
Charger Output ...............................................26V DC | 450 mA
Charge Time Max ........................................................... 5 hours
Cutting Thickness Max .....................................4.5 in. (11.4 cm)
Recommended: 2.5 in. (6.4 cm)
Bar and Chain Length ..........................................5 in. (12.7 cm)
Multi-Angle Head ...................................................... 7 positions
(-45º | -22.5º | 0º | 22.5º | 45º | 67.5º | 90º)
Telescopic Pole ........................................................ 4 ft to 5.8 ft
(1.2 m to 1.8 m)
Overhead Reach............................................ Up to 12 ft (3.7 m)
Oil Tank Capacity ............................................. 0.85 oz (25 ml)
Net Weight (without pole) ...................................... 3.2 lbs (1.5 kg)
Net Weight (with pole) ........................................... 5.2 lbs (2.4 kg)
29
3
4
5
7
6
8
9 10 11 12
30
13 14 15 16 17 18 19
20
28 27 25
2426
23
10. Trigger (pruning saw)
11. Handle
12. Hand guard
13. Locking latch
14. Multi-angle lock button
15. Cam-lock
16. Pole assembly
17. Safety lock
(pole assembly)
18. Trigger (pole assembly)
19. Removable battery
compartment
20. Locking button
(removable battery
compartment)
21. Wrench
22. Bar and chain oil
23. Battery indicators
24. Battery indicator button
25. Push lock button
26. Charging socket
27. iON+ 24V lithium-ion
battery (24VBAT-LTE)
featuring exclusive
EcoSharp®technology
28. Charger plug
29. iON+ 24V lithium-ion
charger (XZ2600-0450)
30. Locking button
(pole assembly)
2
1
22 21
*Initial no-load voltage, when fully charged, peaks at 24 volts; nominal voltage under typical load is 21.6 volts.

9
Unpacking
Carton Contents
• Pruning saw + removable battery compartment
• Pole assembly
• iON+ 24V lithium-ion battery
• iON+ 24V lithium-ion battery charger
• Bar and chain oil
• Wrench
• Manual with registration card
1. Carefully remove the cordless pole + pruning saw and
check to see that all of the above items are supplied.
2. Inspect the product carefully to make sure no breakage or
damage occurred during shipping. If you nd damaged or
missing parts, DO NOT return the unit to the store. Please
call the Snow Joe®+ Sun Joe®customer service center at
1-866-SNOWJOE (1-866-766-9563).
NOTE: Do not discard the shipping carton and packaging
material until you are ready to use your new cordless
pole + pruning saw. The packaging is made of recyclable
materials. Properly dispose of these materials in
accordance with local regulations.
IMPORTANT! The equipment and packaging material are not
toys. Do not let children play with plastic bags, foils or small
parts. These items can be swallowed and pose a suocation
risk!
Battery Pack Operation
The equipment is powered by a lithium-ion battery. The battery
pack is completely sealed and maintenance free.
Battery Charge Level Indicator
The battery pack is equipped with a push button for checking
the charge level. Simply press the push button to read o the
battery charge level from the LEDs of the battery indicator:
Lights Light Indicators
Charge level button
The battery is at 30% capacity
The battery is at 60% capacity
The battery is fully charged
NOTE: If the battery indicator button does not appear to be
working, charge the battery.
NOTE: Immediately after using the battery pack, the battery
indicator button may display a lower charge than it will if
checked a few minutes later. The battery cells “recover” some
of their charge after resting.
Charger Operation
mWARNING! Only charge Sun Joe®24V lithium-ion
battery pack with compatible Sun Joe®24V lithium-ion
chargers. Other types of chargers may cause personal injury
and damage.
To reduce the risk of electric shock, do not allow water to enter
into the charger.
Charging the Battery
1. Push the push lock buttons on either side of the battery
pack to pull it out from the battery compartment (Fig. 1)
2. Check that the mains voltage is the same as that marked
on the rating plate of the battery charger. Then plug the
charger into an appropriate AC power outlet. Connect the
charger plug into the charging socket of the battery to
start charging (Fig. 2).
Fig. 1
Push lock button
Fig. 2
Battery
indicators

10
3. The battery will take approximately 5 hours to charge. The
battery indicator LEDs will cycle on one by one during the
charging process. Unplug the charger immediately when
all 3 LEDs are illuminated.
mCAUTION! FIRE HAZARD. When disconnecting the
charger from the battery, be sure to unplug the charger from
the outlet rst, then disconnect the battery from the charger.
mWARNING! This charger does not automatically turn o
when the battery is fully charged. Please take care not to leave
the battery plugged into the charger. Switch o or unplug the
charger at the mains when charging is complete.
4. Timely recharging of the battery will help prolong the
battery's life. Recharge the battery pack when you notice
a drop in the equipment's power.
IMPORTANT! Never allow the battery pack to become fully
discharged as this will cause irreversible damage to the
battery.
Assembly
This cordless pruning saw comes completely assembled
with the guide bar and chain pre-installed. Users simply have
to congure the unit as a hand-held pruning saw or a pole
pruning saw before operation. Follow the instructions below to
connect the machine.
mCAUTION! Make sure the battery is not inserted and
the chain are covered by the sheath before assembly.
Hand-held Pruning Saw Assembly
1.
To congure the machine as a hand-held pruning saw, align
the small ridge on the removable battery compartment
with the guide slot on the handle, then slide the removable
battery compartment upward into the handle until it clicks
into position (Fig. 3).
2. Insert the battery into the removable battery compartment
until the push lock buttons click into place (Fig. 4).
Removable battery compartment
Fig. 3 Handle
3. To take the removable battery compartment o of the
hand-held pruning saw, press the locking button on the
removable battery compartment and slide it out of the
handle (Fig. 5).
Pole Pruning Saw Assembly
1. To install the pole, align the small ridge on the end of the
pole assembly with the guide slot on the handle,
slide the
pruning saw downward into the
pole assembly
until it clicks
into position
(Fig. 6).
Fig. 4
Push lock button
Locking button
Fig. 5 Handle
Pole
assembly
Fig. 6

11
2. Latch the locking latch over the hook on the end of the
handle, then press the latch lock down to secure the
connection (Fig. 7).
3. Slide the removable battery compartment and battery into
the end of the pole assembly, until it clicks into position
(Fig. 8).
4. To disassemble the pole pruning saw, press down the
locking button on the removable battery compartment and
slide it out of the pole assembly (Fig. 9).
5. Flip up the latch lock and locking latch to unlock the saw
handle (Fig. 10), then press the locking button on the
bottom of the pole assembly and slide the
pruning saw
out
of the pole assembly (Fig. 11).
Locking latch
Handle
Fig. 7
Latch lock
Fig. 8
Removable battery
compartment + battery
Pole assembly
Fig. 9
Locking button
Pole assembly
Preparation
Adjusting Chain Tension
mWARNING! Use protective gloves when handling the
bar and chain.
1. Make sure the pruning saw is o and the battery is
removed.
2. To tighten the chain, turn the tensioning wheel clockwise
until you meet some resistance. Prior to use, a cold chain
should have no slack on the underside of the guide bar,
while still allowing you to rotate the chain by hand without
binding. Be aware that a chain tensioned while warm, may
be too tight upon cooling. (Fig. 12).
Fig. 10 Latch lock Locking latch
Fig. 11
Locking button
R
Fig. 12
Tensioning wheel

12
3. To check the chain tension, lightly pull the chain 1/8"
(3 mm) away from bottom of guide bar. If the chain snaps
back into place upon release, the tension is correct.
During normal operation, the chain will heat up and
expand causing the chain sag slightly by approximately
0.05 in. (~1.25 mm) (Fig. 13).
NOTE: A new chain will stretch. Check the tension of
a new chain frequently during the rst two hours of
operation, after disconnecting the battery and allowing the
chain to cool down.
4. Using the included wrench, turn the tensioning wheel
counter-clockwise to loosen the chain (Fig. 14).
Chain Lubrication
mWARNING! Failure to lubricate the chain will cause
damage to the bar and chain. Only use a good quality bar and
chain oil designed specically for use with chain saws. Do not
use oil containing impurities.
IMPORTANT! The bar and chain oil is bio-degradable. The
use of mineral oil or engine oil can have a serious impact on
the environment. It is essential that you use good quality oil to
lubricate the cutting parts eectively. Used or poor quality oil
does not guarantee good lubrication and reduces the lifespan
of the chain and bar.
R
Fig. 13
Warm chain after use - properly tensioned
0.05 in. (1.25 mm)
R
Too loose
Warm chain after use - requires tensioning
R
Wrench
Tensioning
wheel
Fig. 14
1. Take o the oil tank cap from the top of the pruning saw.
Then ll the oil tank up to top of the oil tank indicator
marked with the word "MAX" (Fig. 15).
2. During operation, press the compression cap 3-4 times
every 30 minutes to lubricate the chain (Fig. 16).
NOTE: Before storing the unit, press the compression cap
3-4 times and run the saw for 30 seconds to lubricate the
chain evenly to prevent corrosion.
Breaking-in your Pruning Saw
It is recommended to break-in your pruning saw every time a
new chain is installed.
1. Remove the battery and adjust the chain tension.
2. Insert the battery and switch on the pruning saw and leave
the motor running idle for approximately 5 minutes.
3. Remove the battery and check the chain tension again. If
necessary, re-tighten the chain.
4. Afterwards make only easy cuts for approximately 30
minutes. Always ensure sucient lubrication of the saw
chain! Only use the pruning saw for heavier cuts and
greater cutting depths after the break-in period.
R
Fig. 15
Oil tank cap
Bar and chain oil
Oil tank indicator
R
Fig. 16
Compression cap

13
Safety Checklist
To help maintain your cordless pruning saw for optimum
performance and safety, we recommend you complete this
checklist prior to each work session.
mWARNING! Do not insert the battery until you have
completed all of the checks.
• Inspect for any visible damage to the chain, guide bar, or
motor housing.
• Check that all the screws on the machine and guide bar
are tightly fastened.
• Clean the guide bar and chain of any debris.
• Make sure any ventilation slots are free of sawdust or
debris.
• Check that the chain is tensioned correctly and sharp.
• Check that the trigger remains locked until the safety lock
is pressed.
Operation
mCAUTION! Repeatedly starting and stopping an electric
motor within a few seconds can generate a great deal of heat
and damage the motor. To protect the life of your cordless
pruning saw, always wait at least ve seconds after stopping
before restarting the saw.
mWARNING! Be sure that the chain is not in contact with
any object when you start the motor.
mWARNING! Keep hands away from chain. Keep hand
on handle. Do not overreach.
mWARNING! Maintain a rm grip. Do not let go of the
saw while it is in operation.
mWARNING! Do not operate the cordless pruning saw in
a tree, on a ladder, or on scaolding. Using the tool under such
circumstances is extremely dangerous.
mCAUTION! The chain will continue to run for several
seconds after turning o the tool.
mCAUTION! Do not use the pruning saw under wet
conditions. Use extreme caution when cutting small brush,
saplings, or branches under tension. Such material may spring
back towards you or get caught on the saw which may result
in throwing you o balance, or pushing the saw out of control.
mWARNING! Do not allow familiarity with this type of tool
to cause you to ignore necessary precautions. Remember that
a careless fraction of a second is sucient to inict serious
injury.
mWARNING! Do not cut branches near electrical wires.
Hand-held Pruning Saw Operation
1. Insert the battery as shown in (Fig. 4).
2. To turn on the tool, rmly grip the pruning saw handle
and press the safety lock to deactivate the safety. Then
squeeze the trigger to activate the saw (Fig. 17).
NOTE: Do not squeeze the trigger until you are ready to
make a cut.
3. With the pruning saw running, butt the base plate up
against the branch you wish to cut and let the saw do all
the cutting (Fig. 18). Apply only light pressure on the saw.
NOTE: The base plate helps to stabilize the saw and
signicantly reduce vibrations. It also acts as a fulcrum,
allowing you to pivot the saw while cutting for better
control.
4. Release the trigger to stop the saw.
R
Fig. 17
Safety lock
Trigger
R
Fig. 18
Base plate
(fulcrum)

14
Pole Pruning Saw Operation
1. To extend the pole assembly, lift the cam-lock and extend
the pole to the desired length (Fig. 19). Close the cam-lock
to secure the pole in position.
2. The pruning saw can be adjusted into 7 dierent angles
(-45º | -22.5º | 0º | 22.5º | 45º | 67.5º | 90º) to allow for
greater exibility and control. To adjust the cutting angle,
push the multi-angle lock button. Then pivot the pruning
saw to your desired angle and release the button. The saw
will click into position and be locked at that angle (Fig. 20).
3. Insert the battery as shown in (Fig. 8).
4. Hold the pole pruning saw with one hand on the handle
and the other on the pole. Always cut adjacent to the
material and never underneath to avoid injury from
falling branches. Adjust the length and angle accordingly
(Fig. 21).
NOTE: Do not raise your bottom hand above chest height
in order to maintain control of the saw in the event of a
kickback.
Fig. 19
Pole
Cam-lock
Fig. 20
Multi-angle
lock button
-45°
0°
-22.5°
22.5°
45°
90° 67.5°
5. To turn on the tool, rmly grip the pruning saw handle
and press the safety lock to deactivate the safety. Then
squeeze the trigger to activate the saw (Fig. 22).
NOTE: Do not squeeze the trigger until you are ready to
make a cut.
6. Release the trigger to stop the saw.
Maintenance
Please contact an authorized Snow Joe®+ Sun Joe®dealer
or call the Snow Joe®+ Sun Joe®customer service center
at 1-866-SNOWJOE (1-866-766-9563) for all maintenance
operations not foreseen in this manual. Any operation
performed in an unauthorized service center or by unqualied
personnel will completely invalidate the warranty.
mWARNING! For your safety and that of others:
• Keep all nuts, bolts, and screws tight to be sure the
equipment is in safe working condition.
R
Fig. 21
Fig. 22
Safety lock
Trigger

15
• Never use the machine with worn or damaged parts.
Damaged parts are to be replaced and never repaired.
• Only use original Snow Joe®+ Sun Joe®replacement
parts. Parts that are not of the same quality can seriously
damage the equipment, compromise safety, and invalidate
the warranty.
• Remove the battery and wait at least ve minutes for the
saw to cool before servicing or storing your unit.
• If you drop the saw, carefully inspect it for damage. If the
guide bar is bent, the housing is cracked, the handle is
broken, or if you see any other damage that may aect the
saw’s operation, do not use the tool.
mWARNING! Always remove the battery before
performing any adjustments, maintenance, or repairs to your
cordless pruning saw.
• Use protective gloves when handling the bar and chain.
• Keep the bar encased in its sheath, except when working
directly on the bar or the chain.
• Never dispose of oils or other polluting materials in
unauthorized places.
mCAUTION! If you notice anything unusual, such
as excessive vibrations or odd noises, shut the saw OFF
immediately. Remove the battery and check the saw for any
damage.
mCAUTION! To avoid overheating and damage to the
motor, always keep the ventilation slots clean and free of
sawdust and debris.
General Cleaning
It's recommended to clean the pruning saw after each use
for best performance. Use a cloth, brush or compressed air
to remove saw dust and splinters from the ventilation slots.
Only clean the housing of the pruning saw with mild soap and
a damp cloth. Never use strong cleaning agents or solvents
to clean the tool. Never immerse any part of the saw or allow
liquids to get inside the cordless power tool.
Storage
• To prevent corrosion, press the compression cap 3-4
times and run the saw for 30 seconds to lubricate the
chain evenly before storage.
• Place the bar sheath over the guide bar before storing.
• Do not store cordless pruning saw near chemicals, such
as fertilizers or other harsh solvents. Do not expose
the plastic parts of the unit to brake uids, gasoline,
petroleum-based products, penetrating oils, or the like.
These products are often highly corrosive and may cause
permanent damage to the plastic parts of your unit.
• When not in use, your machine should be stored indoors
in a dry place, out of the reach of children.
Replacing the Guide Bar + Chain
mWARNING! Make sure the battery is not inserted
and the chain is covered by the sheath before replacing the
guide bar and chain. The operation should be completed on
a at and stable surface, with adequate space for moving the
machine and its components.
mWARNING! Always wear heavy-duty gloves when
handling the bar and chain. Mount the bar and chain very
carefully so as not to impair the safety and ecacy of the
machine. If in doubt, contact an authorized Snow Joe®+
Sun Joe®dealer or call the Snow Joe®+ Sun Joe®customer
service center at 1-866-SNOWJOE (1-866-766-9563).
mDANGER! Never start the motor before installing the
guide bar, chain, and sprocket cover. Without all these parts in
place, the guide bar and chain may y o, exposing the user to
potentially serious injuries.
Replace the guide bar if:
• There is excessive wear or obstructions inside the groove
of the guide bar.
• The guide bar is bent
• The guide bar is cracked
NOTE: It is normal to see burring on the edges of the
guide bar. You can smooth down any burrs with a le
instead of replacing it.
Refer to the table below for the specications of the chain. You
should replace the chain if:
Drive Links Chain Pitch Chain Gauge
32
1/4 in. 0.043 in.
6.35 mm 1.1 mm
• There is too much play between the links and rivets
• There are cracks in the chain
• Length of cutting edge has worn down to 5/32 in. (4 mm)
or less (Fig. 23).
Fig. 23 < 5/32 in.
(4 mm)

16
1. Loosen the tensioning wheel using the wrench and
remove the sprocket cover (Fig. 24).
2. Using heavy-duty gloves, push the tip of the guide bar
inwards towards the sprocket to relieve the tension and
create some slack on the chain (Fig. 25).
3. Keeping the guide bar pushed in, pull the chain o the
sprocket (Fig. 25).
4. With the chain o the sprocket, let go of the guide bar.
The guide bar should spring back slightly allowing you to
remove the chain and guide bar from the saw (Fig. 25).
5. Lay out the new chain in a loop with the cutters facing
outwards and the drive links facing inwards. If necessary,
ip the chain and straighten any kinks (Fig. 26).
NOTE: Replace the chain with an ocial Sun Joe®
replacement 5-inch chain (model SWJ-5CHAIN), and
the guide bar with an ocial Sun Joe®replacement bar
(model SWJ-5BAR).
R
Fig. 24
Wrench
Tensioning
wheel
Sprocket
cover
R
Fig. 25
Guide bar
Sprocket
4
Fig. 26
R
Cutters faces outwards
Drive links faces inwards
6. Starting from the tip, place the new chain into the groove
of the guide bar. Ensure that the groove is free of any
obstructions and that the cutters on the top edge are
facing towards the tip of the guide bar, and the cutters on
the bottom edge are facing away from the tip of the guide
bar. If backwards, turn the chain around. The chain will
only loosely t until secured onto the sprocket (Fig. 27).
NOTE: Make certain of the chain's direction. If the chain is
mounted backwards, the saw will vibrate abnormally and
will not cut.
7. Secure the guide bar onto the tensioning pins (Fig. 28).
8. At this point, the chain is not yet able to be tted onto the
sprocket. To give the chain enough slack, push the tip of
the guide bar inwards towards the sprocket (Fig. 29).
9. Keeping the guide bar pushed in, wrap the end of the
chain onto the sprocket (Fig. 29).
Fig. 27 Top Cutters faces towards tip
R
Bottom Cutters faces away from tip
R
Fig. 28
Tensioning pinsGuide bar
R
Fig. 29
Guide bar
Sprocket
8
9

17
10. Let go of the guide bar once the chain is securely tted
onto the sprocket. The guide bar should spring back
slightly creating some tension on the chain and guide bar.
11. Reinstall the sprocket cover (Fig. 30).
12. Follow the earlier instructions to properly tighten (Fig. 12)
and lubricate the chain (Fig. 16).
Chain Sharpening
mWARNING! To ensure that the saw works safely and
eectively, it is essential that the cutting components are
well-sharpened. It is highly recommended to replace the
chain once it loses its ability to cut cleanly and safely. It
is however, possible to sharpen the existing chain if carefully
performed. Any work on the chain and bar requires specic
experience and special tools. For safety purposes, we
recommend you contact an authorized Snow Joe®+ Sun Joe®
dealer or call the Snow Joe®+ Sun Joe®customer service
center at 1-866-SNOWJOE (1-866-766-9563).
Sharpening is necessary when:
• Sawing creates sawdust instead of wood chips
• Cutting becomes dicult
• The saw does not cut straight
• There are excessive vibrations
A professional service center will sharpen the chain using the
right tools to ensure minimum removal of material and even
sharpness on all the cutting edges.
If you decide sharpen the chain by yourself, it's recommended
to purchase the Sun Joe®24V-CSSHRP-LTE chain saw
sharpener, which can be powered by the same iON+ 24V
battery that comes with this cordless pruning saw. Visit
sunjoe.com or call the Snow Joe®+ Sun Joe®customer
service center at 1-866-SNOWJOE (1-866-766-9563) to order.
R
Fig. 30
Sprocket cover
Manual Chain Sharpening Tools
(not included)
To sharpen the chain manually, you will require the following
tools.
• 5/32 in. (4 mm) round le
• File guide
• Flat le
• Depth gauge tool
• Felt-tip marker
Manual Chain Sharpening Procedure
1. Tighten the chain if loose. Then secure the guide bar in a
vice or clamp.
2. Mark one of the cutters on the top of the guide bar with a
felt-tip marker to indicate where you started.
3. Insert your round le into the le guide.
4. Place the le and le guide into the cutter at a 30° angle.
Then le in a forward motion in 5-6 even strokes, while
maintaining the le at the correct angle and parallel to
the ground until the cutting edge of the cutter is shiny
(Fig. 31).
NOTE: Most le guides have 30° and 35° angles etched
on their upper side to help you preserve the angle as
you le.
5. File every cutter on one side of the chain until you reach
the one you marked before turning the saw over on the
other side to sharpen the rest. Use gloves or a screwdriver
to advance the chain as you progress from one cutter to
the other (Fig. 32).
NOTE: File the cutter on the opposite side of the chain if
right handed or le the cutter on your side if left handed.
Fig. 31
Round le
File guide
30°
30°
Vice
File forward
Fig. 32

18
6. Depth gauges are small teeth on the cutter which protrude
in front of the cutting edge. In order for the chain to
cut eectively, the depth gauge must be lower than
the cutting edge. Therefore, after heavy use or multiple
sharpenings the depth gauge may require ling down.
Place the depth gauge tool over the chain. Ensure that a
depth gauge is exposed and protruding from the slot on
the tool. Using the at le, le down the depth gauge until
ush with the tool in a forward motion (Fig. 33).
7. Remove the depth gauge tool and round o the edge of
the depth gauge with your le.
8. Repeat for all cutters on both sides of the chain.
9. After sharpening, clean the saw of any metal lings or
dust, then tighten (Fig. 12) and lubricate the chain
(Fig. 16).
Battery Caution + Disposal
Always dispose of your battery pack according to federal,
state, and local regulations. Contact a recycling agency in your
area for recycling locations.
mCAUTION! Even discharged battery packs contain
some energy. Before disposing, use electrical tape to cover
the terminals to prevent the battery pack from shorting, which
could cause a re or explosion.
Fig. 33
Flat le
Depth gauge
File forward
Depth gauge tool
Flat le
Depth gauge
Depth gauge tool
Amount to
le down
Cutting edge
mWARNING! To reduce the risk of injury or explosion,
never burn or incinerate a battery pack even if it is damaged,
dead, or completely discharged. When burned, toxic fumes
and materials are emitted into the surrounding environment.
• Batteries vary according to device. Consult your manual
for specic information.
• Install only new batteries of the same type in your product
(where applicable).
• Failure to insert batteries in the correct polarity, as
indicated in the battery compartment or manual, may
shorten the life of the batteries or cause batteries to leak.
• Do not mix old and new batteries.
• Do not mix Alkaline, Standard (Carbon-Zinc), or
Rechargeable (Nickel Cadmium, Nickel Metal Hydride, or
Lithium-Ion) batteries.
• Do not dispose of batteries in re.
• Batteries should be recycled or disposed of as per state
and local guidelines.
Recycling + Disposal
The product comes in a package that protects it against
damage during shipping. Keep the package until you are
sure that all parts have been delivered and the product is
functioning properly. Recycle the package afterwards or keep
it for long-term storage.
WEEE symbol. Waste electrical products should not
be disposed of with household waste. Please recycle
where facilities exist. Check with your local authority
or local store for recycling regulations.
Service + Support
If your Sun Joe®24V-HCSWP-LTE cordless pruning saw
requires service or maintenance, please call 1-866-SNOWJOE
(1-866-766-9563) for assistance.
Model + Serial Numbers
When contacting the company, reordering parts, or arranging
service from an authorized dealer, you will need to provide the
model and serial numbers, which can be found on the decal
located on the housing of the unit. Copy these numbers into
the space provided below.
Record the following numbers from the housing or handle of your
new product:
Model #:
Serial #:
2
4 V - H C S
W
P - L T E

19
Troubleshooting
• Remove the battery and wait at least ve minutes for the saw to cool before carrying out maintenance on the machine or when
checking that its parts are in proper working order.
• Consult the following table before contacting customer service with any mechanical issues.
Problems Possible Cause Possible Solution
The motor fails to start •Battery is not inserted correctly
•Battery is out of charge
•Reinsert the battery
•Check the charge status and
recharge the battery
The saw stops
during operation
•Battery is out of charge
•The machine is overloaded/overheated
•Check the charge status and
recharge the battery
•Wait ve minutes for the saw to cool
The saw runs, but the
chain speed is low •The chain is too tight •Loosen and retighten the chain
Bar and chain are running
hot and smoking
•The chain is too tight
•The chain lacks lubrication
•Loosen and retighten the chain
•Press the compression cap to lubricate
the chain with the oil; rell if necessary.
The motor runs, but the
chain is not moving
•The chain is too tight
•The guide bar, chain or
sprocket is damaged
•Loosen and retighten the chain
•Inspect and replace the damaged part

20
Optional Accessories
mWARNING! ALWAYS use only authorized Snow Joe®+ Sun Joe®replacement parts and accessories. NEVER use
replacement parts or accessories that are not intended for use with this saw. Contact Snow Joe®+ Sun Joe®if you are unsure
whether it is safe to use a particular replacement part or accessory with your saw. The use of any other attachment or accessory
can be dangerous and could cause injury or mechanical damage.
Accessories Item Model
iON+ 24V 2.0 Ah Lithium-Ion Battery 24VBAT-LTE
iON+ 24V 2.5 Ah Lithium-Ion Battery 24VBAT-LT
iON+ 24V 4.0 Ah Lithium-Ion Battery 24VBAT
iON+ 24V 5.0 Ah Lithium-Ion Battery 24VBAT-XR
iON+ 24V lithium-ion Battery Quick Charger 24VCHRG-QC
iON+ 24V lithium-ion Dual-port
Battery Charger 24VCHRG-DPC
R
Sun Joe®5-inch replacement bar SWJ-5BAR
Sun Joe®5-inch replacement chain SWJ-5CHAIN
1
2
3
4
5
6
7
8
Table of contents
Languages:
Other SNOWJOE Pole Saw manuals

SNOWJOE
SNOWJOE SUNJOE SWJ806E-HTG User manual

SNOWJOE
SNOWJOE sunjoe 24V-HCSEC-LT User manual

SNOWJOE
SNOWJOE Martha Stewart MTS-PS10 User manual

SNOWJOE
SNOWJOE SUNJOE 24V-PRN1- LTE User manual

SNOWJOE
SNOWJOE Sunjoe iON8PS2 User manual

SNOWJOE
SNOWJOE SUNJOE SWJ803E-RM User manual

SNOWJOE
SNOWJOE Sunjoe PJ3600C-RM User manual

SNOWJOE
SNOWJOE Sun Joe 24V-LRPL2-LTE User manual

SNOWJOE
SNOWJOE Sunjoe SWJ801E User manual

SNOWJOE
SNOWJOE Sunjoe PJ3600C User manual