Soft dB SMS-HDN User manual
Soft dB Inc.
1040, Belvedere Avenue, Suite 215
Quebec (Quebec) Canada G1S 3G3
Toll free: 1-866-686-0993 (USA and Canada)
E-mail: [email protected]
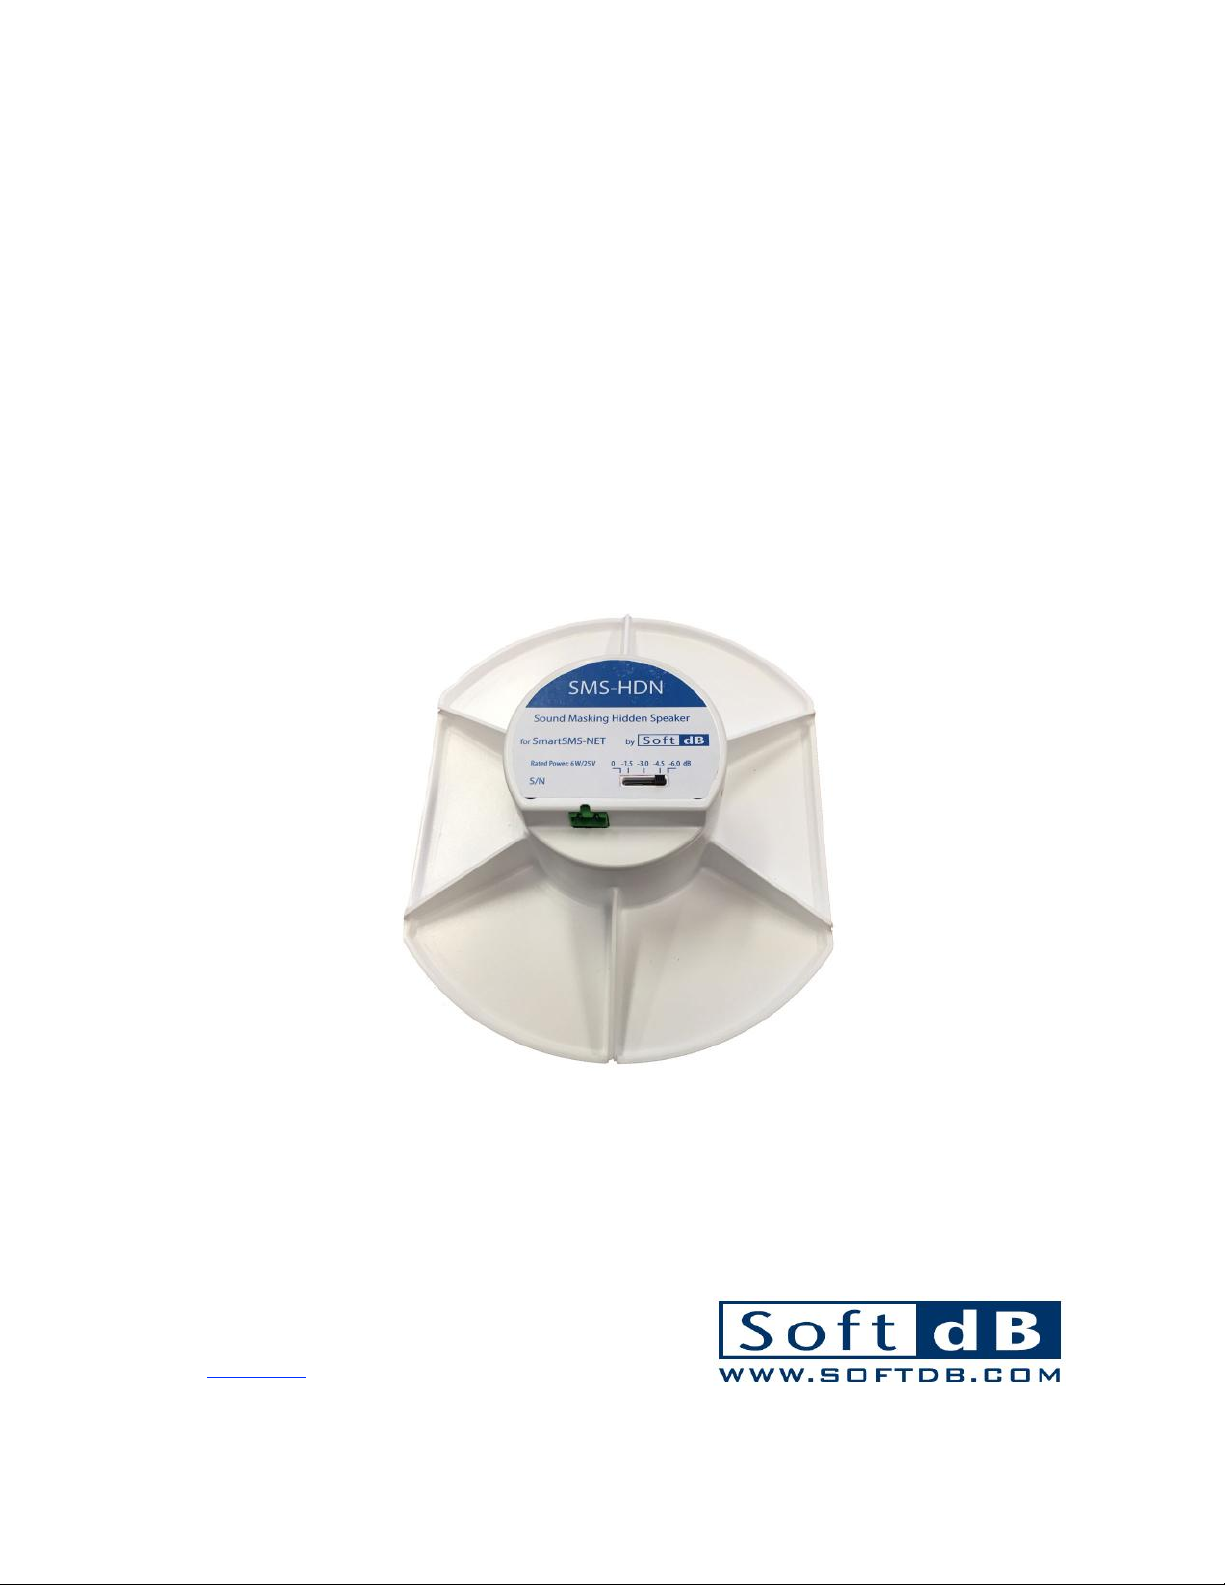
SMS-HDN
HIDDEN Sound Masking Speaker
User Guide
V
20190725

i
Content
1Overview.................................................................................................................................. 2
2Specifications .......................................................................................................................... 3
3Installation............................................................................................................................... 4
3.1 Safety Instructions ....................................................................................................................................... 4
3.2 Connecting the Speaker ............................................................................................................................ 5
3.3 Securing the Speaker.................................................................................................................................. 6
3.3.1 Bonding the SMS-HDN using Construction Adhesive ..................................................... 6
3.3.2 Bonding the SMS-HDN using quick set time spray adhesive (3M Type 77): ............ 6
3.3.3 Remove the SMS-HDN from a damaged tile to re-use it:................................................ 7
3.4 Setting the Tap.............................................................................................................................................. 8

2
1Overview
Hidden within the plenum and mounted to the back of suspended ceiling tiles or gypsum board
drop ceilings, the SMS-HDN converts these ceiling surfaces into large loudspeakers, providing an
impressively diffuse and clear sound field.
When used in closed offices, the SMS-HDN speaker allows for independent volume control of the
masking sound between adjacent offices or open areas. This solves the problem of masking sound
leakage between adjacent areas through the open plenum.
The SMS-HDN is also an improved alternative to surface-mounted speakers in the case of gypsum,
wood or any drop ceilings. Unlike surface or direct-field speakers, the SMS-HDN does not create
acoustical hot spots, providing a significantly more diffuse sound field for excellent sound masking
uniformity.
The SMS-HDN provides an innovative alternative to surface speakers to obtain uniform sound
masking, clear paging & music, and without any compromise on the esthetic of the ceiling.
From Amplifier
Speaker 1
Etc.
Speaker 2
SuspendedCeiling Tile
3
2Specifications
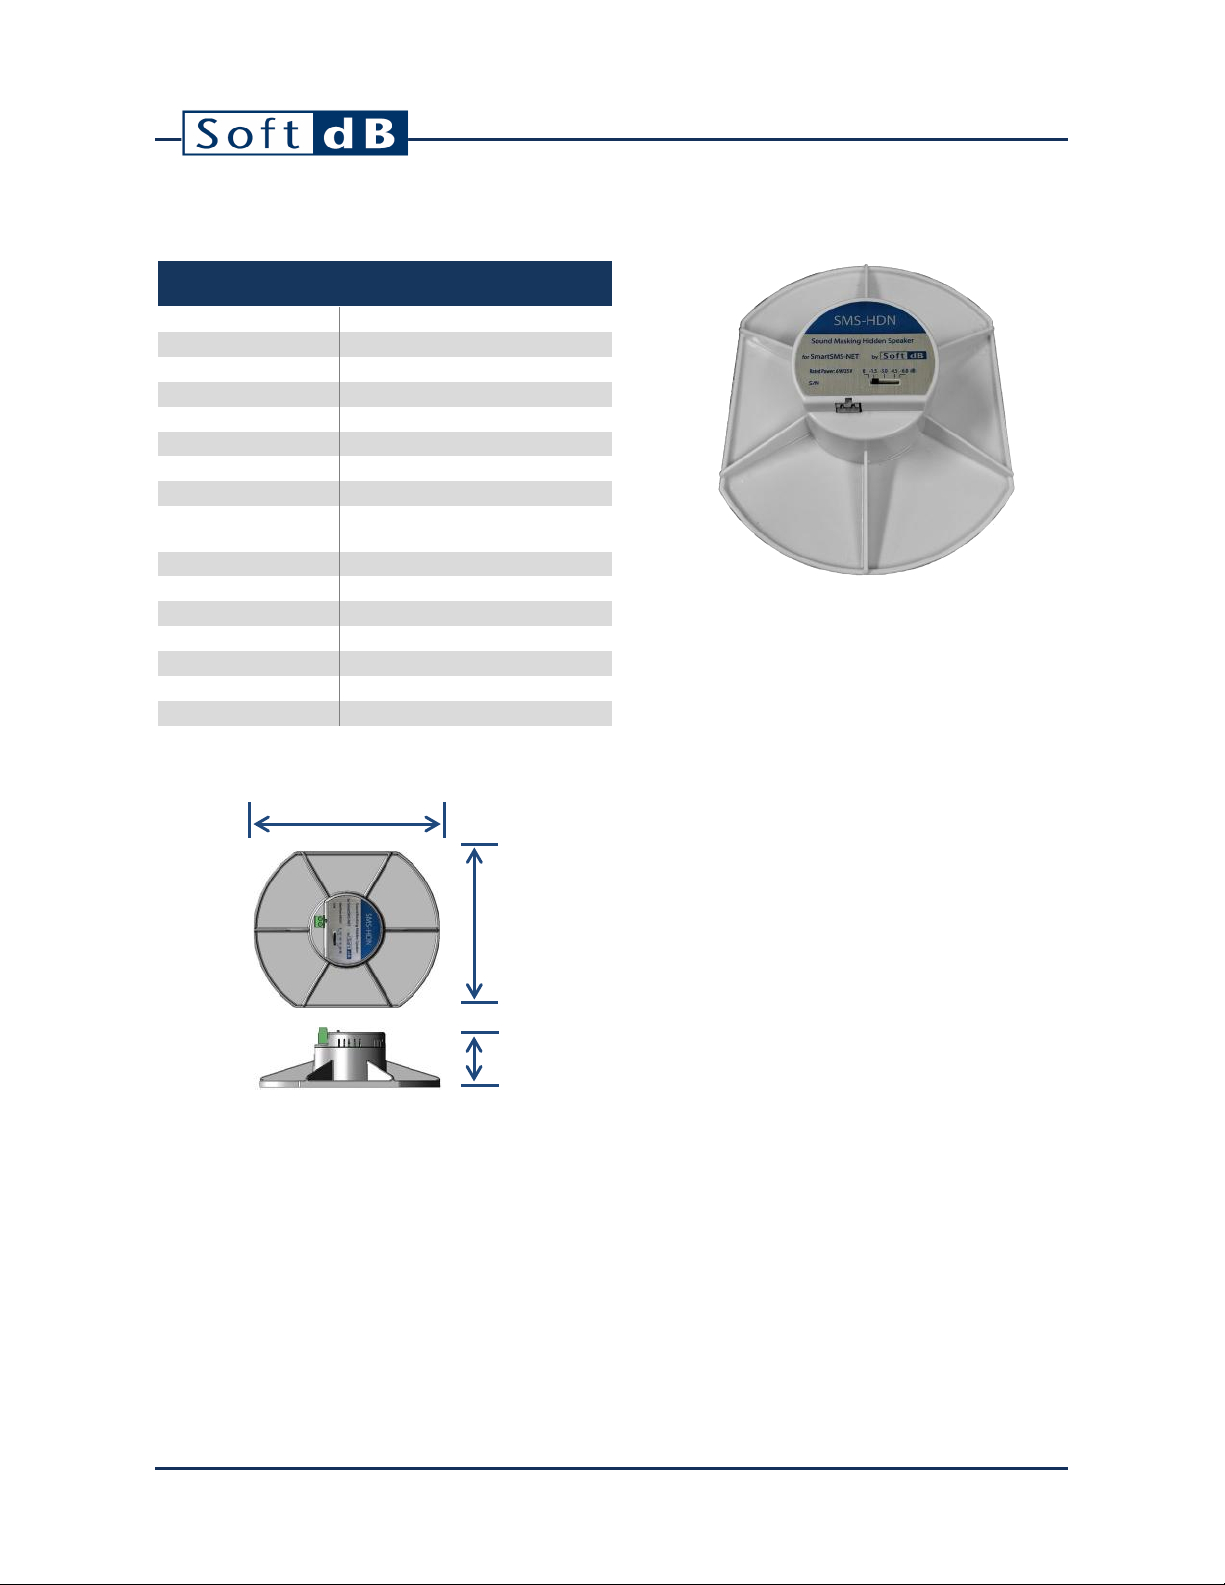
Specifications
Power 5W
Line Voltage 25 V
Enclosure Material Fireproof Lexan UL-94-V0
Frequency Response 100 Hz to 10 kHz
Output Level (W/m) 70 dBA1
Connectors Screw-On
Driver Vibration Exciter
Level Adjustment Sliding switch 0 to -6 dB; -1.5 dB step
Max Speakers/Channel ML-SL Controllers: 4/ch
RL96/CMS-II Controllers: 6/ch
Certification UL2043
Mounting Adhesive2
Color White (RAL9016)
Weight 0.47 kg (1.0 lbs)
Overall Dimension 18 x 14.8 x 5.5 cm (7 x 57/8 x 21/8)
Shipping Weight 0.55 kg (1.2 lbs)
Box Dimensions 21.5 x 17 x 8 cm (7 x 6½ x 3¼")
1-Typical value for gypsum board
18 cm (7’’)
14.8 cm (57/8”)
5,5 cm (21/8”)

4
3Installation
3.1 Safety Instructions
•Read and keep these instructions.
•Heed all warnings and follow all instructions contained within this manual.
•Install in accordance with the manufacturer’s instructions.
•Clean only with dry cloth.
•Do not install near water.
•Do not block any ventilation openings.
•Do not install near any heat sources such as radiators, heat registers, stoves, or other
apparatus (including amplifiers) that produce heat.
•Use the power cord with sealed mains plug appropriate for your local main supply as
provided with the equipment. If the provided plug does not fit into you outlet contact the
manufacturer.
•Protect the power cord from being walked on or pinched particularly at plugs, convenience
receptacles, and the point where they exit from the apparatus.
•Only use attachments and accessories specified by the manufacturer.
•Refer all servicing to qualified service personnel. Servicing is required when the apparatus
has been damaged in any way, such as when the power-supply cord or plug is damaged,
liquid has been spilled or objects have fallen into the apparatus, the apparatus has been
exposed to rain or moisture, does not operate normally, or has been dropped.
•Operate the product only with the voltage specified on the unit. Fire and/or electric shock
may result if a higher voltage is used.
•Do not modify, kink, or cut the power cord. Do not place the power cord in close proximity
to heaters and do not place heavy objects on the power cord and/or the product itself,
doing so may result in fire or electrical shock.
•Be sure the installation of this product is stable, avoid slanted surfaces as the product may
fall and cause injury, property damage, electrocution and/or fire.
•Do not open the cover.

5
3.2 Connecting the Speaker
Connect the SMS-HDN speakers using plenum rated 18/2 FT4 cable. Twist the bare copper ends
and insert them in the terminal block.
Since the SMS-HDN requires more power, only 4 to 6 SMS-HDN speakers are allowed on a sound
masking controller output. Refer to sound masking controller specifications for more details.
From Amplifier
To next speaker
If you connect more than one speaker,
simply twist the wires in the same
connector block.

6
3.3 Securing the Speaker
The SMS-HDN Sound Masking Speaker can be bonded on any acoustical tile, gypsum or wood
panel using standard construction adhesive or quick set time spray adhesive.
3.3.1 Bonding the SMS-HDN using Construction Adhesive
1) Remove dust from the surface where the SMS-HDN is to be bonded to;
2) Put strips of glue, about 2 inches (5 cm) apart, on the SMS-HDN;
3) Press the SMS-HDN on the surface while making small movements allowing the glue to
spread.
4) Wait about 12 hours until the adhesive is cured before powering the SMS-HDN and perform
the calibration.
3.3.2 Bonding the SMS-HDN using quick set time spray adhesive (3M Type 77):
1) Thoroughly clean the surface where the SMS-HDN is to be glued from any dust;
2) Spray the adhesive on both surfaces to bond (the SMS-HDN and the tile for example);
3) Wait a couple of minutes as requested on the spray adhesive instructions and press the
SMS-HDN to the surface;
4) Wait about 1 hour until the adhesive is set before powering the SMS-HDN and perform the
calibration.

7
3.3.3 Remove the SMS-HDN from a damaged tile to re-use it:
1) Firmly hold the SMS-HDN with one hand and pull it from the tile while gently inserting a
knife between the SMS-HDN and the tile;
2) Remove the excess tile material on the SMS-HDN with the knife and a brush;
3) The SMS-HDN is ready to be installed again.

8
3.4 Setting the Tap
A level adjustment tap is available to provide some adjustment on the level of selected speakers on
a speaker line.
The recommended tap for most applications is 0dB. Some limitations may apply to the sound
masking controller. See controller specifications for more details.
Table of contents
Other Soft dB Speakers manuals


