1
SoftBank 101P
101P User Guide Contents
Introduction
Introduction.........................................................................3
Getting Started
Package Contents............................................................... 6
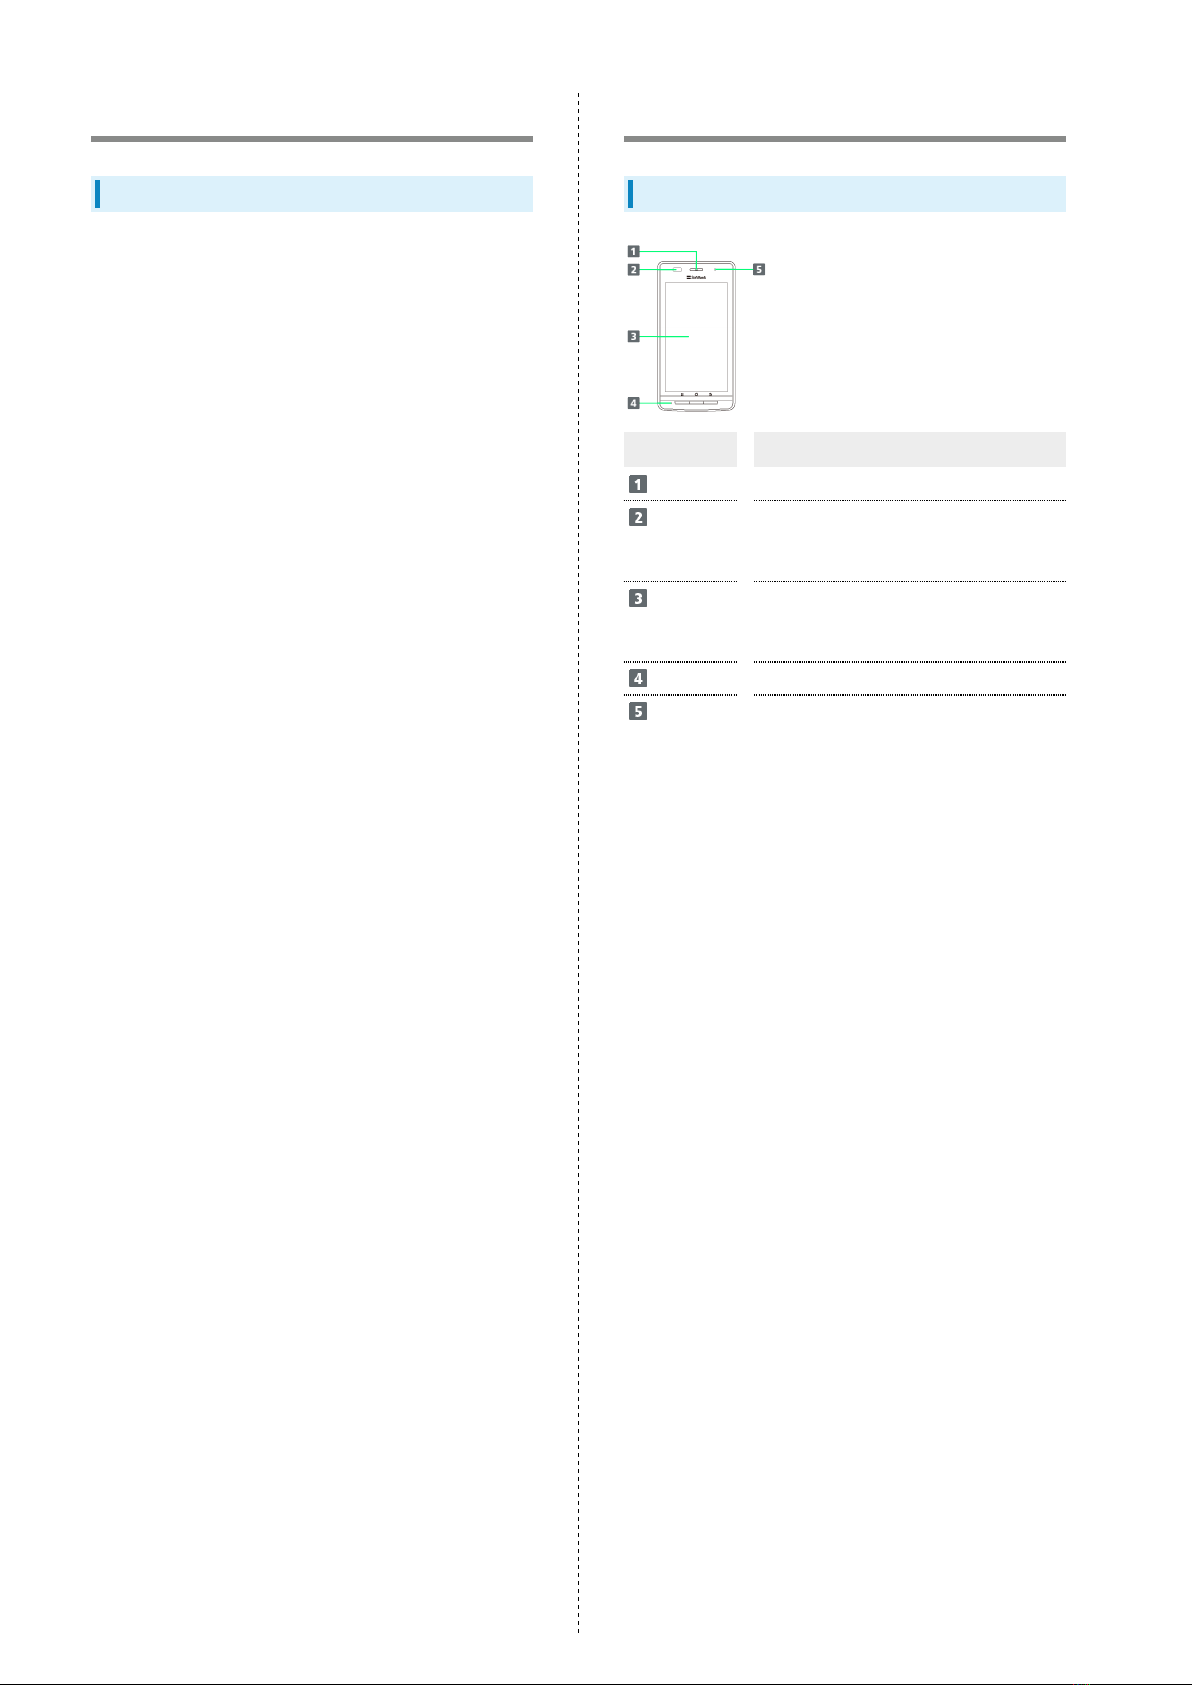
Parts & Functions.............................................................. 6
USIM Card Installation....................................................... 7
SD Card Installation........................................................... 9
Battery Installation..........................................................12
Charging Battery.............................................................. 14
Power On/Off................................................................... 16
Touchscreen Operations................................................... 16
Basic Operations
Basic Operations...............................................................18
Handset Phone Number.................................................... 19
Mobile Manners................................................................. 19
Text Entry.........................................................................20
Google Account................................................................. 22
Android MarketTM .............................................................23
Security Codes.................................................................. 24
USIM PIN............................................................................25
Activating Screen Lock.................................................... 26
Software Updates.............................................................26
Handset Interface
Home Screen Basics.......................................................... 28
Status Bar......................................................................... 28
Notification Window........................................................ 29
Phone
Calling................................................................................ 32
Optional Services..............................................................33
Address Book.................................................................... 38
Messaging & Browser
Messaging.......................................................................... 40
Sending SoftBank Mail..................................................... 40
Creating/Sending Gmail....................................................42
Internet Mail Settings..................................................... 43
Web Browsing....................................................................43
Camera
Imaging...............................................................................46
Music & Images
Music Files.........................................................................48
Image/Video Files............................................................. 48
Connectivity
Wi-Fi...................................................................................50
Bluetooth®........................................................................ 51