Solaira SMaRT Instruction Manual

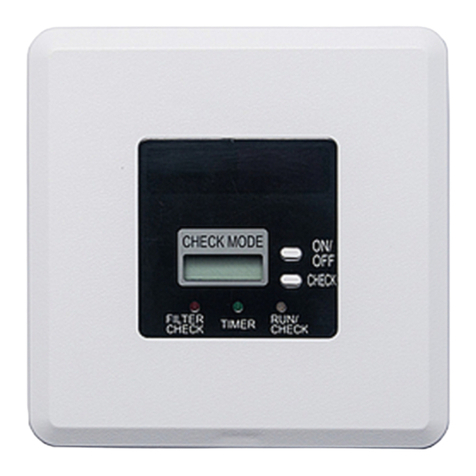
Solaira SMaRT Wall Mounted Remote Control
Installation & User Manual
KEEP THESE INSTRUCTIONS FOR FUTURE REFERENCE
SAFETY WARNING
ALL INSTALLATIONS/SERVICE MUST ONLY
BE PERFORMED BY A
LICENSED/CERTIFIED ELECTRICIAN TO
LOCAL AND NATIONAL ELECTRICAL CODE
(NEC).
WARNING: SHOCK AND FIRE
HAZARD:
•Serious injury or death could occur
•Disconnect ALL power sources before removing cover. Power should only be re-connected after
electrical installations are complete and cover replaced
•The Solaira SMaRT Wall Mounted Remote Control should only be connected to Solaira SMaRT
Power Controllers, models 16-DV and 34-DV
•Follow state, provincial, local and national electric codes (NEC) including field certifications
•Do not use in locations containing hazardous or explosive atmospheres.
ELECTRICAL RATING: 100mA@24VDC
WARNING SERIOUS INJURY OR DEATH COULD OCCUR,
DISCONNECT ALL POWER PRIOR TO SERVICE
SPE-1000 CANADA INSPECTED

INTRODUCTION
The Solaira SMaRT Wall Mounted Remote Control unit provides control of a single, remotely located Solaira
SMaRT heating controller, model numbers 16-DV and 34-DV. The remote control unit is supplied mounted on a
single gang faceplate, ready to be fitted to a single gang back box. As supplied the unit must be installed indoors in
a dry environment, if the unit needs to be installed outdoors or in a wet environment it must be installed onto a
back box, which is itself installed inside a waterproof, IP65 rated enclosure.
The remote controller unit interfaces to the heating controller via a cable connection containing four individual
conductors, see the installation section for further details.
The remote control unit provides control of the following features:
ON/OFF/STANDBY control of the remote heater.
Power level control of the remote heater.
Activation of timer function on the remote heater controller.
Override of the timer function on the remote heater controller.
FEATURES
•Remote control of a single 16-DV or 34-DV heater controller using panel push buttons.
•7 Segment LED indicator showing following heater states:
•ON/OFF.
•Power level.
•Ambient temperature override state.
•Timer override state.
•Control of the following heater features:
•Heater ON/OFF
•Heater power level: 0, 1, 2, 3, 4, FULL(F)
•Timer activation - turns the heater on for a pre-set time.
•Timer function override - disables the timer function so that the heater is not switched OFF when the
timer expires.
•Optional infrared remote control unit, which offers line of site control to the remote wall control unit. The
infrared remote control allows control of the ON/OFF/STANDBY state and power level of the remote
heater controller.
•Powered by low voltage 24VDC supply from the connected heater controller.
•Communication with heater controller via wired RS485 connection.
•Simple single cable, 4 wire connection to heating controller.
WARNING: Solaira SMaRT heater controllers are high power electrical
devices and MUST ONLY BE INSTALLED BY A CERTIFIED
ELECTRICIAN TO LOCAL AND NATIONAL ELECTRICAL CODE

INSTALLATION
WARNING: Although the Wall Mounted Remote Control unit is a low voltage device,
the heater controller to which it connects contains hazardous voltages. The
heater controller must be powered off and isolated before commencing
installation of the Wall Mounted Remote Control unit.
Solaira SMaRT heater controllers are high power electrical devices and
MUST ONLY BE INSTALLED BY A CERTIFIED ELECTRICIAN TO
LOCAL AND NATIONAL ELECTRICAL CODE
The wired connection containing the following 4 connections:
24VDC power (+VE, +)
GND (COM, -)
RS485 A signal (A)
RS485 B signal (B)
The suggested cable for connection between the Wall Mounted Remote Control and the heating controller is:
Unshielded or shielded
2 twisted pairs
Minimum gauge of 24AWG for each of the four conductors.
Maximum length of 24AWG cable 200 feet.
If a longer cable length is required the gauge of the cable may have to be increased due to voltage drop.
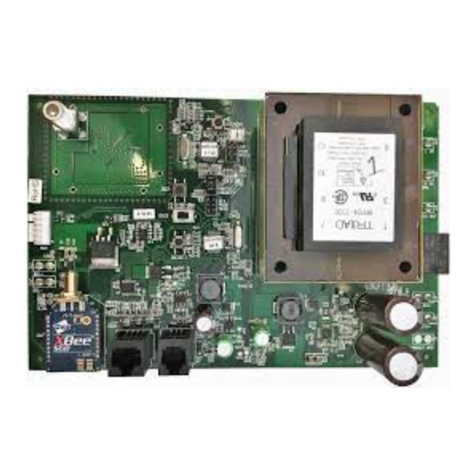
The connection between the two units is shown in the pictures below:
Switch SW2 on the main controller PCB should be set to "REMOTE COMMS" as shown in the picture above. When
"REMOTE COMMS" is selected the front panel buttons and the infrared interface on the main controller is disabled and
the unit can only be controlled from the wall mounted remote control unit.

DISPLAY FEATURES
Display shows "t" The unit is turned OFF as the ambient temperature is above the trip level set by
TEMPERATURE SETPOINT.
Display shows "0" The output is OFF.
Display shows "1", "2", The unit is ON at the indicated power level.
"3", "4"
Display shows "F" The unit is set to FULL output.
Display flashing "." only The "ON" timer has expired and is waiting to be re-triggered by the Occupancy
sensor (i.e. no movement detected for "ON" time) or the pushbutton.
Display shows "." The unit is in STANDBY mode, the output from the main controller is off.
Display flashing "." with The flashing "." while a character is displayed indicates that the unit is in timer
another character override mode - the timeout is disabled.
Display shows "E" The remote control unit cannot communicate with the remote heater controller.
OPERATION
NOTE: The Solaira SMaRT heater controllers have two functions which can override the normal
ON/OFF and power level control which is normally controlled by either the controller
front panel buttons, infrared remote controller or remote wall mounted control unit. The
overrride functions are as follows:
Combined occupancy sensor (PIR) and pushbutton timer input.
Ambient temperature sensor.
Either of the above interfaces can disable the output of the heater control unit, even when
the heater controller is being controlled by the Wall Mounted Remote Control unit.
The functions available from the Wall Mounted Remote Control unit panel buttons are described below:
To set the power level to full, press and release the "˄" button, "F" is displayed to indicate full power.
To increase in increments, press and hold the "˄" button until the desired power level is reached.
To reduce output to OFF, press and release the "˅" button, "0" is displayed indicating that the
output is off.
To reduce in increments, press and hold the "˅" button until the desired power level is reached.
To toggle the unit between the active and standby states, press and release the " " button. The
standby state is indicated by a solid "." being displayed, the active state is indicated by "0", "1",
"2", "3", "4" or "F" being displayed.
To activate the timer function, press and release the " " button. The preset timer value will be
loaded by the main controller and the output enabled, the main controller unit will countdown the
timer and when it expires the output will be disabled. The preset timer value is set by a trimmer
potentiometer on the main controller PCB. When the output is disabled due to the timer, the LED
display on both the main controller and the remote wall mounted controller will display a flashing
".".

The timer function can be overridden, so that the unit is never disabled due to a timeout. To
disable the timer function press and hold the " " button for more than 3 seconds. When the timer
override function has been activated, this will be indicated by a flashing "." on both the remote
wall mounted controller and the main heating controller.
To cancel the timer override function press and release the " " button. The cancellation of the
timer override function is indicated by removal of the flashing "." on both the main controller and
wall mounted remote controller displays.
The buttons on the infrared remote control handset only support a press and release function. The
functions available from the optional Infrared Remote Control handset are described below:
To toggle the unit between STANDBY and ON/OFF states press the "POWER" button.
To increment the power level press the "+" button.
To decrement the power button press the "-" button.
SPECIFICATIONS
Voltage
Power Consumption
Ambient Operating Temperature
IP Rating
Max Unit Operating Temperature
24VDC
50mA
-20°C to 30°C
Installation Dependant
65°C

LIMITATION OF LIABILITY
It is understood and agreed that seller’s liability whether in contract, in tort, under any warranty, in negligence or
otherwise shall not exceed the return of the amount of the purchase price paid by purchaser and under no circumstances
shall seller be liable for special, indirect or consequential damages. The price stated for the equipment is a consideration
in limiting seller’s liability. No action, regardless of form, arising out of the transactions may be brought by purchaser
more than one year after the cause of action has accrued.
WARRANTY
1. SOLAIRA CONTROL products are guaranteed to be free from mechanical and electrical defects for a period of one
year from date of shipment under normal use and service provided installation is made in accordance with
manufacturers’ recommendations.
2. Parts deemed defective shall be repaired or replaced at manufacturers option and at manufacturers expense but shall
not include foreign or federal excise taxes, state or municipal sale or use taxes, all such taxes not limited to the
foregoing being responsibility of the purchaser.
3. No charge for travel and/or mileage will be allowed to purchaser.
4. SOLAIRA reserves the right to make changes in design or make any improvements on any products. The right is
always reserved to modify our equipment because of new technology, underwriter’s requirements and/or government
regulations.
5. The following are not covered under warranty:
a. INSTALLATION OF CONTROL BY NON-CERTIFIED ELECTRICIAN.
b. Failure from neglect, abuse, careless handling and mis-application of unit.
c. Failure to observe guidelines for installation or improper voltage hook-up.
d. Failure caused by improper installation and not following local, state/provincial and federal electrical guidelines
e. Unless specifically allowed by SOLAIRA CONTROLS, no other charges may be included under warranty.
Notice: Inforesight Consumer Products Inc. website, product information and products can be accessed from Canada and
other countries around the world. Customer understands that some or all products provided by Inforesight Consumer
Products Inc. may not be available for purchase or installation in certain jurisdictions or geographical areas. Inforesight
Consumer Products Inc. reserves the right, in its sole discretion, to exclude or otherwise limit the provision of any product
to a person or entity residing in any jurisdiction or geographical area outside of Canada. Inforesight Consumer Products
Inc. provides general product information, installation guidelines and procedures and Customer understands that Customer
is solely and exclusively responsible for installation of the product and ascertaining all applicable local municipal,
provincial, state, and federal NEC (National Electrical Code) rules, by-law, ordinances and guidelines applicable to the
installation of any Inforesight Consumer Products Inc. products. Customer must strictly adhere to and be compliant with
the local rules, laws, ordinances and legal requirements for the safe installation and use of any Inforesight Consumer
Products Inc. products. Instruction manuals are included with the product packaging and copies of our instruction manuals
are available upon request. Under no circumstances shall Inforesight Consumer Products Inc. or its affiliated entitles,
employees, agents, shareholders, officers or directors be liable to Customer or any third party for any product installations
and Customer releases Inforesight Consumer Products Inc. from any and all losses, death, personal injury, property
damage, other damages, rights, claims, demands and actions of any kind arising from the Customer’s installation and use of
the product, whether the installation was or was not in accord with the provided instruction manual and/or in compliance
with applicable local laws.
Solairatm is a registered trademark of Inforesight Consumer Products Inc.
125 Traders Blvd. # 4, Mississauga, Ontario, Canada, M4Z 2H3
Tel: 905-568-7655, EXT 23 SERVIC, Fax:905-568-7521
info@solairaheaters.com
Revision: Issue 1, November 2016
This manual suits for next models
2
Table of contents


