Solar Royal SR1800 Series User manual

Solar Royal, LLC
Solar Royal SR1800 Series Installation Manual
Rev6 RS/vm 2018
Solar Royal SR1800 Series Installation Manual
Solar Ventilation (Attic) Fan Installation

Solar Royal SR1800 Series Installation Manual
2/8
Table of Contents
1 Introduction....................................................................................................3
1.1 Purpose...........................................................................................................3
2 Installation Manual .........................................................................................3
2.1 Pre-requisites..................................................................................................3
2.2 Pre-installation Tasks......................................................................................4
2.3 Installation Procedure .....................................................................................4

Solar Royal SR1800 Series Installation Manual
Solar Royal, LLC | 2018 (Rev6) Page 3 of 8
1 Introduction
Thank you for purchasing the Solar Royal SR1800 Series (SR1800). Before installing the
unit, be sure you make yourself familiar with the different components. Carefully unpack
the unit and review the manual before attempting to install the unit. The SR1800 is the
easiest solar attic fan to install because the separate flashing (metal base) is made to be
installed before the rest of the unit so the attic fan is easier to mount. Once the flashing is
installed, the hood unit of the SR1800 can be easily placed and then securely snapped
into place.
1.1 Purpose
This document is provided to serve as a guide for installing the Solar Royal SR1800 on
composite shingle roofs.
Installing an attic fan is fairly easy but Solar Royal, LLC recommends that if you
have not worked on a roof, installed something on your roof before, or are not familiar
with working on a roof that you should hire an insured and bonded professional to install
anything on your roof, including a solar attic fan.
2 Installation Manual
2.1 Pre-requisites
The following tools and materials will be required to install the Solar Royal SR1800.
- Safety Goggles
- Measuring Tape
- Marking Pencil
- Utility Knife
- Screws (Provided)
- Caulk (MP1 or similar)
- Stud Finder
- Drill w/Phillips Bit
- Flat Pry Bar
- Caulk Gun
- Reciprocating Saw
- String and 2 Nails (Recommended)

Solar Royal SR1800 Series Installation Manual
Solar Royal, LLC | 2018 (Rev6) Page 4 of 8
2.2 Pre-installation Tasks
2.2.1 Location
The location of the Solar Attic Fan must be established. For best operation, install solar
fan where it will receive direct sunlight. South or West facing roof slopes will work best.
If a southern exposure is not feasible, the fan can be installed on any other exposure as
the solar panel can be adjusted up to 45 degrees to accommodate the maximum sunlight
capacity. Placement should be approximately in the center of the attic space and about
24” from the ridgeline if no ridge vents are present. If ridge vents are present, the fan
should be at least 6 feet down towards the centerline.
2.2.2 White-Out Film
For your protection the SR1800 is delivered with a safety film that covers the solar panel.
The safety film serves to protect the installer from the unit starting to spin during the
installation, which could damage the unit and also injure the installer. Also, if the client
wishes to have the unit in another color, the SR1800 can be painted to match the home
and/or roof color.* Once the fan is installed, the white film should be removed so that the
SR1800 will work properly.
*Please contact Solar Royal regarding painting the unit. Please note once the unit has
been painted, it is now altered and no longer can be returned.
2.3 Installation Procedure
Once all prerequisite checks (2.1) and pre-installation tasks (2.2) are completed, proceed
to the unit installation, listed chronologically below.
Do not cut through any roof substrates, rafters or
framed portions of the roof. Also prior to cutting, make
sure that you do not have any electrical, plumbing or
possible gas lines in the area. If you do, then either make
sure you stay clear of these hazards or possibly consider
installing the unit in another location.
Solar Royal, LLC recommends that if you have not worked on a roof,
installed something on your roof before, or are not familiar with the hazards of
working on a roof that you should hire an insured and bonded professional to install
anything on your roof, including a solar attic fan.
Solar Royal SR1800 Series Installation Manual
Solar Royal, LLC | 2018 (Rev6) Page 5 of 8
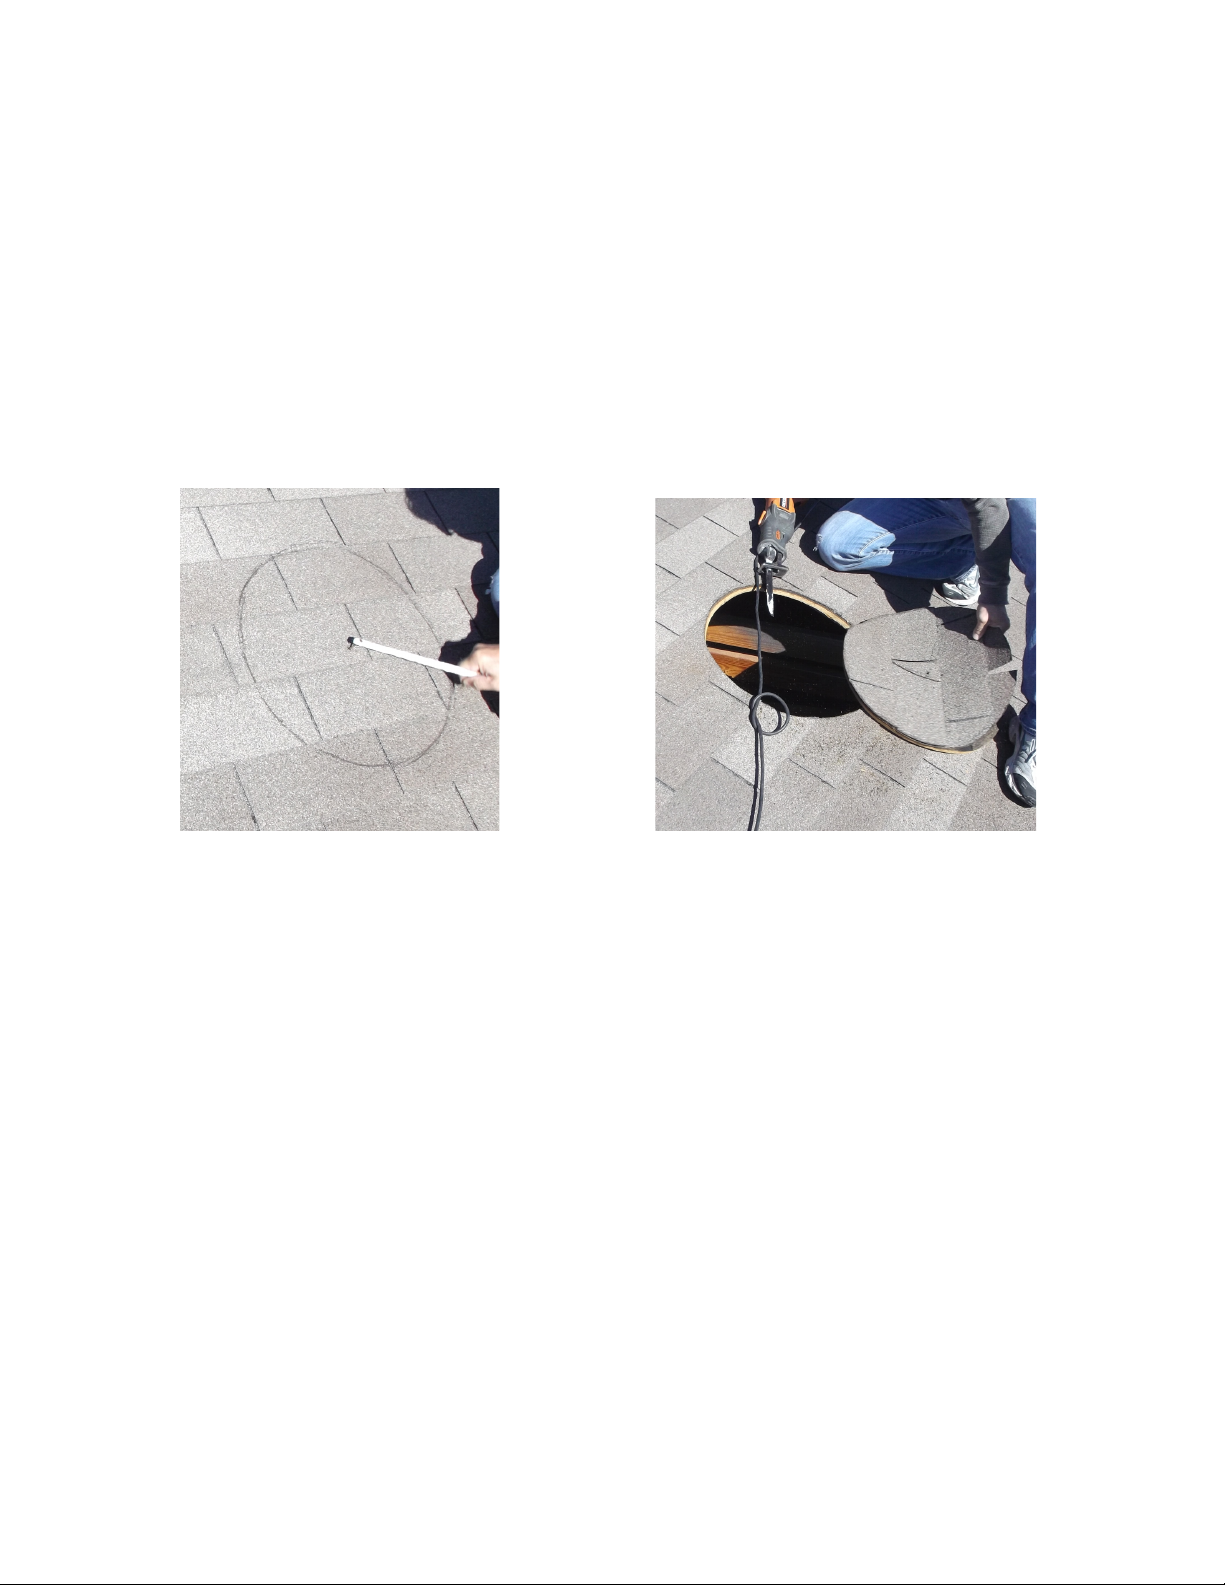
2.3.1 Measuring and Cutting the Hole
On either 24”/16” center construction, we recommend cutting a 15” round hole between
the rafters. We recommend installing the SR1800 between the rafters but if not possible it
is OK to install the SR1800 over a rafter. We recommend marking the cut by connecting
a nail to string or rope and inserting the nail at the center of the hole. Measure 7.5” out
and connect a second nail to the string or rope. Use the second nail to score a line in the
roof. When you are sure the measurements are correct, make the cut with a reciprocating
saw. >>Remember to measure three times and cut once.
Measuring the hole The hole cut out
2.3.2 Inserting the Flashing
Once the hole as been made, trim away shingles as needed to accommodate the metal
base flashing so that you have a clean and tight fit. Normally if you cut a clean 15” hole,
we recommend trimming away from the top rows of shingles an additional 1” (one inch)
to allow the base flashing to slip under the top row(s) of shingles and over the bottom
row(s).
Slip the flat metal base under the top rows of shingles and center the unit over the
opening. If the unit is not properly centered this will jeopardize the integrity of the
installation. The SR1800 has been designed to accommodate all roof slopes. The base is
square so it does not mater which side is installed first. Before attempting to slide in the
flashing, remove any roofing nails or other obstructions. Do not force the flashing into
place. Carefully find out what is causing the issue and adjust as needed. It is also
important to avoid deep scratches in the flashing’s powder-coating.

Solar Royal SR1800 Series Installation Manual
Solar Royal, LLC | 2018 (Rev6) Page 6 of 8
Removing obstructions *Flashing after being slide in
*If possible and to make it look cleaner, replacing the shingles on the bottom third of the
flashing. This is not a requirement, just optional.
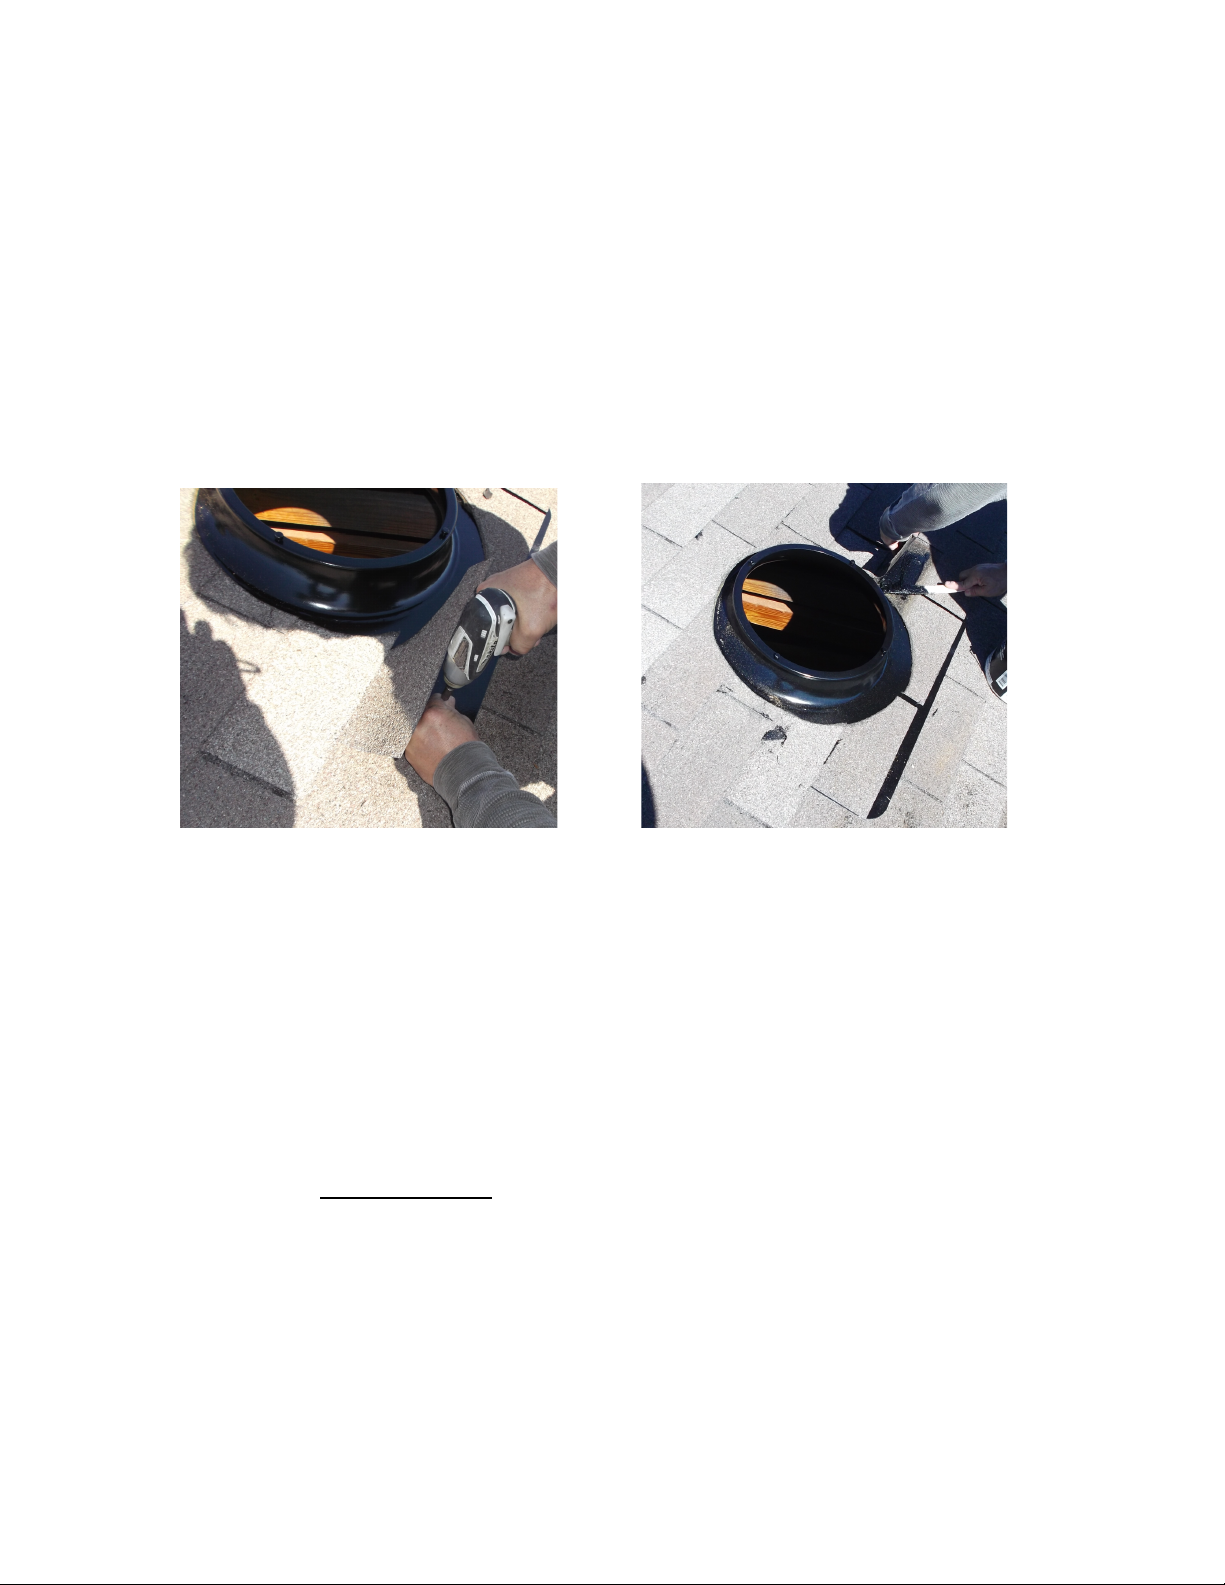
2.3.3 Sealing and Securing the Flashing
Once the metal flashing is in place, gently lift the lower exposed metal base flashing and
apply sealant (caulk) generously under the side and lower edges but not so much that it
oozes out. If sealant starts to ooze, just wipe off excess before it hardens. The bottom part
of the flashing will be exposed and sit on top of the shingles.
Solar Royal SR1800 Series Installation Manual
Solar Royal, LLC | 2018 (Rev6) Page 7 of 8
Drill 8 mounting holes (along bottom and exposed sides). Use the eight (8) #10 1-1/2”
wood screws (pan head) to mount the unit while making sure the unit is properly squared
with the roof edge or side before securing the second screw. Not having the unit properly
squared will make for an uneven look from the ground so it’s important to aligned it
carefully.
After properly mounting the SR1800 to the roof, utilize the exterior grade, high-heat,
waterproof sealant (caulk) - apply generously over the screws, as needed over or on the
sides of the shingles and verifying again the status of the oozing or lack of sealant on the
exposed metal flashing underside. Now is the time to do it right and make sure the
installation is watertight.
Securing the flashing Sealing the flashing
2.3.4 Attaching and Configuring the Hood
The SR1800 comes with a 36” thermostat wire (thermoball) attachment. This is designed
to hang down into your attic, make sure it is untapped and/or hanging freely down. You
can adjust the length of the thermostat with a cable tie or tape. The Thermoball is
designed to allow the fan to run once the temperature is above 80° F ( +/- 5° ). If you do
not want to utilize the thermostat, the unit is delivered with a bridge adapter in the same
pouch as the screws, that allow you to remove the thermostat from the circuitry, within
the thermoball, which allows the fan to run regardless of the temperature when there is
available sun. SPECIAL NOTE: If the white film is removed prior to installing the solar
attic fan on the roof, the thermoball and cable can get caught up quickly within the fan
not to mention can cause injury to the installer. Be sure to verify that they fan/motor is
clear and the cable is clear of the blade and handing down properly. The blade can spin so
fast that if not careful the wiring can be sliced thus making the solar attic fan none
operable.

Solar Royal SR1800 Series Installation Manual
Solar Royal, LLC | 2018 (Rev6) Page 8 of 8
Then, carefully set the SR1800 down (centered) on the metal base (flashing) making sure
the thermoball/cable is not being pinched and is hanging down within the attic space. IT
IS CRUCIAL TO MAKE SURE THE THERMOBALL/CABLE IS NOT
HANGING DOWN IN A WAY THAT IT CAN BE CAUGHT OR PULLED INTO
THE FAN BLADE AS THIS WILL CUT THE CABLE AND THE FAN WILL
CEASE TO WORK AND IS NOT A WARRANTY ISSUE. Depending on the roof
pitch/slope how the cable is hanging down must be inspected and thought out. We
recommend making sure the hanging cable is on the down-side of the pitch/slope of the
roof or installed in a way that keeps the thermoball/cable away from the spinning blade.
If you want to have your solar panel at an angle, remember to take into consideration
where and how the hood is placed. The SR1800, when placed on the base, should be
slightly off and not exactly squared with the metal base unit until the unit is turned to the
left and clicked into place. You will hear a very distinct ‘Click’ which is the metal clips
locking the solar attic fan into place. If you have found that you have placed it
incorrectly, you will then need to remove the four screws from the sides, lifting the top
portion of the solar attic fan off. Again, being careful you do not pinch or sever the
wiring. You will then find two metal thumb-spring plates which you will need to slightly
lift so that you can turn the lower portion of the solar attic fan to the right so it can be
removed and reattached to the top part of the unit.
Attaching the hood Raising the solar panel
Table of contents
Popular Inverter manuals by other brands


MPP Solar
MPP Solar PIP3624MT user manual

SDMO
SDMO TECHNIC 15000 TE Instruction and maintenance manual

Smarter tools
Smarter tools ST-GP9500E owner's manual

Siemens
Siemens simovert master drive operating instructions

Scheppach
Scheppach SG3100 Translation from the original instruction manual

Soltech
Soltech SOLPORT 15W installation manual