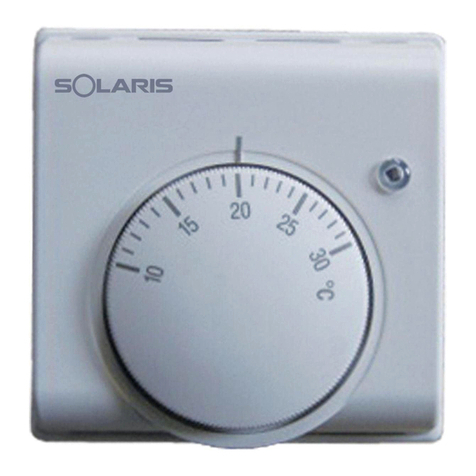
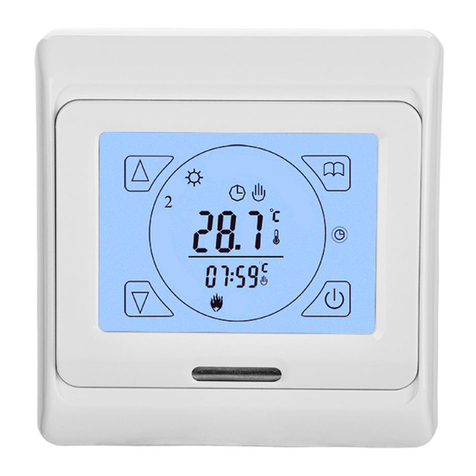
Solaris SENSE N User manual

SO 06/13 IT
SENSE N
CHRONOTHERMOSTAT TOUCH SCREEN
00 06 12 18 24

2
1. After removing the packaging, make sure the appliance is complete. In case of
doubt not use the product and contact our service center co TECHNIQUES. The packing elements (bags
plastic, polystyrene rolo, staples etc.).
They must not be left within reach of children as potential sources of danger.
Caution: the device is not intended for use by persons (including children) whose CA- Pacita physical, sensory or mental Caution: the device is not intended for use by persons (including children) whose CA- Pacita physical, sensory or mental
abilities are reduced, or lack of experience or conoscen- za, unless they have been given, through the ' intermediation of
a person re- sponsible for their safety, of supervision or instructions in its use. Children should be supervised to ensure
they do not play with the ap lot.
2. This device must be used only for the purpose for which it was specifically co- struito namely as programmable thermostat.
The manufacturer can not be held responsible for any damage caused by improper or incorrect use.
3. In case of failure and / or malfunction of the appliance and not turn the power off manomette- towel. For repairs contact
only our Technical Service Center and ask for original spare parts. Failure to comply with the above may compromise the
long PA security.
4. The installation and mounting of electrical devices may be ese Guiti exclusively by a qualified electrician. Observe the
generally applicable safety measures, such as .: before performing work on the unit disconnect and secure against
switching on.
GENERAL WARNINGS
DESCRIPTION
The clock thermostat digital environment touch screen Sense N allows you to adjust the ambient
temperature in heating and cooling in a practical way, it helps to save energy and provides in a simple way
to a pleasant room temperature. The minimum settable temperature is + 7 ° C (antifreeze): this allows to
protect your heating system from damage by freezing.
INSTALLATION
Make sure that the thermostat is not affected by air currents or direct sunlight or heat from other sources.
Install the thermostat in closed and dry environment, protected from possible water splashes on a flat
surface at about 150 cm from the floor
IT
Open the device with a screwdriver and remove
the front part
Open the casing of the relay with the use of a screwdriver
1 2

3
IT
Connect the wires:
• NC = normally closed• NC = normally closed
• NO = normally open• NO = normally open
• COM = common• COM = common
Close the casing of the relay with the use of a
screwdriver
Attach the thermostat to the wall using the supplied
screws
3
4 5
Insert 2 AA LR6 batteries 1.5 Vdc the polarities
6
Close the thermostat with the part that fron-
1 2 3 4 5 6 7
00 06 12 18 24
1
7
THE N THE N THE NTHE N
Ex. Control dry contact boiler Ex. Zone valve
NC
NO
NC
NO

4
ADJUSTING DATE AND TIME
1. Press the button Once again, the flashing year.
With the keys is choose the year
2. Press Once again, the month flashes.
With the keys is Choose the month
3. Press the button Once again, the flashing day.
With the keys is choose the day
4. Press the button Once again, the hour flashes.
With the keys is choose the time
5. Press the button Once again, the minutes flash.
With the keys is choose the minutes
6. Press the button to confirm and exit or wait for the auto output
matic after 1 minute (after 15 seconds the display is no longer lit). The number of the day (1 = Monday
2 = Tuesday 3 = Wednesday 4 = Thursday 5 = Friday 6 = Saturday 7 = Sunday) is automatically
determined by the internal calendar. The summer / winter time change is done automatically.
OPERATION IN HEATING / COOLING
The clock thermostat can work both for heating and for air conditioning systems. To choose the desired
operation mode proceed as follows:
1. Press the button once and then the button
2. Pressing the button it is possible to select the operating mode
desired between:
3. Press to confirm and exit or wait for the automated output
tica after 1 minute (after 15 seconds the display is no longer lit).
the thermostat works in cooling mode (ie controls the air conditioner). In this operating
mode symbol appears when the thermostat turns on the air conditioner the thermostat mode symbol appears when the thermostat turns on the air conditioner the thermostat
works in heating mode (that is, controls the boiler). In this operating mode symbol
appears
when the thermostat switches on the boiler
IT

5
OPERATING MODE
Press to select one of the following 5 modes:
1. icon on the display indicates an operation mode in which the
chronostat always operates at a temperature of comfortchronostat always operates at a temperature of comfort
2. icon displayed on the display indicates a continuous operation at tempera- ture nightdisplayed on the display indicates a continuous operation at tempera- ture night
3. icon on the display indicates continuous operation at tem-3. icon on the display indicates continuous operation at tem-
intermediate ra energy savingintermediate ra energy saving
4. icon on the display indicates that the thermostat works in modali- ty automatic according to the on the display indicates that the thermostat works in modali- ty automatic according to the on the display indicates that the thermostat works in modali- ty automatic according to the
time schedule set. In this mode also it displays the temperature level set in the program (
, or )
5. icon on the display indicates that the thermostat is always working at a temperature of frost ( fixed on the display indicates that the thermostat is always working at a temperature of frost ( fixed on the display indicates that the thermostat is always working at a temperature of frost ( fixed
and can not be changed to + 7 ° C)
IT
SET TEMPERATURES
comfort
temperature
night
temperature
energy saving intermediate
temperature
The programmable thermostat works on 3 different temperature levels:
To set the desired temperature it is necessary that the thermostat is in Automatic mode (icon
present on the display) and pro-
dere in the following manner:
1. Press the icon once, the symbol is the numbers that indicate the temperature is the numbers that indicate the temperature
blink comfort. With the keys is choose the comfort temperature
(Sun).
2. Press the icon once, the symbol and numbers that indicate the tem-
p is ture intermediate energy savings (EUR) flash. With the keysp is ture intermediate energy savings (EUR) flash. With the keysp is ture intermediate energy savings (EUR) flash. With the keys is
choose the intermediate temperature energy saving (EUR)

6
SET THE PROGRAM TIME
In automatic mode (icon on the display - see "How to opera-
To "on page 5) you can define the time schedule according to their needs. E 'can choose between three
different types of programs:
• A DAILY SCHEDULE: different schedule for every day of • A DAILY SCHEDULE: different schedule for every day of
week
B • 5/2 PROGRAM: same schedule for the day from Monday (1) to Friday B • 5/2 PROGRAM: same schedule for the day from Monday (1) to Friday
(5) and a different programming for the days 6 and 7 (Saturday and Sunday)
C • WEEKLY PROGRAM: same programming for each day of C • WEEKLY PROGRAM: same programming for each day of
week (1 to 7)
• A DAILY SCHEDULE:
1. Press and hold the button for about 3 seconds to enter the
programming mode, the indicator of the day (top of display) blinks
2. Press or to select the day you want to program
1 = Monday/ 2 = Tuesday/ 3 = Wednesday/ 4 = Thursday/ 5 = Friday/ 6 = Saturday/ 7 = Sunday1 = Monday/ 2 = Tuesday/ 3 = Wednesday/ 4 = Thursday/ 5 = Friday/ 6 = Saturday/ 7 = Sunday1 = Monday/ 2 = Tuesday/ 3 = Wednesday/ 4 = Thursday/ 5 = Friday/ 6 = Saturday/ 7 = Sunday1 = Monday/ 2 = Tuesday/ 3 = Wednesday/ 4 = Thursday/ 5 = Friday/ 6 = Saturday/ 7 = Sunday1 = Monday/ 2 = Tuesday/ 3 = Wednesday/ 4 = Thursday/ 5 = Friday/ 6 = Saturday/ 7 = Sunday1 = Monday/ 2 = Tuesday/ 3 = Wednesday/ 4 = Thursday/ 5 = Friday/ 6 = Saturday/ 7 = Sunday1 = Monday/ 2 = Tuesday/ 3 = Wednesday/ 4 = Thursday/ 5 = Friday/ 6 = Saturday/ 7 = Sunday1 = Monday/ 2 = Tuesday/ 3 = Wednesday/ 4 = Thursday/ 5 = Friday/ 6 = Saturday/ 7 = Sunday1 = Monday/ 2 = Tuesday/ 3 = Wednesday/ 4 = Thursday/ 5 = Friday/ 6 = Saturday/ 7 = Sunday1 = Monday/ 2 = Tuesday/ 3 = Wednesday/ 4 = Thursday/ 5 = Friday/ 6 = Saturday/ 7 = Sunday1 = Monday/ 2 = Tuesday/ 3 = Wednesday/ 4 = Thursday/ 5 = Friday/ 6 = Saturday/ 7 = Sunday1 = Monday/ 2 = Tuesday/ 3 = Wednesday/ 4 = Thursday/ 5 = Friday/ 6 = Saturday/ 7 = Sunday1 = Monday/ 2 = Tuesday/ 3 = Wednesday/ 4 = Thursday/ 5 = Friday/ 6 = Saturday/ 7 = Sunday1 = Monday/ 2 = Tuesday/ 3 = Wednesday/ 4 = Thursday/ 5 = Friday/ 6 = Saturday/ 7 = Sunday
3. Once you select the day to program press the button : the clock
flashing will appear in the center display. The time schedule will be set starting from 0:00
proceeding towards 24:00 in steps of 30 minutes. The programming mode is as follows:proceeding towards 24:00 in steps of 30 minutes. The programming mode is as follows:proceeding towards 24:00 in steps of 30 minutes. The programming mode is as follows:
•with the clock flashing, select one of the setpoint tem-
ra available by pressing the corresponding key of your choice between:
3. Press the icon once, the symbol and numbers that indicate the tem-
ture night (moon) flash. With the keys is choose the temperature
night (moon)
4. Press to confirm and exit or wait out the auto-
ca after 1 minute (after 15 seconds the display is no longer illuminated)
NB: the antifreeze temperature indicated by the symbol NB: the antifreeze temperature indicated by the symbol It is fixed at + 7 ° C
IT

7
comfort temperature, night temperature, intermediate temperature
energy saving. The corresponding symbol appears on the display
• to press until the clock will not indicate the time up to which you
It intends to maintain the selected temperature
• Press the button corresponding to the new desired temperature level (
temp. comfort, temp. night, temp. intermediate): the symbol corre-
ding will be displayed
• to press until the clock will not indicate the time up to which you
It intends to maintain the selected temperature
• Repeat the previous steps until the clock will not display nuova- mind
• The timer program you just set will be displayed on the histogram time in the bottom of the
display
4. To switch to programming another weekday press the button
and then the button or to select the new
day to program. Then repeat the steps indicated in step 3
5. To save the time program and return to operation mode automated tico, press the button
at anytime.
Caution: the button Caution: the button It must be pressed only at the end of the procedure
programming
NB: E 'can copy the time program from day to day through the NB: E 'can copy the time program from day to day through the
"COPY" ( more details on page. 22)."COPY" ( more details on page. 22).
IT
Day chosen for the program- ming
First time Histogram Now flashing
flashing segment corresponding to
segment the histogram display
1 2 3 4 5 6 7
00 06 12 18 24
2

8
EXAMPLE OF DAILY PROGRAMMING
Programming of day 2 (= Tuesday):
Temp. Night from 0:00 to 6:00 Temp. Of comfort
from 6:00 to 10:30 temp. Economy from 10:30 to
18:00 Temp. Of comfort from 18:00 to 21:30 Night
Temp. from 21:30 to 00:00
IT
Press 3 sec. the button to access programming
mation
TO.
00 06 12 18 24
C. to press to start programming the selected day (2 =
Tuesday)
00 06 12 18 24
B. Press the button to choose the day from
programmed as follows: 2 = Tuesday
00 06 12 18 24

9
IT
D.
to press to select the night temperature.
00 06 12 18 24
IS. to press until the clock displays the time
desired (6:00)
00 06 12 18 24
F. to press to select comfort temperature.
00 06 12 18 24
G. to press until the clock displays the time
desired (10:30)
00 06 12 18 24

10
H. Press to select the energy saving temperature
00 06 12 18 24
to press until the clock displays the time
desired (18:00)
THE.
00 06 12 18 24
THE. to press to select the comfort temperature
00 06 12 18 24
M. to press until the clock displays the time
desired (21:30)
00 06 12 18 24
IT

11
N.
to press to select the night temperature.
00 06 12 18 24
OR. to press until the clock displays the time
desired (0:00)
The programming of day 2 = Tuesday ended.
00 06 12 18 24
P.
00 06 12 18 24
to press to continue programming and repeat steps "B"
to "P" (or press to confirm
and exit)
IT

12
IT
B • 5/2 PROGRAM:
1. Press and hold the button for about 3 seconds to enter the
programming mode, the indicator of the day (top of display) blinks
2. Press or until the indicators of 1-5 days (Monday to Friday)
flash on the display together
3. Then press the button : the clock flashing will appear
at the center of the display. The time schedule will be set starting from 0:00 proceeding towards 24:00
in steps of 30 minutes. The programming mode is as follows:in steps of 30 minutes. The programming mode is as follows:in steps of 30 minutes. The programming mode is as follows:
•with the clock flashing, select one of the setpoint tem-
ra available by pressing the corresponding key of your choice between:
comfort temperature, night temperature, intermediate temperature
energy saving. The corresponding symbol appears on the display
• to press until the clock will not indicate the time up to which you
It intends to maintain the selected temperature
• Press the button corresponding to the new desired temperature level (
temp. comfort, temp. night, temp. intermediate): the symbol corre-
ding will be displayed
• to press until the clock will not indicate the time up to which you
It intends to maintain the selected temperature
• Repeat the previous steps until the clock will not show you nuovamen-
• The timer program you just set will be displayed on the histogram tem- Porale in the bottom of the
display
4. To go to the programming of 6-7 days (Saturday and Sunday), press the button
and then the button or until the indicators (6-7)
both flash on the display. Then repeat the steps indicated in step 3
5. To save the time program and return to operation mode automated tico, press the button
at anytime.
Caution: the button Caution: the button It must be pressed only at the end of the procedure
programming

13
IT
Days chosen for the program- ming
First time Histogram Now flashing
flashing segment corresponding to
segment the histogram display
1 2 3 4 5 6 7
00 06 12 18 24
1 2 3 4 5
PROGRAMMING EXAMPLE 5/2
Programming days 1 to 5 (= Monday to Friday):
Temp. Night from 0:00 to 6:00 Temp. Of comfort
from 6:00 to 10:30 temp. Economy from 10:30 to
18:00 Temp. Of comfort from 18:00 to 21:30 Night
Temp. from 21:30 to 00:00
Press 3 sec. the button to access programming
mation
TO.
00 06 12 18 24

14
B. Press the button until the gods indicators
1-5 days (Monday to Friday) flash together
00 06 12 18 24
C. to press to begin programming of 1-5 days (Monday to
Friday)
00 06 12 18 24
D.
to press to select the night temperature.
00 06 12 18 24
IS. to press until the clock displays the time
desired (6:00)
00 06 12 18 24
IT

15
F. to press to select comfort temperature.
00 06 12 18 24
G. to press until the clock displays the time
desired (10:30)
00 06 12 18 24
H. Press to select the energy saving temperature
00 06 12 18 24
to press until the clock displays the time
desired (18:00)
THE.
00 06 12 18 24
IT

16
THE. to press to select the comfort temperature
00 06 12 18 24
M. to press until the clock displays the time
desired (21:30)
00 06 12 18 24
N.
to press to select the night temperature.
00 06 12 18 24
OR. to press until the clock displays the time
desired (0:00)
The programming of 1-5 days (Monday to Friday) is finished.
00 06 12 18 24
IT

17
P.
00 06 12 18 24
to press to continue programming and repeat steps "B"
to "P" (or press to confirm
and exit)
C • WEEKLY PROGRAM:
1. Press and hold the button for about 3 seconds to enter the
programming mode, the indicator of the day (top of display) blinks
2. Press or until the indicators of 1-7 days (Monday to Sunday)
flash on the display together
3. Then press the button : the clock flashing will appear
at the center of the display. The time schedule will be set starting from 0:00 proceeding towards 24:00
in steps of 30 minutes. The programming mode is as follows:in steps of 30 minutes. The programming mode is as follows:in steps of 30 minutes. The programming mode is as follows:
•with the clock flashing, select one of the setpoint tem-
ra available by pressing the corresponding key of your choice between:
comfort temperature, night temperature, intermediate temperature
energy saving. The corresponding symbol appears on the display
• to press until the clock will not indicate the time up to which you
It intends to maintain the selected temperature
• Press the button corresponding to the new desired temperature level (
temp. comfort, temp. night, temp. intermediate): the symbol corre-
ding will be displayed
• to press until the clock will not indicate the time up to which you
It intends to maintain the selected temperature
• Repeat the previous steps until the clock will not show you nuovamen-
• The timer program you just set will be displayed on the histogram tem- Porale in the bottom of the
display
IT

18
4. To save the time program and return to operation mode automated tico, press the button
at anytime.
Caution: the button Caution: the button It must be pressed only at the end of the procedure
programming
Days chosen for the program- ming
First time Histogram Now flashing
flashing segment corresponding to
segment the histogram display
1 2 3 4 5 6 7
00 06 12 18 24
1 2 3 4 5 6 7
WEEKLY PROGRAMMING EXAMPLE
Programming days 1 to 7 (= Monday to Sunday):
Temp. Night from 0:00 to 6:00 Temp. Of comfort
from 6:00 to 10:30 temp. Economy from 10:30 to
18:00 Temp. Of comfort from 18:00 to 21:30 Night
Temp. from 21:30 to 00:00
Press 3 sec. the button to access programming
mation
TO.
00 06 12 18 24
IT

19
B. Press the button until the gods indicators
1-7 days (Monday to Sunday) flash together
00 06 12 18 24
C. to press to begin programming of 1-7 days (Monday to
Sunday)
00 06 12 18 24
D.
to press to select the night temperature.
00 06 12 18 24
IS. to press until the clock displays the time
desired (6:00)
00 06 12 18 24
IT

20
IT
F. to press to select comfort temperature.
00 06 12 18 24
G. to press until the clock displays the time
desired (10:30)
00 06 12 18 24
H. Press to select the energy saving temperature
00 06 12 18 24
to press until the clock displays the time
desired (18:00)
THE.
00 06 12 18 24
Table of contents
Other Solaris Thermostat manuals
Popular Thermostat manuals by other brands
Danfoss
Danfoss ECtemp 530 installation instructions
Honeywell
Honeywell FocusPRO TH5000 Series installation guide
Honeywell
Honeywell FocusPRO 5000 brochure
Salus
Salus QUANTUM SQ610RF Full user manual
ClimateMaster
ClimateMaster ATP32U03 Operation guide
Carrier
Carrier 33CS Installation, service, and troubleshooting instructions
