Solatell Sola Check User manual

Artisan Technology Group is your source for quality
new and certied-used/pre-owned equipment
• FAST SHIPPING AND
DELIVERY
• TENS OF THOUSANDS OF
IN-STOCK ITEMS
• EQUIPMENT DEMOS
• HUNDREDS OF
MANUFACTURERS
SUPPORTED
• LEASING/MONTHLY
RENTALS
• ITAR CERTIFIED
SECURE ASSET SOLUTIONS
SERVICE CENTER REPAIRS
Experienced engineers and technicians on staff
at our full-service, in-house repair center
WE BUY USED EQUIPMENT
Sell your excess, underutilized, and idle used equipment
We also offer credit for buy-backs and trade-ins
www.artisantg.com/WeBuyEquipment
REMOTE INSPECTION
Remotely inspect equipment before purchasing with
our interactive website at www.instraview.com
LOOKING FOR MORE INFORMATION?
Visit us on the web at www.artisantg.com for more
information on price quotations, drivers, technical
specications, manuals, and documentation
Contact us: (888) 88-SOURCE | sales@artisantg.com | www.artisantg.com
SM
View
Instra
Sola-Check Manual version 1.1
Last printed 20/05/2004 14:30
Sola Check Manual
Solatell Ltd.
King Henry’s Drive
Croydon CR9 0BG
UK
+44 1689 808033
PART NUMBER
51702010001
Artisan Technology Group - Quality Instrumentation ... Guaranteed | (888) 88-SOURCE | www.artisantg.com

Sola-Check Manual version 1.1
Last printed 20/05/2004 14:30
WARNINGS
Mains Voltage –Shock Hazard!
A 115 or 240 VAC mains supply is required to charge the Solatell
Sola-Scope 2000 unit.
UV Hazard!
The system is designed to measure high intensity ultra violet light.
Strong UV light represents a hazard to human skin and eyes.
Normal precautions should be taken when working with the UV
lamps themselves –if in doubt, refer to manufacturer.
When working with the instrument under normal working conditions,
there should be no exposure at all to UV light. However, the probe
locators installed at the monitoring points will transmit small, but
intense amounts of UV light whenever a reading is taken.
This UV light emission from the probe locators should be
treated with caution, and one should never look into the entry of the
locator tube with unprotected vision.
It is recommended that UV absorbing glasses or visors should be
used to protect eyes and UV absorbing gloves should be used to
protect hands whenever working with UV.
Medical advice should be sort immediately if any skin reddening or
irritation of the eyes is experienced after working with UV.
Care of Cables
Proper care of the interface and power cables is essential for the
overall safety and efficiency of the instrumentation.
Artisan Technology Group - Quality Instrumentation ... Guaranteed | (888) 88-SOURCE | www.artisantg.com

Sola-Check Manual version 1.1
Last printed 20/05/2004 14:30
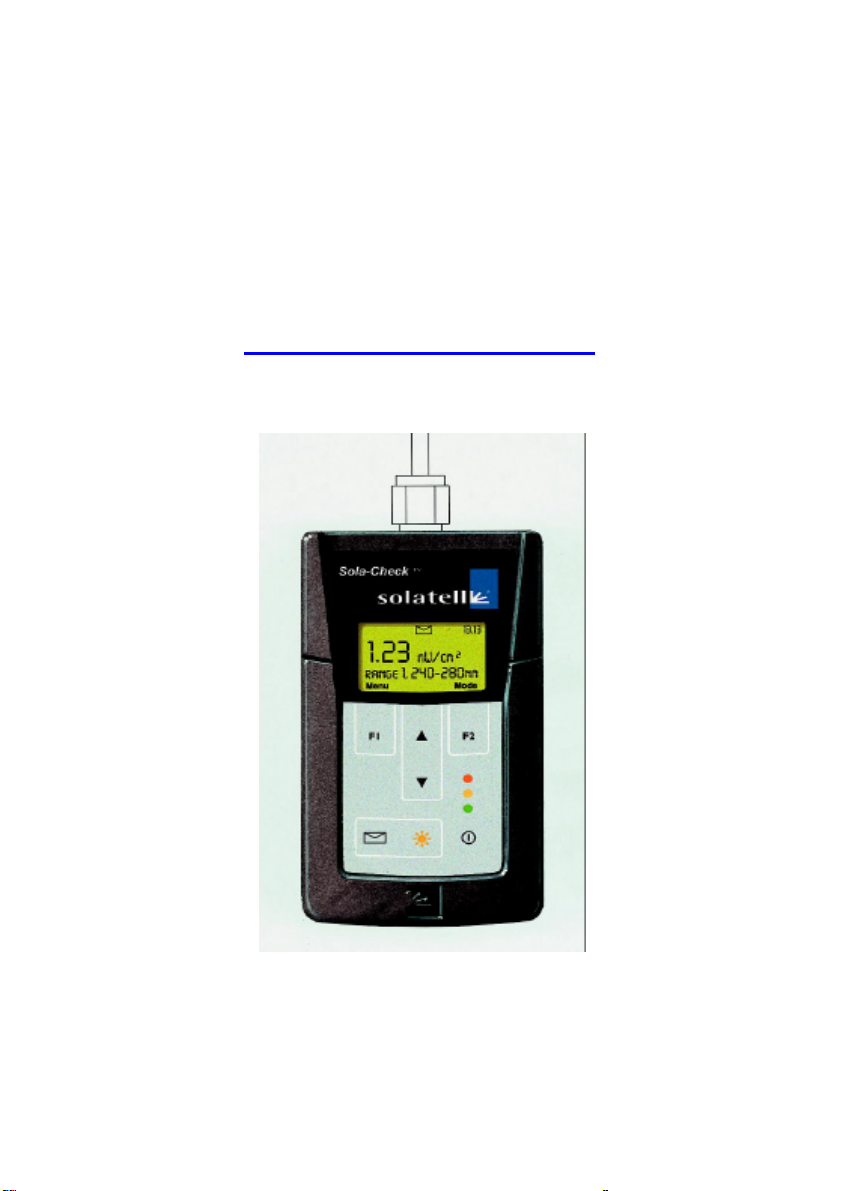
1Quick Start
1.1 On / Off
Press button to switch on. Press and hold for 2 seconds to switch off.
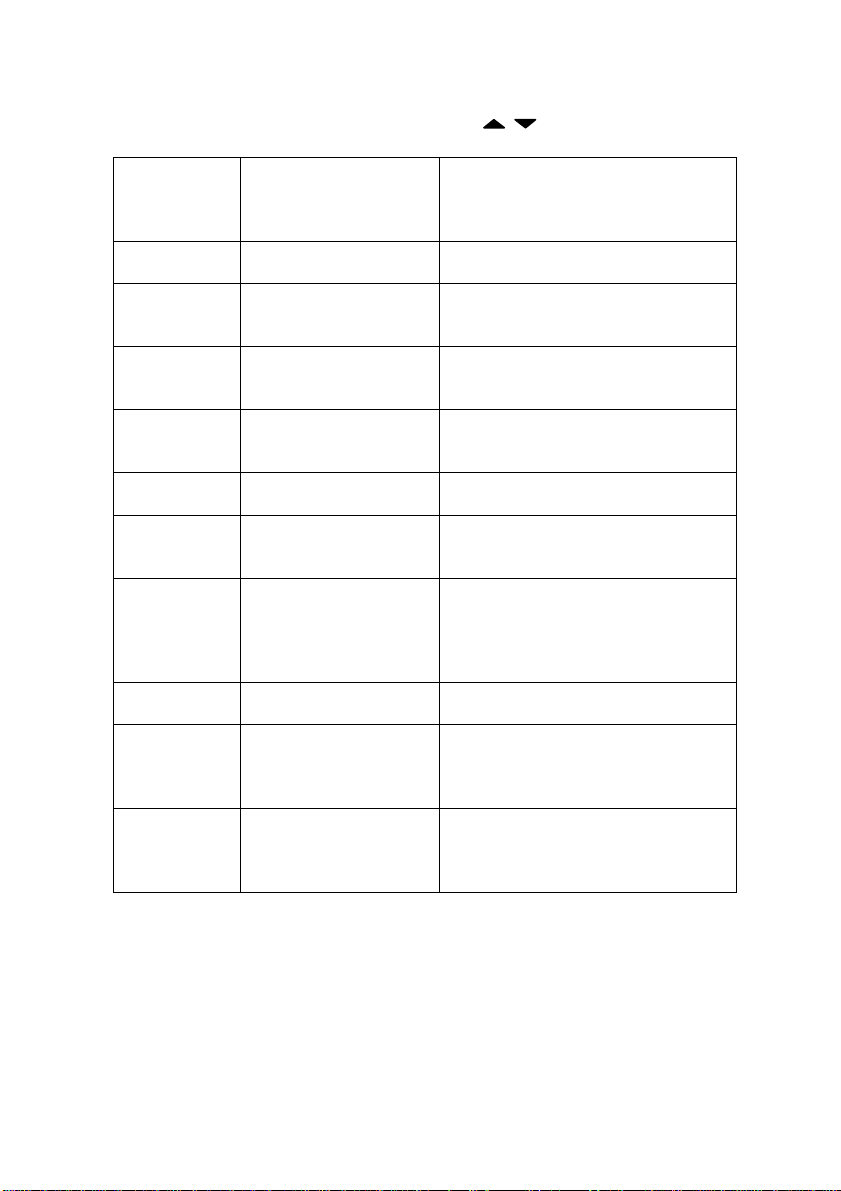
1.2 ICONS at top of screen
The top part of your screen displays a number of symbols to keep you
informed about battery level, stored data, range meter and time as follows:
Icon Function
Indicates battery level –the more black the better the
battery. If power supply is plugged in the icon indicates
a filling battery .
This icon is displayed when the data on the screen is
the stored or reference data.
Indicates whether you need to re-sample using auto-
ranging (see later for full explanation)
12:41 Real-time clock or count-down when sampling.
1.3 User Interface
Key Function
F1 and
F2 keys
the function keys or soft keys. Their function changes in
accordance with the text on the screen above the keys.
The stored data button allows you to store and view
reference data.
The sample key
Multi functioned Arrow keys for scrolling, selecting and
editing.
1.4 Altering the Contrast
In Gauge mode (see section 1.6 ), press keys to alter the contrast of
the screen.
Artisan Technology Group - Quality Instrumentation ... Guaranteed | (888) 88-SOURCE | www.artisantg.com
Sola-Check Manual version 1.1
Last printed 20/05/2004 14:30
1.5 Radiometer Mode
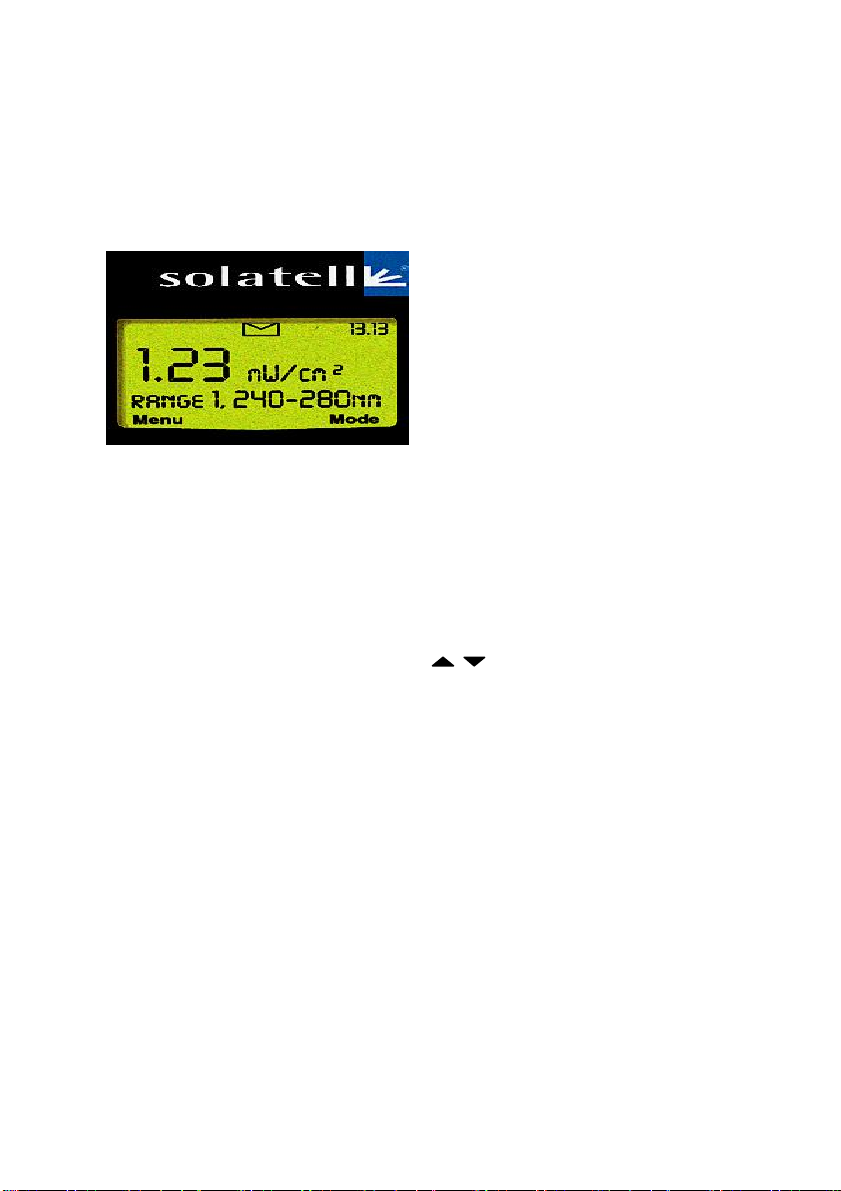
Figure 1 illustrates the Radiometer Mode. If your instrument is in the Gauge
Mode, press F2 to change modes.
Figure 1 Radiometer Mode
The top part of the screen gives information in the form of icons about
battery level, range meter, saved data and time.
The middle section gives the current data displayed as large numbers in the
Radiometer Mode. The large numbers give the intensity (area) within the
wavelength range noted below –in this case 240 –280nm.
To scroll between area 1, area 2 and their ratio and thermocouple data (if
using thermocouple probe) press the buttons.
The bottom section of the screen has the labels for the function keys F1 and
F2.
Artisan Technology Group - Quality Instrumentation ... Guaranteed | (888) 88-SOURCE | www.artisantg.com
Sola-Check Manual version 1.1
Last printed 20/05/2004 14:30
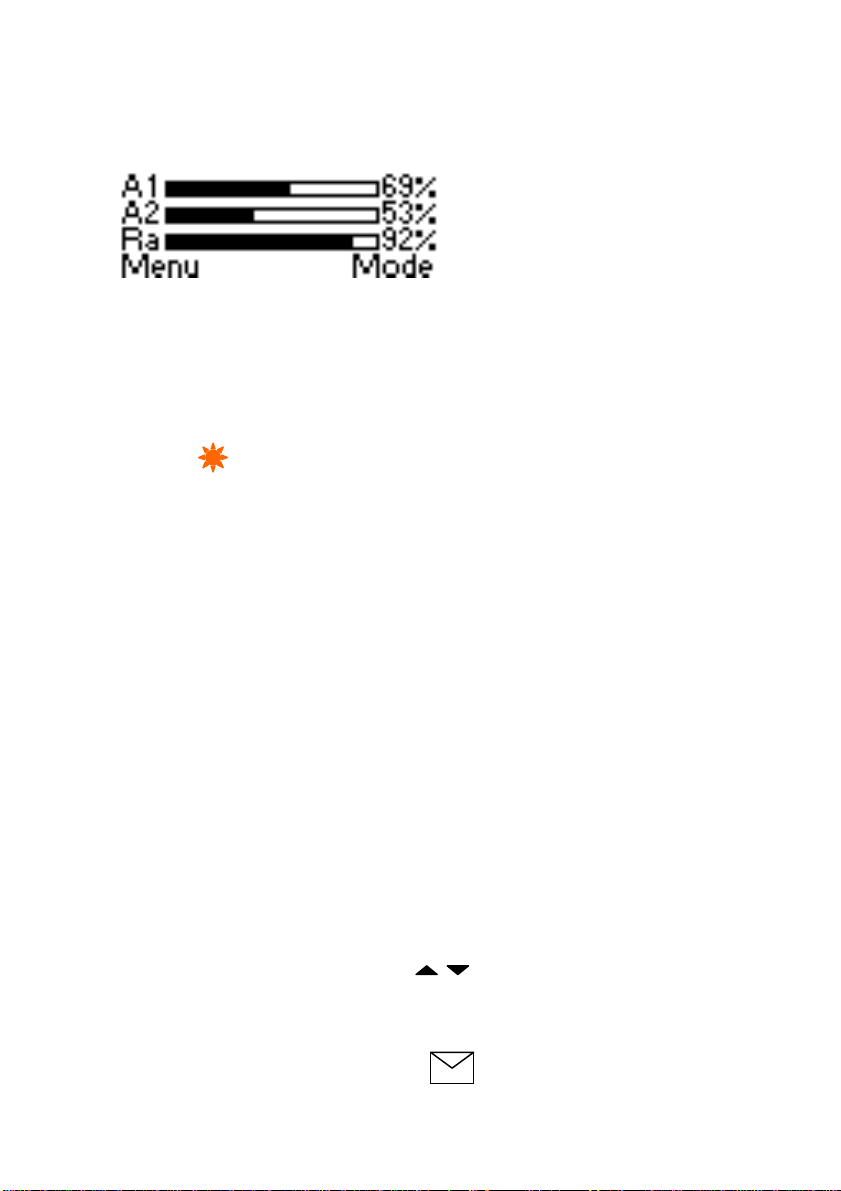
1.6 Gauge Mode
Figure 2 Gauge Mode
If your instrument is in the Radiometer Mode, press F2 to change modes.
The Gauge Mode shows how the current UV lamp data compares with the
stored or reference lamp data for Area 1, Area 2 and the Ratio.
1.7 Making a UV Measurement
To take your first sample, position instrument in appropriate place and press
and hold key for 2 seconds, then release. The Sola–Check will now
Auto-Range (work out the exposure time required) and take a sample.
For subsequent readings of the same lamp or same type of lamp at the
same or similar distance, you will only need to press the sample key briefly
as the instrument has now learnt the exposure time required.
Note. Positioning of the Sola Check is critical. Probes should be locked in
place with a probe locator. If no probe is being used, the Sola-Check should
be positioned on a flat surface and clamped in place.
1.8 Warning LED Lights
There are three coloured warning lights on the front of the instrument. These
change colour depending on how the current lamp data compares with the
stored reference lamp.
?? A green LED indicates that all the areas and ratios for the current data
are above the alarm level.
?? An amber LED indicates that either an area or the ratio for the current
data is below the amber alarm level but above the red alarm level.
?? A red LED indicates that either an area or the ratio for the current data is
below both the amber and the red alarm levels.
2Menu Control
The menus allow the user to configure the Sola-Check exactly as required.
To enter the menu system press F1 (when it says ‘menu’ above it). To
navigate the menu system, press the keys to highlight an item, then
press F1 to select the item; press F2 to exit the current menu.
The menu allows you to view or change the following (italics show range,
bold shows default):-
For help whilst in menu control press
Artisan Technology Group - Quality Instrumentation ... Guaranteed | (888) 88-SOURCE | www.artisantg.com
Sola-Check Manual version 1.1
Last printed 20/05/2004 14:30
To change an item use the keys.
Menu Name Sub Menu Function
Set range 1
short
wavelength
Min. wavelength
235 –470 nm, 240
Max. wavelength
235 –470 nm, 320
Allows user to change the
wavelength band width for
wavelength-range-1
Amber alarm level
0 –100%, 75%
Red alarm level
0 –100%, 50%
Allows user to change alarm levels
for wavelength-range-1 as a
percentage of current reading vs
stored reading. Coloured LED will
light up when current reading falls
below the % set.
Set range 2
long
wavelength
Min. wavelength
235 –470 nm, 320
Max. wavelength
235 –470 nm, 400
Allows user to change the
wavelength band width for
wavelength-range-2
Amber alarm level
0 –100%, 75%
Red alarm level
0 –100%, 50%
Allows user to change alarm levels
for wavelength-range-2 as a
percentage of current reading vs
stored reading. Coloured LED will
light up when current reading falls
below the % set.
Set ratio
short / long
Amber alarm level
0 –100%, 75%
Red alarm level
0 –100%, 50%
Allows user to change alarm levels
for ratio as a percentage of current
reading vs stored reading. Coloured
LED will light up when current ratio
falls below the % set.
Set
Intensity
Range
Use keys to manually
change intensity range of lamps
being measured. Use if auto-
ranging is not appropriate eg when
lamps are varying in intensity over
time.
Artisan Technology Group - Quality Instrumentation ... Guaranteed | (888) 88-SOURCE | www.artisantg.com
Sola-Check Manual version 1.1
Last printed 20/05/2004 14:30
To change an item use the keys.
Settings Logging
On / Off
When On sends the following data
to RS232 (PC or printer):
Log time (hh:mm:ss); date; UV
data; temperature.
Set Clock
hh:mm:ss:dd:mm:yy
Allows user to change date and
time of real-time clock.
Cont. scan interval
1 –60 min; 0
Set interval mm between samples
when in continuous scan mode.
Optimisation
1-7, 3
Number of scans taken to
construct a Smart-Scan (see
section 4.3).
Lock
On / off
When on prevents accidental
alteration of baseline, ranges and
alarms.
Information Stored data Gives date, time, and sampling
info of the stored reference data.
Last data Gives date, time, and sampling
info of the current data (the last
sample).
Product Info. Sola-Check software version and
serial number; Attachment part
number and serial number;
Environmental temperature and
visible light.
Real-Time data Gives current date, time,
temperature etc.
Lock
On/Off
Allows all settings to be locked so
that the reference data and all
settings can not be changed
accidentally.
Cont. scan
Start / stop
Once started, will automatically
scan every time interval (mm as
selected in “Cont. scan interval” –
see above)
Artisan Technology Group - Quality Instrumentation ... Guaranteed | (888) 88-SOURCE | www.artisantg.com

Sola-Check Manual version 1.1
Last printed 20/05/2004 14:30
3The Facts behind the Figures
3.1 Radiometer Mode
The radiometer mode is in fact three separate screens. The first screen
shows the intensity within the wavelength-range-1 and is labeled Area-1.
The range for Area 1 can be changed in the menu as described in section 2.
The reason it is known as the area is because it is the sum of the intensities
for each wavelength within the range –in other words the area under the
curve.
240 260 280 300 320 340 360 380 400 420
nm
240 260 280 300 320 340 360 380 400 420
nm
Spectral
Scan
Apply
Ranges
1 &
2
A1
A2
240 260 280 300 320 340 360 380 400 420
nm
1.23 mW/cm
2
RANGE 1, 240-280nm
4.56 mW/cm
2
RANGE 2, 315-400nm
RATIO = 0.27
RANGE 1 / RANGE 2
Calibrated
Areas in
Range1& 2
Artisan Technology Group - Quality Instrumentation ... Guaranteed | (888) 88-SOURCE | www.artisantg.com

Sola-Check Manual version 1.1
Last printed 20/05/2004 14:30
3.2 Gauge Mode
The gauge mode compares the current data with the stored data and
represents the comparison in the form of a bar.
The top bar represents the current intensity (or “area”) within wavelength-
range-1 as a percentage of the same area of the stored data and is labeled
A1.
For example, if the intensity in the 240-280nm range (Area 1) for the current
data is 0.849mW/cm2 and the intensity of the stored data in the range 240-
280nm is 1.23mW/cm2 , then the percentage would be calculated as follows:-
0.849/1.23 *100 = 69%
The middle bar represents the intensity (or “area”) within wavelength-range-2
for the current data as a percentage of the same area of stored data and is
labeled A2.
The bottom bar represents the ratio of current Area 1/Area 2 as a
percentage of the stored ratio.
For example, if for the current data the intensity for Area 1 is 0.849mW/cm2
and the intensity for Area 2 is 2.34mW/cm2then the ratio for the current data
is 0.849/2.34 = 0.363
If, also, for the stored data the intensity for Area 1 is 1.23 mW/cm2 and the
intensity for Area 2 is 3.12mW/cm2then the ratio for the stored data is
1.23 /3.12 = 0.394
The percentage would then be calculated as follows:-
0.363/0.394*100 = 92%
Artisan Technology Group - Quality Instrumentation ... Guaranteed | (888) 88-SOURCE | www.artisantg.com
Sola-Check Manual version 1.1
Last printed 20/05/2004 14:30
3.3 Range meter
The Sola-Check measures UV in a similar way to a camera taking a
photograph. In other words to get a sharp and accurate picture of the UV the
“exposure time” or sample time is critical. When you use auto-ranging the
Check is finding the correct sample time.
The five bars at the top of the display (between the store icon and alarm
icon) indicate how good your “signal” is. For example, if there is insufficient
UV for the sample time then only 1 bar shows. The data is not of good
enough quality if there are fewer than three bars.
The ‘range meter’, therefore, is a very good gauge as to whether you are
using the correct ‘sample time’, i.e. if a new auto-ranging scan is required or,
if you have used auto-ranging, whether there is too little UV for the
instrument to read.
3.4 The Store Key
There are two ‘memories’ in the Sola-Check, i.e. two places to store
complete scans with all their information. One is used to store the ‘current’
data, the other is accessed using the store key. When in radiometer mode, if
you press and hold the store key, the stored area will be displayed; also the
store icon will be displayed. When you release the held key, the current
measurement will return.
To store the current measurement, press and hold the store key, then press
the sample key –this can be done in radiometer mode or gauge mode. If this
is done in gauge mode, the gauges will all read 100%. If this is done in
radiometer mode, no difference will be seen when you press the store key
(except the store icon). The message “saving baseline scan…please wait” is
displayed.
Artisan Technology Group - Quality Instrumentation ... Guaranteed | (888) 88-SOURCE | www.artisantg.com

Sola-Check Manual version 1.1
Last printed 20/05/2004 14:30
4Advanced Explanations
4.1 Taking measurements
There are three possible ways to make the Sola-Check take a sample of the
UV:
1. Auto-ranging scan : Hold sample for 2 seconds, then release.
2. Simple scan: Press sample , briefly –this takes a scan using the
same ‘intensity range’ as the previous scan. The intensity range
can also be altered manually using the “Set Intensity Range”
option in the menu.
3. Cont. scan : Select from menu –this takes scans at the user-
defined interval. If the interval is set to zero then the Sola-Check
takes readings as fast as it can. To change the interval first select
from menu Settings / Cont. scan interval .
4.2 Auto-range vs. simple scan
Auto-ranging automatically finds the correct “exposure” for the lamp. There is
a sequence of events associated with taking an auto-ranging scan. These
are listed below and can take a little longer than a simple scan.
To take an auto-ranging sample, the user presses and holds the sample
button for two seconds, then releases it.
1. If in radiometer mode, the last reading is shrunk to normal sized
text. If in gauge mode, the ratio bar is temporarily removed. In the
space provided ‘Auto-ranging’ is displayed.
2. The attachment’s calibrations are read.
3. The Sola-Check tries several scan times or “exposures” then
calculates the exact one required, i.e. auto-ranging is performed.
4. The ‘Auto-ranging’ message is replaced with ‘SCANNING’.
5. The clock is cleared and replaced with a countdown timer indicating
time remaining until the sample is complete.
6. The electronics are initialised.
7. A ‘Smart-Scan’ is commenced (see section 4.3).
8. When the scan is complete, the various calibrations are applied.
9. The time, date, temperature, visible light, dark current, stray light,
live zero, etc. etc. are recorded.
10. All the collected information is stored.
11. Area 1, area 2 and ratio are calculated, then alarms set as required
(LEDs, etc.).
12. The display is updated (radiometric values, gauge, range meter,
etc.).
13. The sample is complete and the current time returns to the display
in place of the countdown timer.
Artisan Technology Group - Quality Instrumentation ... Guaranteed | (888) 88-SOURCE | www.artisantg.com

Sola-Check Manual version 1.1
Last printed 20/05/2004 14:30
If the user just presses sample (i.e. uses the same intensity range as the
previous scan) and the intensity range is inappropriate (too low or too high)
then a warning message is displayed.
4.3 Smart-Scan : Optimising
Smart-Scan increases the ”definition” between low and high intensity
wavelengths (like better focus of a camera). The greater the difference
between the intensity of the short and long wavelengths (UVC and UVA) the
higher the number of Smart-Scans required in Settings Optimisation. For
first time users it is suggested that a high number of scans should be used.
With experimentation the user can find the smallest number of scans that
gives a consistent reading, thus decreasing the time to collect sample data
to the minimum possible.
5Real time clock
The real time clock is set in the settings menu item. The time is always
displayed in the top right of the display, except during a scan when the time
remaining of the scan is displayed.
6Charging
To charge the Sola-Check, connect the external PSU to the DC-in
connector. The Sola-Check can be on or off and still charge. When fast
charging the battery indicator cycles around the segments. When ‘topping
off’ the battery the top battery segment flashes.
7Warranty, Service and Support
To receive support, please ensure you return your warranty registration
card.
Artisan Technology Group - Quality Instrumentation ... Guaranteed | (888) 88-SOURCE | www.artisantg.com

Artisan Technology Group is your source for quality
new and certied-used/pre-owned equipment
• FAST SHIPPING AND
DELIVERY
• TENS OF THOUSANDS OF
IN-STOCK ITEMS
• EQUIPMENT DEMOS
• HUNDREDS OF
MANUFACTURERS
SUPPORTED
• LEASING/MONTHLY
RENTALS
• ITAR CERTIFIED
SECURE ASSET SOLUTIONS
SERVICE CENTER REPAIRS
Experienced engineers and technicians on staff
at our full-service, in-house repair center
WE BUY USED EQUIPMENT
Sell your excess, underutilized, and idle used equipment
We also offer credit for buy-backs and trade-ins
www.artisantg.com/WeBuyEquipment
REMOTE INSPECTION
Remotely inspect equipment before purchasing with
our interactive website at www.instraview.com
LOOKING FOR MORE INFORMATION?
Visit us on the web at www.artisantg.com for more
information on price quotations, drivers, technical
specications, manuals, and documentation
Contact us: (888) 88-SOURCE | sales@artisantg.com | www.artisantg.com
SM
View
Instra
This manual suits for next models
1
Table of contents


