3
PART 1: IMPORTANT SAFETY INSTRUCTIONS
IT IS IMPORTANT TO READ, UNDERSTAND AND FOLLOW ALL SAFETY
MESSAGES AND INSTRUCTIONS PRINTED IN THIS MANUAL AND ON THE
EQUIPMENT BEFORE OPERATING. IF SAFETY INFORMATION IS NOT HEEDED,
SERIOUS INJURY OR DEATH TO THE OPERATOR OR BYSTANDERS MAY OCCUR.
DANGER
Indicates a hazardous situation, if not avoided, will result in death or serious injury.
The possible hazards are shown in the adjoining symbols or explained in the text.
WARNING
Indicates a hazardous situation, if not avoided, could result in death or serious injury.
The possible hazards are shown in the adjoining symbols or explained in the text.
CAUTION
Indicates a hazardous situation, if not avoided, may result in minor or major injury.
The possible hazards are shown in the adjoining symbols or explained in the text.
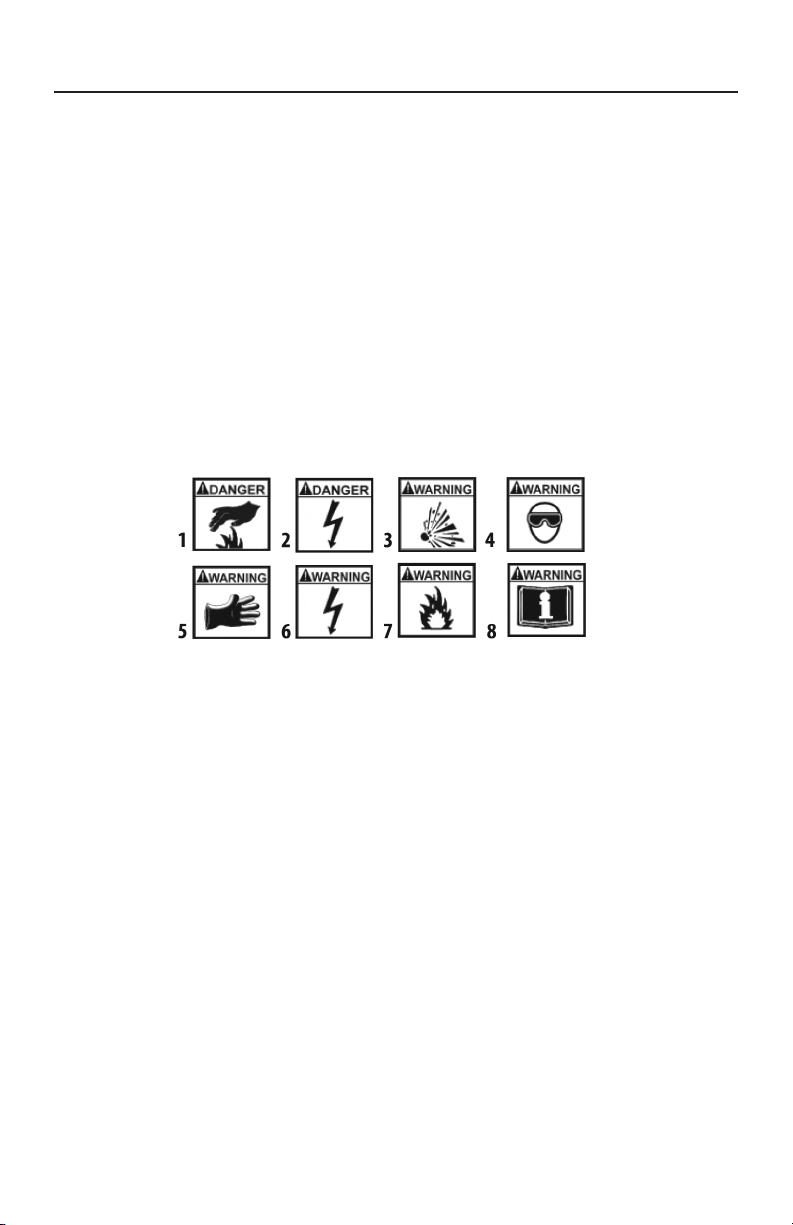
THE FOLLOWING SAFETY ALERT SYMBOLS ARE USED IN THIS MANUAL.
SYMBOL 1: Potential burn hazard. Sparks from electrical shorts can ignite
ammable liquids such as fuel or oil. Heat from electrical overloads can cause re
hazards.
SYMBOL 2: Potential electrical hazard. Batteries have enough electrical energy
potential to ignite ammable liquids such as fuel or oil. Wire overloads can cause
electrical failures. Shock hazard exists.
SYMBOL 3: Potential explosive air hazard. Pneumatic pressures used with this
equipment can cause explosive failures on damaged equipment.
SYMBOL 4: Potential eye hazard. Wear OSHA approved safety glasses. Battery
acid and high air pressures create hazardous situations for eyes.
SYMBOL 5: Potential chemical burn hazard. Wear protective gloves. Battery acid
is corrosive and can cause skin damage.
SYMBOL 6: Potential electrical hazard. Electrical energy can cause heat and
burn hazards.
SYMBOL 7: Potential re hazard. Use caution with ammable liquids such as fuel
and oil. Electrical shorts can ignite ammable liquids and wiring.
SYMBOL 8: Important information is stated.