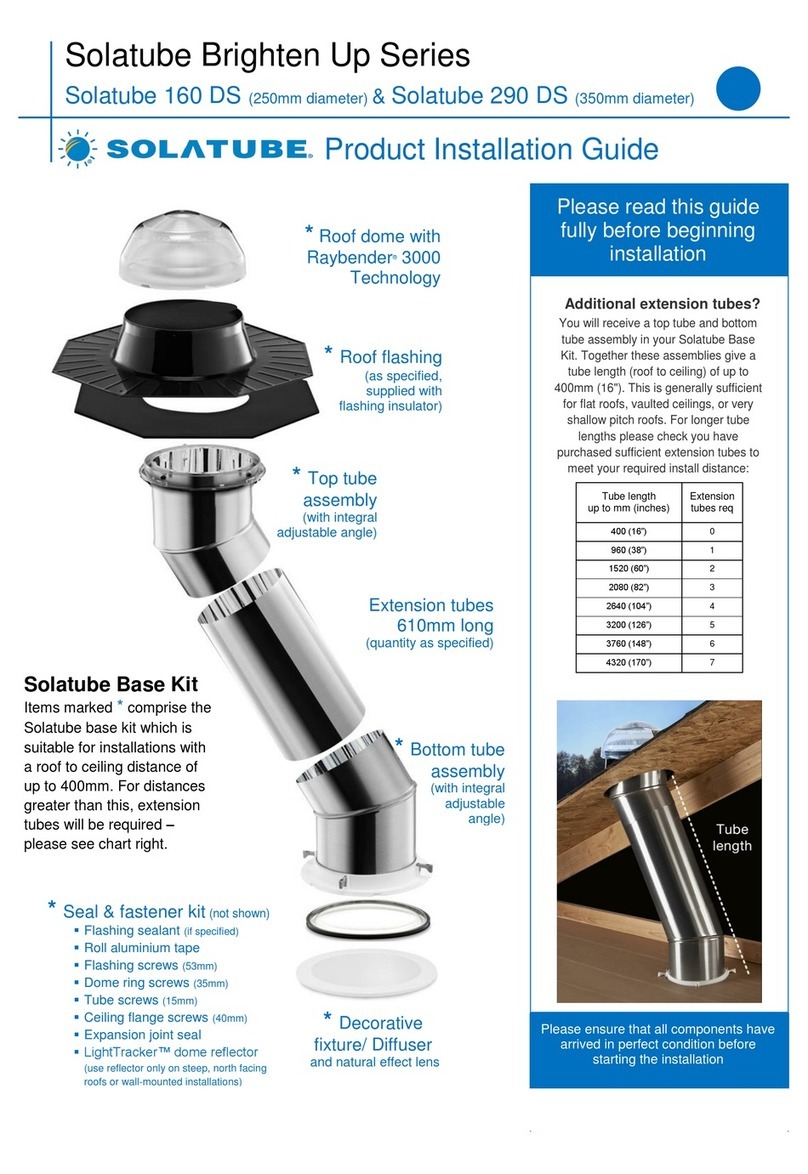
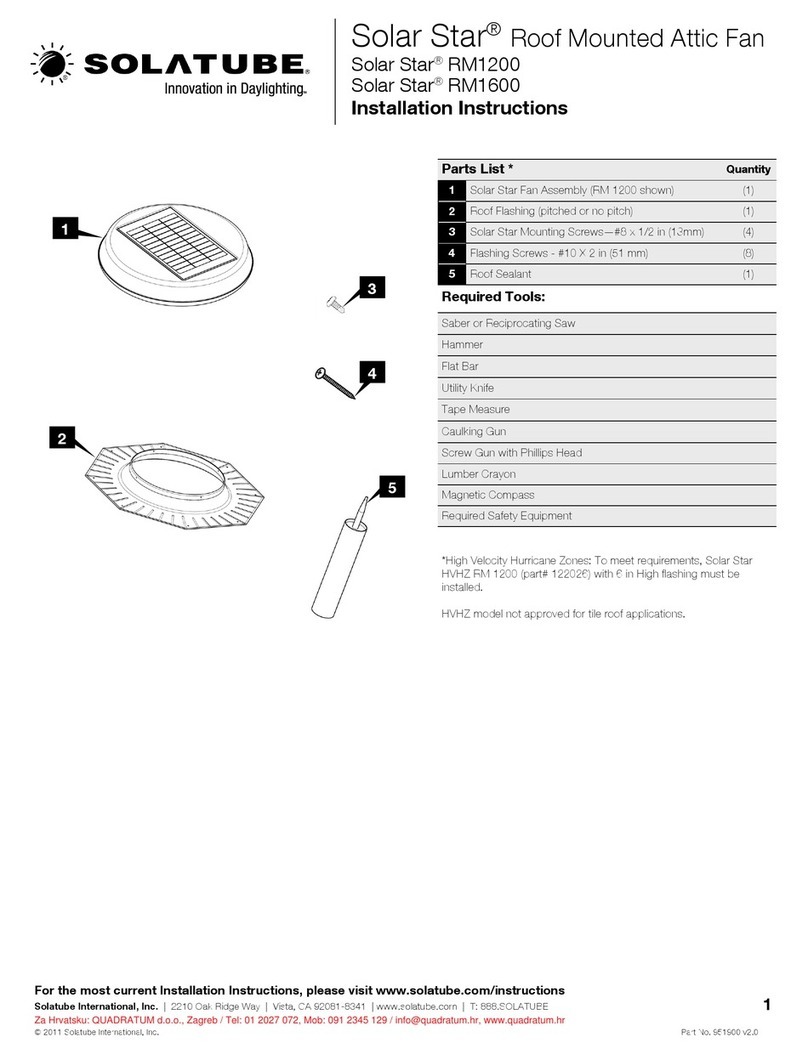
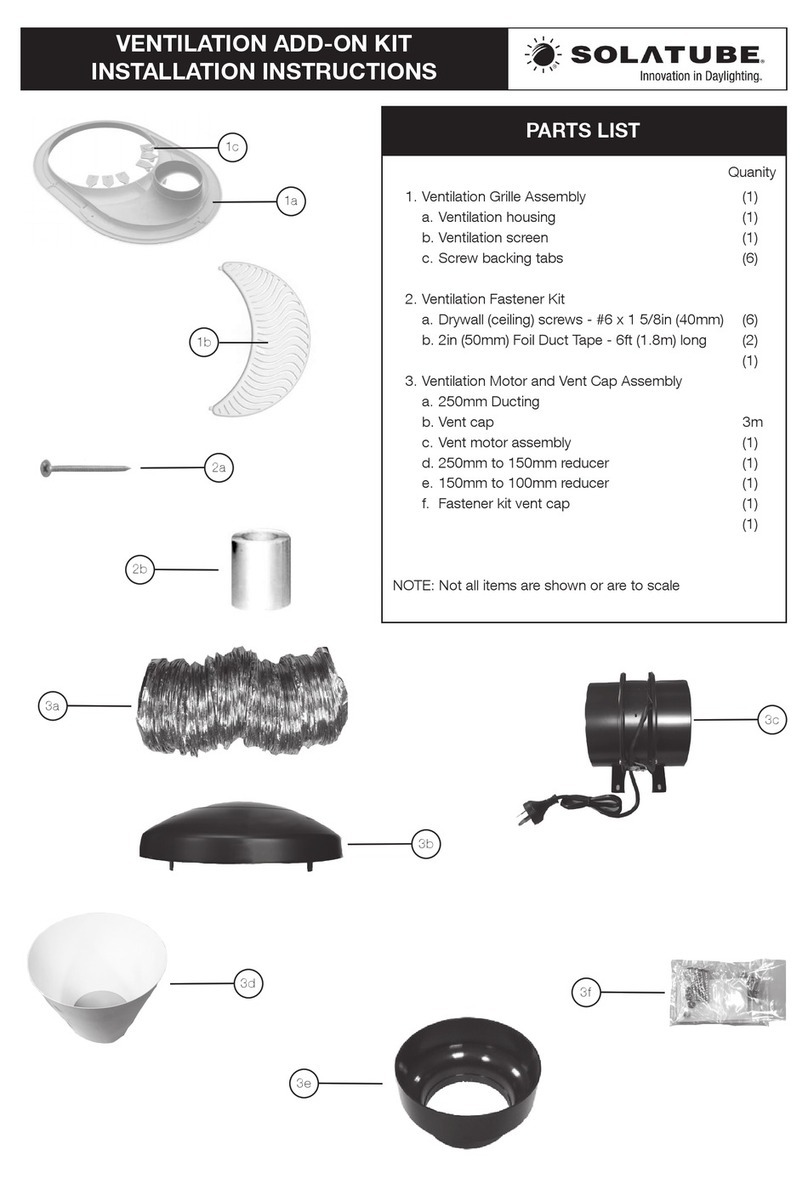
Solatube Solar Star RM 1500 User manual

For the most current Installaon Instrucons, please visit www.solatube.com/instrucons
Solatube Internaonal, Inc. | 2210 Oak Ridge Way | Vista, CA 92081-8341 | www.solatube.com | T: 888.SOLATUBE
© 2017 Solatube Internaonal, Inc. Part No. 951900 v2.2
1
Solar Star® Roof Mounted Ac Fan
Solar Star® RM 1500
Solar Star® RM 2400
Installaon Instrucons
Parts List * Quanty
1 Solar Star Fan Assembly (RM 1500 shown) (1)
2Roof Flashing (pitched or no pitch) (1)
3Solar Star Mounng Screws—#8 x 1/2 in (13mm) (4)
4Flashing Screws - #10 X 2 in (51 mm) (8)
5Roof Sealant (1)
3Required Tools:
Saber or Reciprocang Saw
Hammer
Flat Bar
Ulity Knife
Tape Measure
Caulking Gun
Screw Gun with Phillips Head
Lumber Crayon
Magnec Compass
Required Safety Equipment
4
1
*High Velocity Hurricane Zones: To meet requirements, Solar Star HVHZ
RM 1500 (part# 122290) and HVHZ RM 2400 (part# 122440)must be
installed with 6 in High ashing.
HVHZ models are approved for le roof applicaons.
2
5

For the most current Installaon Instrucons, please visit www.solatube.com/instrucons
Solatube Internaonal, Inc. | 2210 Oak Ridge Way | Vista, CA 92081-8341 | www.solatube.com | T: 888.SOLATUBE
© 2017 Solatube Internaonal, Inc. Part No. 951900 v2.2
2
WARNING
Solar Star Installaon Tips
These instrucons are a step-by-step guide for the installaon of a Solar Star ac venlaon products in the following condions. For other roof
types, please contact your Solatube Internaonal representave for addional informaon.
Built Up Flat Roof - Single Ply/Membrane - Asphalt Shingle - Low/No Pitched - Pitched -
Prefabricated Curbs - Metal Roof Panels
Solar Star products develop 100% of their operaonal power from the sun; therefore, it is very important that the solar panel be exposed to as much
sunlight as possible. The best locaon for Solar Star products is on the south facing slope.
Install the Solar Star Roof Mounted Ac Fan just below the top ridge of the roof, since hot moist air will naturally rise to the top poron of the ac.
Ensure net free air intake opening is a minimum of 1/150 of ac square footage or is meeng your local building code requirements.
Keep Solar Star solar panels covered unl product is mounted and sealed to roof. Cover solar panel whenever motor, fan, or unit is to be serviced.
Fan blade is controlled by the solar panel and may become operaonal when panel is exposed to sunlight.
Solar Star products are designed for general venlaon purposes only. Do not exhaust any hazardous materials or gases such as ammable,
explosive or incendiary materials.
Solar Star products have an unguarded fan blade. Do not use Solar Star products in areas that are easily accessible.
If your home has gable or dormer vents, install the Solar Star Roof Mounted Ac Fan between vents or consider the Solar Star IM1500.
Cauon
Carbon monoxide may be drawn into a house or ac space with the operaon of Solar Star products if fuel-burning equipment is not serviced or
monitored regularly. Carbon monoxide (CO) is a colorless, odorless gas that can be hazardous to your health and may cause death. Fuel-burning
equipment must have proper venlaon, Solar Star products are not designed to provide venlaon for fuel-burning products.
Do not proceed with the installaon unl you have read the enre instrucons, including these warnings. (Use of
materials or methods not authorized by Solatube Internaonal will result in an invalid warranty.)
Solatube Internaonal, Inc. (seller) assumes no responsibility or obligaon whatsoever for the failure of an architect, contractor, installer, or building owner
to comply with all applicable laws, ordinances, building codes, electrical codes, energy codes, re and safety codes and requirements, roof warranes and
adequate safety precauons. Installaon of this product should be aempted only by individuals skilled in the use of the tools and equipment necessary for
installaon. Protect yourself and all persons and property during installaon. If you have any doubt concerning your competence or experse, consult a qualied
expert before proceeding.
Install at your own risk!
Solatube product installaons may be dangerous and include the potenal for death, personal injury and property damage. The hazardous condions
include but are not limited to the following:
Solatube Daylighng System and Solar Star products may have sharp edges. Always wear leather or canvas gloves while handling and installing
products.
Solatube product installaons require climbing and working at dangerous heights, including on ladders, scaolding, roofs and in ac spaces. Risk of
death, personal injury and property damage may result from a fall, or from falling objects. Use extreme cauon to minimize risk of accidental injury,
including, but not limited to the following procedures:
Clear area below your work space of all people, animals and other items.
Avoid working on surfaces that are slippery or wet.
Use foot-wear with excellent tracon.
Use only strong, well supported ladders.
Work only in calm dry weather.
When in the ac, ensure that your weight is supported at all mes with structurally sound framing; drywall material is not designed to carry
a person’s weight.
To reduce the risk of re, electric shock, and personal injury, basic safety precauons should always be followed when using electric tools, including
always wearing safety goggles or other suitable eye protecon, and ensuring work area is clear of all electrical wires, gas pipes, water pipes, and other
obstacles.
When working in the ac or other dusty areas, use of a mask or respirator is recommended to avoid lung irritaon. Ac spaces may be dark, conned,
and subject to extreme temperatures. Beware of sharp protruding objects. Do not aempt installaon without having someone within range of your
voice or close enough to come to your aid if necessary.
Solatube products are not designed to withstand the weight of a person, tools or other objects. Walking or placing objects on the system could cause
personal injury and property damage. If the product is damaged, the structural capacity may be weakened; therefore the system should be repaired
immediately. For safe installaon and use, do not deviate from these installaon instrucons.
Re-Roong
Solatube products require special care if removed for re-roong. In order to ensure proper removal and re-installaon, please contact your
Solatube Internaonal representave.

For the most current Installaon Instrucons, please visit www.solatube.com/instrucons
Solatube Internaonal, Inc. | 2210 Oak Ridge Way | Vista, CA 92081-8341 | www.solatube.com | T: 888.SOLATUBE
© 2017 Solatube Internaonal, Inc. Part No. 951900 v2.2
3
1/2 in (12.7 mm)
Roof Underlayment
4Remove Roof Shingles
Center on Nail and Trace Inside Flashing Base
Roof Underlayment
5
3Cut Roof Opening
Set Flashing
Nail
Cut Line; 1/2 in
(13 mm) Outside
Traced Line
Traced Line
b
a
Roof Sealant
(3/8 in (10 mm) thick)
6Fasten Flashing to Roof and Replace Shingles
Roof Underlayment
Flashing Screw
a
b
Mark Roof Locaon Between Raers
1
Nail
Roof
Center Nail
Between Raers
2

For the most current Installaon Instrucons, please visit www.solatube.com/instrucons
Solatube Internaonal, Inc. | 2210 Oak Ridge Way | Vista, CA 92081-8341 | www.solatube.com | T: 888.SOLATUBE
© 2017 Solatube Internaonal, Inc. Part No. 951900 v2.2
4
b
c
a
Install Fan Assembly
For no-pitch RM 1500, no-pitch RM 2400, and pitched RM 2400.
7
b
a
For pitched RM 1500 and RM 2400, use steps below:
Alternative Fan Assembly
d
Drill 1/2 in (13 mm)
down from top of
ashing edge.
8Now you can enjoy the benets of your Solar Star Roof Mounted Ac Fan and the
high performance, ac venlaon it provides.
Please refer to the Solatube Brighten Up Series Installa-
on Instrucons for alternave roof types and ashings.
This manual suits for next models
1
Table of contents
Other Solatube Fan manuals
