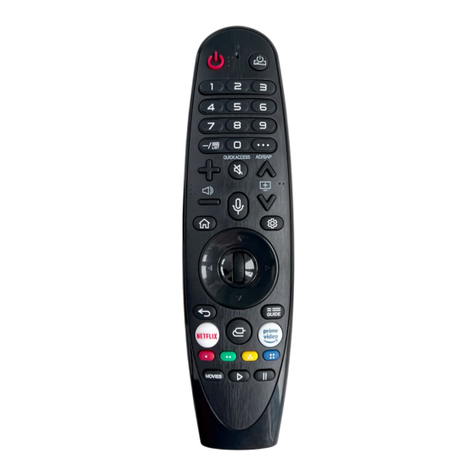
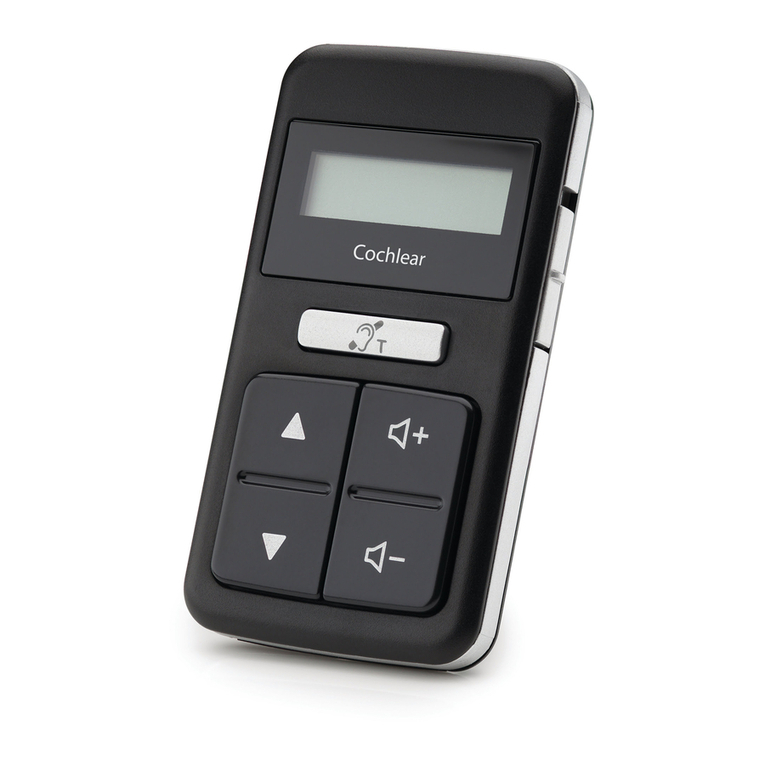
Solatube HSE User manual

For the most current Installaon Instrucons, please visit www.solatube.com/instrucons
Solatube Internaonal, Inc. | 2210 Oak Ridge Way | Vista, CA 92081-8341 | www.solatube.com | T: 888.SOLATUBE
© 2020 Solatube Internaonal, Inc. Part No. 951845 v1.1
1
Solatube® HSE Skylight
Remote Control User Manual
Page
Remote Control Descripon 2
Remote Control Structure and Preparaon 3
Control 3
Remote Control Menu Descripon 4
Add Device (Quick Start)
Pair Remote to Skylight 5
Assign Remote As Secondary
(Mirror / Clone Remote & Copy Group) 6—7
Remove Device From Network—Unpair Remote from
Skylight 8
Reset Remote Control—Erase Memory from Remote 9
Addional Informaon—Informaon Codes 10
Troubleshoong 11—12
Note 13

For the most current Installaon Instrucons, please visit www.solatube.com/instrucons
Solatube Internaonal, Inc. | 2210 Oak Ridge Way | Vista, CA 92081-8341 | www.solatube.com | T: 888.SOLATUBE
© 2020 Solatube Internaonal, Inc. Part No. 951845 v1.1
2
Congratulaons on the purchase of your new Solatube HSE Series Operable Skylight.
To ensure proper funcon of your new Solatube HSE Series Operable Skylight, please read this User Manual.
REMOTE CONTROL DESCRIPTION
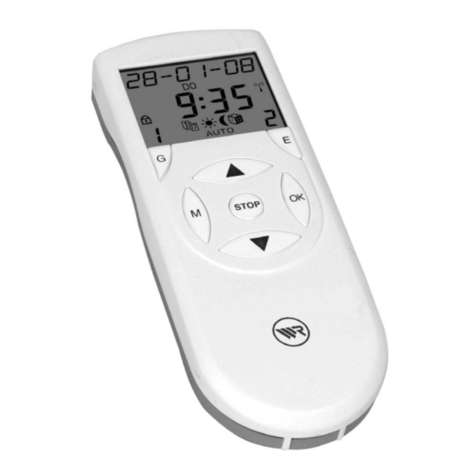
The Solatube HSE Operable Skylight Remote Control is designed to control devices compable with the Z-Wave plaorm of
technologies for smart home capabilies. The remote control enables you to operate up to 12 devices in each of the 12 groups
(a total of 144 devices). The currently selected group is marked with the appropriate number on the remote’s screen.
The Z-Wave network features division into PRIMARY and SECONDARY remote controls.
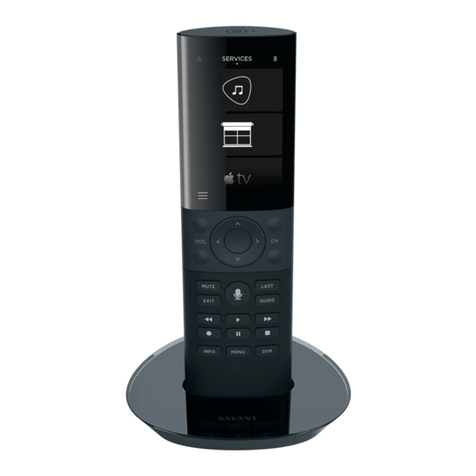
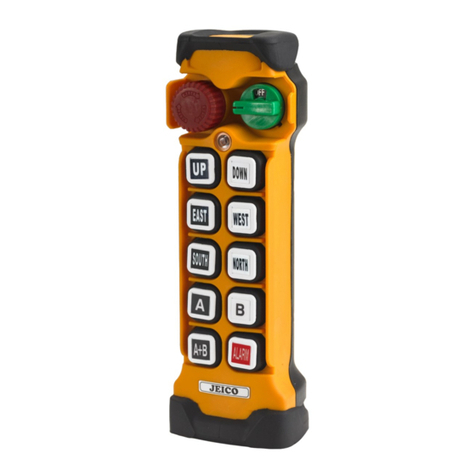
Remote Control
Remote Control Wall Mount
Wall Anchors
PRIMARY remote control—used to operate devices. It can add and remove devices. Only one PRIMARY remote control can be
in one network.
SECONDARY remote control—used only to operate devices. Many SECONDARY remote controls can be in one network.
Please note: these remotes must be associated with the primary remote. Only the primary remote can be paired directly to a
skylight.
SPECIFICATIONS
Power Supply: 2 x 1.5v AAA
Reach: Up to 20m in a building
Working Temperature: 0-40° C (32-104°F)
Dimensions: 125/48/16 mm
Radio Protocol: Z-Wave
Frequency: EU-868, 42 MHz
AS/NZ—921, 42 MHz
RU—869 MHz
(Depending on version)

For the most current Installaon Instrucons, please visit www.solatube.com/instrucons
Solatube Internaonal, Inc. | 2210 Oak Ridge Way | Vista, CA 92081-8341 | www.solatube.com | T: 888.SOLATUBE
© 2020 Solatube Internaonal, Inc. Part No. 951845 v1.1
3
Remote Control Structure
Display
1
2
5
4
6
3
SHORT press of the control (less
than half sec.) causes the acon to
reach end posion.
1
LONG press of the control (longer
than half sec.) causes the acon
unl releasing the buon.
2
Pressing STOP buon stops the
acon
3
Navigaon, Control Buon—UP
Navigaon Buon—RIGHT
Stop, Accept Buon—STOP
Navigaon, Control Buon—DOWN
Navigaon Buon—LEFT
Remote Control Preparaon
1. Slide down back cover of remote to remove
baery cover.
2. Remove plasc baery protector
3. To replace baery cover, slide cover up and click
into place.
Control
Control Modes
Device Control
Controlling devices using the Solatube remote control
consists in controlling selected group of devices. If you
want to control devices independently, they must be
assigned to separate groups.
Using LEFT/
RIGHT buons
select the group
you want to
control (only
acve groups).
Using UP/Down
buons control
device or
devices.
Stop the acon
by using the
STOP buon.
8 8
8 8 8 8 881 1 8 8
-
- -
-

For the most current Installaon Instrucons, please visit www.solatube.com/instrucons
Solatube Internaonal, Inc. | 2210 Oak Ridge Way | Vista, CA 92081-8341 | www.solatube.com | T: 888.SOLATUBE
© 2020 Solatube Internaonal, Inc. Part No. 951845 v1.1
4
The Solatube remote control is equipped with a hidden screen located under the front of the housing. This makes it easy to nd
the funcon that you are interested in. Abbreviaons displayed on the screen are described below.
Remote Control Menu Descripon
Holding Stop + Up Buon for 3 Seconds
Quick Start / Adding Device (Quick Start)—
Adding devices both to network and group.
Associate / Adding Devices to Group.
Include / Adding Device to Network.
Copy Group—
Copying groups to other remote controls in the same network.
Assign A Route / Associang Devices—
Control signal is sent between associated devices.
Listening Mode—
Enables remote conguraon of the remote control from another controller.
Back to Previous Screen.
Holding Stop + Down Buon for 3 Seconds
Learn Mode—
Enables to add the remote control to the network as Secondary.
Delete Mode / Removing Devices from Group
Delete Group / Removing Group—
Removes the enre selected group.
Exclude / Removing Device from Network.
Default / Reseng Remote Control—
Resets seng of the remote control and removes informaon about devices and network.
Back to Previous Screen.

For the most current Installaon Instrucons, please visit www.solatube.com/instrucons
Solatube Internaonal, Inc. | 2210 Oak Ridge Way | Vista, CA 92081-8341 | www.solatube.com | T: 888.SOLATUBE
© 2020 Solatube Internaonal, Inc. Part No. 951845 v1.1
5
Add Device (Quick Start)
This funcon allows you to pair a remote to a skylight.
You can add mulple skylights to one remote by repeang this step for each skylight.
Each skylight can be added to one group or separate groups (i.e. group 1 can operate all skylights by selecng group 1 and
repeang these steps, or each skylight can be added to individual groups by repeang these steps and selecng a new group (2,
3, 4…) for each skylight being added).
Hold simultaneously the UP and
STOP buons unl the remote
enters conguraon mode.
8 89 5
Using UP / DOWN buons
select marked posion.
8 89 5
Using LEFT / RIGHT
buons select group to
which you want to assign
the device (e.g. 1)
8 81
Accept by pressing STOP buon.
8 8
Display will begin to count down.
Press “P” buon on skylight
being added within 12 seconds
of countdown.
8 8
1 21
Procedure performed correctly.
Blue backlight ashes once.
8 8
Error. Red backlight ashes 3
mes. Repeat procedure or see
page 11, point 1 or 2.
8 8
1
1 e . 8 8e 7
..

For the most current Installaon Instrucons, please visit www.solatube.com/instrucons
Solatube Internaonal, Inc. | 2210 Oak Ridge Way | Vista, CA 92081-8341 | www.solatube.com | T: 888.SOLATUBE
© 2020 Solatube Internaonal, Inc. Part No. 951845 v1.1
6
Secondary
This funcon allows you to assign a second remote control as a SECONDARY. This allows you to use two remote controls to
operate skylights. Follow these steps if you want a secondary remote to do the same as the primary remote.
PLEASE NOTE: You must rst unpair the secondary remote from the skylight (Page 8) and then erase memory from the
secondary remote (Page 9) before performing the steps on this page.
Assign Remote As Secondary (Mirror / Clone Remote) and Copy Group
Using UP / DOWN buons
select the marked posions.
8 8
Hold simultaneously STOP
and DOWN buons unl
you enter conguraon
mode.
8 8
Procedure performed correctly. Blue backlight
ashes once on Primary and Secondary remote
controls.
8 8
1
Accept by pressing STOP
buon.
Display will begin to count
down. Within 30 seconds
complete the following steps
on the Primary remote (Add
DEVICE TO NETWORK)
8 8
3 0
l l
Secondary Secondary Secondary
8 8
l
Primary
Hold simultaneously the
UP and STOP buons
unl the remote enters
conguraon mode.
8 81
Using UP / DOWN buons
select marked posion.
8 8
Accept by pressing STOP
buon.
Display will begin to count
down.
8 8
1 2
The Secondary remote has now learned the Primary remote control.
It is now necessary to copy the group from the Primary remote
control to the Secondary remote.
Please proceed to next page (Page 7 Copy Group) to complete
Cloning process.
1 8 81
Primary Primary Primary Primary
8 8
1
Secondary

For the most current Installaon Instrucons, please visit www.solatube.com/instrucons
Solatube Internaonal, Inc. | 2210 Oak Ridge Way | Vista, CA 92081-8341 | www.solatube.com | T: 888.SOLATUBE
© 2020 Solatube Internaonal, Inc. Part No. 951845 v1.1
7
This funcon allows you to assign a second remote control as a SECONDARY. This allows you to use two remote controls to
operate skylights. Follow this step if you want a secondary remote to do the same as the primary remote.
Assign Remote As Secondary (Mirror / Clone Remote) and Copy Group Connued
Using LEFT / RIGHT buons
select a target group.
8 8
1
Hold simultaneously UP and
STOP buons unl you enter
conguraon mode.
8 8
c
Using UP / DOWN
buons select marked
posion.
8 8c
Using LEFT / RIGHT
buons select group
which you want to
remove (e.g. 1).
8 81 g g
Accept by pressing
STOP buon.
8 8
1
Display will begin to count down.
Within 12 seconds run LISTENING
MODE on the Secondary remote
control.
8 8
1 2
Primary Primary Primary Primary
Primary Primary
The remote control enters Listening
Mode. Blue LEDs ash sequenally,
Clockwise. The remote control remains
in the Listening Mode for 30 seconds
aer the data transmission.
8 8
Accept by pressing STOP buon.
8 8
Hold simultaneously STOP
and UP buons unl you
enter conguraon mode.
8 8l
Using UP and DOWN
buons select marked
posion.
8 8l 1
1
l 1 l 1
Secondary Secondary
Secondary Secondary
The Secondary remote has now Copied the
selected Group from the Primary remote
control and will operate the skylight(s).

For the most current Installaon Instrucons, please visit www.solatube.com/instrucons
Solatube Internaonal, Inc. | 2210 Oak Ridge Way | Vista, CA 92081-8341 | www.solatube.com | T: 888.SOLATUBE
© 2020 Solatube Internaonal, Inc. Part No. 951845 v1.1
8
This step allows a remote to be removed from a skylight memory.
Remove Device From Network
Unpair Remote From Skylight
Using UP / DOWN buons select
the marked posions.
8 8
e
Hold simultaneously STOP and
DOWN Buons unl you enter
conguraon mode.
8 8
Procedure performed correctly.
Blue backlight ashes once.
8 8
1
l
Accept by pressing STOP buon.
8 8
Display will begin to count down.
Within 12 seconds press the “P”
buon of the skylight being
unpaired.
8 8
1 2
Error. Red backlight ashes 3
mes. Repeat procedure or see
page 12, point 5.
8 8
1
e . 8 8e 7
..
e l
e l

For the most current Installaon Instrucons, please visit www.solatube.com/instrucons
Solatube Internaonal, Inc. | 2210 Oak Ridge Way | Vista, CA 92081-8341 | www.solatube.com | T: 888.SOLATUBE
© 2020 Solatube Internaonal, Inc. Part No. 951845 v1.1
9
Removes all informaon from remote.
Reset Remote Control
Erase Memory from Remote
Procedure performed correctly.
Blue backlight ashes once.
8 8
0
Accept by pressing STOP buon.
8 8
Hold simultaneously STOP and
DOWN buons unl you enter
conguraon mode.
8 8
p
f
Using UP and DOWN
buons select marked
posion.
8 8
p
f
p
f

For the most current Installaon Instrucons, please visit www.solatube.com/instrucons
Solatube Internaonal, Inc. | 2210 Oak Ridge Way | Vista, CA 92081-8341 | www.solatube.com | T: 888.SOLATUBE
© 2020 Solatube Internaonal, Inc. Part No. 951845 v1.1
10
*1—Programming Mode
Programming mode is reached by pressing programming buon on the device being added / removed. Solatube products have
programming buons marked with “P” leer.
Addional Informaon
Informaon Codes
No reach, programming buon not pressed or a dierent primary remote has already been paired to this
device.
Low remote control baery level.
Exit menu automacally.
Stop procedure (using stop buon).
Group to which the device is to be added is full.
The baery level cannot be checked if more than one device is in the group. The device does not have
baeries.
Group is empty.
WARNING STATUS: Low baery level. Aer pressing any buon, that is aer waking up the remote control,
the symbol lights for 2 seconds. The device can sll be controlled.
CRITICAL STATUS: Crical low baery level. The symbol lights for 2 seconds. In addion, red backlight ash-
es quickly for 2 seconds. The device cannot be controlled.

For the most current Installaon Instrucons, please visit www.solatube.com/instrucons
Solatube Internaonal, Inc. | 2210 Oak Ridge Way | Vista, CA 92081-8341 | www.solatube.com | T: 888.SOLATUBE
© 2020 Solatube Internaonal, Inc. Part No. 951845 v1.1
11
1. Device cannot be added to Z-Wave network.
Troubleshoong
Cause Soluon
Device is added to other Z-Wave network.
Programming buon is not pressed.
Too long waing for pressing programming buon on the
device.
Controller is assigned to the network as SECONDARY. Only PRIMARY controller can add and remove devices.
Press programming buon in me no longer than 12 seconds.
Press programming buon for 2 seconds.
Removing Device From Network (page 8).
2. Device cannot be removed from the network.
Cause Soluon
Group is full (dot at group number, e.g. “1.”).
Programming buon is not pressed.
Too long waing for pressing programming buon on the
device. Press programming buon in me no longer than 12 seconds.
Press programming buon for 2 seconds.
Add device to another group.
3. Device cannot be removed from the group.
Cause Soluon
Programming buon is not pressed.
Too long waing for pressing programming buon on the
device. Press programming buon in me no longer than 12 seconds.
Press programming buon for 2 seconds.
4. Group cannot be copied.
Cause Soluon
Too long waing me for running LEARNING MODE on the
target controller.
Run LEARNING MODE on the target controller no longer than
12 seconds.

For the most current Installaon Instrucons, please visit www.solatube.com/instrucons
Solatube Internaonal, Inc. | 2210 Oak Ridge Way | Vista, CA 92081-8341 | www.solatube.com | T: 888.SOLATUBE
© 2020 Solatube Internaonal, Inc. Part No. 951845 v1.1
12
5. Device cannot be removed from the network.
Cause Soluon
Controller is assigned to the network as SECONDARY.
Programming buon is not pressed.
Too long waing me for pressing programming buon on
the device.
Press programming buon in me no longer than 12 seconds.
Press programming buon for 2 seconds.
Only PRIMARY controller can add and remove devices.
Troubleshoong
6. ZRH12 remote control cannot be added as SECONDARY.
Cause Soluon
The controller being added is assigned to other Z-Wave
network.
Too long waing me for ADD DEVICE funcon on PRIMARY
controller.
Run ADD DEVICE funcon on PRIMARY controller in me no
longer than 12 seconds.
Restore controller being added to factory sengs.
7. Device cannot be associated.
Cause Soluon
Devices cannot be associated in reverse order.
Too long waing me for pressing programming buon on
the device. Press programming buon for no longer than 99 seconds.
Repeat the procedure while maintaining the correct order of
adding devices.
8. Problems with reach.
Cause Soluon
Distance between device is too far or no power.
Check whether the device that you want to control is
properly connected to the power source. This can be done by
using manual control buon.

Solatube Internaonal, Inc.,
2210 Oak Ridge Way, Vista CA 92081-8341
Phone (800) 966-7652 • Fax (760) 599-5181
www.solatube.com Part No. 951845 v1.1
Notes
Table of contents
