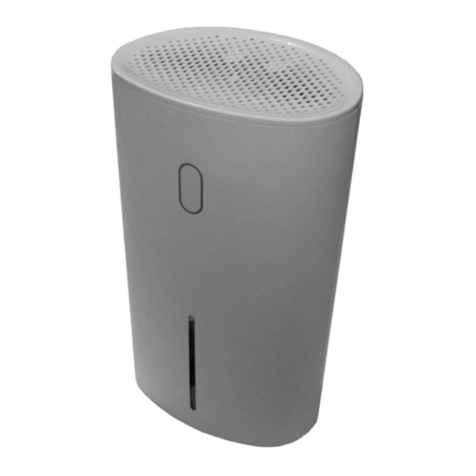
Solenco 5LLE User manual

DEHUMIDIFIER
USER
MANUAL
MODEL:5LLE

2
CAUTION: NEVER CONNECT THE APPLIANCE TO AN EXTERNAL TIMER OR REMOVE THE
DEVICE FROM THE OUTLET WHILE IN OPERATION.
Use only the POWER button located on the control panel to turn the unit off. Failure to comply with
this safety precaution could damage the appliance and void the warranty.
Carefully read the instructions before operating the unit. This appliance is for indoor use only
and intended for use in a domestic environment only. Any other use is not recommended by
the manufacturer and may cause fire, electrical shocks or other injury to user or property.
Installation must be in accordance with regulations of the country where the unit is used.
Disconnect the power before dismantling, assembling, or cleaning. Avoid touching any
moving parts of the appliance. Never insert fingers, pencils, or any other objects though the
guard.
Do not leave children unsupervised with this appliance. Do not clean the unit by spraying it
or immersing it in water. Never connect the unit to an electrical outlet using an extension
cord. Never operate this appliance if the cord, power adapter or plug is damaged. A
damaged power supply cord should be replaced by the manufacturer or a qualified
electrician to avoid a hazard.
Any service other than regular cleaning or filter replacement should be performed by an
authorized service representative. Failure to comply could result in a voided warranty. Do not
use the appliance for any purpose other than its intended use.
Always place the unit on a dry and stable surface. The appliance should not be installed in
laundry or wet rooms where the humidity is higher than 85% RH. Do not dry laundry above the
unit to prevent water entering the dehumidifier. Place the laundry at least 1 meter away from
your dehumidifier.
If the appliance is installed, used, or stored in an unventilated room, the room must be such
as to prevent stagnation of possible leaks of refrigerant gas. Do not use the product and
contact the retailer for advice if damage has occurred to the unit which may have
compromised the refrigerant system. Any repairs or maintenance must only be carried out on
WARNING: THE APPLIANCE MUST WORK IN THE VERTICAL POSITION. DO NOT TURN IT OVER!
The dehumidifier must be stored and transported vertically; otherwise, irreparable damage to
the compressor may occur. You should wait for 24 hours with the appliance upright before
starting the appliance. Failure to do so may damage the unit and void the warranty.
If you turn off the dehumidifier, wait 10 minutes before turning it back on. This prevents the
compressor from being damaged.
SAFETY INSTRUCTIONS

3
ENERGY SAVING AND UNIT SAFETY PROTECTIONTIPS
FEATURES AND FUNCTIONS
the unit by a suitably qualified engineer. The refrigerant system should not be perforated or
punctured.
·
Do not cover or restrict the airflow from the outlet or inlet grills. For maximum
performance the minimum distance from a wall or objects should be 20 cm.
·
Keep the filters or grills of the unit clean. Under normal conditions, filters or grills should
only need cleaning once every three weeks (approximately).
·
Since the filters remove airborne particles, more frequent cleaning maybe necessary,
depending on the air quality. Wash the mesh filters with hot soapy water and dry them
before placing them back in the unit.
The dehumidifier uses compressor technology to extract water from the environment.
Compressor dehumidifiers are ideal for normal domestic or office environments which are
heated during the winter months and maintain a temperature above 12-15 oC.
The dehumidifiers are designed to extract unwanted humidity while saving money due to their
power saving logic. They feature an intelligent humidistat where the desired relative
humidity can be adjusted in increments of 5% between 35% and 80% ensuring your room is
not dried too much and power is not wasted.
Auto-Restart
If the unit stops unexpectedly due to the power cut, it will restart with the previous function
selected automatically when the power resumes, and the compressor will start after 3
minutes protection.
Features
·
Easyto use controls.
·
Cost effective way to combat mould, condensation, and damp.
·
Designed to complement any modern space.
·
IntelligentCPU controlled digital humidistat with 35%-80% RH and room humidity display.
·
24 hours start / stop timer.
·
Tank operation or permanent drainage option with splash proof tank
·
Water tank full alarm & auto -stop function.

4
Handle
Air outlet
Control panel
Water tank
Silicone pad
Air inlet
Pre-filter
Power cord
OVERVIEW OF THE COMPONENTS

5
POWER Button
Turn the appliance on/off.
MODE Button
Select
the
function
of
the
unit
between
SMART
and
FAN
modes.
The
corresponding light will show which mode is selected.
SMART MODE:
This is designed for maximum convenience and aims to reduce the relative humidity
to the level set and maintain the room at that level. The default level is 50% - 55%,
although this can be easily changed using the button.
FAN MODE:
Only the fan will run, and water is not extracted, which when used with filters will purify
the air.
HUMIDITY/ TIMER SETTING
In SMART mode press these buttons to select the desired relative humidity level.
Humidity level can be set within a range of 35% RH (Relative Humidity) to 80% RH in
5% increments. When it reaches 80%RH, press button again to 35%RH and repeat this circle.
Press Timer button, then press this button to adjust the timer (1-24hrs). When it reaches 24hrs,
press button again to 0hrs and repeat this circle.
CONTROL PANEL

6
TIMER
Press the TIMER button to program the timer. When the timer is activated the
"TIMER" light will be illuminated. Before programming the timer, ensure the timer
function has not been activated (the light must be off). The following timer programs are
available.
DELAYED POWER-ON FUNCTION:
With the appliance in stand-by, press the TIMER button, then use the
button to set in how many hours you require the unit to start (1~24 hours).
DELAYED POWER-OFF FUNCTION:
While the appliance is running with the desired settings, press the TIMER button, then
use the button to set in how many hours you require the unit to stop
(1~24 hours).
SLEEP / CHILD LOCK
Press this button to enter the sleep mode. The sleep indicator light is on. Other
indicator lights are off.
Press and hold this button for 3 seconds to enter the child lock mode. The child lock indicator
light is on, and other touch buttons are invalid; after pressing and holding this button for
another 3 seconds, the child lock indicator light is off, and other touch buttons are active
again.
Note: The SLEEP and CHILD LOCK functions are controlled by one button. When the SLEEP
function is off, press this button for three seconds enter the CHILD LOCK function, then the
SLEEP function will be turned on together. So, if you want to enter the CHILD LOCK function
only, you need turn on SLEEP mode first, press this button for three seconds. Then the SLEEP
function will be turned off and the CHILD LOCK function will be turned on.

7
Notes: When humidity level is outside the normal operational parameters will show LO/HI. If
ambient humidity is lower than 20%, it will show “LO”. If ambient humidity is higher than 90%, it
will show “HI”.
Your dehumidifier contains an advanced micro - CPU controlled device which is capable of
self- diagnostics. The LCD display may also show the error and protections codes.
INSTALLATION
POSITIONING THE DEHUMIDIFIER
TANK FULL
When the water tank is full, removed or incorrectly inserted the unit will stop
dehumidifying, the tank full light will illuminate, and the unit will beep. Empty
the tank and reinsert it correctly to resume operation.
HUMIDITY LEVEL & TIMER 2 DIGIT DISPLAY
The led indicator performs the following functions:
When the unit is plugged in, it will indicate the humidity level of the room.
When the button is pressed in the SMART mode, it will indicate the
desired humidity level.
When the button is pressed in the TIMER mode, it will indicate the
desired time you require the unit to start/stop.
Do not open windows or doors while the unit is running.
Place the unit on a hard / flat surface.
To reduce noise levels
Place a piece of carpet or a rubber mat under the unit to reduce any vibrations while the
unit is running.
A badly positioned dehumidifier will have little effect.
Please ensure circulation of air is not restricted around the unit.
Allow at least 20 cm space around the unit. This
dehumidifier is designed only for indoor residential or
small office applications.

8
WATER DRAINAGE
Use in an enclosed area for maximum efficiency. Close all doors, windows to create
an effective operating environment. Do not use outdoors.
Your dehumidifier will begin to protect your space from the harmful effects of
excessive moisture as soon as it is turned on. Excess moisture is dispersed throughout
your home. For this reason, the dehumidifier should be positioned in a central and
clear location so that it can draw this moist air towards it from all over the home. A
warm hallway or landing is an excellent position for your dehumidifier. If possible,
leave interior doors ajar to allow air circulation.
Alternatively, if you have a serious problem in one area you can begin by positioning
the dehumidifier there and moving it to a more central location later. For the most
effective use, run your dehumidifier with external doors and windows kept closed.
Please note the unit should not be placed directly against a radiator or other heat
source.
·
When positioning your dehumidifier, ensure that it is placed clear of any obstacle that
may limit the air movement. Place the dehumidifier on aflat dry surface.
When the water tank is full, the unit will stop automatically. When it happens, the tank full
light will show on the control panel.
There are two ways to dispense collected water.
1. USE THE WATER TANK
When the water tank is full, the unit will automatically stop running and the water tank
full indicator will flash.
Slowly pull out the watertank. Grip the water tank by its handle securely, and carefully
pull it out. Empty the water tank before reinserting it into the dehumidifier. The tank must
be in place and securely seated for the dehumidifier to operate again. The dehumidifier
will re-start when the tank is restored to its correct position.
NOTE:Only empty the water tank when it is full or before moving or storing the unit.
WARNING:Any commercial or industrial use will invalidate the warranty.

9
NOTE: The pipe has 1m long.
Do not remove any parts from the water tank or tank enclosure. The water full sensor will no
longer be able to detect the water level correctly and water may leak from the water tank.
2. CONTINUOUS DRAINAGE (OPTIONAL)
Water can be automatically plumbed in or drained into a sink, a larger recipient or
through the wall into an outside drain by attaching a pipe to the unit (10mm internal
diameter). Insert the pipe into the drain outlet at the back of the unit as shown here.
Make sure the connection between pipe and the drain outlet is tight and does not leak.
Then direct the pipe to a suitable drainage point.
This unit uses gravity to dispose of water hence the drain should be lower than the water
outlet on the unit. Put the water tank back. Be sure to run the water pipe downward and let
the water to flow out smoothly. Do not kink or bend the pipe.
NOTES:When you remove the water tank, do not touch sensors or any parts which are
situated behind the tank. Doing so may damage the product. Be sure to push the water tank gently
all the way into the unit. Banging the bucket against anything or failing to push it in securely
into place may cause the unit not to operate.

10
CAUTION: Do not splash water directly onto the main unit. Doing so may cause an electrical
shock and can lead to the insulation to deteriorate or cause the unit to rust.
Always shut off the unit and unplug from the mains before cleaning or performing any
maintenance. When it is not in use for long periods, it is advised to remove the plug from the
power socket.
Do not use chemical solvents (such as benzene, alcohol, or gasoline) as they may cause
irreversible damage to the unit.
Clean the grill and case.
· Use water and a mild detergent to clean the washable mesh filters. Do not use bleach
or abrasives.
·
The air intake and outlet grilles get soiled easily, so use a vacuum
attachment or soft brush to clean.
·
Wipe the dehumidifier body with a soft damp cloth or kitchen
towel.
·
If the mesh filter is dirty, hoover it. If it is heavily soiled, wash it with warm soapy water
and dry thoroughly before reinserting it in the unit.
·
When filter cleaning is finished and filters are dry, place them back into the unit.
CARE AND MAINTENANCE

11
NOTE:Do not use a dishwasher to clean the tank. After cleaning and drying, the tank must
be reinserted securely into the dehumidifier to restart operation.
Clean the water tank.
Every few weeks, clean the tank to prevent growth of mould, mildew and bacteria. Partially
fill the tank with clean water and add a little mild detergent. Wash it around and then empty
the tank and rinse.
END OF SEASON MAINTENANCE
·
Empty and clean the water tank.
·
Clean the unit and the filters as per cleaning procedure above.
·
Coil the power cord on the special cord storage rest at the back of the unit.
·
Cover the unit and keep it in a dry place.

12
Issue
Cause
Solution
Hot or cold air
being produced
Normal Operation
When the unit is in dehumidifying mode, it absorbs humid air
from the room and reduces the humidity.
During the fan and defrost cycle, there should be cold air coming
out of the unit. During the dehumidify cycle, hot dry air should be
coming out of the unit.
Unit does not
operate
Is the plug properly
inserted inthe socket?
Insert the plug in the socket and turn the unit on.
Does the tank full
indicator is on?
Tank full float displaced, or tank not properly inserted. Empty tank,
check float and make sure tank is properly inserted in unit.
Dehumidifier
does not
extract water
Is the unit set to a
humidity level higher
than the one in the
room?
Set the humidity level on the humidistat below current humidity
reading.
Is the temperature too
low for water extraction
to be efficient?
Increase temperature in the room or reposition the unit.
Is any intake grill
blocked?
Is the unit too close
to walls?
Remove obstructions and restart the unit.
Ensure a distance of at least 20cm between the unit and walls.
Airflowseems
weak
Is filter dirty or
clogged?
Please service the filters regularly as per user manual.
Unit is noisy
duringoperation
Is the unit on an
uneven surface?
Please place on flat horizontal surface.
Is filter clogged?
Please service the filters regularly as per user manual.
E3 or E4
Humidity sensor error
Use the unit within the prescribed humidity range. Unplug the unit,
rest and plug it back in. If error repeats, call for service center.
E1 or E2
Temperature sensor
error
Use the unit within the prescribed temperature range. Unplug the
unit rest and plug it back in. If error repeats, call for service center.
Tank full indicator
light
Water tank full
notification
Tank is full or is not in the right position. Empty the tank and
replace in the right position.
Any other malfunctions will need to be reported to our service center. Do not attempt unauthorised repairs
as these may invalidate the warranty.
TROUBLESHOOTING

13
Room Conditions
Maximum Water
Extraction Wattage
10℃and 60%RH
1.31L/day
133W
15℃and 60%RH
1.58L/day
138W
20℃and 60%RH
2.01L/day
146W
25℃and 60%RH
2.63L/day
154W
30℃and 60%RH
3.02L/day
180W
10℃and 80%RH
1.96L/day
135W
15℃and 80%RH
2.6L/day
144W
20℃and 80%RH
3.65L/day
156W
25℃and 80%RH
4.37L/day
170W
30℃and 80%RH
4.9L/day
196W
EXTRACTION RATE

14
TECHNICAL DATA

15
DISPOSAL: MEANING OF THE DUSTBIN SYMBOL
This appliance has been properly tested to the South African standards. During the warranty
period, we will proceed to the free removal - for repair or, in our decision, for replacement - of
defects in the device or accessories that may arise from material or manufacturing
errors. The provision of warranty services will not extend it, nor will they start a new warranty
period! The purchase receipt will consist of proof of this guarantee. Without it, it will not be
possible to do any free exchange or repair.
In the event of a warranty, please email [email protected] with your purchase receipt
and collection address. We will troubleshoot with you and if the unit needs to be repaired or
replaced, we will arrange couriers to collect the unit. In the event of damage to any
accessories, a complete replacement of the appliance will not be carried out automatically.
Contact us in this case. Damage caused by broken glass or plastic parts will have to be paid
by the customer. No defects in accessories or wearing parts, or cleaning,
maintenance, or replacement of wearing parts are included in the warranty, and such costs
must
be
reimbursed.
The
guarantee
will
be
terminated
whenever
there
has
been
interference with the equipment.
After the expiration of the warranty period, arrangements may be made by specialized
personnel or by our repair services. The costs of repair will no longer be the responsibility of
us.
Protect our environment: do not dispose of electrical equipment in the
domestic waste. Please return any electrical equipment that you will no
longer use to the collection points provided for their disposal. This helps
avoid the potential effects of incorrect disposal on the environment and
human health. This will contribute to the recycling and other forms of reutilization of electrical
and electronic equipment. Information concerning where the equipment can be disposed of
can be obtained from your local authority.
WARRANTY


Table of contents
Other Solenco Dehumidifier manuals
Popular Dehumidifier manuals by other brands
Zodiac
Zodiac SIROCCO 2 2M Instructions for installation and use
Danby
Danby Premiere DDR30E Owner's use and care guide

Sandstorm
Sandstorm SDH20L13E instruction manual
Anslut
Anslut 014956 operating instructions

Sears
Sears 580.54501 50 owner's manual

Clarke
Clarke Air DMD36 Operation & maintenance instructions

Suntec Wellness
Suntec Wellness KLIMATRONIC DryFix 3000 instruction manual
Goldstar
Goldstar DH305Y7 Service manual
Momax
Momax 2 Healthy instruction manual

Mission Air
Mission Air PRODRY 50L instructions

Calorex
Calorex DH30A quick start guide
Mitsubishi Electric
Mitsubishi Electric MJ-EZ6CX-S1-IT instruction manual
