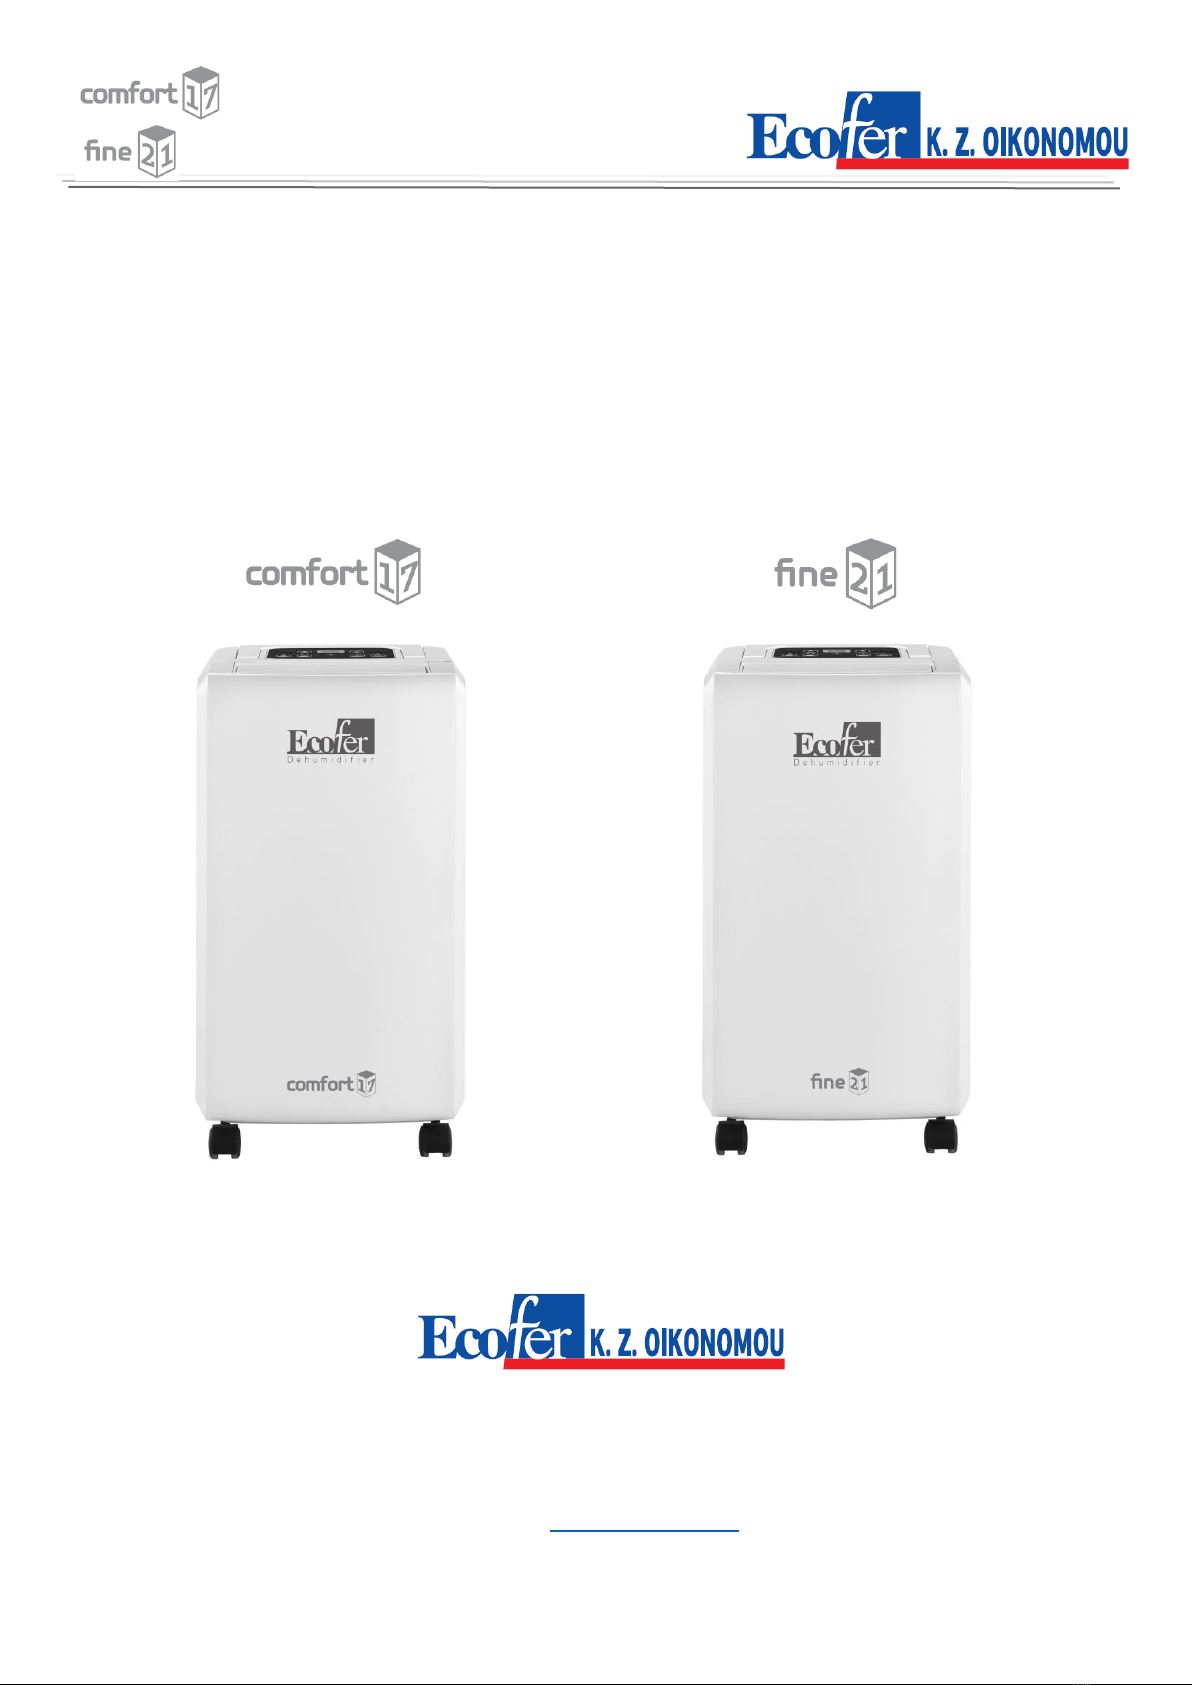
ECOFER Comfort 17 User manual
User manual
User Manual
of dehumidifiers
ECOFER COMFORT & ECOFER FINE
Please read this user’s manual carefully to ensure proper use, maintenance and installation
Ithomis Str. 6, Chalandri, GR-15231
Athens - Greece
Τel: +30210 6715510 / +30211 7007269/ +30211 7007270
Fax: +302106542877
Website: www.ecofer.com.gr

User manual
Table of contents
Safety instructions................................................................................................................................................ 1
Characteristics...................................................................................................................................................... 3
Name of parts ...................................................................................................................................................... 4
Appearance and function of control panel.......................................................................................................... 5
Humidity Level & Timer 2 digit display............................................................................................................. 5
Push Button Functions...................................................................................................................................... 6
Draining the collected water................................................................................................................................ 7
Emptying the Drainage Tank............................................................................................................................. 7
Continuous Water Drainage ............................................................................................................................. 8
Maintenance ........................................................................................................................................................ 9
Cleaning the Dehumidifier ............................................................................................................................... 9
Storing the Dehumidifier................................................................................................................................ 10
Clearance............................................................................................................................................................ 10
Troubleshooting ................................................................................................................................................. 11
Recycling ............................................................................................................................................................ 12
Guarantee .......................................................................................................................................................... 12

User manual
1
Safety instructions
VERY IMPORTANT!
Please do not install or use your dehumidifer before you have carefully read this manual. Please keep this instruction
manual for an eventual product warranty and for future reference.
1. The appliance is for indoor use only.
2. Do not use the unit on a socket under repairs or not installed properly
3. Do not use the unit, follow these precautions:
A: Near to source of fire.
B: An area where oil is likely to splash.
C: An area exposed to direct sunlight.
D: An area where water is likely to splash.
E: Near a bath, a laundry, a shower or a swimming pool.
4. Never insert your fingers, rods into the air outlet. Take special care to warn children of these dangers.
5. Keep the unit upward while transport and storage, for the compressor locates properly.
6. Before cleaning the dehumidifier, always turn off or disconnect the power supply.
7. When moving the dehumidifier, always turn off and disconnect the power supply, and move it slowly.
8. To avoid the possibility of fire disaster, the unit shall not be covered.
9. All the dehumidifier’s sockets must comply with the local electric safety requirements. If necessary,
please check it for the requirements.
10. Children should be supervised to ensure that they do not play with the appliance.
11. If the supply cord is damaged, it must be replaced by the manufacturer, its service agent or similarly
qualified persons in order to avoid a hazard.
12. This appliance can be used by children aged from 8 years and above and persons with reduced physical,
sensory or mental capabilities or lack of experience and knowledge if they have been given supervision or
instruction concerning use of the appliance in a safe way and understand the hazards involved. Children shall
not play with the appliance. Cleaning and user maintenance shall not be made by children without
supervision.
13. The appliance shall be installed in accordance with national wiring regulations.
14. Details of type and rating of fuses:T, 250V AC,2A.
15. Contact authorized service technician for repair or maintenance of this unit.
16. Do not pull, deform. or modify the power supply cord, or immerse it in water. Pulling or misuse of the
power supply cord can result in damage to the unit and cause electrical shock.
17. Compliance with national gas regulations shall be observed.
18. Keep ventilation openings clear of obstruction.
19. Any person who is involved with working on or breaking into a refrigerant circuit should hold a current
valid certificate from an industry-accredited assessment authority, which authorizes their competence to
handle refrigerants safely in accordance with an industry recognized assessment specification.
20. Servicing shall only be performed as recommended by the equipment manufacturer. Maintenance and
repair requiring the assistance of other skilled personnel shall be carried out under the supervision of the
person competent in the use of flammable refrigerants.

User manual
2
21. Do not operate or stop the unit by inserting or pulling out Die power plug, it may cause electric shock or
fire due to heat generation.
22. Unplug the unit if strange sounds, smell, or smoke comes from it.
Warning
•Do not use means to accelerate the defrosting process or to clean, other than those recommended by the
manufacturer.
•The appliance shall be stored in a room without continuously operating ignition sources (for example: open
flames, an operating gas appliance or an operating electric heater.
•Do not pierce or burn.
•Be aware the refrigerants may not contain an odor.
•Appliance shall be installed, operated and stored in a room with a floor area larger than 4 m2.
Notes:
•If any parts damage, please contact the dealer or a designated repair shop.
•In case of any damage, please turn off the air switch, disconnect the power supply, and contact the dealer or a
designated repair shop.
•In any case, the power cord shall be firmly grounded.
•To avoid the possibility of danger, if power cord is damaged, please turn off the air switch and disconnect the
power supply. It must be replaced from the dealer or a designated repair shop.
Specific information regarding appliances with R 290 refrigerant gas:
•Thoroughly read all of the warnings.
•When defrosting and cleaning the appliance, do not use any tools other than those recommended by the
manufacturing company.
•The appliance must be placed in an area without any continuously sources of ignition (for example: open
flames, gas or electrical appliances in operation).
•Do not puncture and do not burn.
•This appliance contains Y g (see rating label back of unit) of R290 refrigerant gas.
•R290 is a refrigerant gas that complies with the European directives on the environment. Do not puncture
any part of the refrigerant circuit.
•If the appliance is installed, operated or stored in a nonventilated area, the room must be designed to
prevent to the accumulation of refrigerant leaks resulting in a risk of fire or explosion due to ignition of the
refrigerant caused by electric heaters, stoves, or other sources of ignition.
•The appliance must be stored in such a way as to prevent mechanical failure.
•Individuals who operate or work on the refrigerant circuit must have the appropriate certification issued by
an accredited organization that ensures competence in handling refrigerants according to a specific
evaluation recognized by associations in the industry.
•Repairs must be performed based on the recommendation from the manufacturing company. Maintenance
and repairs that require the assistance of other qualified personnel must be performed under the
supervision of an individual specified in the use of flammable refrigerants.

User manual
3
Characteristics
High level of moisture removal: Utilizing cooling technology, the dehumidifier reduces the room moisture
level to the desired value to maintain the internal atmosphere at the optimum level of comfort.
Lightweight compact design for easy transport: the light and ergonomic design of the dehumidifier allows it
to be moved to any room.
Adjustable humidity: the humidity is adjusted to the desired level.
Start / Stop timer: Program of the unit's automatic start and shutdown.
Silent operation: Low noise level that makes it suitable for every room
High energy efficiency: extremely low power consumption.

User manual
4
Name of parts
1. Front shell 2. Outlet 3. Handle
4. Control Panel 5. Filter box 6. Back shell
7. Tank 8. Wheels 9. Supply cord
User manual
5
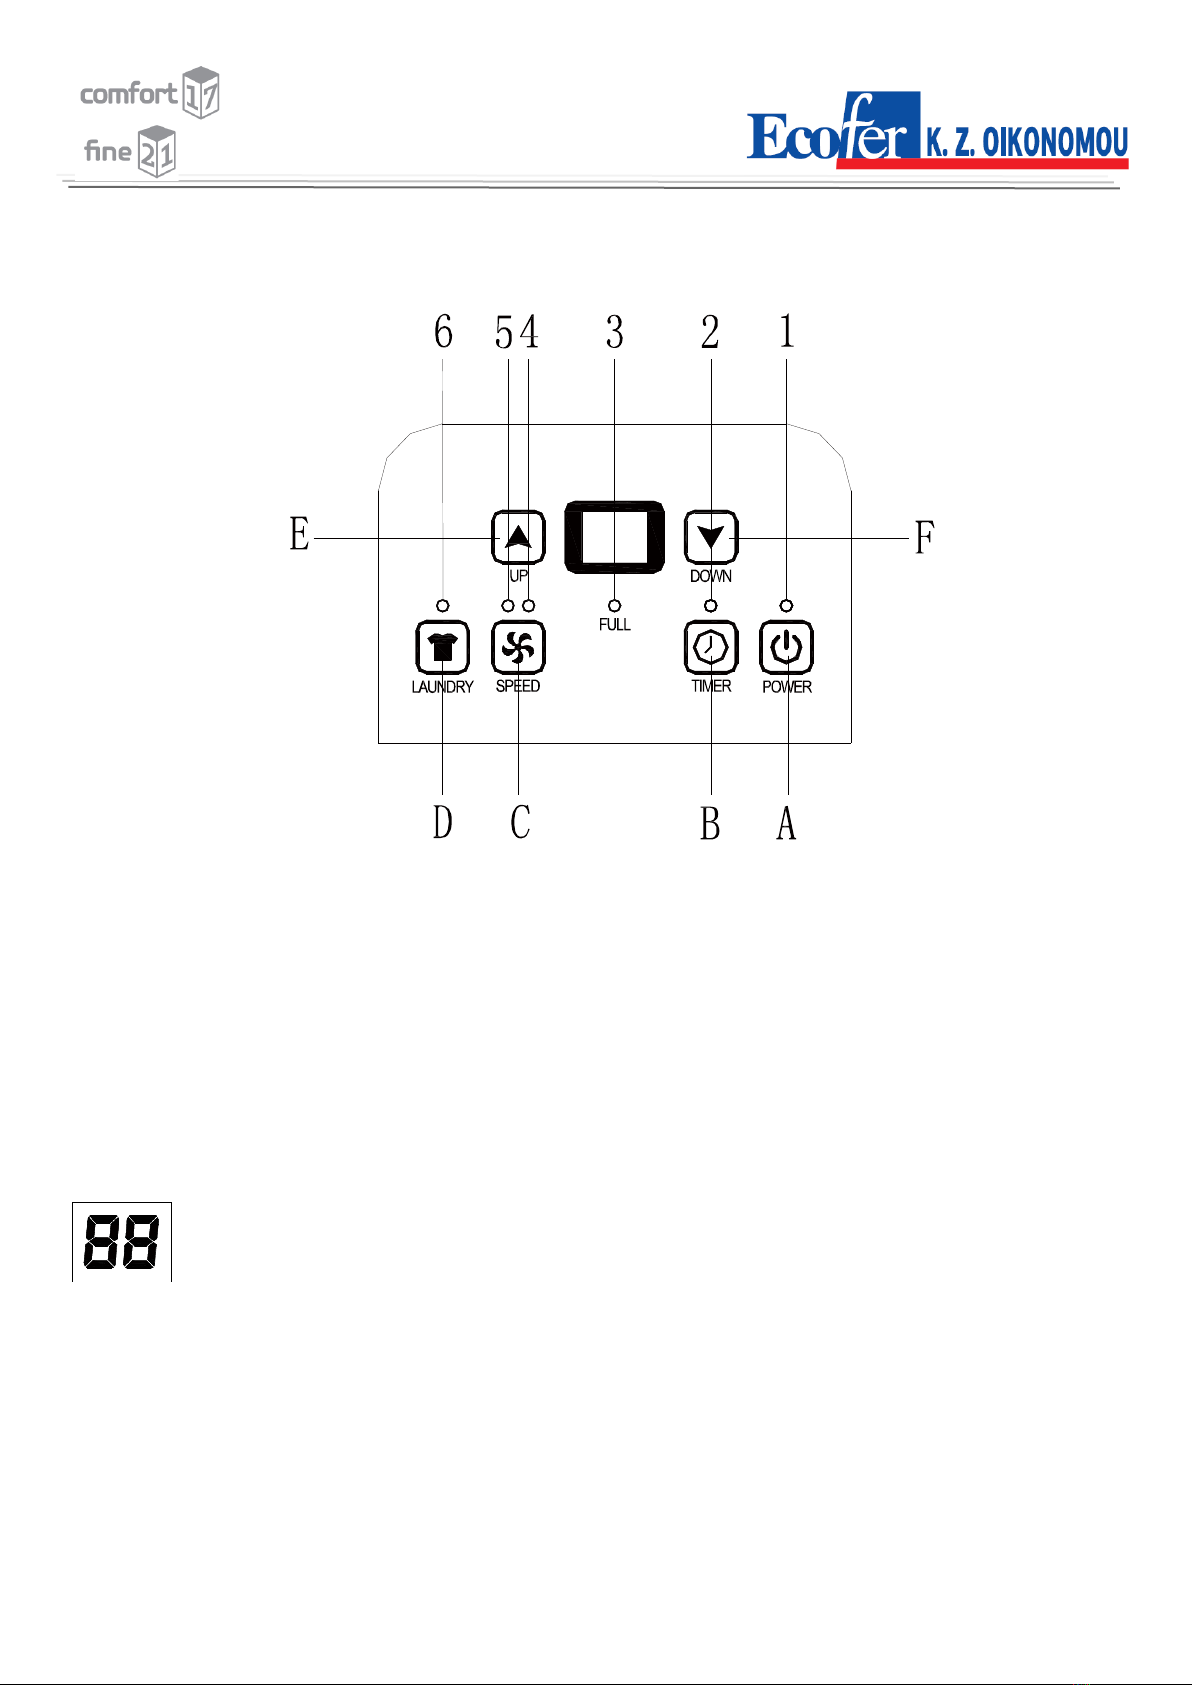
Appearance and function of control panel
LED INDICATORS
1. POWER-LED
2. TIMER-LED
3. FULL-LED
4. LOW WIND -LED
5. HIGH WIND-LED
6. LAUNDRY-LED
Humidity Level & Timer 2 digit display
1. when the unit is plugged in, it will indicate the room humidity level.
2. when you set the humidity, it will indicate the humidity that you have selected
3. when you program the time for the unit to turn on and off, it will show the hours.
4. When the environment humidity is lower than 35%, it will show “LO”
5. When the environment humidity is higher than 95%, it will show “HI”

User manual
6
Push Button Functions
A- Power Push Button
B- Timer Push Button
C- Fan Speed Button
D- Laundry Push Button
E- UP Push Button
F- DOWN Push Button
1. The Power indication light will turn on when the unit is plugged in,
regardless of whether the unit is operating or not.
2. Press button once to start operation. Press it again to stop operation.
3. Press or button to set the desired humidity level in the room, which can be set from 30% to
90% at 5% intervals or “CO”.
After a period of working,when environment humidity is lower than the selected humidity by 2%,
compressor will stop ;When environment humidity is equel to or higher than the selected humidity by 3%,
compressor will restart once 3-minute compressor protection time over.
When setting the humidity to “ CO ”, the compressor will run continuously .
4.press button can be timer setting:
Press the button to program the time when the unit turns on and turns off. If you want to cancel the timer
programming, press the button to adjust the time at 0, and press the button, it will be circulate from
0-1-2……23-24.It is the programmed time to switch the machine. The programmed time will be cancelled
when to switch compressor manually each time. The programmed time remains unchanged if the machine
stops to wok due to water full or during defrosting
5. press button to open closed Laundry function.

User manual
7
Draining the collected water
When the drainage tank is full, the tank full indicator light will turn on, the operation will stop automatically
and the buzzer will beep 15 times to alert the user, that the water needs to be emptied from the drainage
tank.
Emptying the Drainage Tank
1. Lightly press on the sides of the tank with both hands and pull the tank out gently.
2. Discard the collected water
NOTE
1. Do not remove the float from the water tank. The water full sensor will no longer be able to detect the
water level correctly without the float and water may leak from the water tank.

User manual
8
2. If the drainage tank is dirty, wash it with cold or lukewarm water. Do not use detergent, scouring pads,
chemically treated dust cloths, gasoline, benzene, thinner, or other solvents, as these can scratch and
damage the tank and cause water leakage
3. When replacing the drainage tank, press the tank firmly into place with both hands. If the tank is not
positioned properly, the “TANK FULL” sensor will be activated, and the dehumidifier will not operate.
Continuous Water Drainage
The unit features a continuous drainage port. Using a plastic pipe (with an inner diameter of 10mm) inserts
into drain hole (on intermediate plate), reach out from side of water tank, install it in place, and arrange the
drain pipe.
The water in the drainage tank can be continuously drained out from the continuous port on the unit.
User manual
9
Maintenance
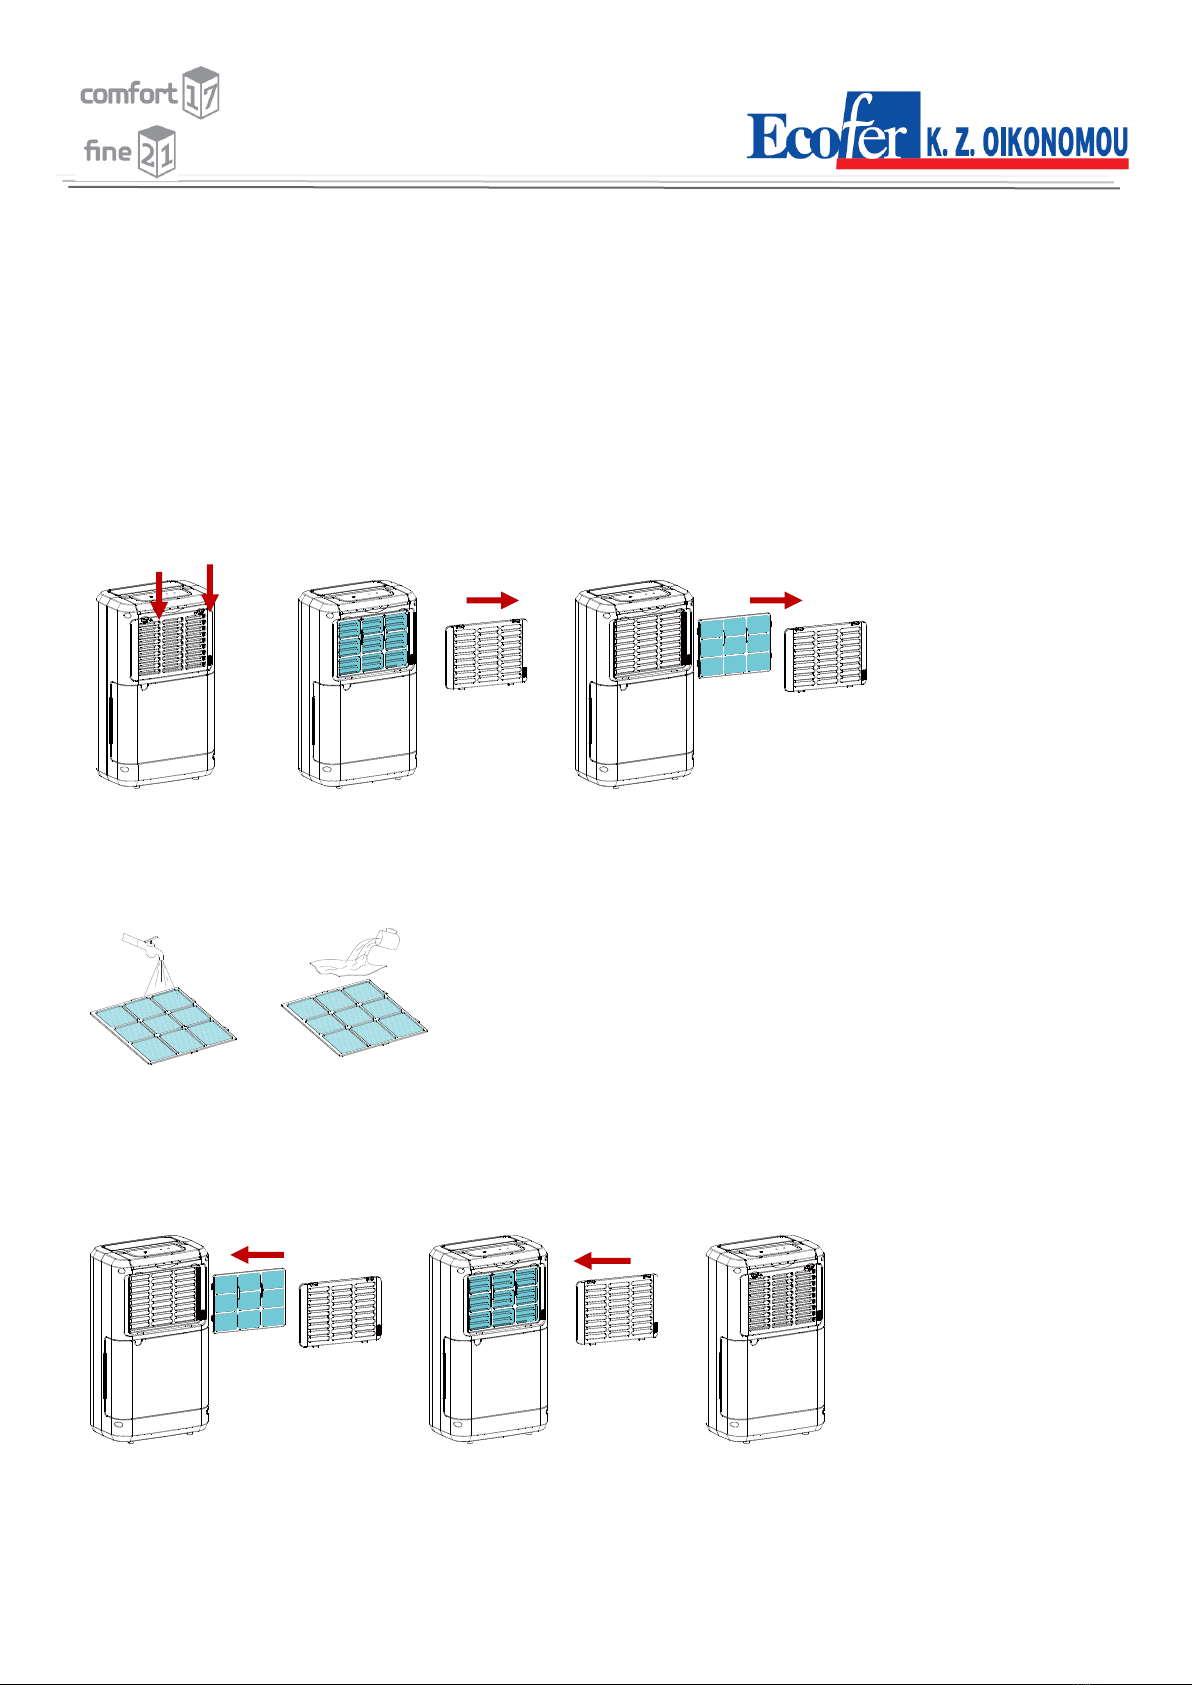
Cleaning the Dehumidifier
To clean the Body
Wipe it with a soft damp cloth.
To Clean the Air Filter
1. Open the inlet grill firstly and remove the air filter
2. Clean the air filter
Run a vacuum cleaner lightly over the surface of the air filter to remove dirt. If the air filter is exceptionally
dirty, wash it with warm water and a mild cleanser and dry thoroughly.
3. Attach the air filter
Insert the filter into the grill smoothly, and place the inlet grill into right place.
User manual
10
Storing the Dehumidifier
When the unit is not being used for a long period of time and you want to store it note the following steps:
1. Empty any water left in the drainage tank.
2. Fold up the power supply cord and put it in the water tank.
3. Clean the air filter
4. Discard in a cool and dry place .
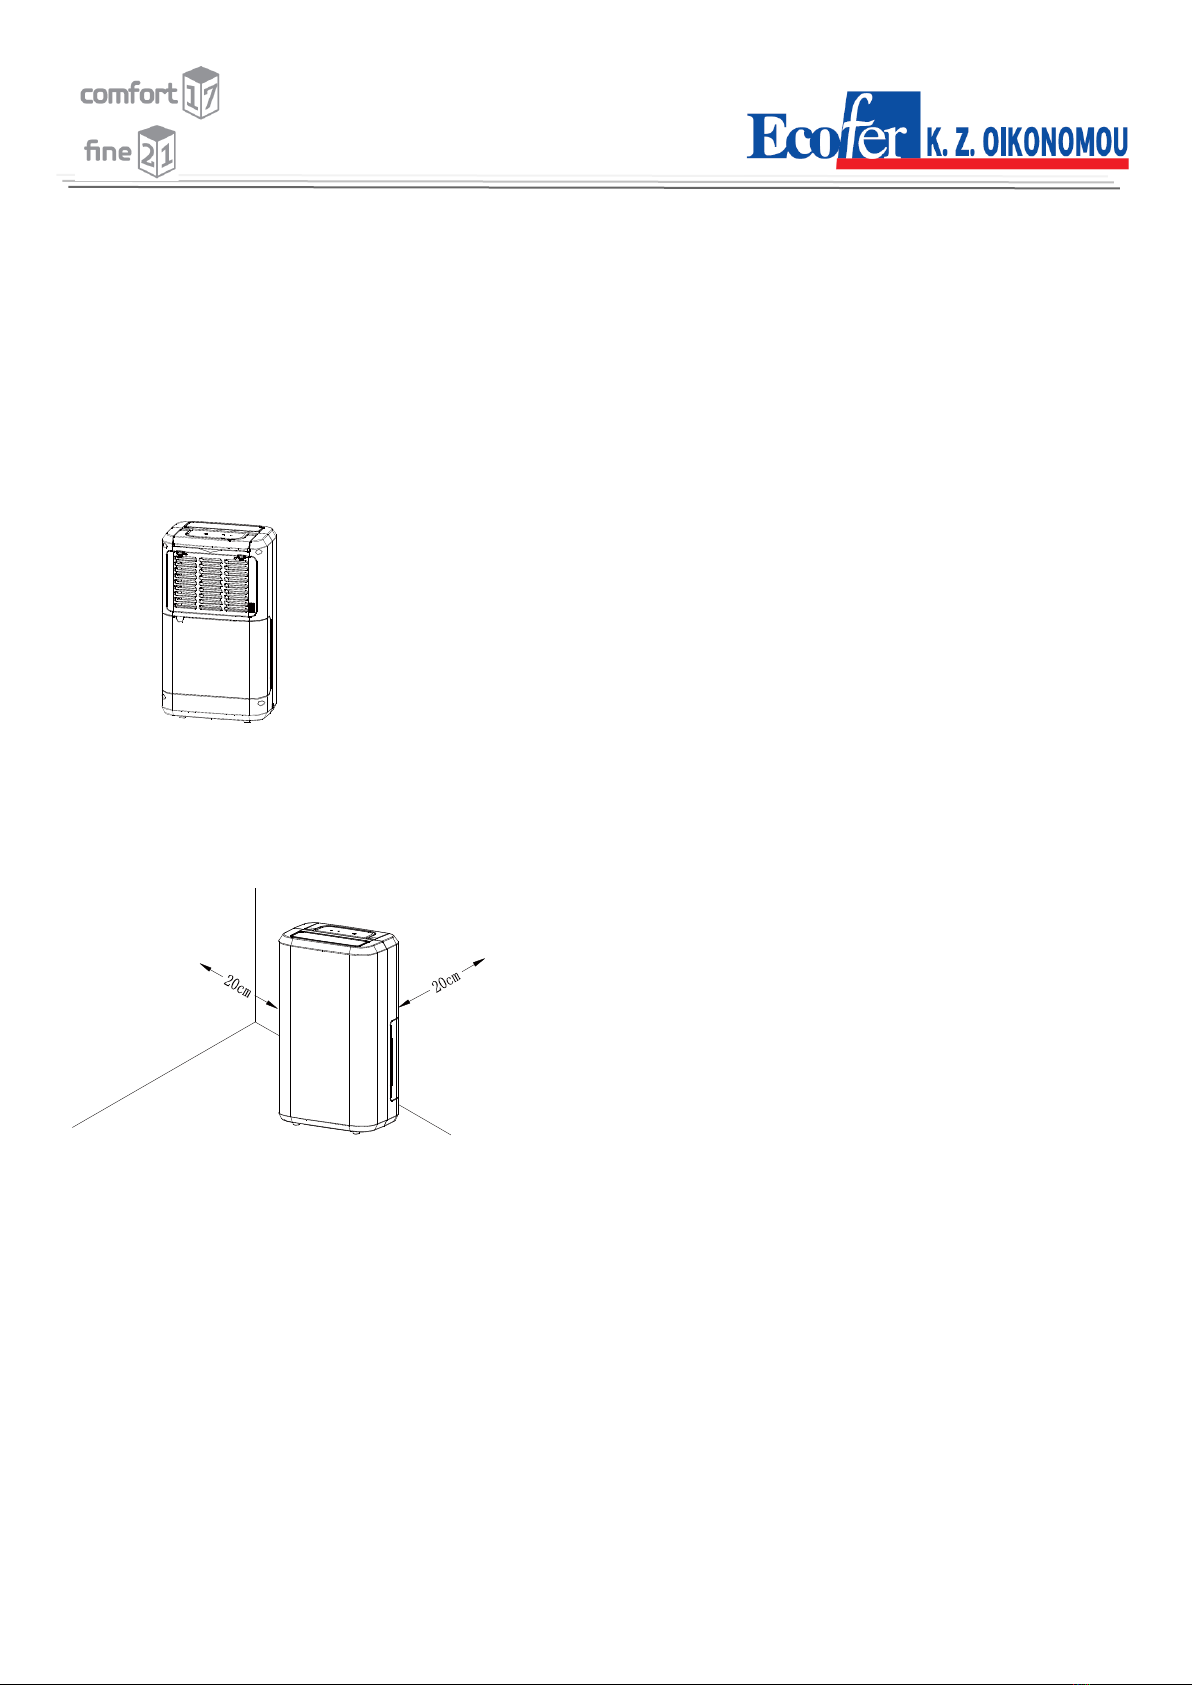
Clearance
Maintain the minimum clearance around the dehumidifier when the unit is operating as shown in the left
drawing.
User manual
11
Troubleshooting
Problem
Possible Cause
Solution
The unit doesn't operate
Has the power cord been
disconnected?
Plug the power cord into the
outlet.
Is the tank full indication
lamp blinking? (The tank is
full or in a wrong position.)
Empty the water in the
drainage tank and then
reposition the tank.
Is the temperature of the
room above 35℃or below
5℃?
The protection device is
activated and the unit
cannot be started.
The dehumidifying
function doesn't work
Is the air filter clogged?
Clean the air filter as
instructed under
"Cleaning the dehumidifier".
Is the intake duct or
discharge duct obstructed?
Remove the obstruction from
the discharge duct or intake
duct.
No air is discharged
Is the air filter clogged?
Clean the air filter as
instructed under
"Cleaning the dehumidifier".
Operation is noisy
Is the unit tilted or
unsteady?
Move the unit to a stable,
sturdy location.
Is the air filter clogged?
Clean the air filter as
instructed under
"Cleaning the dehumidifier".
Model
Ecofer Comfort
Ecofer Fine
Rated Voltage:
220-240V/50HZ
220-240V/50HZ
Rated Input
300W
380W
Rated Current
1.5A
2.0A
Moisture removal (32℃,RH80﹪)
17L/day
21L/day
Refrigerant
R290
R290
Working Temperature
5℃-35℃
5℃-35℃
Dimensions (mm) Μ/Π/Υ
276 x 235 x 500
276 x 235 x 500

User manual
12
The product or equipment contains fluorinated greenhouse gas.
Coolant: R290
Global Warming Potential: 3
Recycling
This marking indicates that this product should not be disposed with other household wastes throughout
the EU. To prevent possible harm to the environment or human health from uncontrolled waste disposal,
recycle it responsibly to promote the sustainable reuse of material resources. To return your used device,
please use the return and collection systems or contact the retailer where the product was purchased. They
can take this product for environmentally safe recycling.
Guarantee
This product is guaranteed for 24 months granted. Your warranty is valid if the product is used in accordance
to the instructions and for the purpose for which it was created.
The warranty does not apply if the error is due to improper use or handling, neglect, incorrect installation or
storage, inappropriate connection or installation. The warranty is invalidated if alterations or repairs are
made by unauthorized people. The warranty is also invalidated in the following cases:
- If a product for domestic use is used in an industrial environment.
- If the product is not working any more due to another device in your home.
- If the product's serial number has been removed.
- If the product has been opened for a reason other than the intended use.
- The product has been repaired by an unauthorized service center or if non-original spare parts or
accessories have been used for the repair.
In case you want to make use of the warranty or in case of damage, please contact your local store that you
bought the product. In addition, the original purchase (invoice, sales slip or receipt) is to be submitted with
the date of purchase, the name of the retailer and the item number of the product. Our warranty covers only
manufacturing defects. Τhe warranty does not cover normal wear and tear due to use.
Recommendation:
-If the product does not work as intended, first check if the cause is other reasons, such as incorrect
handling.

This manual suits for next models
1
Table of contents
Popular Dehumidifier manuals by other brands


ALORAIR
ALORAIR Storm LGR Extreme Installation and operation manual

BENDIX
BENDIX AD-SP SYSTEM PURGE AIR DRYER manual

DEWTEQ
DEWTEQ DHD2000WP User manual and technical specifications

GE
GE APEL70 owner's manual

S&P
S&P MD Installation, operation and maintenance manual

Mission Air
Mission Air OPTIDRY 25L instructions