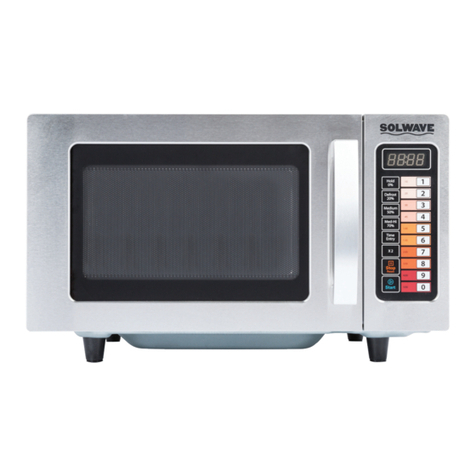
Solwave 180MW1000D User manual

User Manual
1000W Commercial Microwave
User Manual
Model: 180MW1000D
Please read and keep these instructions. Indoor use only.
05/2017

User Manual
When using electrical equipment, basic safety precautions should be followed to
reduce the risk of burns, electrical shock, fire, or injury to persons.
READ all of the instructions before using this equipment.
1. This equipment MUST BE GROUNDED. Connect only
to properly GROUNDED outlet. See “GROUNDING
INSTRUCTIONS” on page 3 for further details.
2. Use this equipment ONLY for its intended use
as described in this manual. This type of oven is
specifically designed to heat, cook or dry food. It is
not designed for industrial or laboratory use.
3. DO NOT heat items able to explode in this
microwave, such as: eggs, sealed containers, glass
jars, etc.
4. DO NOT operate this equipment if the cord, plug and/
or door is damaged, if is not working properly or if it
has been damaged or dropped.
5. This equipment, including power cord, must be
serviced ONLY by qualified service personnel.
Contact the nearest authorized service facility for
examination, repair, or adjustment.
6. DO NOT cover or block filter or other openings on
equipment.
7. DO NOT store this equipment outdoors.
8. DO NOT use this product near water or immerse the
cord and/or plug in water.
9. Keep cord AWAY from HEATED surfaces.
10. DO NOT let cord hang over edge of table or counter.
11. DO NOT overcook food as to avoid fire in oven cavity.
12. If materials inside the oven ignite, keep oven door
CLOSED, turn oven off and disconnect the power
cord, or shut off power at the fuse or circuit breaker
panel.
13. DO NOT use the cavity for storage.
14. Do not overheat liquids.
15. After heating, allow the container to stand in the
microwave oven for a short time before removing the
container.
16. DO NOT operate equipment without load or food in
oven cavity.
17. DO NOT use metal utensils in oven.
18. NEVER use paper, plastic, or combustible materials
that are not intended for cooking.
19. Clean oven regularly and remove any food deposits.
20. For commercial use only.
SAVE THESE INSTRUCTIONS
IMPORTANT SAFETY INSTRUCTIONS

User Manual
OPENING YOUR NEW OVEN
1. Inspect oven for any damage such as cracks or dents in door or
inside oven cavity.
2. Remove all materials from oven interior.
3. Remove all plastic wrap and packaging material before use.
4. Do not install oven next to or above source of heat, such as pizza
oven or deep fat fryer. This could cause the microwave oven to
operate improperly and could shorten life of electrical parts.
5. Install oven on a level countertop surface.
6. Outlet should be located so that the plug is accessible when
oven is in place.
GROUNDING INSTRUCTIONS
Oven MUST be grounded. Grounding reduces risk of electric shock by
providing an escape wire for the electric current, if an electrical short
occurs. This oven is equipped with a cord having a ground wire with a
grounding plug. The plug must be plugged into an outlet that is properly
installed and grounded. Do not use an extension cord.
To avoid risk of electrical shock or death, this oven must be earthed.
To avoid risk of electrical shock or death, do not alter the plug.
Instructions
1. Open oven door, place food in oven, and close oven door.
2. Turn time entry knob clockwise to desired time.
- Cooking time can be set up to 6 minutes.
- Oven begins operation and time counts down.
3. When cooking time has elapsed, microwave energy stops
and oven signal sounds.
Interrupting Operation
Open oven door to interrupt operation or turn time entry knob
counterclockwise to "0".
When cooking is interrupted by opening door, oven
automatically resets to zero time.
To resume microwave oven operation, close door and re-enter
desired time by turning knob clockwise.
Changing Time and Canceling Mistakes
Heating time can be changed at any time while the oven is
operating. Turn knob to desired new setting. To set cooking time
to zero, turn knob counterclockwise to "0". Setting the time to
zero cancels the set cooking time and turns the oven off.
DIAL OPERATION

User Manual
CARE AND CLEANING
To avoid electrical shock which can cause severe personal injury or death, unplug power
cord or open circuit breaker to oven before cleaning or removing light bulb.
TROUBLESHOOTING
COMPLAINT POSSIBLE CAUSE REMEDY
Dim oven light Cooking at low power level This is normal
Steam forms on oven door When cooking foods in a microwave steam is
generated.
This is normal
Hot air expelled from vents Foods cooking in a microwave may release
heat
This is normal
Oven does not start Power cord not plugged in correctly
Fuse blown or circuit breaker open
Malfunctioning outlet
Door not closed
Plug cord into outlet correctly
Replace fuse (should be repaired by
authorized servicer) or reset breaker
Test outlet with other electrical appliance
Close door
WARRANTY
6 MONTH REPLACEMENT WARRANTY
• This warranty is effective from the time of purchase.
• This warranty is not effective if damage occurs because of accident, carelessness, improper installation, lack of proper set – up,
supervision when required or if the equipment is installed or operated in any manner contrary to the installation and operating instructions.
• Work performed by unauthorized personnel or unauthorized service agencies voids this Warranty
• This warranty does not apply to, and Solwave is not responsible for any warranty claims on products sold or used outside of the
contiguous United States.
• This equipment is intended for commercial use only. Warranty is void if equipment is installed in anything other than commercial
applications.
• Cleaning the interior and exterior will require a
mild detergent, water and a soft sponge or cloth.
• Do not use cleaners that include ammonia or
citrus.
• Do not use water pressure cleaning systems on
your microwave.
• Inspect air vents monthly and clean using a
damp cloth.

02/2020
184T3300B 208V - 3300W (10" Wide Belt)
184T3600B 208V - 3600W (14½" Wide Belt)
184T140 120V - 1750W (10" Wide Belt)
184T3300D 208V - 3300W (10" Wide Belt)
184T3600D 208V - 3600W (14½" Wide Belt)
Adjustable Speed Conveyor Toaster
USER MANUAL

Important Safety Information .............2
Circuit Diagram ............................3
Discharge Assembly .......................4
Before Using Your Conveyor Toaster ......5
Using Your Conveyor Toaster..............5
Cleaning & Maintenance...................6
Specifications ..............................7
Limited Warranty ..........................8
INDEX
1.

When using electrical appliances, basic safety precautions should always be followed,
including the following:
1. Read all instructions carefully and completely.
2. For commercial use only.
3. DO NOT touch hot surfaces.
4. Protect against electrical shock by keeping all cords, plugs, and other electrical
components away from water or other liquids.
5. Unplug this unit when not in use and before cleaning.
6. Allow the unit to cool before putting on or taking off parts.
7. DO NOT operate this or any appliance with a damaged electrical cord or plug.
8. DO NOT operate this or any appliance after it has malfunctioned or has been
damaged in any way.
9. DO NOT use outdoors.
10. DO NOT place on or near a hot gas or electric burner.
11. Attach plug to appliance first, then plug electrical cord into the wall outlet.
12. Disconnect the unit by removing the electrical plug from the wall outlet.
13. DO NOT use appliance for any application other than intended use.
14. DO NOT insert metal utensils or oversized foods into this unit, as they may cause
a fire and heighten the risk of electrical shock.
15. DO NOT store any item on top of this unit when in operation.
16. DO NOT allow this oven to touch or to be covered by flammable material,
such as curtains, draperies, walls, etc., when in operation.
17. DO NOT clean with metal scouring pads, as pieces can break off and touch electrical
components, heightening the risk of electrical shock.
18. Never place materials such as paper, cardboard, plastic, etc. in this oven.
19. DO NOT cover interior of this unit with metal foil, as it may cause the oven to overheat.
20. Avoid scratching the surface or nicking the edges of this unit. If the oven is damaged
or broken, contact customer service before use.
21. Turn off the appliance by removing the plug from the wall outlet.
22. Note that the use of accessories not recommended by the manufacturer
may result in injury.
23. Children should be supervised to ensure that they DO NOT play with the oven.
24. This appliance is not intended for use by persons (including children) with reduced
physical sensory or mental capabilities, or lack of experience and knowledge,
unless a person responsible for their safety has given them supervision or instruction
concerning use of the appliance.
25. When using the appliance in shops, snack bars, hotels etc., check the voltage and
outlet to make sure the appliance is correctly connected with power.
26. Place unit on a flat surface that is well ventilated. The appliance must be supervised
during operation. DO NOT leave appliance without powering off.
NOTE: Save these instructions for future reference.
SAFETY
2.

3.
CIRCUIT DIAGRAM
QS
2
3
4
N
L
EH1
EH2
HL1
R
E
P1
P2
D
MODEL: CONVEYOR TOASTER
184T140
1.75kW/120VAC/50-60Hz
WIRING DIAGRAM
XL
LEGEND DESCRIPTION
HL1
QS
EH1, EH2
∞
M
R
XL
25A/300V
120V
16A/250V
710W, 1040W/120V
12x12/120V
120V/60Hz
30W/150
90°C 16A/250V
θS
θS
DIN5408/4A

FRONT DISCHARGE
1. Pull metal plate up to the closed position
and latch. This will direct food to the
bottom of the toaster.
2. Pick up the longer of the two chutes.
3. Slide the flanged end of the chute up
underneath the toaster.
4. Rest the flanged end of the chute onto
the interior ledge.
REAR DISCHARGE
1. Push the metal plate down to the open
position. This will direct food to the back
of the toaster.
2. Loosen the two rear screws.
3. Pick up the smaller of the two chutes.
4. Slide the two keyholes on the chute behind
the loosened screws. If the chute does not
fit all the way down, loosen the screws more.
5. Tighten the screws to secure the chute
to the toaster.
The optional stacking kit attachment can be used
to mount one toaster on top of another.
1. To mount, set up both toasters for front discharge.
2. Remove the two rear top cover screws from
the bottom toaster.
3. Place the stacking bracket onto the top cover
of the toaster.
4. Replace the two top cover screws,
securing the stacking bracket in place.
5. Remove the discharge chute from the toaster
to be placed on top.
6. Place the toaster onto the bracket, ensuring
the leveling feet locate into the holes in the
stacking bracket.
4.
As detailed in the diagrams below, the unit can either be assembled with front or rear discharge
depending on installation position and preference.
DISCHARGE ASSEMBLY
STACKING KIT #184STK10 - 10" WIDE
#184STK145 - 14½" WIDE

5.
Before cooking anything in your oven for the first time, please follow these simple instructions:
1. This conveyor toaster has been designed to continuously produce toasted bread or buns.
The desired toasted color of the product can be adjusted by changing the belt speed of the
conveyor. Depending on installation position, the toasted product can be discharged to the
front or rear of the unit.
2. Ensure the support feet are assembled to the unit before commencing operation.
3. Thoroughly clean as described in the cleaning section of this manual (page 6).
4. For best results, allow the unit to preheat for 20-25 minutes before use so that the correct
operating temperature can be reached.
The unit has two controls.
1. Speed/color control
Determines the length of time the toast or product is in the heating chamber.
The slower the speed, the longer the exposure and the darker the product.
2. Heat control switch has 4 settings.
“OFF” - In this position, the unit is off.
“STANDBY” - In this position, the conveyor belt will run and both top and bottom
elements will operate at 25% capacity. This mode is designed to keep the unit warm in
quiet periods to reduce start-up time and conserve energy.
“BREAD” - In this position, both top and bottom elements operate at full capacity.
This is the ideal mode for toasting bread.
“BUNS” - In this position, only the top element operates at full capacity.
This is the ideal setting for toasting one side only of a bun.
These units have three controls.
1. Speed/color control
Determines the length of time the toast or product is in the heating chamber.
The slower the speed, the longer the exposure and the darker the product.
The top and bottom heating elements are independently controlled.
2. Heat Control Top Element is infinitely adjustable.
“0” is the off position. “6” is the hottest setting. “1” is the lowest setting.
3. Heat Control Bottom Element is infinitely adjustable.
“0” is the off position. “6” is the hottest setting. “1” is the lowest setting.
As described above, product appearance or color is dependent on conveyor speed and type
of product. These other factors may also affect the toasting color:
i. Moisture content of the product.
ii. Sugar content of the product.
iii. Initial product temperature.
BEFORE USING YOUR TOASTER
USING YOUR TOASTER
184T140
184T3300B •184T3300D •184T3600B •184T3600D

6.
CAUTION: THIS APPLIANCE SHOULD NOT BE IMMERSED IN WATER. USE ONLY A
DAMP CLOTH OR SPONGE DIPPED IN SOAPY WATER. DO NOT USE STEEL
WOOL AS IT WILL DAMAGE THE BRIGHT STAINLESS STEEL FINISH.
EXTERIOR & CRUMB TRAY
1. Unplug the power cord from the wall outlet.
2. Wait for the oven to cool.
3. Wipe off the unit with a dry cloth and wait at least half an hour before reconnecting
to the power outlet.
4. Remove the crumb tray from the unit by pulling forward. Dispose of the crumbs
and clean the tray with a damp cloth or sponge dipped in soapy water.
Refit the tray before reusing the unit.
CONVEYOR BELT
1. Turn off the toaster and allow the unit to cool down.
2. Turn the unit on and set to Standby Mode, adjust the belt to slow speed.
3. Using an abrasive pad, wipe the conveyor belt in a back and forth motion
(ie: side to side) to remove baked-on product.
4. Finally, clean the belt with a damp cloth in the same manner described in number 3.
CLEANING & MAINTENANCE
SUGGESTED CLEANER
Noble Chemical QuikSan Food Contact & Surface Sanizer

DIMENSIONS
MODEL A B C
184T3300B / 184T3300D 14.5" 16.5" 17"
184T3600B / 184T3600D 18.5" 16.5" 18"
184T140 14.5" 16.5" 30"
7.

7.
EQUIPMENT LIMITED WARRANTY
To Make a Warranty Claim:
For Warranty Inquiries contact the location where you purchased the product:
• The Restaurant Store: If you purchased this unit from your local store, please contact your store directly.
• TheRestaurantStore.com: Online purchases, call 717-392-7261. Please have your order number ready.
Failure to contact the designated location prior to obtaining equipment service may void your warranty.
Avatoast makes no other warranties, express or implied, statutory or otherwise, and HEREBY DISCLAIMS ALL IMPLIED
WARRANTIES, INCLUDING THE IMPLIED WARRANTIES OF MERCHANTABILITY AND OF FITNESS FOR A
PARTICULAR PURPOSE.
This Limited Warranty does not cover:
• Equipment sold or used outside the Continental United States
• Use of unltered water (if applicable)
• Avatoast has the sole discretion on wearable parts not covered under warranty
• Equipment not purchased directly from an authorized dealer
• Equipment used for residential or other non-commercial purposes
• Equipment that has been altered, modied, or repaired by anyone other than an authorized service agency
• Equipment where the serial number plate has been removed or altered.
• Damage or failure due to improper installation, improper utility connection or supply, and issues resulting from
improper ventilation or airow.
• Defects and damage due to improper maintenance, wear and tear, misuse, abuse, vandalism, or Act of God.
Any action for breach of this warranty must be commenced within 1 year of the date on which the breach occurred.
No modication of this warranty, or waiver of its terms, shall be effective unless approved in a writing signed by the
parties. The laws of the Commonwealth of Pennsylvania shall govern this warranty and the parties’ rights and duties under
it. Avatoast shall not under any circumstances be liable for incidental or consequential damages of any kind, including but
not limited to loss of prots.
Avatoast warrants its equipment to be free from defects in material and workmanship for a period of 1 year. This is the sole
and exclusive warranty made by Avatoast covering your Avatoast brand equipment. A claim under this warranty must be
made within 1 year from the date of purchase of the equipment. Only the equipment’s original purchaser may make a claim
under this warranty. Avatoast reserves the right to approve or deny the repair or replacement of any part or repair request.
The warranty is not transferable. Avatoast Equipment installed in/on a food truck or trailer will be limited to a period of
30 days from the original date of purchase.

Commercial Refrigerator
User’s Manual
- 1 -
User Manual
Please read the manual thoroughly prior to equipment set-up,
operation and maintenance.
10/2020
Refrigerated Pizza Prep Units
178SSPPT1, 178SSPPT2, 178SSPPT260, 178SSPPT3
Refrigerated Sandwich Prep Units
178SSPT27HC, 178SSPT36HC, 178SSPT48HC, 178SSPT60HC,
178SSPT71HC, 178SSPT27MHC, 178SSPT36MHC, 178SSPT48MHC,
178SSPT60MHC, 178SSPT71MHC

- 2 -
User Manual
Warning
DANGER – RISK OF FIRE OR EXPLOSION. FLAMMABLE REFRIGERANT USED. TO BE REPAIRED ONLY BY TRAINED SERVICE
PERSONNEL. DO NOT PUNCTURE REFRIGERANT TUBING.
PELIGRO - RIESGO DE INCENDIO O EXPLOSION. REFRIGERANTE INFLAMABLE UTILIZADO. PARA SER REPARADO
SOLAMENTE POR PERSONAL DE SERVICIO CALIFICADO. NO PINCHAR LA TUBERÍA REFRIGERANTE.
DANGER – RISQUE DE FEU OU D’EXPLOSION. LE FRIGORIGÈNE EST INFLAMMABLE. CONFIER LES RÉPARATIONS À UN
TECHNICIEN SPÉCIALISÉ. NE PAS PERFORER LA TUBULURE CONTENANT LE FRIGORIGENE.
CAUTION – RISK OF FIRE OR EXPLOSION. FLAMMABLE REFRIGERANT USED. CONSULT REPAIR MANUAL/OWNER’S GUIDE
BEFORE ATTEMPTING TO SERVICE THIS PRODUCT. ALL SAFETY PRECAUTIONS MUST BE FOLLOWED.
ATENCION - RIESGO DE INCENDIO O EXPLOSIÓN. REFRIGERANTE INFLAMABLE UTILIZADO. CONSULTE EL MANUAL DE
REPARACIÓN / GUÍA DEL PROPIETARIO ANTES DE INTENTAR DAR SERVICIO A ESTE PRODUCTO. DEBEN CUMPLIR CON
TODAS LAS PRECAUCIONES DE SEGURIDAD.
ATTENTION – RISQUE DE FEU OU D’EXPLOSION. LE FRIGORIGÈNE EST INFLAMMABLE. CONSULTER LE MANUEL DU
PROPRIÉTAIRE/GUIDE DE RÉPARATION AVANT DE TENTER UNE RÉPARATION. TOUTES LE MESURES DE SÉCURITÉ DOIVENT
ÊTRE RESPECTÉES.
CAUTION – RISK OF FIRE OR EXPLOSION DUE TO PUNCTURE OF REFRIGERANT TUBING; FOLLOW HANDLING INSTRUCTIONS
CAREFULLY. FLAMMABLE REFRIGERANT USED.
ATENCION - RIESGO DE INCENDIO O EXPLOSIÓN DEBIDO A LA PERFORACION DE LA TUBERÍA REFRIGERANTE; SIGA LAS
INSTRUCCIONES DE MANIPULACIÓN CON CUIDADO. REFRIGERANTE INFLAMABLE UTILIZADO.
ATTENTION – RISQUE DE FEU OU D’EXPLOSION SI LA TUBULURE CONTENTANT LE FRIGORIGÈNE EST PERFORÉE; SUIVRE
LES INSTRUCTIONS DE MANUTENTION AVEC SOIN. LE FRIGORIGÈNE EST INFLAMMABLE.
BASE UNIT LEFT MIDDLE RIGHT OPTIONAL MODELS
178SSPPT1 DRAWER 178SSPPT1A
178SSPPT260 SLIM DOOR DRAWER 178SSPPT260B
178SSPPT260 SLIM DRAWER DRAWER 178SSPPT260C
178SSPPT260 SLIM DRAWER DOOR 178SSPPT260D
178SSPPT2 DOOR DRAWER 178SSPPT2B
178SSPPT2 DRAWER DRAWER 178SSPPT2C
178SSPPT2 DRAWER DOOR 178SSPPT2D
178SSPPT3 DOOR DOOR DRAWER 178SSPPT3E
178SSPPT3 DOOR DRAWER DOOR 178SSPPT3F
178SSPPT3 DOOR DRAWER DRAWER 178SSPPT3G
178SSPPT3 DRAWER DRAWER DRAWER 178SSPPT3H
178SSPPT3 DRAWER DOOR DOOR 178SSPPT3I
178SSPPT3 DRAWER DOOR DRAWER 178SSPPT3J
178SSPPT3 DRAWER DRAWER DOOR 178SSPPT3K

- 3 -
User Manual
Installation
Important!!! Please Read Before Installation
• If the shelf has a raised lip, the lip needs to be installed facing up towards the rear of the cabinet to
promote proper air flow. Failure to install the shelves properly is considered user-error and is not
covered by warranty.
• If the unit has recently been transported on its side, please let unit stand still for a minimum of 24
hours before plugging it in.
• Make sure that the unit drops down to desired temperature before loading the unit with product.
• Make sure that there is proper ventilation around the unit in the area where it will operate.
• Make sure all accessories are installed (i.e.. Shelves, shelf clips, casters) before plugging the unit in.
• Please read through the manual in its entirety.
Cabinet Location Guidelines
• Install the unit on strong and leveled surfaces
- Unit may be noisy and/or malfunction if surface is uneven.
• Install the unit in an indoor, well-ventilated area
-For best performance, please maintain clearance of 4" on the back of the unit. Brackets should be attached on the
back of the unit.
- Outdoor use may cause decreased efficiency and damage to the unit.
• Avoid installation in a high humidity and/or dusty area
- Humidity could cause unit to rust and decrease efficiency of the unit.
- Dust collected on condenser coil will cause unit to malfunction.
- Malfunction due to dirty condenser will void warranty.
• Select a location away from heat and moisture-generating equipment
- High ambient temperatures will cause the compressor to overwork, leading to higher energy bills and gradual
breakdown of the unit.
-With the lid open, the unit should not be used in areas over 80 degrees. The unit should not be used in areas over 90
degrees.
-Malfunction due to high ambient temperature will void warranty.
• For optimal performance, 3" of clearance is required around all louvered or vented panels, to allow
for proper air flow
-For your convenience, a set of brackets is included to prevent this unit from being pushed up against a wall
-Component failure due to improper installation is not covered under warranty.
CAUTION – RISK OF FIRE OR EXPLOSION DUE TO FLAMMABLE REFRIGERANT USED. FOLLOW HANDLING INSTRUCTIONS
CAREFULLY IN COMPLIANCE WITH LOCAL GOVERNMENT REGULATIONS.
ATENCIÓN – RIESGO DE INCENDIO O EXPLOSIÓN DEBIDO A REFRIGERANTE INFLAMABLE UTILIZADO. SIGA LAS
INSTRUCCIONES DE MANIPULACIÓN CON CUIDADO CONFORME A LAS REGLAS DE LA MUNICIPALIDAD.
ATTENTION – RISQUE DE FEU OU D’EXPLOSION SI LE FRIGORIGÈNE EST INFLAMMABLE. SUIVRE LES INSTRUCTIONS DE
MANUTENTION AVEC SOIN CONFORMÉMENT AUX RÈGLEMENTATION GOUVERNEMENTALE LOCAUX.

- 4 -
User Manual
Electrical
• Please ensure that the required voltage of the compressor is being supplied at all times. Low or
high voltage can detrimentally affect the refrigeration unit.
• All units should be plugged into a grounded and properly-sized electrical outlet with appropriate
overcurrent protection. Please refer to the electrical requirements on the nameplate.
• Please make sure that your unit has its own dedicated outlet.
• Do not use an extension cord.
Temperature Controls
• Refrigerant LED - Compressor is on
• Fan LED - Fan is on
• Defrost LED - Defrost cycle is running
Functions
Adjusting the Temperature
Your new refrigerator or freezer is already factory-set to run at optimum temperatures for food
safety and should require no adjustments.
Refrigerators are set to cycle between a minimum temperature of 33 degrees Fahrenheit and a
maximum temperature of 40 degrees Fahrenheit.
Adjusting the temperature changes the minimum temperature your unit will run at. Your unit will not
run constantly at this setting. To change it, follow these instructions:
Digital Control Units
• Hold “SET” for 1 sec. The display will flash the current minimum temperature.
• Use the arrow buttons to adjust the minimum temperature you want it to run at.
• Press “SET” again to save your settings
Always remember to calculate the differential if you change the minimum temperature setting. The
cabinet temperature will fluctuate up to +7 degrees over your set minimum temperature as the
compressor runs and shuts off. Setting the temperature too high will result in unsafe maximum
temperatures.

- 5 -
User Manual
Loading Product
Before loading shelves, please be sure that all shelf clips are completely fastened in their correct
locations. It is important that all shelves rest completely level before stocking your cabinet with product.
In order to maintain correct air flow inside the unit, please be sure to leave two to four (2 to 4) inches
of space between the back wall and stored product. Blocking the evaporator fans will result in a
warmer cabinet temperature, and ultimately compressor failure.
Running a Manual Defrost Cycle
This unit is pre-programmed to run automatic defrost cycles at preset intervals. However, if you
would like to run a manual defrost cycle at any time, please follow the steps below:
Refrigerators: Press the defrost button (snowflake symbol and down arrow) for approximately 3
seconds. Repeat to stop the defrost cycle.
Defrost Systems
Refrigerator coils are kept below the freezing point (32° F). During compressor down-time, the
evaporator fan continues to circulate air through the evaporator coil. This air circulation raises the coil
temperature above the freezing point, melting any accumulated frost. Run-off water is drained into
the evaporator pan and evaporated. Freezer coils are defrosted electrically. Automatic defrost timers
automatically initiate at pre-set intervals and for a pre-determined duration.
Loading Food Pans
Pizza prep units and sandwich prep units are designed to function with all pans in place, even if
some pans are to be left empty. For maximum food freshness, fill the pans only with an amount that
can be used in a specific usage period. During non-use, please close the insulated lid cover.
set
mute
Refrigerator Control

- 6 -
User Manual
Safety / Warning
Please pay close attention to the safety notices in this section. Disregarding these notices may lead
to serious injury and/or damage to the unit.
Attention
• To minimize shock and fire hazards, be sure not to overload outlet. Please designate one outlet for
your unit.
• Do not use extension cords.
• Do not put your hands under the unit while it is being moved.
• When the unit is not in use for a long period of time, please unplug the unit from the outlet.
• After unplugging the unit, wait at least 10 minutes before plugging it back in. Failure to do so could
cause damage to the compressor.
Unplug Cord
• To minimize shock and fire hazards, please do not plug or unplug the cord with wet hands.
• During maintenance and cleaning, please unplug the unit.
Proper Grounding Required
• To minimize shock and fire hazards, make sure that the unit is properly grounded.
Warning
• Do not attempt to remove or repair any component unless instructed by factory.
• Make sure that the unit is not resting on or against the electrical cord and plug.
• To minimize personal injury, do not hang on the doors.
• Do not store any flammable and explosive gas or liquids inside the unit.
• Do not attempt to alter or tamper with the electrical cord.

- 7 -
User Manual
Regular Maintenance
WARNING: DISCONNECT POWER CORD BEFORE
CLEANING ANY PARTS OF THE UNIT.
Cleaning The Condenser Coil
• For efficient operation, it is important that the condenser surface be kept free of dust, dirt, and lint.
• We recommend cleaning the condenser coil and fins at least once per month.
• Clean with a commercial condenser coil cleaner, available from any kitchen equipment retailer.
Brush the condenser fins from top to bottom, not side to side.
• After cleaning, straighten any bent condenser fins with a fin comb.
Cleaning The Fan Blades and Motor
If necessary, clean the fan blades and motor with a soft cloth. If it is necessary to wash the fan
blades, cover the fan motor to prevent moisture damage.
Cleaning The Interior of Unit
• When cleaning the cabinet interior, use a solvent of warm water and mild soap.
• Do not use steel wool, caustic soap, abrasive cleaners, or bleach that may damage the stainless
steel surface.
• Wash door gaskets on a regular basis, preferably weekly. Simply remove door gasket from the
frame of the door, soak in warm water and soap for thirty (30) minutes, dry with soft cloth, and
replace.
• Check door gaskets for proper seal after they are replaced.
• Periodically remove the shelves and pilasters from the unit and clean them with mild soap and
warm water. To remove the pilasters, first remove the shelves and shelf brackets. Then, simply lift
the pilaster up and out.
Other manuals for 180MW1000D
1
Table of contents
Other Solwave Microwave Oven manuals
Solwave
Solwave SWA-T Series User manual
Solwave
Solwave 180MWASHD12 User manual
Solwave
Solwave 180MWHD12 User manual
Solwave
Solwave SWAFP Series User manual
Solwave
Solwave 180MW112T User manual
Solwave
Solwave 180MW1200T User manual
Solwave
Solwave 180MW1000T User manual
Solwave
Solwave 180MWAS12T User manual
Solwave
Solwave 180MW1000D User manual
Solwave
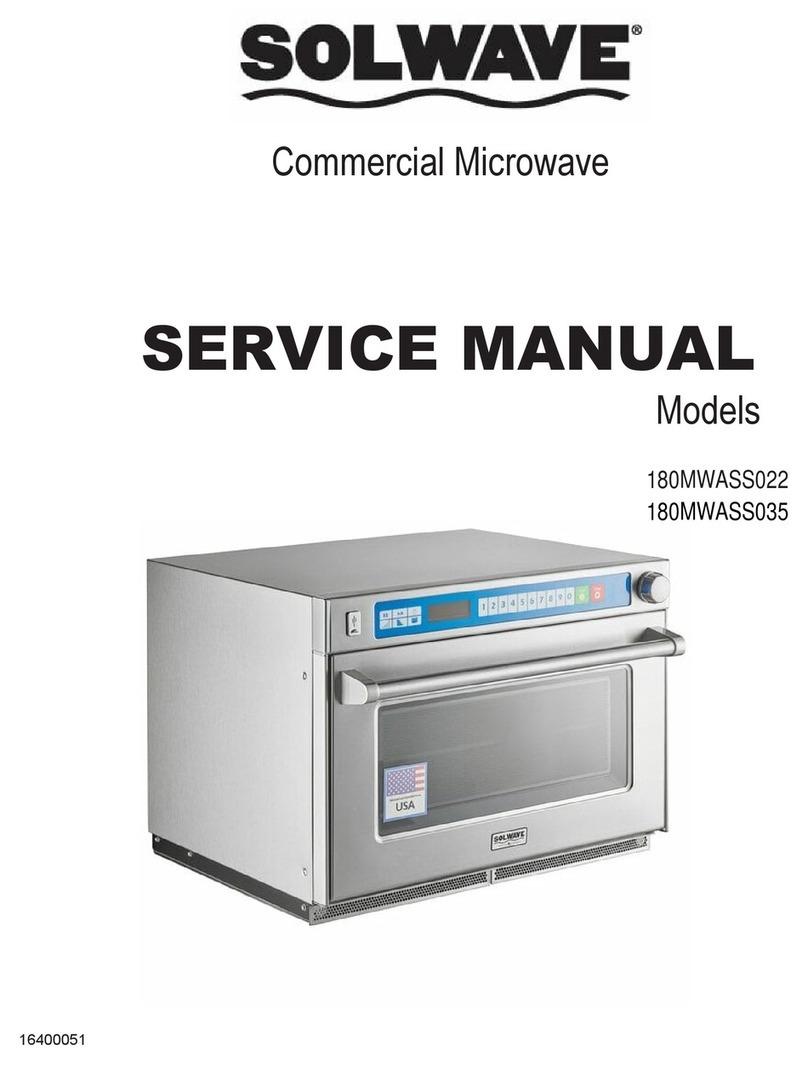
Solwave 180MWASS022 User manual
