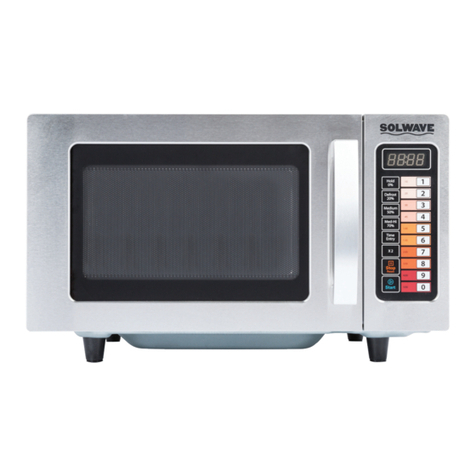
Solwave 180MW112T User manual

User Manual
Model: 180MW112T
1000W Stackable 1.2 Cu. Ft.
Commercial Microwave
User Manual
Please read and keep these instructions. Indoor use only.
05/2017

User Manual
• When using electrical equipment, basic safety precautions should be followed to
reduce the risk of burns, electrical shock, fire, or injury to persons.
• READ all of the instructions before using this equipment.
1. This equipment MUST BE GROUNDED. Connect only
to properly GROUNDED outlet. See “GROUNDING
INSTRUCTIONS” on page 3 for further details.
2. Use this equipment ONLY for its intended use
as described in this manual. This type of oven is
specifically designed to heat, cook or dry food. It is
not designed for industrial or laboratory use.
3. DO NOT heat items able to explode in this
microwave, such as: eggs, sealed containers, glass
jars, etc.
4. DO NOT operate this equipment if the cord, plug and/
or door is damaged, if is not working properly or if it
has been damaged or dropped.
5. This equipment, including power cord, must be
serviced ONLY by qualified service personnel.
Contact the nearest authorized service facility for
examination, repair, or adjustment.
6. DO NOT cover or block filter or other openings on
equipment.
7. DO NOT store this equipment outdoors.
8. DO NOT use this product near water or immerse the
cord and/or plug in water.
9. Keep cord AWAY from HEATED surfaces.
10. DO NOT let cord hang over edge of table or counter.
11. DO NOT overcook food as to avoid fire in oven cavity.
12. If materials inside the oven ignite, keep oven door
CLOSED, turn oven off and disconnect the power
cord, or shut off power at the fuse or circuit breaker
panel.
13. DO NOT use the cavity for storage.
14. Do not overheat liquids.
15. After heating, allow the container to stand in the
microwave oven for a short time before removing the
container.
16. DO NOT operate equipment without load or food in
oven cavity.
17. DO NOT use metal utensils in oven.
18. NEVER use paper, plastic, or combustible materials
that are not intended for cooking.
19. Clean oven regularly and remove any food deposits.
20. For commercial use only.
SAVE THESE INSTRUCTIONS
IMPORTANT SAFETY INSTRUCTIONS

User Manual
OPENING YOUR NEW OVEN
1. Inspect oven for any damage such as cracks or
dents in door or inside oven cavity.
2. Remove all materials from oven interior.
3. Remove all plastic wrap and packaging material
before use.
4. Do not install oven next to or above source of heat,
such as pizza oven or deep fat fryer. This could
cause the microwave oven to operate improperly
and could shorten life of electrical parts.
5. Install oven on a level countertop surface.
6. Outlet should be located so that the plug is
accessible when oven is in place.
Turning The Oven On:
• “-- --“ displays when the oven is powered up for the first time.
Time Entry:
• The user may manually enter a cook time and power level
while in this mode.
• During Ready Mode LED displays “0:00”.
• While the oven is in the Ready Mode, pressing the key
will put the oven into Time Entry Mode: “00:00” will display.
• Press , or key to select power level, LED will
display the related power. If the same key is pressed twice,
the power will change to PL10 (Power Level 10 or full power).
If no power is chosen, PL10 is the default.
• During setting process, press the key to enter Time Entry
Mode and begin cooking. Press the key to enter Ready
Mode.
Manual Cook Mode:
• This mode allows cooking of the food items. While in Manual
Cook Entry Mode, pressing the key will cause the oven to
begin Manual Cook Mode.
• During this mode, cooking time displays, the fan operates
and oven light will be on.
GROUNDING INSTRUCTIONS
Oven MUST be grounded. Grounding reduces risk
of electric shock by providing an escape wire for the
electric current, if an electrical short occurs. This oven
is equipped with a cord having a ground wire with a
grounding plug. The plug must be plugged into an outlet
that is properly installed and grounded. Do not use an
extension cord.
• To avoid risk of electrical shock or death, this oven must be earthed.
To avoid risk of electrical shock or death, do not alter the plug.
OPERATION INSTRUCTIONS
:10
Hold
0%
Defrost
20%
Medium
50%
Med-Hi
70%
Time
Entry
X 2
Stop
Reset
Start
1
:20 2
:30 3
:45 4
1:00
1:30
2:00
2:30
3:00
3:30
5
6
7
8
9
0
:10
Hold
0%
Defrost
20%
Medium
50%
Med-Hi
70%
Time
Entry
X 2
Stop
Reset
Start
1
:20 2
:30 3
:45 4
1:00
1:30
2:00
2:30
3:00
3:30
5
6
7
8
9
0
:10
Hold
0%
Defrost
20%
Medium
50%
Med-Hi
70%
Time
Entry
X 2
Stop
Reset
Start
1
:20 2
:30 3
:45 4
1:00
1:30
2:00
2:30
3:00
3:30
5
6
7
8
9
0
:10
Hold
0%
Defrost
20%
Medium
50%
Med-Hi
70%
Time
Entry
X 2
Stop
Reset
Start
1
:20 2
:30 3
:45 4
1:00
1:30
2:00
2:30
3:00
3:30
5
6
7
8
9
0
:10
Hold
0%
Defrost
20%
Medium
50%
Med-Hi
70%
Time
Entry
X 2
Stop
Reset
Start
1
:20 2
:30 3
:45 4
1:00
1:30
2:00
2:30
3:00
3:30
5
6
7
8
9
0
:10
Hold
0%
Defrost
20%
Medium
50%
Med-Hi
70%
Time
Entry
X 2
Stop
Reset
Start
1
:20 2
:30 3
:45 4
1:00
1:30
2:00
2:30
3:00
3:30
5
6
7
8
9
0
:10
Hold
0%
Defrost
20%
Medium
50%
Med-Hi
70%
Time
Entry
X 2
Stop
Reset
Start
1
:20 2
:30 3
:45 4
1:00
1:30
2:00
2:30
3:00
3:30
5
6
7
8
9
0
Control Panel and Features
OPERATION
(1) Power Buttons
(2) Time cook Button
(3)
(4)
Start Button
(5)
X2 Button
(6) Number Button
Stop/Reset Button
10
(1)
(2) (3)
(4) (5)
(6)
(1)

User Manual
1. "_ _ _ _" displays when the oven is connected to power for the first time. Press red "STOP/RESET" button to enter Idle Mode.
Note: While in Idle Mode, no buttons can be pressed.
1. The oven will enter Idle Mode after a number of seconds have expired in Ready Mode or Pause Mode without a key being pressed or the door
being opened & closed. The number of seconds is determined by the Keyboard Timeout Window, set by User Option 4.
2. During Idle Mode the display is blank and there will be no oven activity.
3. Opening and then closing the oven door will cause the oven to exit Idle Mode and enter Ready Mode.
1. Opening and then closing the oven door while in Idle Mode will put the oven into Ready Mode.
2. During Ready Mode, "READY" displays.
3. From the Ready Mode, the oven can go into almost all of the other modes.
4. The fan and the lamp remain on for 60 seconds after last use. This is a cooldown feature of the microwave.
1. While the oven door is open, the oven will enter Door Open Mode.
2. During this mode, the display is blank. If the door is opened during cooking, "DOOR" and "OPEN" will display in turn.
3. When the door is closed, if User Option OP:60 is selected and the oven was running a manual or preset cook cycle, the oven shall enter Pause
Mode. In all other cases, the oven shall be put into Door Open Mode with User Option OP:61 set, any information about a running Manual or
Preset Program will be cleared.
1. While in Manual Cook Mode or Preset Program Cook Mode, the oven will enter Pause Mode if the door is opened & closed or if the red "STOP/
RESET" button is pressed.
2. While in Pause Mode, the oven will display the remaining cooking time.
3. Only the fan and lamp will be on during Pause Mode.
4. Pause Mode will expire back to Idle Mode in the exact fashion as Ready Mode, dependent on User Option 4.
5. If the red "STOP/RESET" button is pressed, the oven will enter Ready Mode.
6. If the green "START/CONFIRM" button is pressed, the oven will go into Working Mode.
1. While the oven is in Ready Mode, press the "TIME ENTRY" button to enter Manual Cook Entry Mode.
2. While in Manual Cook Entry Mode, the oven will display "00:00".
3. Press the "HOLD 0%", "DEFROST 20%", "MEDIUM 50%", or "MED-HI 70%" button to select power level and it will be displayed on the LED.
4. If the same button is pressed twice, the power will change to "PL10". If no power is chosen, "PL10" is default.
5. Only the fan and lamp will be on during Manual Cook Entry Mode.
6. If the red "STOP/RESET" button is pressed, the oven the oven will enter Ready Mode.
7. If the green "START/CONFIRM" button is pressed, the oven will go into Manual Cook Mode.
1. Press the green "START/CONFIRM" button to enter Manual Cook Mode.
2. During this mode, the remaining cooking time is displayed and the fan and oven lamp will be on.
3. When cooking program finishes, the oven will enter End of Cook Cycle Mode.
4. If the red "STOP/RESET" button is pressed, the oven will enter Pause Mode.
1. After the time has expired in Manual Cook Mode or a Preset Program Cook Mode, the oven will enter the End of Cook Cycle Mode.
2. During this mode "DONE" is displayed.
3. If either User Option "OP:11" or "OP:12" is selected, the oven shall continue to sound until the user acknowledges this by either opening and
then closing the door or pressing the red "STOP/RESET" button. If User Option "OP:10" is selected, the oven will enter Idle Mode after the 3
second beep.
Power Up
Idle Mode
Ready Mode
Door Open Mode
Pause Mode
Manual Cook Entry Mode
Manual Cook Mode
End of Cook Cycle Mode

User Manual
1. Open the door and press "1" for (5) five seconds. The buzzer will sound once
and enter Programming Mode.
2. "PROGRAM" will show in the LED display.
3. Press any number (0-9) and the LED will display the saved time.
Then you can input the time you need.
4. Press the desired Power Button (0% HOLD, 20% DEFROST, 50% MEDIUM, or
70% MED-HI) to input the power level. The LED display will show the related
power. If the same button is pressed twice, or if no power is chosen, "PL10" is
default.
5. To change the cooking factors: If you press "X2", LED display will show "CF:80".
80% is the default power. If you would like to change the power, press one of
the Power Buttons to set.
6. After setting the time and power, press and hold the green "START/CONFIRM"
button for 30 seconds. The LED display will show "PROGRAM" once settings
have been saved.
7. If the set cooking time exceeds the maximum time, a buzzer will sound when
"START/CONFIRM" is pressed. The LED display will return to "PROGRAM" and
the previously set time will not change.
8. To return to Ready Mode: Close the door.
9. To cancel programming, press the "PAUSE/RESET" button to return to Door
Open Mode. Unsaved program will be lost.
10. If there is a program saved as a memory feature, press the related number
button and the saved program will start. If there is no saved program set, the
buzzer will sound when the number button is pressed.
1. This mode allows cooking through a one button operation.
2. While in Ready Mode, press one of the ten digit buttons on the keyboard to run the Preset Program associated with that button.
3. Remaining cooking time will be displayed. If it is a multi-stage cooking preset, the total remaining time will be displayed, not a particular stage
cooking time.
4. When the cooking program is finished, the oven will enter End of Cook Cycle Mode.
5. If the red "STOP/RESET" button is pressed, the oven will enter Pause Mode.
1. While the oven is cooking or in Pause Mode, if User Option "OP:51" is selected, press a preset button to start it's Preset Cooking Program
automatically.
2. The remaining cooking time will be displayed.
3. When the cooking program is finished, the oven will enter End of Cook Cycle Mode.
4. If the red "STOP/RESET" button is pressed, the oven will enter Pause Mode.
Note:
1. If the electricity is cut off, the saved programs will NOT be lost.
2. If a program needs to be reset, just repeat the above steps.
3. If "STOP/RESET" is pressed at the last step, the microwave will
return to Door Open Mode and the setting will NOT be saved.
Programming Mode
This mode allows the user to assign cook times and power levels to the one touch buttons.
Preset Program Cook Mode
On the Fly Cooking
NOTE: See following page for User Option setting instructions.
Control Panel and Features
OPERATION
(1) Power Buttons
(2) Time cook Button
(3)
(4)
Start Button
(5)
X2 Button
(6) Number Button
Stop/Reset Button
10
(1)
(2) (3)
(4) (5)
(6)
(1)

User Manual
USER OPTIONS
Bold = Default
OPTION SETTING DESCRIPTION
1: End of Cooking Tone
OP:10 3 Second Beep
OP:11 Continuous Beep
OP:12 5 Quick Beeps, Repeating
2: Beeper Volume
OP:20 Beeper Off
OP:21 Low
OP:22 Medium
OP:23 High
3: Beeper On/Off OP:30 Beeper Off
OP:31 Beeper On
4: Keyboard Input Time Window
OP:40 15 Seconds
OP:41 30 Seconds
OP:42 60 Seconds
OP:43 120 Seconds
5: On The Fly OP:50 Disabled
OP:51 Enabled
6: Door Reset OP:60 Disabled
OP:61 Enabled
7: Maximum Cook Time OP:70 60 Minutes
OP:71 10 Minutes
8: Manual Programming OP:80 Disabled
OP:81 Enabled
9: Double Digit OP:90 Single Digit Mode - 10 Programs
OP:91 Double Digit Mode - 100 Programs
1. When the oven is in Ready Mode, press "X2" button and then press any number button within 5 seconds to begin cooking with the preset
cooking setting adjusted for quantity.
2. When the "X2" button is pressed "DOUBLE" will be displayed. When a number button is pressed, the quantity preset time will be displayed.
For Example: Number button "5" has a preset time of 1:00. When "X2" is pressed beforehand, the time will change to 1:48 (1:00 x 1+0.8).
3. When the cooking program finishes, the oven will enter End of Cook Cycle Mode.
1. A maximum of (3) three stages can be set under Cooking Mode or Memory Mode.
2. Set the power and time for the first stage, then press "TIME ENTRY" to set the second stage. Repeat to set the third stage.
3. When setting the second or third stage, upon pressing "TIME ENTRY", "STAGE-2" or "STAGE-3" will be displayed.
4. Press the green "START/CONFIRM" button to start cooking.
1. Open the oven door and press "2" for 5 seconds. The buzzer will sound and the oven will enter User Option Mode.
2. "OP: - -" will be displayed.
3. Press any number button to enter related mode setting.
For Example: To set the volume of the buzzer to medium: Press "2", "OP:22" will be displayed. If you want to change, keep pressing "2". The LED
will display "OP:20", "OP:21", "OP:22", "OP:23", "OP:20" in cycle.
4. Press the green "START/CONFIRM" button to save the current setting. After it is saved, "OP: - -" will display again.
5. If the green "START/CONFIRM" button is NOT pressed at the last step, the program will NOT be saved and it will revert to it's previous setting.
6. During the setting process, press red "STOP/RESET" button to enter Door Open Mode. Closing the door will enter Ready Mode.
Double Quantity Cooking
Stage Cooking Programming
This allows the user to cook food items at a combination of various Power Levels.
User Option Mode

User Manual
CARE AND CLEANING
• To avoid electrical shock which can cause severe personal injury or death, unplug power
cord or open circuit breaker to oven before cleaning or removing light bulb.
TROUBLESHOOTING
COMPLAINT POSSIBLE CAUSE REMEDY
Dim oven light Cooking at low power level This is normal
Steam forms on oven door When cooking foods in a microwave steam is
generated.
This is normal
Hot air expelled from vents Foods cooking in a microwave may release
heat
This is normal
Oven does not start Power cord not plugged in correctly
Fuse blown or circuit breaker open
Malfunctioning outlet
Door not closed
Plug cord into outlet correctly
Replace fuse (should be repaired by
authorized servicer) or reset breaker
Test outlet with other electrical appliance
Close door
WARRANTY
1 YEAR REPLACEMENT WARRANTY
• This warranty is effective from the time of purchase.
• This warranty is not effective if damage occurs because of accident, carelessness, improper installation, lack of
proper set – up, supervision when required or if the equipment is installed or operated in any manner contrary to
the installation and operating instructions.
• Work performed by unauthorized personnel or unauthorized service agencies voids this Warranty
• This warranty does not apply to, and Solwave is not responsible for any warranty claims on products sold or used
outside of the contiguous United States.
• This equipment is intended for commercial use only. Warranty is void if equipment is installed in anything other
than commercial applications.
• Cleaning the interior and exterior will
require a mild detergent, water and a
soft sponge or cloth.
• Do not use cleaners that include
ammonia or citrus.
• Do not use water pressure cleaning
systems on your microwave.
• Inspect air vents monthly and clean
using a damp cloth.
1. Open the oven door and press "3" for 5 seconds to enter Service Mode.
2. "SERVICE" will be displayed.
3. To check the number of times the door has been opened or closed, press the number "3". The LED will display the times.
4. To clear this number, press number "4". "4-CLEAR" will be displayed. Press the green "START/CONFIRM" button and "CLEARED" will be
displayed. The message will be cancelled.
5. Press the red "STOP/RESET" button to enter Door Open Mode.
6. Close the door to enter Ready Mode.
1. In Power Up or Ready Mode, press the green "START/CONFIRM" and "0" buttons simultaneously to Restore Factory Defaults.
Service Mode
Restore Factory Default Settings
Table of contents
Other Solwave Microwave Oven manuals
Solwave
Solwave 180MWASHD12 User manual
Solwave
Solwave 180MW1200T User manual
Solwave
Solwave 180MW1000D User manual
Solwave
Solwave 180MW1000T User manual
Solwave
Solwave 180MWASS022 User manual
Solwave
Solwave SWA-T Series User manual
Solwave
Solwave SWAFP Series User manual
Solwave
Solwave 180MWHD12 User manual

Solwave
Solwave 180MW1000D User manual
Solwave
Solwave 180MWAS12T User manual
