Somogyi Elektronic home SMA 68 User manual

bedienungsanleitung
eredeti használati utasítás
návod na použitie
manual de utilizare
uputstvo za upotrebu
navodilo za uporabo
instruction manual
SMA 68
Made for Europe

EN - Front panel
1. sensor area of contact free phase detector
2. phase detector indicator
3. LC display
4. pushbuttons
5. function selector switch
6. connecting sockets
DE -
Frontplatte
1. Sensorbereich für den berührungslosen Phasenprüfer
2. Leuchtmelder des Phasenprüfers
3. LCD-Anzeige
4. Drucktaster
5. Funktionsumschalter
6. Anschlussbuchsen
HU - Előlap
1. érintés nélküli fáziskereső érzékelési területe
2. fáziskereső visszajelző
3. LC-kijelző
4. nyomógombok
5. funkcióváltó kapcsoló
6. csatlakozóaljzatok
SK -
Predný panel
1. miesto snímania bezdotykovej skúšačky fáz
2. kontrolka skúšačky fáz
3. LC displej
4. tlačidlá
5. otočný prepínač funkcií
6. pripojovacie zásuvky
RO - Panoul frontal
1. zona senzorului care detectează faza circuitelor electrice
(fără a nevoie de realizarea contactului)
2.
indicatorul luminos aferent funcţiei de detectare a fazei circuitelor electrice
3. aşaj cu cristale lichide (LC)
4. butoane de comandă
5. comutatorul rotativ pentru selectarea funcţiei dorite
6. borne de intrare
SRB -
Prednja ploča
1. površina za bezkontaktno ispitivanje faze
2. Indikator ispiticača faze
3. LC displej
4. tasteri
5. prekidač za promenu mernog opsega
6. utičnice za merne kablove
SLO -
Sprednja plošča
1. površina za brezkontaktno preiskovanje faze
2. kazatelj preiskovalca faze
3. LC zaslon
4. stikala
5. stikalo za spremembo merilnega obsega
6. vtičnice za merilne kable
SMA 68

SMA 68 Digital multimeter
EN
Overview: This digital multimeter was designed with a view to comply with
the safety requirements of standard IEC 61010-1. Complies with 600 V CAT
IV and 1000 V CAT III measurement categories and Category 2 contamina-
tion requirements. Before using this instrument, please read this instruction
manual and observe the relevant safety precautions. CAT IV: Measure-
ments on low voltage power sources. For example, consumption meters,
input cabinets, primary surge protection devices. CAT III: Measurements
inside buildings or plants. For example, xed equipment, distribution panel,
cabling, bus bars, switches, surge protection distribution box, etc. CAT II:
Measurements on circuits that are directly connected to low voltage circuits.
For example, measurements on household appliances, portable devices
and similar equipment. CAT I: Measurements on electric circuits that are not
directly connected to mains.
Warning! These operating instructions contain the information and
warnings required for the safe use and maintenance of the unit. Read and
understand the instructions for use before using the device. Failure to un-
derstand the instructions or observe the warnings can result in serious per-
sonal injury or property damage. For your safety, please use the probe cable
included with the multimeter. Before use, please check that your multimeter
is intact and serviceable.
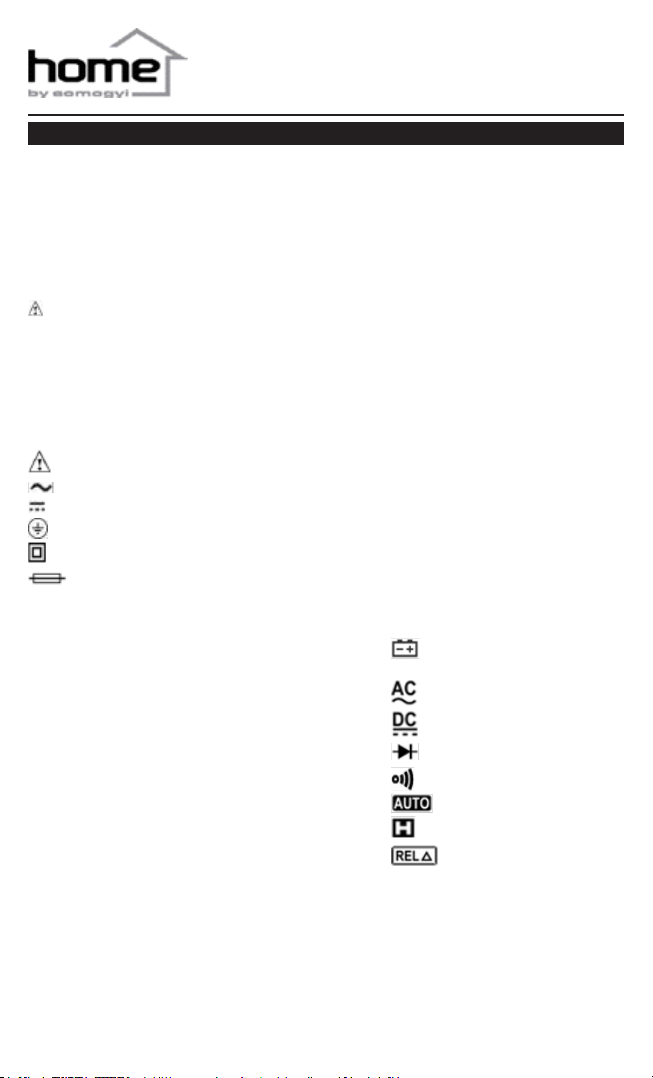
Safety Markings
Important warning Read
the contents of the instruction manual.
Alternating current
Direct current
Grounding
Double grounding (Contact protection class II)
Fuse protected.
Please replace according to the instructions for use.
Maintenance
In order to split the outer shell of the multimeter or remove the battery
compartment rst unplug the probe cable. Before opening the multimeter,
remove the battery and check that there is no static electricity charge pres-
ent to ensure that the multimeter’s components are not damaged. Before
opening the multimeter, you should be aware that dangerous voltage may
be present in some of the capacitors even if the device is switched off.
The calibration, maintenance and servicing of the multimeter should only
be performed by a specialist who is completely familiar with the operation
of the multimeter and the shock hazard involved. If not planning to use the
multimeter for an extended period of time, please remove the battery and
avoid storing the unit in excessively warm or humid environments. If neces-
sary, replace the fuse with one matching the parameters below:
F1: 6x30 mm, F 400 mA / 1000 V
F2: 6x30 mm, F 10 A / 500 V
Do not use any abrasives or solvents on the device. Only use a damp cloth
or mild detergent for cleaning the unit.
During Use
• If the unit is used near strong electromagnetic interference, please note
that the multimeter’s operation can become unstable or it may indicate
malfunction.
• Never exceed the safety limits specied in the instructions for each mea-
surement range.
• Never use the unit without its rear panel fully attached.
• Remove from circuit and discharge the high voltage capacitors before
measuring resistance, interruption, diodes or capacity.
• Be very careful when working with bare cables or bus bars.
• If any irregular operation is detected on the multimeter, immediately switch
it off and have it serviced.
• If the value to be measured is unknown, check the highest possible mea-
surement range on the multimeter, or whenever possible, select the auto-
matic measurement range mode.
• Before turning the limit selection switch, disconnect the probe cable from
the measurement circuit.
• Never perform resistance or interruption measurements on energized
circuits.
• When performing measurements on TV sets or circuits with high AC, al-
ways remember that there might be high amplitude voltage on the test
points, which can damage the multimeter.
• If the voltage to be tested exceeds the effective value of 60 V DC or 30 V
AC, work carefully in order to avoid sustaining an electric shock.
• If the battery symbol appears on the display, the battery must be replaced
immediately. Low battery voltage may result in measurement errors, elec-
tric shock, or even injury.
• Keep your ngers away from the connecting sockets.
• Do not use the multimeter in the presence of ammable gas, vapours
or dust.
• Before each use, check the unit in order to ensure proper operation (e.g.,
using a known voltage source).
• When performing CAT III and CATIV voltage measurements, the voltage
may not exceed 1000 V and 600 V, respectively.
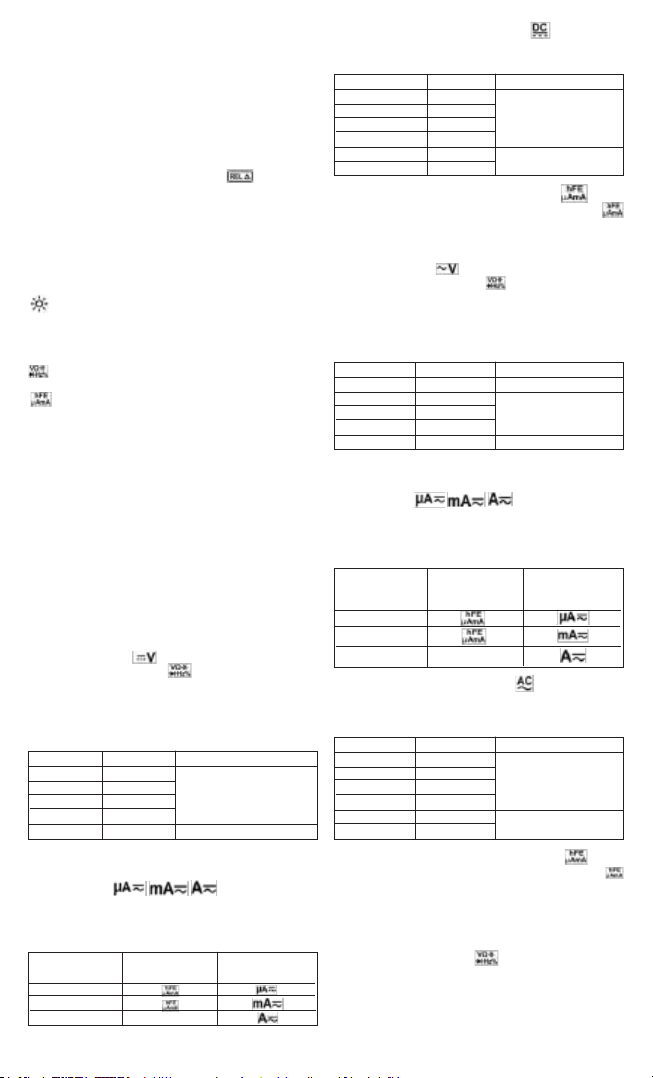
General description
This instrument features a 4 digit, 7-segment display. It can be used to mea-
sure direct current, alternating current, DC voltage, AC voltage, resistance,
frequency, capacity, ll factor, diodes and interruption, as well as for testing
transistors. Features a contact free phase detector function. Capable of per-
forming relative measurements, has background illumination, and automati-
cally or manually switches measurement ranges. The reading can be saved
on the display. Switches off automatically.
Pushbuttons
FUNC If more than one secondary function is available at any given
dial setting, this pushbutton can be used to toggle them. Each
push of the button shifts to the next function.
RANGE Manual measurement range selection pushbutton: Pressing
the button once will cause the multimeter to enter manual
measurement range mode, and each addition press will shift
it to the next measurement range. Keeping the button
pressed for 2 seconds will cause the unit to return to
automatic measurement range selection.
REL Relative value. The current reading is stored at the moment
the button is pressed, the symbol appears on the display
and the display is cleared. Afterwards, the reading appearing
on the display will be of a value relative to the previous one.
Pressing the button again or changing functions will cause
the instrument to clear the relative reading.
HOLD Pressing this button will store the measured reading on the
display. Pressing the button again or changing functions will
cause the instrument to clear the data.
Hz/Duty Frequency/duty factor measurement toggle button.
Each push of the button shifts to the next function.
Backlight
Display symbols
low battery
negative input polarity
AC voltage/
alternating current
DC voltage/
direct current
diode test
interruption test
automatic measurement
range change
reading saved
relative reading saved
% ll factor measurement
hFE transistor test
mV, V voltage measurement
µA, mA, A current measurement
Ω, KΩ, MΩ resistance measurement
Hz, KHz, MHz frequency measurement
nF, µF capacity measurement
–

Input sockets
COM common socket for all quantities to be measured and transistor
testing (COM) (negative)
voltage, resistance, capacity, frequency, duty factor and diode
tester input (positive)
current (0 – 400 mA), transistor tester (IN) input (positive)
10 A current (400 mA – 10 A) input (positive)
Accuracy
Accuracy is ensured for one year after calibration, at an operating tempera-
ture of 18 °C – 28 °C and a relative humidity of 0% – 75%.
FEATURES
Battery saver function
In order to conserve power, the multimeter automatically switches off after
approx. 15 minutes if no measurement is performed or function is changed.
This is indicated by 5 short beeps 1 minute before switching off then the unit
switches off with a beep.
Contact free phase detection (NCV)
Set the dial to the “NCV” position. If the multimeter’s front (indicated by 1 in
gure) is brought close to a live conductor, the multimeter’s light (indicated
by 2 in gure) and buzzer will activate. Precondition for activation: voltage
exceeding 110 V AC RMS.
Note: Do not rely solely on the instrument, as dangerous voltage may still
be present in the conductor being tested even if there is no indication. De-
tection can depend on the type of socket, the thickness of insulation, RF
interference and other factors, which can falsify the measurement.
DC voltage measurement ( )
Connect the red probe cable to the socket, and the black one to the
“COM” socket. Set the dial to the DC voltage position. Connect the mea-
surement probes to the circuit to be measured.
Note: The reading can be unstable, especially in the 400 mV measurement
range, if the probe cable is not connected to the circuit being measured.
Measurement limit Resolution Accuracy
400 mV 0.1 mV ±(0.5% offset + 2 digits)
4 V 1 mV
40 V 10 mV
400 V 100 mV
1000 V 1 V ±(0.8% offset + 2 digits)
Input impedance: 10 MΩ
Maximum input voltage: 1000 V DC or 750 V AC RMS
DC measurement ( )
Connect the black probe cable to the “COM” socket. Connect the red probe
cable and set the selector dial according to the current values to be mea-
sured:
Current to be measured Red probe cable Dial setting
connection (socket)
0 – 4 mA
4 – 400 mA
0.4 – 10 A 10 A
Use the “FUNC” pushbutton to set the DC ( ) function. Interrupt the
circuit whose current is to be measured then connect the probe to the points
to be measured.
Measurement limit Resolution Accuracy
400 µA 0.1 µA ±(0.8% offset + 2 digits)
4 mA 1 µA
40 mA 10 µA
400 mA 100 µA
4 A 1 mA ±(2.0% offset + 5 digits)
10 A 10 mA
Overload protection: The F400 mA / 1000 V fuse is at the socket
while the F10A/500 V fuse is at the “10A” socket.
Max input current: socket: 400 mA DC or AC RMS; at “10A” socket:
10A DC or AC RMS If the measured current is greater than 5 A, the duration
of continuous measurement should not exceed 10 seconds, and at least 1
minute should elapse between two measurements.
Measurement of AC voltage ( )
Connect the red probe cable to the socket, and the black one to the
“COM” socket. Set the dial to the AC voltage position. Connect the mea-
surement probes to the circuit to be measured. Note: The reading can be
unstable, especially in the 400 mV measurement range, if the probe cable is
not connected to the circuit being measured.
Measurement limit Resolution Accuracy
400 mV 0.1 mV ±(2% offset + 3 digits)
4 V 1 mV ±(0.8% offset + 2 digits)
40 V 10 mV
400 V 100 mV
750 V 1 V ±(1% offset + 3 digits)
Input impedance: 10 MΩ. Maximum input voltage: 1000 V DC or 750 V AC
RMS. Measuring range: 40 Hz- 400 Hz
Measurement of AC ( )
Connect the black probe cable to the “COM” socket. Connect the red probe
cable and set the selector dial according to the current values to be mea-
sured:
Current to be measured Red probe cable Dial setting
connection (socket)
0 – 4 mA
4 – 400 mA
0.4 – 10 A 10 A
Use the “FUNC” pushbutton to set the AC ( ) function. Interrupt the
circuit whose current is to be measured then connect the probe to the points
to be measured.
Measurement limit Resolution Accuracy
400 µA 0.1 µA ±(1.5% offset +2 digits)
4 mA 1 µA
40 mA 10 µA
400 mA 100 µA
4 A 1 mA ±(2.5% offset +5 digits)
10 A 10 mA
Overload protection: The F400 mA / 1000 V fuse is at the socket while
the F10A/500 V fuse is at the “10A” socket.
Max input current: socket: 400 mA DC or AC RMS; at “10A” socket:
10A DC or AC RMS
If the measured current is greater than 5 A, the duration of continuous
measurement should not exceed 10 seconds, and at least 1 minute should
elapse between two measurements.
Measuring range: 40 Hz – 400 Hz
Frequency measurement
Connect the red probe cable to the socket, and the black one to the
“COM” socket. Set the dial to the “Hz%” measurement range. Use the “Hz/
DUTY” pushbutton to set the frequency (Hz) function. Connect the mea-
surement probe to the circuit to be measured.
Note: Frequency measurement only works with automatic measurement
range selection. Do not exceed the input voltage as this will damage the
instrument.
Measurement limit Resolution Accuracy
9.999 Hz 0.001 Hz ±(0.5% offset + 2 digits)
99.99 Hz 0.01 Hz
999.9 Hz 0.1 Hz
9.999 kHz 1 Hz
99.99 kHz 10 Hz
999.9 kHz 0.1 kHz
9.999 MHz 1 kHz

Input voltage: 200 mV – 10 V AC RMS
Over-voltage protection: 250 V DC or 250 V AC RMS
Duty factor measurement
Connect the red probe cable to the socket, and the black one to the
“COM” socket. Set the dial to the “Hz%” measurement range. Use the “Hz/
DUTY” pushbutton to set the duty factor (%) function. Connect the measure-
ment probe to the circuit to be measured.
Note: Do not exceed the input voltage as this will damage the instrument.
Measuring range Resolution
0 – 100% 0.1%
Input voltage: 200 mV – 10 V AC RMS
Over-voltage protection: 250 V DC or 250 V AC RMS
Diode and interruption testing
Diode testing: Connect the red probe cable to the socket, and the
black one to the “COM” socket (the red probe is for “+” polarity). Set the dial
to the position. Use the “FUNC” pushbutton to set the diode testing (
) function. Connect the red probe cable to diode’s anode, and the black
one to its cathode. The display will show the diode’s approximate forward
voltage. If the connection is reversed, “OL” will appear in the display.
Interruption testing: Connect the red probe cable to the socket, and
the black one to the “COM” socket. Set the dial to the position. Use the
“FUNC” pushbutton to set the interruption testing ( ) function. Connect
the measurement probe to the circuit to be tested. If the circuit is connected
to a power source, switch of the power source and discharge the capaci-
tors before starting measurement. Short-circuits (less than 60 Ω) will be
indicated by the built-in buzzer.
Function Resolution Measuring environment
1 mV Measurement current:
approx. 1 mA
Idle voltage: approx. 2.8 V
The built-in buzzer will Idle voltage less
activate below 60 Ω than 700 mV
Overload protection: 250 V DC or 250 V AC RMS
Transistor testing
Connect a transistor testing socket to the instrument so that its “COM”
connector plugs into the multimeter’s “COM” socket, and its “IN” connector
plugs into the multimeter’s socket. Set the dial to the “hFE” measure-
ment range. Insert the transistor to be tested into the testing socket. Ob-
serve the pin layout and transistor type (PNP, NPN).
Measurement limit Description Measuring environment
hFE Estimated hFE on display Base current: 10 µA
(0 - 1000) Vce: approx. 2.8 V
Capacity measurement ( )
Connect the red probe cable to the socket, and the black one to the
“COM” socket. Set the dial to the position. Use the “FUNC” pushbutton
to set the capacity measurement (nF) function. Connect the measurement
probe to the circuit to be measured. If the capacitor to be measured is con-
nected to a circuit, switch of the power source and discharge the capacitors
before starting measurement. Note: Capacity measurement only works with
automatic measurement range selection. When performing measurements
please note that the larger the capacity (µF) being measured, the more time
it takes for the multimeter to take an accurate measurement.
Measurement limit Resolution Accuracy
4 nF 1 pF ±(4.0% offset +15 digits)
40 nF 10 pF
400 nF 0.1 nF
4 µF 1 nF
40 µF 10 nF
200 µF 100 nF
Overload protection: 250 V DC or 250 V AC RMS
Resistance measurement (Ω)
Connect the red probe cable to the socket, and the black one to
the “COM” socket. (The red probe cable is “+” polarity). Set the dial to the
position. Use the “FUNC” pushbutton to set the resistance measure-
ment (Ω) function. If the resistor to be measured is connected to a circuit,
switch of the power source and discharge the capacitors before starting
measurement.
Measurement limit Resolution Accuracy
400 Ω 0.1 Ω ±(0.8% offset + 3 digits)
4 kΩ 1 Ω ±(0.8% offset + 1 digit)
40 kΩ 10 Ω
400 kΩ 100 Ω
4 MΩ 1 kΩ
40 MΩ 10 kΩ ±(1.0% offset + 2 digits)
Open circuit voltage: under 700 mV
Over-voltage protection: 250 V DC or 250 V AC RMS.
Battery and fuse replacement
If the “ ” icon appears on the display, the batteries require replacing.
The fuse only needs to be replaced rarely due to errors associated with
use. Prior top replacing the battery/fuse, turn off the instrument and unplug
the probe cables. For battery replacement, use a screwdriver to remove the
screw from the rear panel. For fuse replacement rst remove the instrument
from its case then remove the screws from the rear panel. Replace the
battery/fuse. Observe the correct battery polarity. Replace the cover and
tighten the screws.
Warning:
Before opening the instrument, make sure that the probe cables have been
removed from the measuring circuit. Replace and tighten the screws so that
the device operates in a stable manner during use and accident hazards
are avoided.
Accessories: • Instructions for Use • probe cable • transistor testing
socket • 9 V (6F22) battery • box
Waste equipment must not be collected separately or disposed
of with household waste because it may contain components
hazardous to the environment or health.
Used or waste equipment may be dropped off free of charge at the point of
sale, or at any distributor which sells equipment of identical nature and func-
tion. Dispose of product at a facility specializing in the collection of electronic
waste. By doing so, you will protect the environment as well as the health
of others and yourself. If you have any questions, contact the local waste
management organization. We shall undertake the tasks pertinent to the
manufacturer as prescribed in the relevant regulations and shall bear any
associated costs arising.
Batteries, whether alkaline or rechargeable, must not be handled together
with regular household waste. It is the legal obligation of the product’s user
to dispose of batteries at a nearby collection center or at a retail shop. This
ensures that the batteries are ultimately neutralized in an environment-
friendly way.
Specications
• measurement category: CAT III 1000 V, CAT IV 600 V and Category 2
contamination
• fuses: 6x30 mm, F 400 mA / 1000 V quick blow; 6x30 mm, F 10 A / 500
V quick blow
• ambient temperature and humidity: 0 – 40 °C (<80% relative humidity)
• operating altitude: <2000 m
• storage temperature and humidity: -10 – 60 °C (<70% RH and remove
the battery)
• maximum allowed voltage between the measurement device and ground:
1000 V DC or 750 V AC RMS
• display: 4 digit LCD display
• sampling frequency: approx. 3 / second
• power supply: 9 V (6F22) battery
• reading over measurement limit: “OL” appears in the display window.
• polarity indication: “-” is displayed for negative polarity.
• exhausted battery: “ “ icon appears on the display.
• dimensions: 195 mm x 92 mm x 55 mm
• weight: approx. 380 g (including battery)
Table of contents
Languages:
Other Somogyi Elektronic Multimeter manuals