manuals.online logo
Brands
  1. Home
  2. •
  3. Brands
  4. •
  5. SonicWALL
  6. •
  7. Network Router
  8. •
  9. SonicWALL SOHO APL31-0B9 User manual

SonicWALL SOHO APL31-0B9 User manual

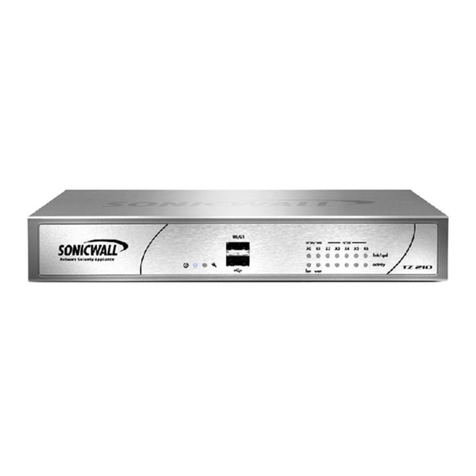
1SOHOfrontandbackpanels
Back Panel
Front Panel
10/100/act
SonicWall
SOHO
1000/act
X0
lan wan
X1 X2 X3 X4
wan SDHC powerlan
X0 X1 X2 X3 X4
console
SDHC Slot
For future use
Power
Test
Fast blinking is initializing
Slow blinking is SafeMode
Top - 10/100 Mbps when lit
Bottom - 1 Gbps when lit
X0 LAN Port X2/X3/X4
Congurable ports
USB port
Console Port
X1 WAN Port
Power
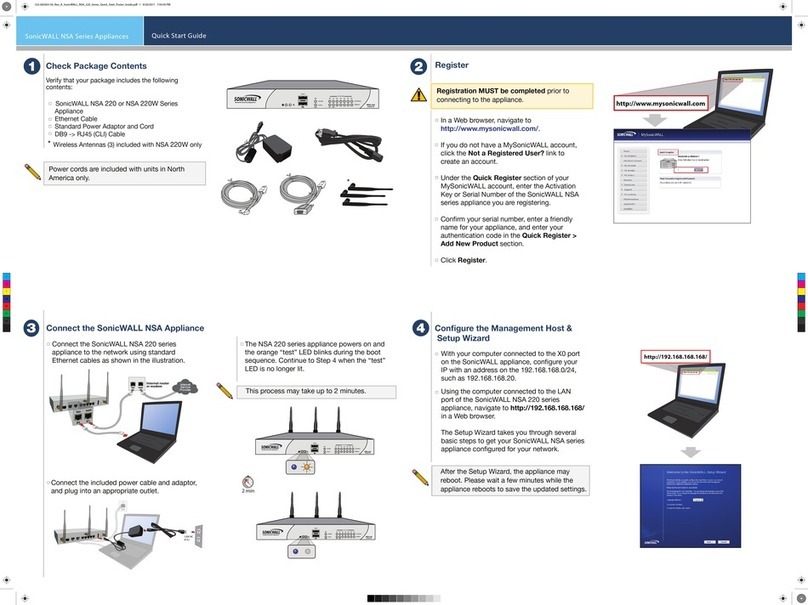
2Checkpackagecontents
Verifyyourpackagehasthefollowingcontents:
•SonicWallSOHOappliance
•Ethernetcable
•Standardpoweradaptor
•Standardpowercord
•QuickStartGuide
NOTE:Theincludedpowercordisapprovedforuseonly
inspecificcountriesorregions.Beforeusingapower
cord,verifythatitisratedandapprovedforuseinyour
location.
3Poweron
•Connectthepoweradaptortotheapplianceandto
thepowercable.Plugthepowercableintoan
appropriateoutlet(100‐240volts).
•TheSOHOappliancepowersonandtheTestLED
blinksduringthebootsequence.
120V AC
(U.S.)
2 min
CAUTION:Onlyusetheincludedpoweradaptorwith
thisappliance.Donotuseapoweradaptorthatis
damagedorfromanotherappliance.
4Connecttheinterfaces
•ConnecttheWANinterface(X1)toyourInternet
connectionusingastandardEthernetcable.
•ConnecttheLANinterface(X0)toyourcomputer
usingastandardEthernetcable.
5RuntheSetupWizard
•Navigatetohttps://192.168.168.168onyour
Webbrowser.
wan
X1
Internet
wan
X1
Internet
wan
X1
Internet
wan
X1 X0
Internet
wan
X1 X0
Internet
wan
X1 X0
Internet
wan
X1
Internet
wan
X1 X0
Internet
wan
X1 X0
Internet
wan
X1
lan
X0
Internet
http://192.168.168.168/
TIP:YourcomputershouldbeusingDHCPIPaddressing.
•Inthewindowthatopens,clickonthewordherein
thelinethatsays,“TolaunchtheSonicWallSetup
Wizard,clickhere.”
•TheSonicOSStartupWizardopens.

•ClickNextandentertheadministratorcredentialsto
changethepassword,ifyouwish.
•ClickNextandfollowthepromptsoneachscreento
configureanyoffollowing:
•ChangeTimeZone
•ConfigureModularDeviceType
•WANNetworkMode
•WANNetworkMode:NATEnabled
•LANSettings
•LANDHCPSettings
•PortAssignment
•Summary
•SetupWizardComplete
•Example—OntheWANNetworkModepage,select
themodethatyouusetoconnecttoyourInternet
NOTE:Thedefaultadministratorcredentialsare
Username:adminPassword:password
SonicWall™SOHO
QuickStartGuide
RegulatoryModelNumber:
APL31‐0B9
Copyright©2017SonicWallInc.Allrightsreserved.
SonicWallisatrademarkorregisteredtrademarkofSonicWallInc.and/oritsaffiliatesin
theU.S.A.and/orothercountries.Allothertrademarksandregisteredtrademarksare
propertyoftheirrespectiveowners.
TheinformationinthisdocumentisprovidedinconnectionwithSonicWallInc.and/orits
affiliates'products.Nolicense,expressorimplied,byestoppelorotherwise,toany
intellectualpropertyrightisgrantedbythisdocumentorinconnectionwiththesaleof
SonicWallproducts.EXCEPTASSETFORTHINTHETERMSANDCONDITIONSASSPECIFIED
INTHELICENSEAGREEMENTFORTHISPRODUCT,SONICWALLAND/ORITSAFFILIATES
ASSUMENOLIABILITYWHATSOEVERANDDISCLAIMSANYEXPRESS,IMPLIEDOR
STATUTORYWARRANTYRELATINGTOITSPRODUCTSINCLUDING,BUTNOTLIMITEDTO,
THEIMPLIEDWARRANTYOFMERCHANTABILITY,FITNESSFORAPART I C U LARPURPOSE,
ORNON‐INFRINGEMENT.INNOEVENTSHALLSONICWALLAND/ORITSAFFILIATESBE
LIABLEFORANYDIRECT,INDIRECT,CONSEQUENTIAL,PUNITIVE,SPECIALORINCIDENTAL
DAMAGES(INCLUDING,WITHOUTLIMITATION,DAMAGESFORLOSSOFPROFITS,
BUSINESSINTERRUPTIONORLOSSOFINFORMATION)ARISINGOUTOFTHEUSEOR
INABILITYTOUSETHISDOCUMENT,EVENIFSONICWALLAND/ORITSAFFILIATESHAVE
BEENADVISEDOFTHEPOSSIBILITYOFSUCHDAMAGES.SonicWalland/oritsaffiliates
makenorepresentationsorwarrantieswithrespecttotheaccuracyorcompletenessof
thecontentsofthisdocumentandreservestherighttomakechangestospecifications
andproductdescriptionsatanytimewithoutnotice.SonicWallInc.and/oritsaffiliatesdo
notmakeanycommitmenttoupdatetheinformationcontainedinthisdocument.
Formoreinformation,visithttps://www.sonicwall.com/legal.
SOHOQuickStartGuide
Updated‐January2017
232‐003417‐50RevA
Legend
WARNING :AWARNINGiconindicatesapotentialforpropertydamage,
personalinjury,ordeath.
CAUTION:ACAUTIONiconindicatespotentialdamagetohardwareorlossof
dataifinstructionsarenotfollowed.
IMPORTANT,NOTE,TIP,MOBILE,orVIDEO:Aninformationiconindicates
supportinginformation.
ServiceProvider(ISP).AllmodesexceptRouter‐based
offerautomaticWANIPaddressing(DHCP).
•Example—ToconfigureLANDHCPSettings,select
EnableDHCPServeronLANandentertheLAN
addressrangeintheappropriatefields.
•Selecttheinitialportsassignedtotheapplianceand
clickNext.
•TheSummarypagedisplaysyourconfiguration.Click
Apply,thenclosetheWizard.
6Registerproduct
•PointyourbrowsertotheapplianceLANIPaddress
(defaulthttps://192.168.168.168)andlogin
usingtheadministratorcredentials.
•ClickRegisterontheSystem>Statuspageunder
SecurityServices.
•LoginusingyourMySonicWallaccountnameand
password.IfyoudonothaveaMySonicWallaccount,
TIP:RegisteringtheappliancefromSonicOSrequiresthat
DNSServersettingsareconfiguredontheWAN(X1)
interface.
clicktheCreateMySonicWallaccountlinktocreate
anaccount.
•MySonicWallgetsthenecessaryinformationdirectly
fromtheSOHOappliance.Whenfinished,youwill
seeamessagethatregistrationhasbeencompleted.
7Getthelatestfirmware
•InaWebbrowser,navigateto
http://www.mysonicwall.com
•ClickDownloadsandselectSOHOFirmwarefromthe
SoftwareTypedrop‐downmenu.
NOTE:Yourappliancemustberegisteredtodownload
thelatestfirmware.
•Clickthelinkforthefirmwareyouwantandsavethe
filetoalocationonyourcomputer.
•OntheSOHOappliance,navigatetotheSystem>
SettingspageandclicktheUploadNewFirmware
button.
•ClicktheBrowsebuttontonavigatetoandselectthe
firmwareyoujustdownloaded.
•ClickUploadandwaitfortheuploadtocomplete.
•IntheFirmwareManagementTable,clicktheBoot
iconforyournewfirmware.
8MountingtheSOHOappliance
Foroptionalwallmounting,youneed:
•Screwdriver
•Drillwithappropriatesizebit
•Formountingondrywall:
WARNING:Donotmounttheapplianceontheceiling,it
isnotdesignedforsecureceilingmounting.
•Two#7pan‐headscrews,1inchlong(7.25mm
diameterhead,25mmlong)
•Twowallanchors
•Formountingonsolidwoodormetal:
•Two#7pan‐headwoodormachinescrews,1
inchlong(7.25mmdiameterhead,25mmlong)
Tomounttheapplianceonthewall:
1Drilltwoholes4.33inches(11cm)apartinthewall
whereyouwanttomounttheappliance.
2Ifusingwallanchors,insertawallanchorintoeach
hole.
3Insertascrewintoeachwallanchor(intoeachholeif
notusingwallanchors),leaving5/3 2 inches(0.4cm)of
thescrewsexposed(includingscrewhead).
4Positiontheappliancemountingslotsoverthescrews
andpressinanddownuntiltheapplianceissecurely
mounted.
9Safetyandregulatoryinformation
Installingtheappliance
Installinalocationawayfromdirectsunlightandsourcesofheat.Amaximumambient
temperatureof104ºF(40ºC)isrecommended.
Routecablesawayfrompowerlines,fluorescentlightingfixtures,andsourcesofnoisesuch
asradios,transmitters,andbroadbandamplifiers.
Theincludedpowercord(s)areapprovedforuseonlyinspecificcountriesorregions.Before
usingapowercord,verifythatitisratedandapprovedforuseinyourlocation.
Ensurethatnowaterorexcessivemoisturecanentertheunit.
Allowunrestrictedairflowaroundtheunitandthroughtheventsonthesideoftheunit.A
minimumof1inch(25.44mm)clearanceisrecommended.
Considerationmustbegiventotheconnectionoftheequipmenttothesupplycircuit.
Appropriateconsiderationofequipmentnameplateratingsmustbeusedwhenaddressing
thisconcern.Donotoverloadthecircuit.
Thisequipmentisnotintendedforuseatworkplaceswithvisualdisplayunits,inaccordance
with§2oftheGermanordinanceforworkplaceswithvisualdisplayunits.Toavoid
incommodingreflectionsatvisualdisplayworkplacesthisdevicemustnotbeplacedinthe
directfieldofview.
Lithiumbatterywarning
TheLithiumBatteryusedintheSOHOsecurityappliancemaynotbereplacedbytheuser.
ReturntheSOHOsecurityappliancetoaSOHO‐authorizedservicecenterforreplacement
withthesameorequivalenttyperecommendedbythemanufacturer.If,foranyreason,the
batteryorSOHOsecurityappliancemustbedisposedof,dosofollowingthebattery
manufacturer'sinstructions.
Cableconnections
AllEthernetandRS232(Console)cablesaredesignedforintra‐buildingconnectiontoother
equipment.Donotconnecttheseportsdirectlytocommunicationwiringorotherwiring
thatexitsthebuildingwheretheSOHOapplianceislocated.
Powersupplyinformation
IfthepowersupplyismissingfromyourSOHOproductpackage,pleasecontactSOHO
TechnicalSupportathttps://support.sonicwall.com/contact‐supportforareplacement.This
productshouldonlybeusedwithaULlistedpowersupplymarked“I.T.E.LPS”withanoutput
rated12VDC,minimum2.0A,Tma: minimum40degreeC.
Declarationofconformity
A“DeclarationofConformity”inaccordancewiththedirectivesandstandardshasbeen
madeandisonfileatSonicWallInternationalLimited,CityGatePark,Mahon,Cork,Ireland.
CEdeclarationscanbefoundonlineathttps://support.sonicwall.com.
台灣 RoHS
限用物質含有情況標示資訊請參考下列網址 :https://support.sonicwall.com.
操作說明 :
NOTE:Additionalregulatorynotificationsandinformationforthisproductcanbefound
onlineathttps://support.sonicwall.com.
輸入產品型號並搜尋
選擇 Technical Documentation
選擇 SafetyandRegulatoryReferenceGuide
Downloadthisdocument 下載此文件
VerwarnungWeiterehinweisezurmontage
WählenSiefürdieMontageeinenOrt,derkeinemdirektenSonnenlichtausgesetztistund
sichnichtinderNähevonWärmequellenbefindet.DieUmgebungstemperaturdarfnicht
mehrals40°Cbetragen.
FührenSiedieKabelnichtentlangvonStromleitungen,LeuchtstoffröhrenundStörquellen
wieFunksendernoderBreitbandverstärkern.
DasimLieferumfangenthaltenebzw.dieimLieferumfangenthaltenenNetzkabelsindnur
fürdieVerwendunginbestimmtenLändernundRegionenzugelassen.ÜberprüfenSiebitte
vorderVerwendungeinsNetzkabels,obesfürdieVerwendunginIhremLandoderIhrer
RegionzugelassenistunddengefordertenNormenentspricht.
StellenSiesicher,dassdasGerätvorWasserundhoherLuftfeuchtigkeitgeschütztist.
StellenSiesicher,dassdieLuftumdasGerätherumzirkulierenkannunddieLüftungsschlitze
anderSeitedesGehäusesfreisind.HieristeinBelüftungsabstandvonmindestens26mm
einzuhalten.
PrüfenSiedenAnschlussdesGerätsandieStromversorgung,damitderÜberstromschutz
sowiedieelektrischeLeitungnichtvoneinereventuellenÜberlastungderStromversorgung
beeinflusstwerden.PrüfenSiedabeisorgfältigdieAngabenaufdemAufkleberdesGeräts.
ÜberlastenSienichtdenStromkreis.
DiesesGerätistnichtzurVerwendunganArbeitsplätzenmitvisuellenAnzeigegeräten
gemäß§2derdeutschenVerordnungfürArbeitsplätzemitvisuellenAnzeigegeräten
vorgesehen.UmstörendeReflexionenamBildshirmarbeitsplatzzuvermeiden,darfdieses
ProduktnichtimunmittelbarenGesichtsfeldplatziertverden.
Verwarnunghinweiszurlithiumbatterie
DieinderInternetSecurityAppliancevonSonicWallverwendeteLithiumbatteriedarfnicht
vomBenutzerausgetauschtwerden.ZumAustauschenderBatteriemussdieSonicWallin
einvonSonicWallautorisiertesService‐Centergebrachtwerden.DortwirddieBatterie
durchdenselbenoderentsprechenden,vomHerstellerempfohlenenBatterietypersetzt.
BeachtenSiebeieinerEntsorgungderBatterieoderderSonicWallInternetSecurity
AppliancediediesbezüglichenAnweisungendesHerstellers.
Verwarnungkabelverbindungen
AlleEthernet‐undRS232‐C‐KabeleignensichfürdieVerbindungvonGerätenin
Innenräumen.SchließenSieandieAnschlüssederSonicWallkeineKabelan,dieausdem
Gebäudeherausgeführtwerden,indemsichdasGerätbefindet.
Informationenzurstromversorgung
WenndieStromversorgungvonderSonicWall‐Produktpaketfehlt,wendenSonicWallden
TechnischenSupportunterhttps://support.sonicwall.com/contact‐support.
DiesesProduktsolltenurmiteinemfürdenEuropäischenMarktgenehmigtenNetzteilmit
demLogo"I.T.E.LPS"undeinerAusgangsleistungvon12VDC,mind.2.0 A,Tma:mind.40
GradC,betriebenwerden.

Other SonicWALL Network Router manuals

SonicWALL SonicWave 641 User manual

SonicWALL

SonicWALL SonicWave 641 User manual

SonicWALL APL66 106 User manual

SonicWALL

SonicWALL APL66 106 User manual

SonicWALL SuperMassive 9800 User manual

SonicWALL

SonicWALL SuperMassive 9800 User manual

SonicWALL SonicPoint Service manual

SonicWALL

SonicWALL SonicPoint Service manual

SonicWALL TZ 210 Series User manual

SonicWALL

SonicWALL TZ 210 Series User manual

SonicWALL SOHO TZW User manual

SonicWALL

SonicWALL SOHO TZW User manual

SonicWALL TZ 215 Series User manual

SonicWALL

SonicWALL TZ 215 Series User manual

SonicWALL TZ 190 User manual

SonicWALL

SonicWALL TZ 190 User manual

SonicWALL Network Security NSA 220 Series User manual

SonicWALL

SonicWALL Network Security NSA 220 Series User manual

Popular Network Router manuals by other brands

TP-Link SafeStream TL-R600VPN Quick installation guide

TP-Link

TP-Link SafeStream TL-R600VPN Quick installation guide

virtual access GW2040 Series Management manual

virtual access

virtual access GW2040 Series Management manual

iDirect Evolution 8000 Series Installation and safety manual

iDirect

iDirect Evolution 8000 Series Installation and safety manual

Allied Telesis AT-8000GS Layer 2 stackable gigabit power over ethernet switch

Allied Telesis

Allied Telesis AT-8000GS Layer 2 stackable gigabit power over ethernet switch

D-Link DSL-3785 Installation guides

D-Link

D-Link DSL-3785 Installation guides

D-Link DWR-920 Troubleshooting

D-Link

D-Link DWR-920 Troubleshooting

3One data IRT5300-AW-5T2D Quick installation guide

3One data

3One data IRT5300-AW-5T2D Quick installation guide

Auto Mate ValveLink 8 user manual

Auto Mate

Auto Mate ValveLink 8 user manual

Speedtouch SpeedTouch 716v5 (WL) Cli reference guide

Speedtouch

Speedtouch SpeedTouch 716v5 (WL) Cli reference guide

Alink RoadRunner 84AP Quick installation guide

Alink

Alink RoadRunner 84AP Quick installation guide

JJ Plus JWAI203 user manual

JJ Plus

JJ Plus JWAI203 user manual

AirLive ARM-201E user manual

AirLive

AirLive ARM-201E user manual

Planet ISW-621 Series user manual

Planet

Planet ISW-621 Series user manual

Ruby Tech VS-820S user manual

Ruby Tech

Ruby Tech VS-820S user manual

Black Box VOE212 user manual

Black Box

Black Box VOE212 user manual

Black Box LR1560A-ST-R2 Specifications

Black Box

Black Box LR1560A-ST-R2 Specifications

ADDON EDFAMUX 10G User & installation manual

ADDON

ADDON EDFAMUX 10G User & installation manual

Black Box LB611A Specifications

Black Box

Black Box LB611A Specifications

manuals.online logo
manuals.online logoBrands
  • About & Mission
  • Contact us
  • Privacy Policy
  • Terms and Conditions

Copyright 2025 Manuals.Online. All Rights Reserved.