SONIQ Qvision LCDTV15/A User manual

LCDTV15/A
1
Instruction Manual
TABLE OF CONTENTS
Packing List .....................................................................1
Safety Precautions ..........................................................2
Feature Description .........................................................4
Identification of Controls ..................................................5
Remote Control...............................................................6
Preparing the Remote Control ........................................7
Connecting to the antenna..............................................8
General Function ............................................................9
Function Selection Menus ..............................................10
Troubleshooting Guide ...................................................11
Parts QTY
LCD TV 1
Remote Control 1
Operation Manual 1
Power Adapter 1
PACKING LIST
BEFORE YOU BEGIN...
Congratulations! You have purchased a Digital Television, one of the finest Color Televisions on the
market today.
This manual will guide you in the use of the many exciting features found on Digital televisions. These
features will enhance your viewing experience, making your television viewing more enjoyable than ever
before. However, before you begin to use your new TV set, it is important that you read through this entire
manual for complete operating instructions. After you are finished with this manual, please retain it for future
reference.
Customer Record
You will find the model number and chassis number of your TV on the back of your TV set.Record these num-
bers in the space provided below. Refer to them whenever you call Digital customer service or your
dealer regarding this product.
Model Number: ____________________________ Chassis Number: _____________________________
Safety Precautions
Please carefully study this manual and always keep it available. There are, however, some installation
and operation precautions which you should be aware of.
1.Read Instructions - All the safety and operating instructions should be read before the product is operated.
2.Attachments - Do not use attachments not recommended by the product manufacturer as they may cause haz-
ards.
3.Power Sources - This product should be operated only from the type of power source indicated on the mark-
ing label.If you are not sure of the type of power supply to your home, consult your product dealer or local power
company.For products intended to operate from battery power, or other sources, refer to the operating instruc-
tions.
4.Power/Signal Cord - The cords should be routed so that they are not likely to be walked on or pinched by items
placed upon or against them, paying particular attention to cords at plugs, convenience receptacles, and the
point where they exit from the product.
5. O ve rloading - Do not ove rload wall outlets, extension cords, or integral convenience receptacles as this can result
in a risk of fire or electric shock .
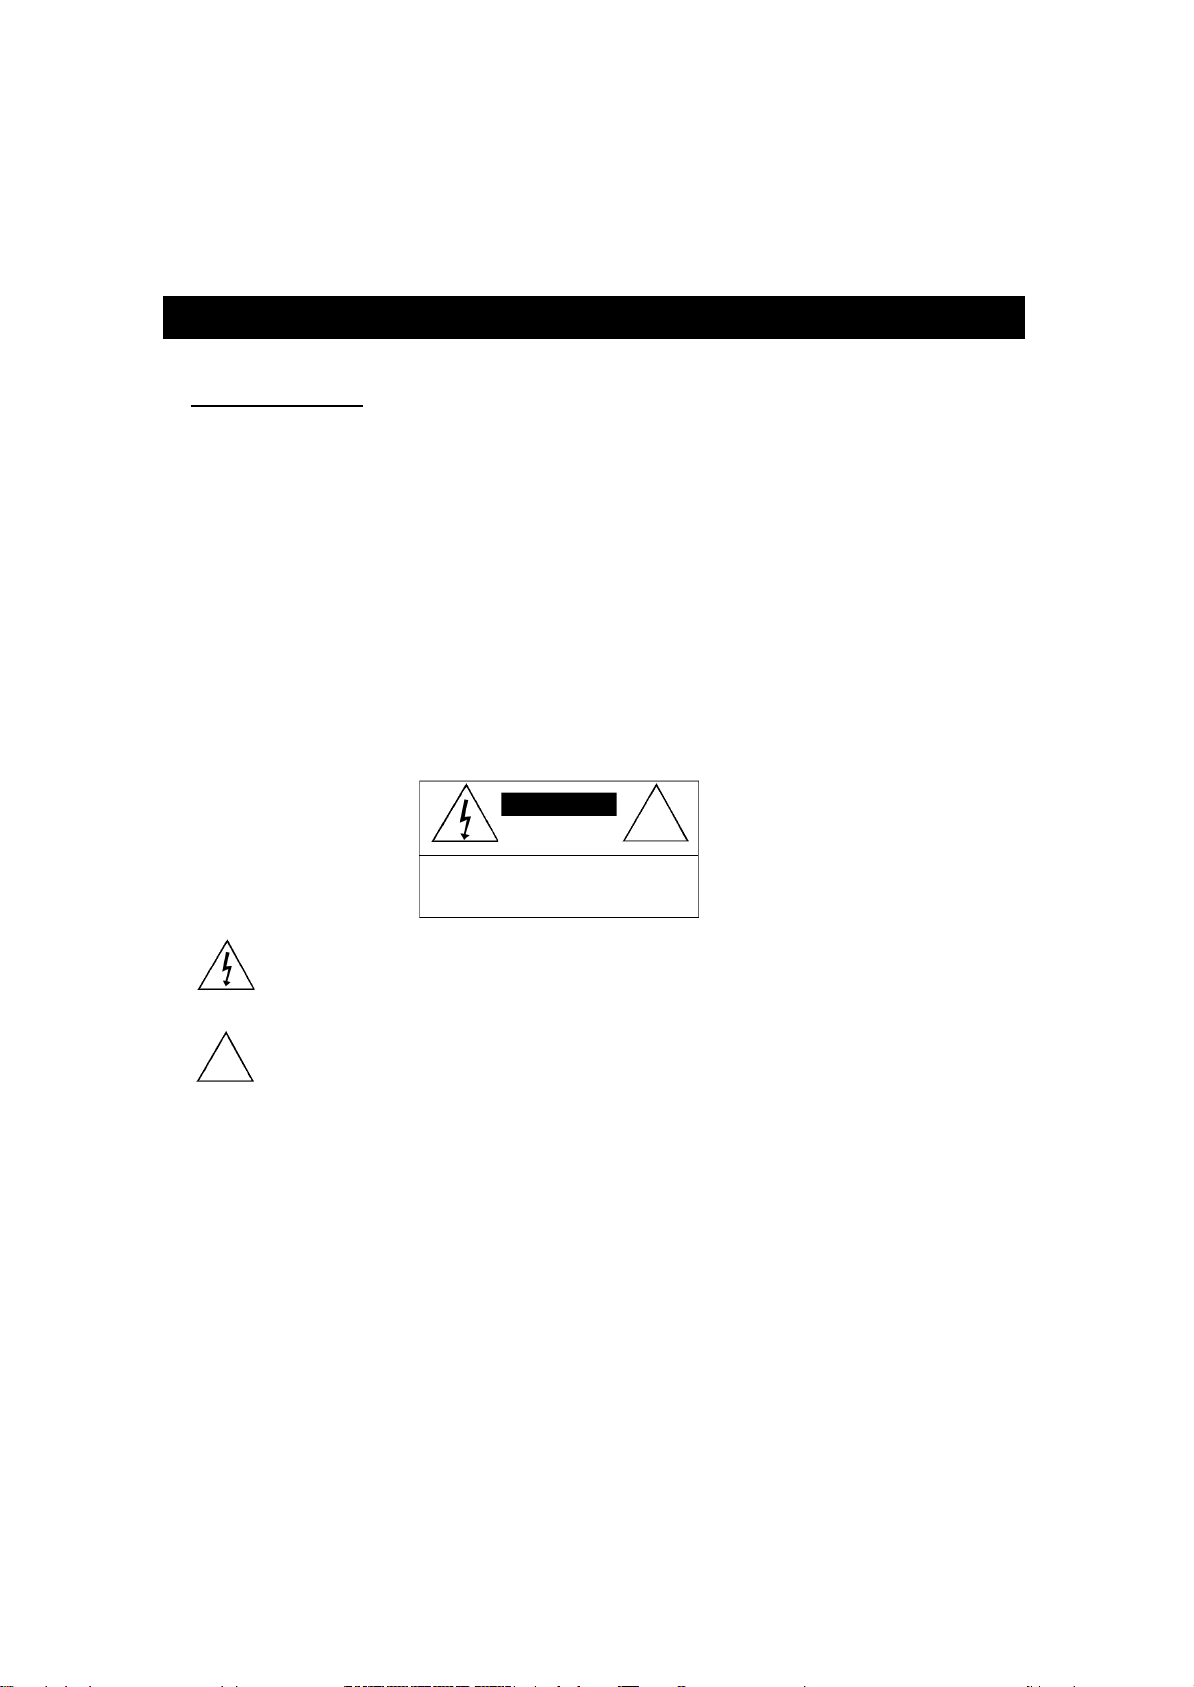
The lightning symbol in the triangle tells you that the voltage inside this product may be strong enough to cause
an electric shock
CAUTION
RISK OF ELECTRIC SHOCK
DO NOT OPEN
CAUTION:TO REDUCE THE RISK OF ELECTRIC
SHOCK, DO NOT REMOVE COVER (OR BACK).NO
USER-SERVICEABLE PART INSIDE.REFER
SERVICING TO QUALIFIED SERVICE PERSONNEL
!
!
The exclamation point in the triangle tells yo u that important operating and maintenance instructions follow
this symbol.DO NOTTRY TO S E RVICE THIS PRODUCT YO U R S E L F
2
LCDTV15/A

panel dry
6.Object and Liquid Entry - Never push objects of any kind into this product through openings as they may
touch dangerous voltage points or short-out parts that could result in a fire or electric shock.Never spill liquid
of any kind on the product.
7.
E nviroment - Do not place the unit on an unstable cart, stand, tripod or tabl e.And do not place your TV somew h e r e
the screen may be lighted straightly by sunlight or highlighted by any other source.Keep it away fo rm moisture, dust
and heat, keep some distance from the wall to ensure proper ve n t
i l
a
t i o
n
.The tempreture had better arranges 5oC -
4
0
o
C.To avoid any hurt, unplug your TV at a storm or unused for a long time of dura
t i
o n .
8.Cleaning - Unplug this product from the wall outlet before cleaning.Do not use liquid cleaners or aerosol clean-
e s.Use a damp cloth for cleaning or use a specified cleaner for LCD. N ever power on LCDTV before the LCD
s.
9.LCD Protection - Never scratch or hit the LCD with any hard wa
r
e, otherwise it will cause irrecove ra ble scra t c h ,
spots or damage.
1
0.Remote Control - Do not press, drop, moisten or disassemble the remote control, do not mix the old battery
with new one, or dispose of in fire or wa t e r.Ta ke the batteries out when they are exhausted or unused for a long
time so as to avoid liquid leakage causing damage to the remote.
11.Servicing - Do not attempt to service this product yourself as opening or removing covers may expose you
to dangerous voltage or other hazards. Refer all servicing to qualified service personnel.
Unplug this product from the wall outlet and refer servicing to qualified service personnel under the fo l l owing con-
d i t i o n s
:
a.When the power-supply cord or plug is damaged.
b. If liquid has been spilled, or objects have fallen into the product.
c.If the product has been exposed to rain or water.
d. If the product does not operate normally by following the operating instructions. Adjust only those controls
that are covered by the operating instructions as an improper adjustment of other controls may result in dam-
age and will often require extensive work by a qualified technician to restore the product to its normal opera-
tion.
e. If the product has been dropped or damaged in any way, and
f. When the product exhibits a distinct change in performance - this indicates a need for service.
12.Replacement Parts - When replacement parts are required, be sure the service technician has used
replacement parts specified by the manufacturer or have the same charateristics as the original part.
Unauthorized substitutions may result in fire, electric shock, or other hazards.
13.Wall or Ceiling Mounting - The product should be mounted to a wall or ceiling only as recommended by the
manufacturer.
3
Instruction Manual
r

LT-15
AC 110V - 240V 50/60Hz
FS
1024 X 768
2 0
0
Signal S y s t e m F r e q u e n c y
Broadcast T V, PAL-B/G
Video Recorder,etc. PAL-D/K 48.25MHz-831.25MHz
PA L - I
S E C A M - L /
L'
75 ohm
8 ohm
Vocal input: 0.5Vrms±3dB >20KΩ
Vocal output: 0.5Vrms±3dB <5KΩ
Video in/out:1Vpp±3dB 75Ω
15 inch
3.0W x 2
45W
Power
TV Tuning System
Resolution
Channel Preset
Television System
Antenna Input
Speaker Resistance
Trilingual OSD
External Jack
LCD Screen Size
Audio Out
Power Consumption
Unit Dimensions
TV Quality
6kg
BEFORE YOU BEGIN...(continued)
15 "TFT LCD Screen
No Radiation, No Flash, Environmental Protection
Slim, Light, Low-consumption
RF Input Specified with CATV Features
AV Input -VIDEO/S-VIDEO/SCART input available for convenience to enjoy various programs by video
recorder, camera, player, etc.
Built-in Speaker - dual channel stereo
PAL/SECAM Mode
Auto Volume Control
200 Channel storage
TV TUNER
Auto/Manual Channel Search
4 Picture Mode Available
4 Sound Mode Available
Mute with Blue Background
English/Spanish/French/German OSD Selectable
Program Edit
On/Off Timer
Auto Switch-off for No Signal Input
Sleep Power-off
Teletext Function
Wide Mains Power (AC 110-240V -- 50/60Hz)
Feature Description
S P E C I F I C AT I O N S
English/Frech/German/Spanish OSD Selectable
4
LCDTV15/A
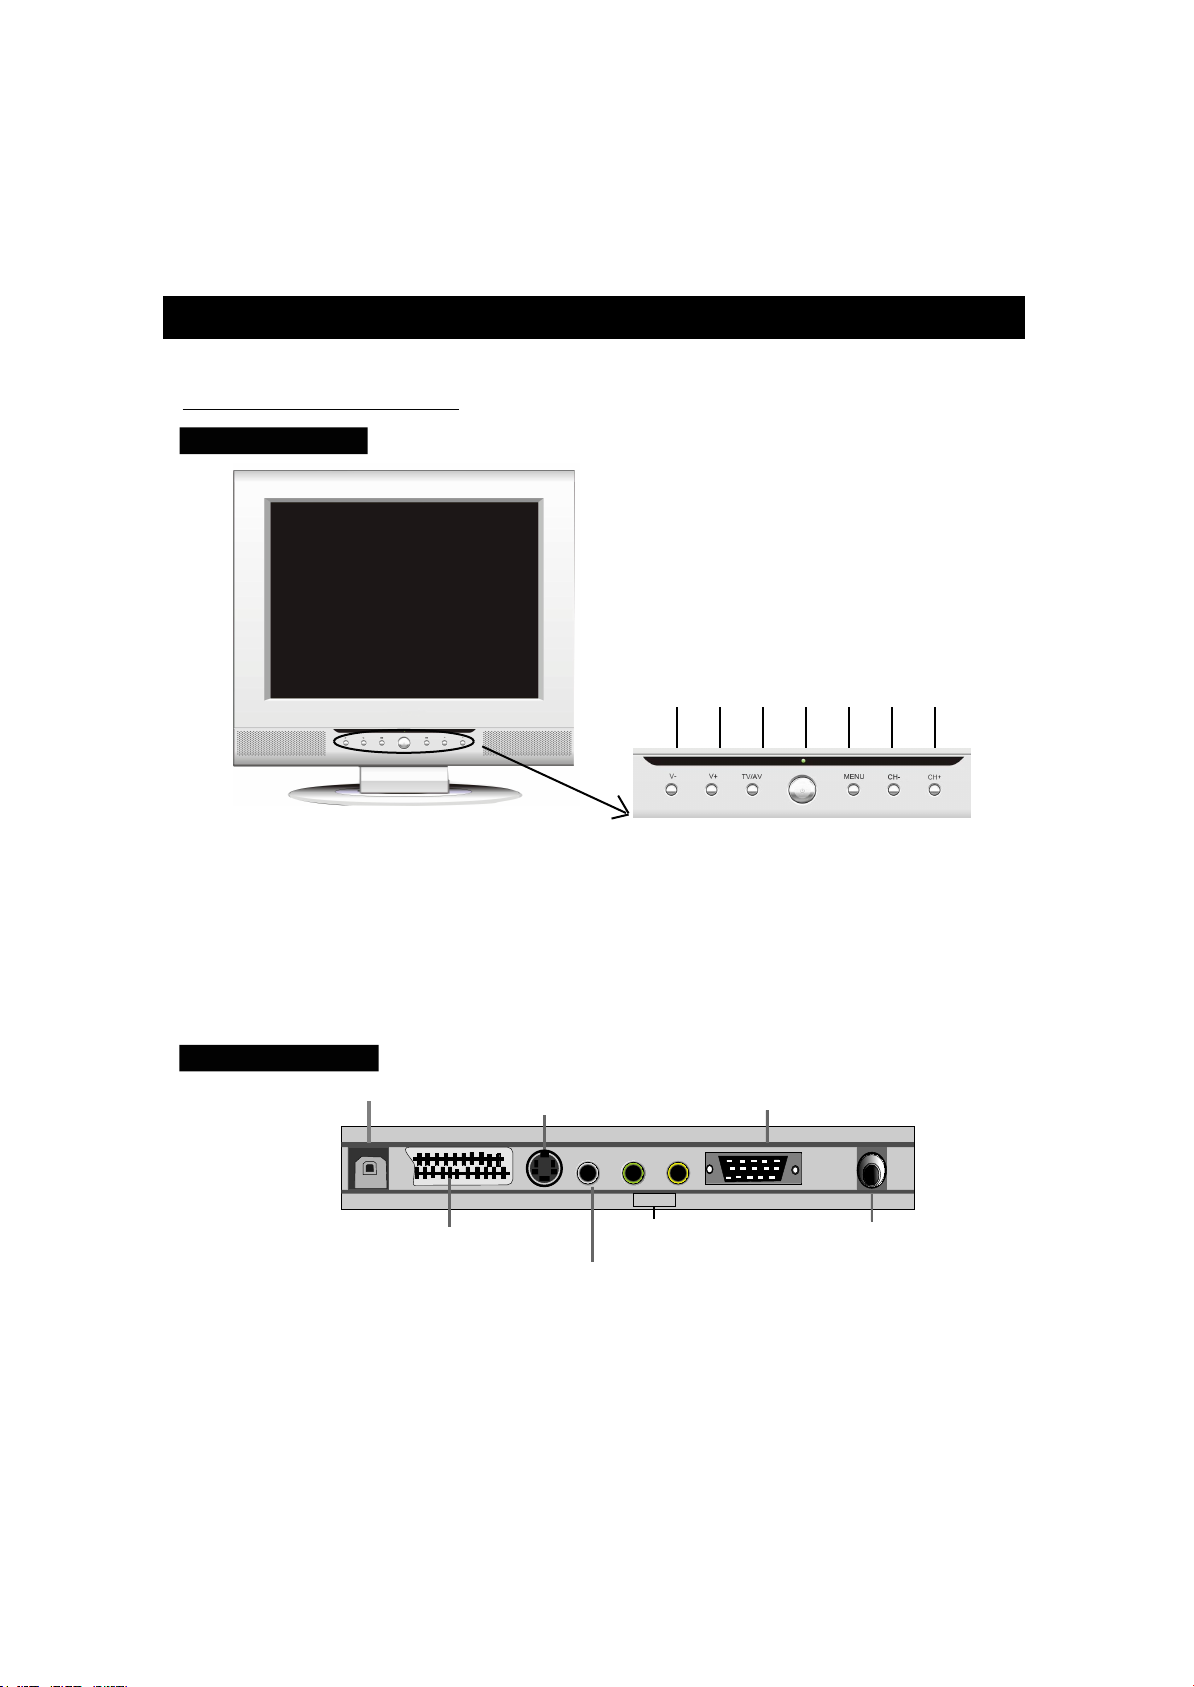
Turns the TV On or Off
2.TV / AV Used to select a signal source, TV, AV, S Video or SCART
3. MENU Accesses or banish the TV menus
4. CH+ Used to select a channel up
5. CH- Used to select a channel down
6. VOL- Volume down
7. VOL+ Volume up
DC Supply Input To Main Power (DC 12V Input)
RF Input For connection to RF Antenna
SCART Input 21-Pin Digital Scart Terminal
Video Input Composite Video Input
Audio Input Left, Right audio Input
S Video Input S Video Input
VGA Input Connect up pc as a monitor
5
Instruction Manual
Main unit (front view)
Sockets for connection
1.POWER
IDENTIFICATION OF CONTROLS
LR
PC In VGA Input
DC Supply Input
SCART Input
Video Input
Audio Input RF Input
PC IN
S-Video Input
6 7 2 1 3 4 5
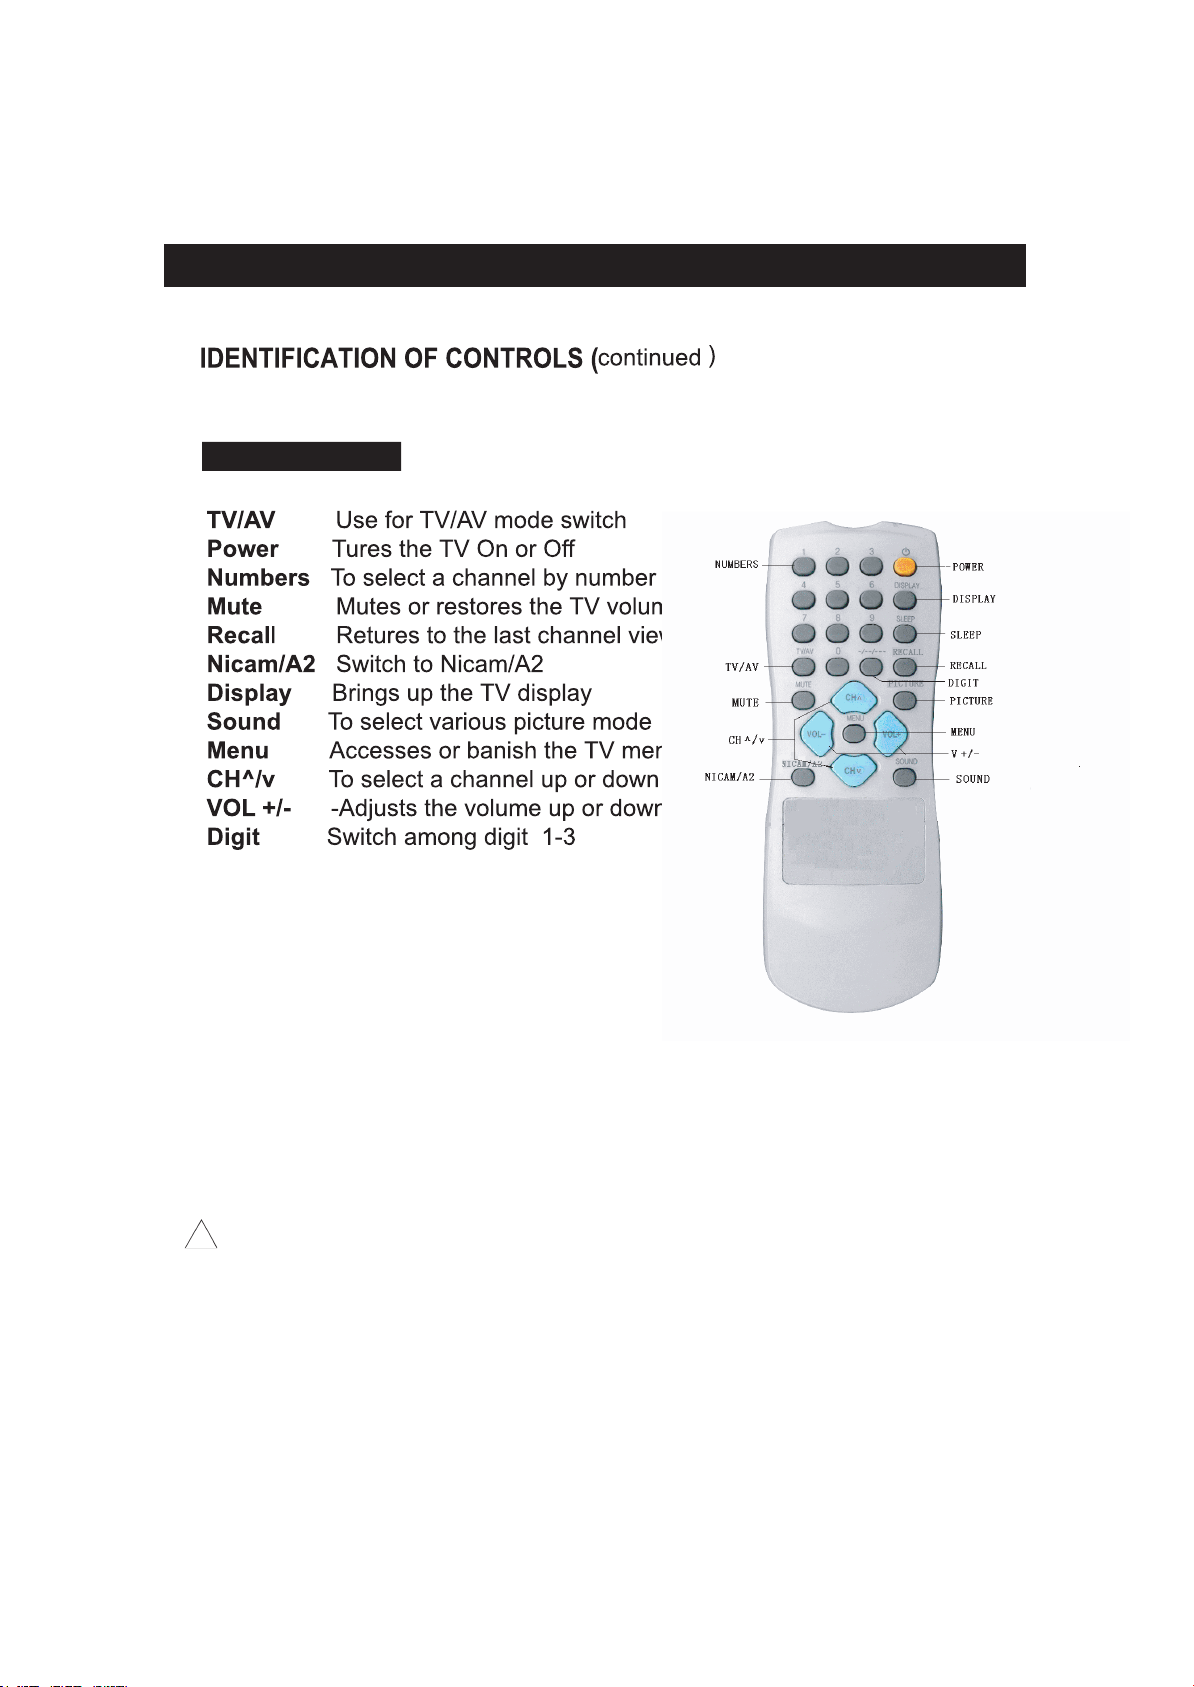
Remote Contorl
*To operate the LCD TV, you must point the remote control at the remote sensor of the TV (Stuff placed between them
may affect the operation).
* Never let the remote sensor on the TV explosed to the direct sunlight or strong light to avoid the remote misfunction. You
should change the lighting angel or TV position angle or operate the remote near the sensor.
!
6
LCDTV15/A

Instruction Manual
1. Open the cover.
2. Insert batteries (AAA size).
Make sure to match the + and - on the batteries to the
marks inside the battery compartment.
3. Close the cover.
OPERATING WITH THE REMOTE CONTROL
Operating LCD TV with the remote control.
The remote control must point at the remote sensor in order for the TV to function correctly.
* Do not face the remote sensor towards any light source such as direct sunlight.The TV may malfunction.
BATTERIES
PREPARING THE REMOTE CONTROL
To operate the LCD TV, you must first place the batteries in the remote control.
INCORRECT USE OF BATTERIES MIGHT CAUSE THEM TO LEAK,CORRODE OR EXPLODE.
* Do not place the batteries in the wrong direction.*
It is dangerous to charge/heat/open or short-circuit the batteries.
* Do not leave dead batteries or mix old/new batteries in the remote control.
* When not using the remote control for a long duration of time, remove the batteries.When operating range becomes
reduced, replace.
* If leakage from the battery occurs, wipe the battery liquid from the battery compartment, then replace.
*Take out the batteries when unused for a long time of duration.
7
!
7
Instruction Manual
LCDTV15
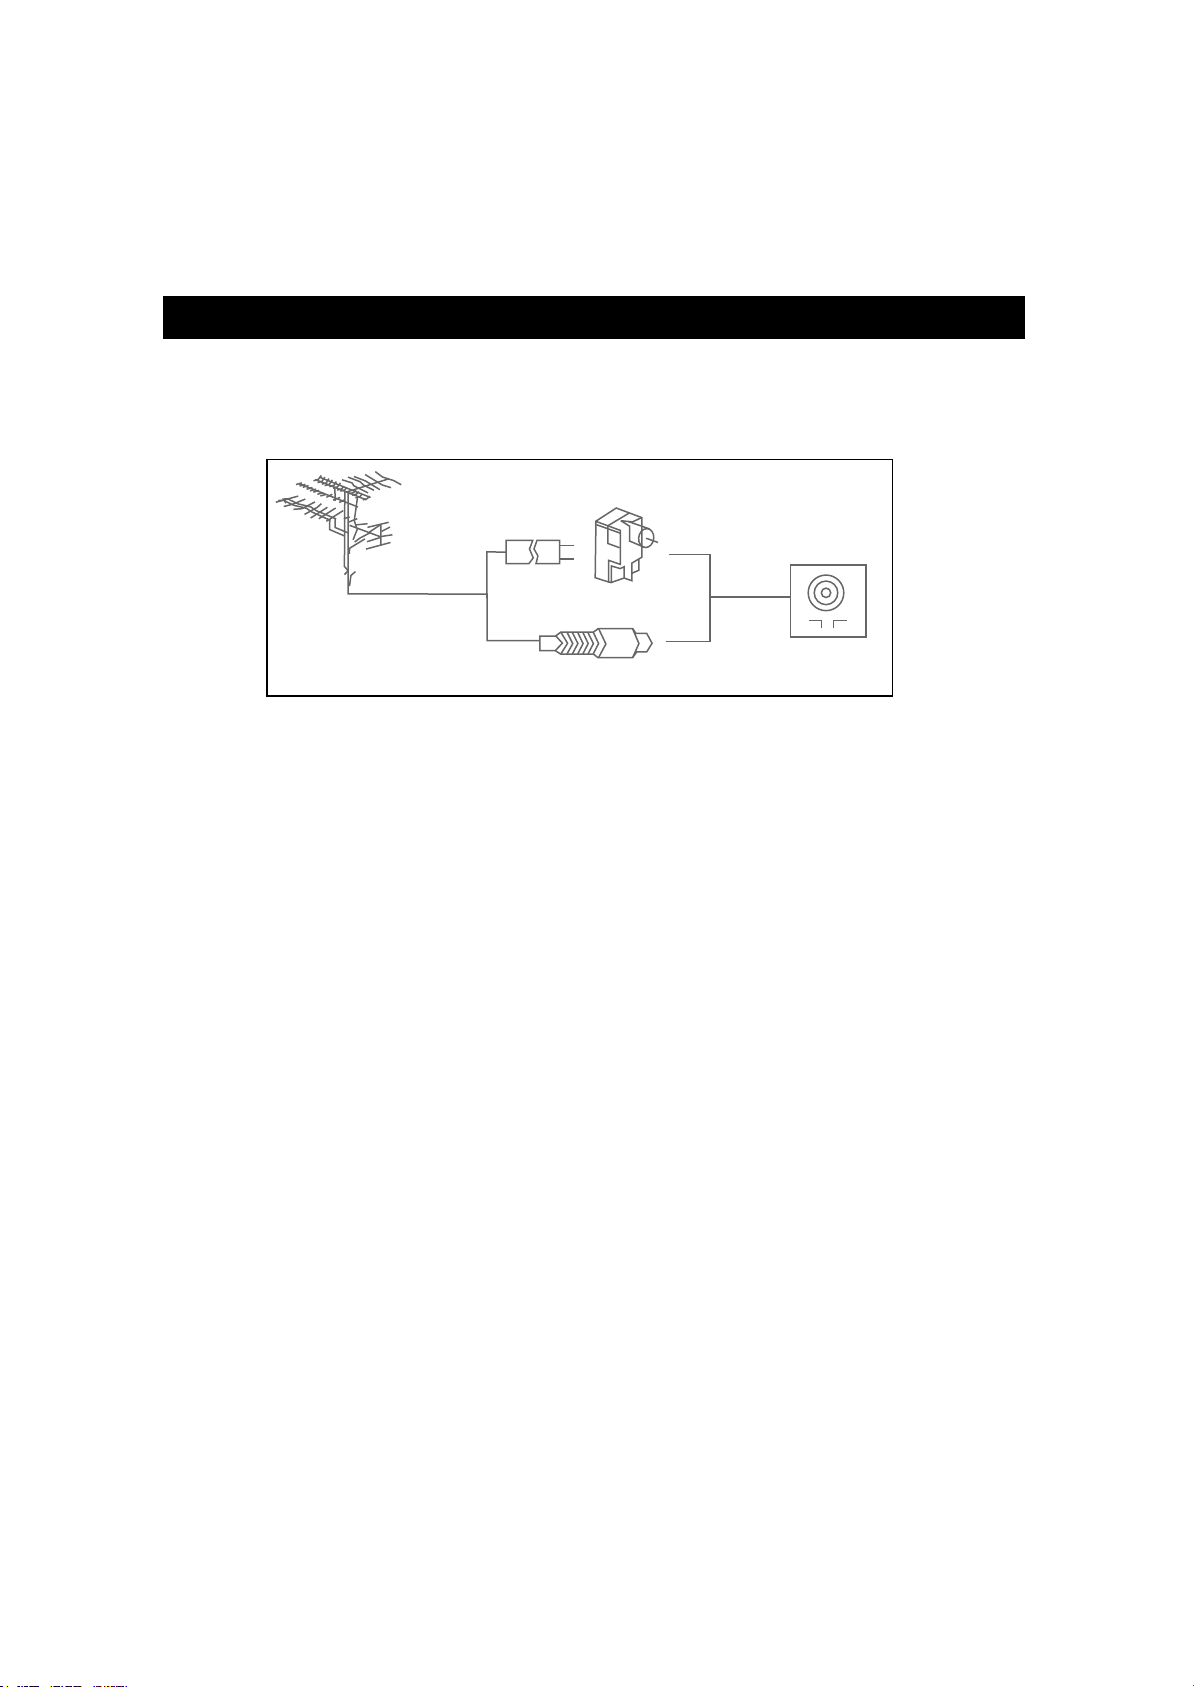
CONNECTING TO THE ANTENNA
To ensure best receiving effect, use outdoor antenna or cable antenna (CATV).The type and loca-
tion of antennas shall vary with places.
Notes:
* Connect the outdoor antenna as shown above, and also install a lightning arrester and perform
periodical checking and repair.
* It is suggested to better use a 75 Ω coaxial cable, to eliminate interference or noise due to improp-
er matching of impedance.
*The cable must not be tied together with supply cord.
CONNECTING TO THE AC ADAPTER
An AC adapter is supplied with the TV, to transform AC 110V-240V to DC 12V.To power on the TV
set, you should first connect the adapter to the rear of the TV and the other end to the main power.
Parallel flat:cable
(300 Ω)
Impedance adapter
(300Ω-75Ω)
Coaxial cable
(75Ω)
RF Input
8
LCDTV15/A

FUNCTIONS & FEATURES
1. Power On
Plug in the supply cord, and press the MAIN POWER SWITCH on the front of the TV to turn the power on.
The red indicator light on the TV will come on and channel menu will appear on the right upper corner.
2.Switch off
Press POWER on the front of the TV to switch it off. The red indicator light on the TV will turn off and the
menu will disappear.
3. Auto Off
If the TV is ON, and there is no signal is coming into the TV set without any operation for 10 minutes, the TV
will turn off.
4. Sound Mode Selection
You can use the SOUND button on the remote to select the most suitable sound from the four modes which
are preset in factory.
5. Picture Mode Selection
You can use the PICTURE button on the remote to select the most suitable picture from the four modes which
are preset in factory.
6.TV Tuner Mode
To view the information of the current TV frequency, press DISPLAY.
7. AV Mode
To view the information of the current AV input, press DISPLAY.
8. Channel Selection
In TV mode, press CH+/ CH- to skip to the next/ previous channel, or use the numbers on the remote control
to select a channel directly.
9. Adjusting the Volume
To adjust the volume, press the VOL+/- button on the remote and on the front panel of the unit as well.
10.Muting the Volume
To mute the volume, press the MUTE button, press it again or press VOL +/- to restore the volume.
Don't be too-quick or too-often pressing the buttons on the panel or remote for that will shorten the life length
of the parts of the unit.
9
General Function
!
9
Instruction Manual

FUNCTIONS & FEA
LCDTV15
TURES ... (continued)
Easy OSD message is designed for your convenience to setup each item of adjustment. Press MENU
to access the main menu (press it again to abolish it), then you can use the CH+/CH-/VOL+/VOL-
(direction keys) to navigate within the menu with the item highlighted, and press VOL+/VOL- to select
and ajust it.
The menu varies according to the different input mode, TV tuner or AV input (CVBS, S Video,Video,
Scart) illustrated as the following:
TV MODE
There are 6 function classifications in the
main menu.
1.Image adjustment factors
2. Audio adjustment factors
3.Channel search
4.Sort channel
5.Timer setup
6.Configure
7.Corresponding description of the highlighted
1.How to adjust TV image?
Press the MENU button to access the main menu with the 1st icon highlighted, then press CH+/CH- to select
the factor you want to adjust:Bright, Contrast, Color and Sharpness, and you can use the VOL+/VOL- button
to adjust the image to the best performance.
2. How to adjust Audio effects?
Press the MENU button to access the main menu
with the 2nd icon highlighted, then press CH+/CH-
to select the factor you want to adjust: Bass,Treble,
and Balance, and you can use the VOL+/VOL- but-
ton to adjust the sound to the best performance.
3. How to search TV channels?
Press the MENU button to access the main menu with the 3rd icon highlighted, then press CH+/CH- to select
the item you want to function: Auto Search, Manu
search, Fine Search, Save, Skip, Colour system
and sound systemthen you canuse the VOL+/VOL-
button to begin the operation.
*Before operates Auto Search, you had set Colour
system to PAL and Sound system toI. When Auto
Search is selected, it will search all of the channels
receivable automatically and store them.
* When Manu Search is selected, it will search a
channel then stop, you should highlight Save and
press VOL+/VOL- to confirm it, as such search
channels one by one.
Function Selection Menus
10
LCDTV15/A

Instruction Manual
FUNCTIONS & FEATURES ... (continued)
*To each of the channel, you can select Fine Search to make the current channel fine.
* Select Save to save your setting.
* If you donot need the current channel, select Skip and press VOL+/VOL- to confirm it, the channel will be
skipped.
4.How to Sort Channels?
When all channels have been searched, if you want to
sort them in your favorite order. Highlight the 4th icon
and press VOL+/VOL- to confirm it.Input the two
channelÕs number respecitvely and select Exchange,
the order of them will be exchanged accordingly.
5.How to setup a timer in TV mode?
Highlight the 5th icon, then press VOL+/VOL-, then
input Current Time, ON Time, OFF Time and Select
Channel respectively. The ON Time / OFF Time refers
to your selected channel starts / stops playback time.
To realize this function make sure your TV is in the
standby mode, not disconnected from the power.
6. How to configure your TV?
The Input enables you to select the four signal
sources:TV, Video, S-Video and SCART. It must
accord with the current connection.
The Language enables you to select your favorite
OSD language.
The Lock enables you to lock your TV.To unlock it
press any key on the remote, otherwise you cannot
watch TV.
The Reset enables you to reset all the setting to the
default in factory.
When you are watching video of cassette and the
video image is not good,please set VCR to "on",in other
times,please set VCR to "off".
AV MODE
There are 3 function classifications only in the
main menu.
1.Image adjustment factors
2. Audio adjustment factors
3.Configure
The 3 operations are same as that of the TV mode.
11
11
Instruction Manual
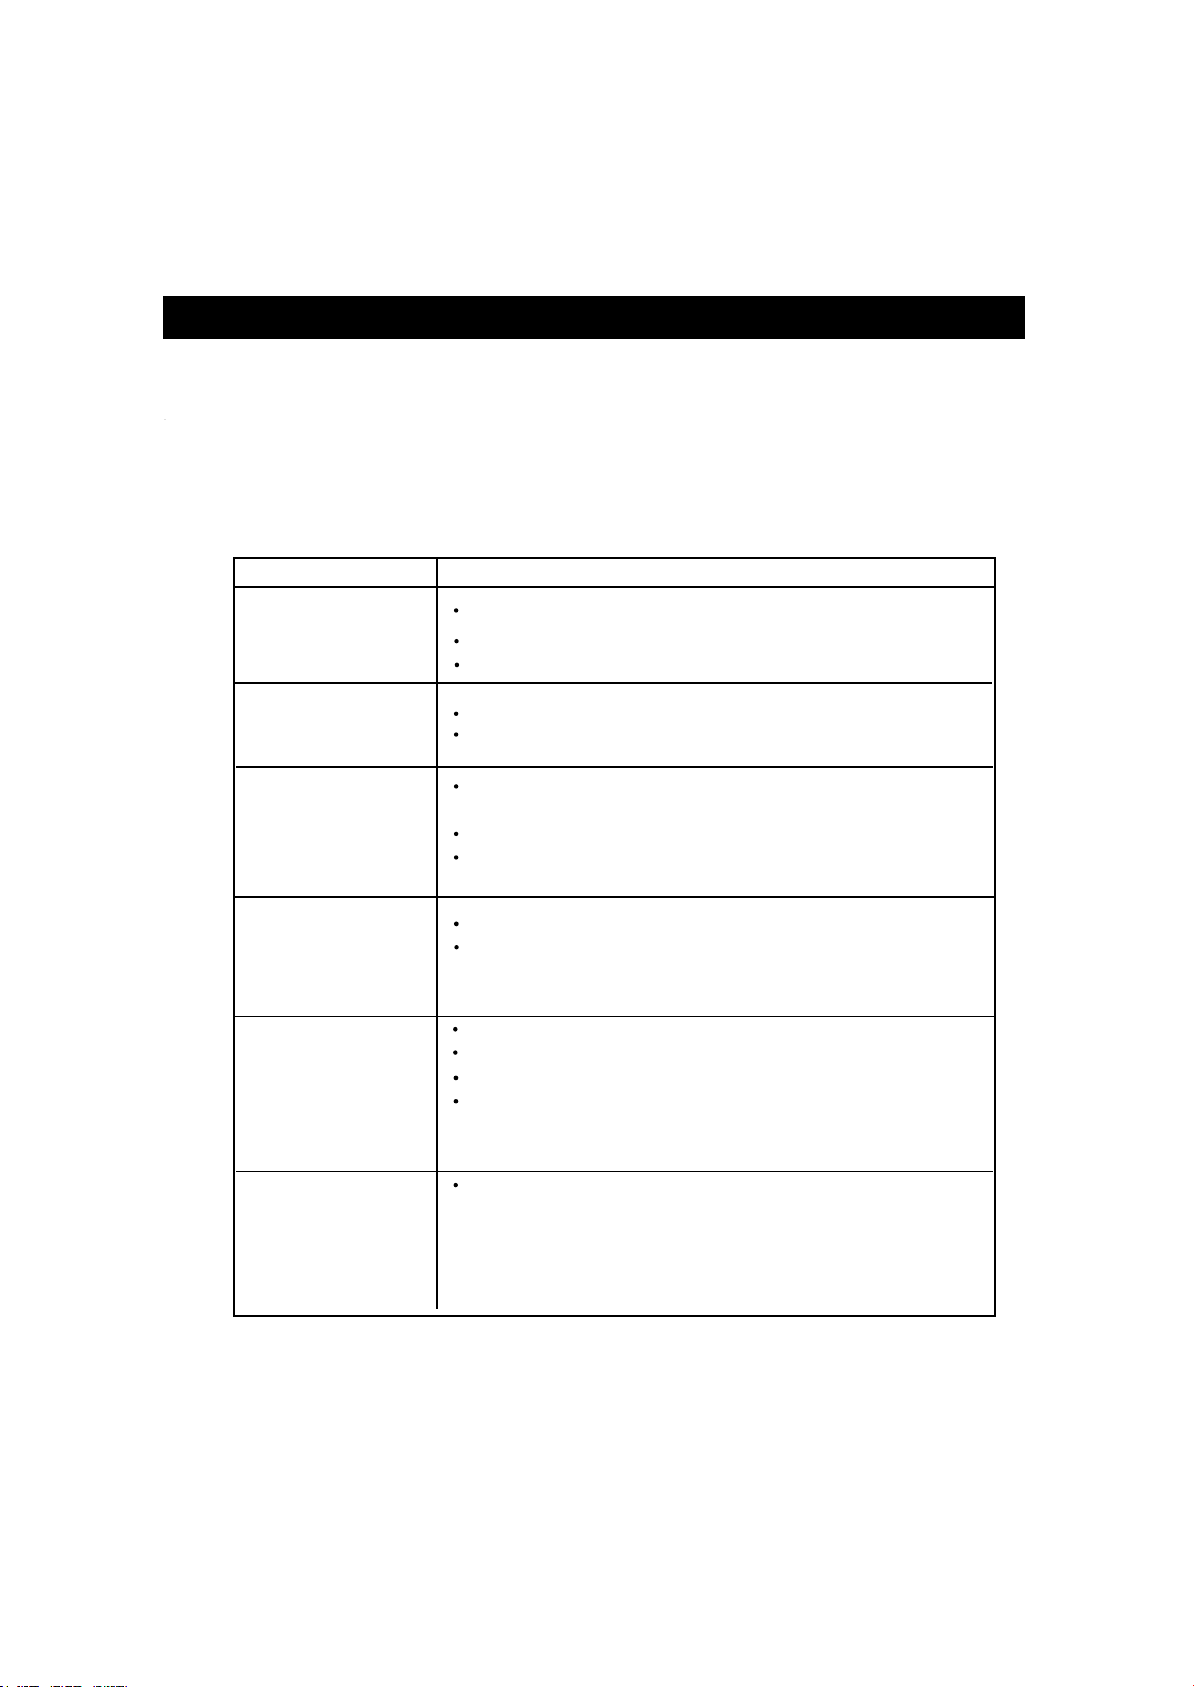
Check the following guide for a possible correction to a problem before contacting customer service .
Symptoms C o r r e c t i o n
No power, no picture,
no sound
Picture color is not
g o o
d
Picture is poor or with
stripes on it
TV channel not received
Remote control
doesn't operate.
Make sure the AC adapter is properly connected.
Make sure the mode is set correctly: T V, Video, S-Video or Scart?
Make sure the main power switch of the main unit is on.
Check color adjustment. (PA L or SECAM mode)
Verify the saturation is at an appropriate level (Maybe it was set to minimum)
Check if there is any interference from other electric appliance or strong
magnetic field.
Verify the antenna lead wire is in working condition.
Bad reception can be considered.
Make sure the T V / AV setting is correct.
Check if the Skip function is set, if it do, unskip it by the menu.
Batteries may be weak. Replace batteries.
Make sure nothing is in between the remote and the remote sensor.
Make sure the remote sensor of the unit is not exposed to strong beam.
Check if the poparity is correct in the direction, and be in good connection.
TROUBLESHOOTING GUIDE
There are a few color
spots on the screen
The LCD monitor is specified with high-resolution Liquid Crystal Display.
Because of some specific feature, there are a few color spots on the screen,
t h a t 's not a fault. We will make sure it is in compliance wtih the evaluation
s t a n d a r d
.
LCDTV15
12
LCDTV15/A
Table of contents
Other SONIQ LCD TV manuals

SONIQ
SONIQ L32V11D-NZ User manual

SONIQ
SONIQ Qvision QV195LT User manual

SONIQ
SONIQ E40W13A-AU User manual

SONIQ
SONIQ G75UW62A User manual

SONIQ
SONIQ E32HV40A User manual

SONIQ
SONIQ QSL322T User manual

SONIQ
SONIQ L32V12B-AU User manual

SONIQ
SONIQ L55S11A-au User manual

SONIQ
SONIQ QSL322T User manual

SONIQ
SONIQ E40V16A-AU User manual

SONIQ
SONIQ Qvision QV325L User manual

SONIQ
SONIQ qv220lti User manual

SONIQ
SONIQ QSL423XT User manual

SONIQ
SONIQ E42FV40A User manual

SONIQ
SONIQ S42V14A-AU User manual

SONIQ
SONIQ E23Z13A-AU User manual

SONIQ
SONIQ iV220T Qvision User manual

SONIQ
SONIQ L32V11B-AU User manual

SONIQ
SONIQ U42V14B-AU User manual

SONIQ
SONIQ E48S12A-Au User manual


