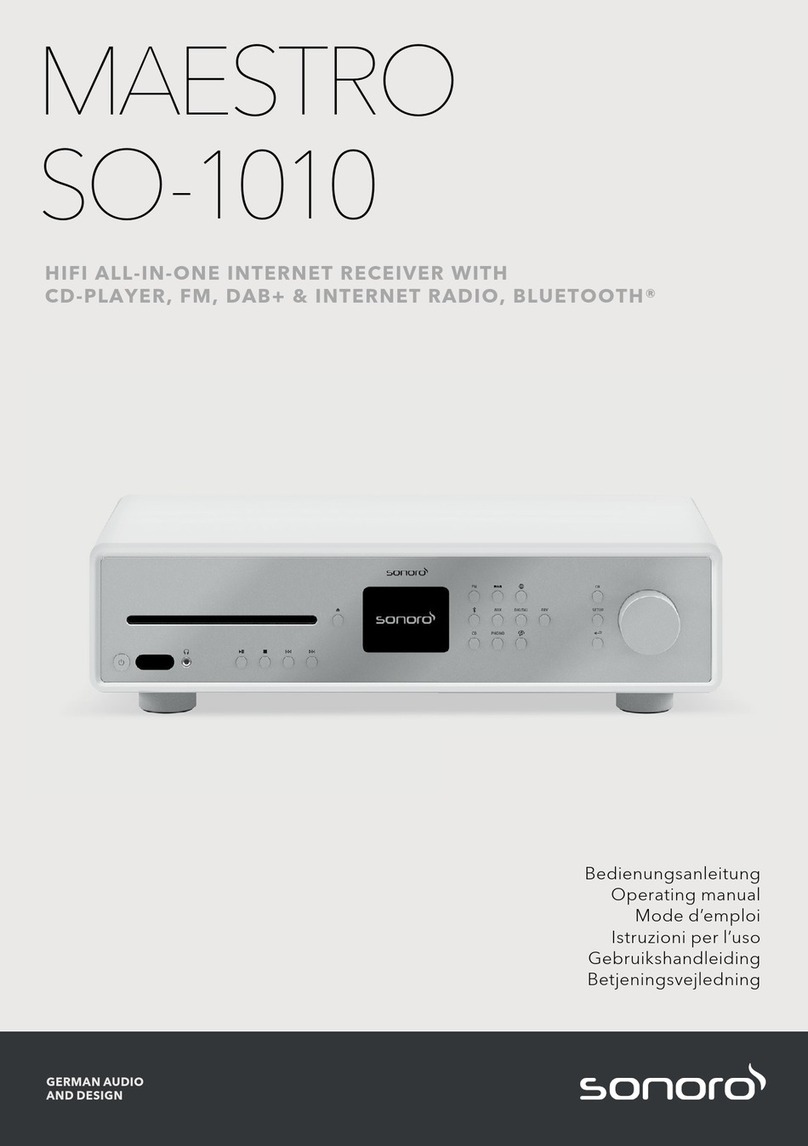
Sonoro MAESTRO Quantum User manual

Operating instructions
MAESTRO
Quantum

23
Operating instructions MAESTRO Quantum Operating instructions MAESTRO Quantum
Document information
Operating instructions for the device:
All-In-One Audio Music System MAESTRO Quantum
<Read these instructions carefully.
<Keep the instructions accessible.
<Observe the instructions in the corresponding safety manual.
<When passing on the device, also hand over these instructions and the associated
safety manual.
This Operating instructions is part of the product and protected by copyright.
Reproduction, reprinting and distribution only with permission.
Manufacturer:
sonoro audio GmbH
Hammer Landstraße 45
41460 Neuss
Germany
Tel. +49 2131 8834-141
Fax +49 2131 7517-599
Do you need help?
<Visit our support website for more information.
https://support.sonoro.com
1. Safety information ..................................................6
1.1 Intended use ........................................................6
1.2 General safety instructions.............................................7
2. Product information .................................................8
2.1 Equipment ..........................................................8
2.2 Scope of delivery.....................................................9
2.3 Front of device......................................................10
2.4 Rear of device ......................................................11
2.5 Remote control .....................................................12
2.6 Display icons .......................................................13
2.7 Technical data ......................................................14
3. Setting up ........................................................16
3.1 Unpacking the device................................................16
3.2 Positioning the device ...............................................16
3.3 Preparing the remote control . . . . . . . . . . . . . . . . . . . . . . . . . . . . . . . . . . . . . . . . .17
3.4 Connecting antennas ................................................18
3.4.1 Wi-Fi-antennas ...............................................18
3.4.2 FM/DAB telescopic antenna....................................19
3.4.3 FM/DAB aerial ................................................20
3.5 Connecting loudspeakers ............................................21
3.5.1 Direct connection .............................................21
3.5.2 Connection with banana plug ..................................22
3.6 Connecting external units (optional) ...................................23
3.6.1 PRE-OUT.....................................................23
3.6.2 PHONO-IN (MM)..............................................24
3.7 Establishing a power supply ..........................................25
3.8 Initial setup .........................................................26
3.9 Network connection .................................................27
3.10 Sound optimisation..................................................28
4. Operation.........................................................30
4.1 Control on the device................................................30
4.2 Control via the remote control ........................................32
4.3 Functions...........................................................33
Table of contents

45
Operating instructions MAESTRO Quantum Operating instructions MAESTRO Quantum
4.4 Main menu .........................................................35
4.4.1 Menu ........................................................35
4.4.2 Sound settings................................................35
4.4.3 Sleep timer...................................................37
4.4.4 Alarm........................................................37
4.4.5 Recently played...............................................38
4.4.6 Recall from favorites...........................................38
4.4.7 Settings......................................................38
4.5 Sources ............................................................39
4.5.1 FM Radio ....................................................40
4.5.2 DAB Radio ...................................................41
4.5.3 Internet radio .................................................42
4.5.4 Podcast ......................................................43
4.5.5 Bluetooth® ...................................................44
4.5.6 My Music.....................................................46
4.5.7 Digital .......................................................48
4.5.8 Analogue ....................................................49
4.5.9 CD ..........................................................50
4.5.10 Music services ................................................51
4.5.11 Streaming....................................................52
4.5.12 Smart Home..................................................53
4.6 Favorites ...........................................................54
4.6.1 Device .......................................................54
4.6.2 Remote control ...............................................55
4.6.3 Internet . . . . . . . . . . . . . . . . . . . . . . . . . . . . . . . . . . . . . . . . . . . . . . . . . . . . . .55
4.7 Settings . . . . . . . . . . . . . . . . . . . . . . . . . . . . . . . . . . . . . . . . . . . . . . . . . . . . . . . . . . . .56
4.7.1 Network wizard ...............................................56
4.7.2 Network info .................................................57
4.7.3 Language ....................................................57
4.7.4 Date and time ................................................57
4.7.5 Device info ...................................................57
4.7.6 Manual software update .......................................57
4.7.7 Reset device..................................................57
4.7.8 Streaming audio quality .......................................58
4.7.9 Chromecast built-in ...........................................58
4.7.10 AirPlay password..............................................58
4.7.11 Display settings ...............................................58
4.7.12 Power management ...........................................59
4.7.13 Privacy policy .................................................59
5. sonoroaudioapp ..................................................60
6. sonoroweb client..................................................60
7. Cleaning and care..................................................61
8. Troubleshooting ...................................................62
9. Disposal . . . . . . . . . . . . . . . . . . . . . . . . . . . . . . . . . . . . . . . . . . . . . . . . . . . . . . . . . . 65
9.1 Disposing of the packaging ..........................................65
9.2 Disposing of the device ..............................................66
10. Appendix ........................................................67
10.1 Marks of conformity and certificates ...................................67
10.2 Declaration of conformity ............................................69

67
Operating instructions MAESTRO Quantum Safety information
Front of device
Rear of device
Contents
Support
Operating instructions MAESTRO Quantum Safety information
Front of device
Rear of device
Contents
Support
1. Safety information
1.1 Intended use
The device is suitable for the following:
• Operation of external speakers with an impedance of 4–16 Ω.
• For playing analogue and digital radio stations that can be accessed via antenna.
• For playing streaming services, radio stations and podcast programmes accessible
via the Internet.
• For playing from devices and to devices paired via Bluetooth®.
• For playing from external devices connected via the following inputs:
AUX 1
AUX 2
Phono
Optical
Coaxial
HDMI
USB
• For playing from sound carriers in the formats audio CD and MP3/WMA CD.
• For playing from media servers or streaming applications that are on the same
network.
• For playing from sources or to devices connected via Smart Home systems.
• For charging external devices connected via the USB input.
The device is intended exclusively for use in private households.
Only use the device if it is in faultless technical condition and has been set up correctly.
Any other use is considered contrary to the intended use.
Intended use also includes reading and observing these instructions and the associated
safety manual.
1.2 General safety instructions
WARNING!
Danger due to non-observance of the safety instructions!
The associated safety manual contains important information for the safe use of the
device. Special attention is drawn to possible dangers. Failure to observe these may
result in serious injury or damage to the device.
<Read the associated safety manual and these instructions carefully.
<Follow the safety instructions.
<Store the documents in an accessible location.
Use of the device is prohibited in the following cases:
• In case of damage to the device or individual components.
• In the event of unauthorised conversions or modifications to the device.
• After improper repairs.
The manufacturer accepts no liability for damage in the following cases:
• If these instructions are not followed.
• In case of improper use.
• In case of improper handling.
• In the case of unauthorised conversions or modifications.

89
Operating instructions MAESTRO Quantum Product information
Front of device
Rear of device
Contents
Support
Operating instructions MAESTRO Quantum Product information
Front of device
Rear of device
Contents
Support
2. Product information
2.1 Equipment
Sound • High-efficiency Class-D Hypex amplifiers
• Nominal power 2x 180 Watt on 4 Ω, 2x 110 Watt on 8 Ω
• Operation of external speakers with impedance of 4–16 Ω
• Equaliser function for adjusting bass, treble and balance, with
presets for sonoro speakers
• Adaptive loudness and dynamic bass function
• Dirac Live sound optimisation
Display High-resolution 4" TFT colour display
with automatic brightness adjustment.
Station scan Automatic and manual.
Sleep timer Switch-off function with precise setting to the minute (5–90 min).
Favourites A total of 99 memory locations.
Operation • Directly on the device, via remote control, via the sonoro audio
app or via the sonoro web client
• Smart Home ready
Music transmission • Digital radio FM and DAB+, internet radio, podcast
• CD player with repeat and shuffle function
• Bluetooth® (bidirectional), Qualcomm® aptX™ / aptX™ HD
audio, Apple AirPlay, Chromecast built-in
• Amazon Music™, Deezer™, Napster™, Qobuz™,
SpotifyConnect™, TIDAL Connect™
• DLNA, UPnP
• Phono pre-amplifier for MM cartridge
Connections • HDMI ARC/eARC
• Optical and coaxial digital inputs and outputs
• Analogue AUX IN (2x), LINE-OUT, Stereo PRE-OUT and Phono
• USB-A, USB-C (charging and playback function)
• Headphones (3.5 mm jack)
• Loudspeaker screw terminals
2.2 Scope of delivery
OK
G
A
CD
B
FE H I
A MAESTRO Quantum
B Document box with Quick Start Guide and safety manual
C FM/DAB aerial
D FM/DAB telescopic antenna
E Battery compartment opener
F 2 AAA batteries (IEC LR03)
G Remote control
H 2 Wi-Fi antennas
I Power cable

10 11
Operating instructions MAESTRO Quantum Product information
Front of device
Rear of device
Contents
Support
Operating instructions MAESTRO Quantum Product information
Front of device
Rear of device
Contents
Support
2.3 Front of device
A CB G
H I J K L M N
D E F
A CD slot
B CD eject button ( )
C Display
D Source buttons
• CD ( )
• FMRadio ( )
• DABRadio ( )
• Internet Radio ( )
• Podcast ( )
• Bluetooth® ( )
• Streaming Music ( )
• Digital ( )
• Analogue ( )
E Favorites button ( )
F Navigation buttons
• OK button ( )
• Back button ( )
• Main menu button ( )
G Rotary control
H Standby button ( )
I Infrared and light sensor
J Headphone jack ( )
K Play / pause button ( )
L Stop button ( )
M Previous title / station button ( )
N Next title / station button ( )
2.4 Rear of device
A B C D E F G H I J K
L O P Q R SNM T U WV
A Main ON/OFF switch
B Heat sink
C Socket for Wi-Fi antenna 1
D Television HDMI ARC / eARC connection
E USB-C connection
F USB-A connection
G Optical output
H Optical input
I Ventilation openings
J Socket for Wi-Fi antenna 2
K Socket for telescopic antenna
L Power cable socket
M Speaker connections
N WPS button
O LAN socket RJ45
P Coaxial output
Q Coaxial input
R LINE OUT output (RCA)
S PRE OUT output (RCA)
T AUX 1 input (RCA)
U AUX 2 input (3.5 mm)
V Phono grounding (GND)
W Phono input

12 13
Operating instructions MAESTRO Quantum Product information
Front of device
Rear of device
Contents
Support
Operating instructions MAESTRO Quantum Product information
Front of device
Rear of device
Contents
Support
2.5 Remote control
OK
A
B C
J
L
M
N
D
E
F
I
K
H
G
A Infrared sensor
B Standby button
C Mute button
D Top / Up button
E OK / Play / Pause button
F Left / Previous title / Station button
G Right / Next title / Station button
H Bottom / Down button
I Main menu button
J Back button
K 6 favorites buttons
L Volume up button
M Volume down button
N MENU button
On the back:
• Battery compartment with lock opening
2.6 Display icons
The Wi-Fi connection is established (with display of signal strength).
The Wi-Fi connection is interrupted.
The Wi-Fi connection is interrupted and is in configuration mode (“SoftAP”).
The LAN network is connected.
The LAN network is disconnected.
Bluetooth is in detection mode.
A Bluetooth device is connected.
A Bluetooth headset is connected.
The radio station is in the favorites list.
The radio signal is being received (with display of the signal strength).
The playback mode “Repeat all” is active.
The playback mode “Repeat one” is active.
The playback mode “Repeat folder” is active.
Shuffle is active.
CD playback is active.
The sleep timer is active.
The alarm is active.
The snooze function is active.
The headphones are plugged in.
The sound output is muted.
The streaming playback is loading.
The streaming playback is buffering.
Playback started.
Playback paused.
Playback stopped.

14 15
Operating instructions MAESTRO Quantum Product information
Front of device
Rear of device
Contents
Support
Operating instructions MAESTRO Quantum Product information
Front of device
Rear of device
Contents
Support
2.7 Technical data
Dimensions Approx. 452 x 279 x 120 mm (W x D x H)
Weight Approx. 6.2 kg
Ambient temperature 0 °C to +40 °C
Load impedance 4–16 Ω
Nominal power 1 KHz, THD+N < 0.1% (AES17) -
2x 180 Watt on 4 Ω, 2x 110 Watt on 8 Ω
Transmission range 10 Hz– 42 KHz
Display 4" TFT colour display (800 x 480 px)
FM Frequency range 87.50 MHz–108.00 MHz
DAB/DAB+ Band III, 174.928 MHz – 239.200 MHz
Internet radio Over 50,000 stations worldwide
Favorites Total of 99 for FM Radio / DAB Radio / Internet Radio / Podcasts
/ Amazon Music / TIDAL / Deezer / Qobuz / My Music /
Spotify (max. 20)
Supported CD
formats
• CD-DA (12 cm), CD-R, CD-RW,
• MP3 (max. 48 kHz, 320 kbps, 16 bit),
• WMA (DRM not supported, max. 48 kHz, 320 kbps, 16 bit)
USB Type C, type A - charging power 5 V DC, max. 2.1 amps,
File formats for playback: FAT, FAT 32, NTFS, EXT 2/3/4
Sensitivity AUX-IN • AUX-IN 1 (RCA socket) 2000 mV / 1000 mV / 500 mV,
• AUX-IN 2 (3.5 mm) 300 mV
Digital inputs • Optical In (TOSLINK) - Linear PCM, STEREO, sampling rate 44.1 kHz,
192 kHz, colour depth 24 bit
• Coaxial In (S / PDIF) - Linear PCM, STEREO, sampling rate 44.1
kHz, 192 kHz, colour depth 24 bit
HDMI HDMI eARC (television) - PCM, STEREO, sampling rate max. 192 KHz,
colour depth 16 bit, 24 bit
Headphone
impedance
16–32 Ω
LINE OUT (RCA) 2 Vrms
HDMI HDMI eARC (television) - PCM, STEREO, sampling rate max. 192 KHz,
colour depth 16 bit, 24 bit
LINE OUT (RCA) 2Vrms
Digital outputs • Optical Out (TOSLINK) - Linear PCM, STEREO, sampling rate
96 kHz, colour depth 24 bit
• Coaxial Out (S/PDIF) - Linear PCM, STEREO, sampling rate
96 kHz, colour depth 24 bit
Pre-amplifier output Max. 2 Volt (RMS) / 1.5 k Ω
Supported services Bluetooth®, Airplay, Chromecast built-in, compatible with UPnP,
Roon Ready
Supported network IIEEE 802.11 a/b/g/n/ac/ax 2 x 2 MIMO,
2.412 GHz–2.472 GHz / 5.18 GHz–5.70 GHz
Output power 16.5 dBm (2.4 GHz), 19.4 dBm (5 GHz)
Network LAN Ethernet, 10BASE-T/100BASE-TX
Encryption WEP, WPA2 (PSK), WPA3, WPS
Bluetooth® Version 5.0, AVRCP v1.6 profile, A2DP 1.3.1,
2.402 GHz – 2.480 GHz,
SBC, AAC, aptX, aptX HD,
range approx. 10 m
Output power BT 12,9dBm, BLE 10,0dBm
Supported audio
formats
• WAV, FLAC & AIFF - max. 24 bit / 192 kHz
• ALAC (Apple Lossless Audio Codec) - max. 24 bit / 192 kHz
• AAC - max. 48 kHz, 320 kbps, 16 bit
• MP3 - max. 48 kHz, 320 kbps, 16 bit
• AAC (LC / HE-AAC / (v2) – max. 48kHz, 320kbps, 16bit
• OGG Vobis and WMA - max. 48 kHz, 320 kbps, 16 bit
• M4A - max. 48 kHz, 320 kbps, 16 bit
Supported playlist
formats
ASX (Microsoft®), M3U, PLS / WPL
Remote control
batteries
2x LR03 (AAA), 1,5V
Supply voltage AC220–240V, 50/60Hz
Standby power
consumption
<0,5W
Network standby
power consumption
<2,0W
Specifications are subject to change without notice.

16 17
Operating instructions MAESTRO Quantum Setting up
Front of device
Rear of device
Contents
Support
Operating instructions MAESTRO Quantum Setting up
Front of device
Rear of device
Contents
Support
3. Setting up
)The instructions in the corresponding safety manual must be observed.
3.1 Unpacking the device
<Carefully unpack the device and all enclosed parts.
<Place the device in a suitable location.
<Check the device and all parts included for damage.
<Check the scope of delivery for completeness.
See chapter “2.2 Scope of delivery” (page9).
<If possible, keep the packaging.
If parts are missing or damaged:
<Contact your dealer or sonoro customer service immediately.
<Remove the protective film from the
display.
3.2 Positioning the device
The following points must be observed when setting up the device:
• There must be no interfering objects or equipment in the vicinity (e.g. heat sources,
metal, water, steam).
• The mains socket used must be accessible at all times.
• Stains may appear on natural wood with oiled or waxed surfaces.
<Choose a suitable location for the device.
3.3 Preparing the remote control
<Open the battery compartment.
-
<Insert two batteries (AAA IEC LR03)
correctly.
OK
<Close the battery compartment.

18 19
Operating instructions MAESTRO Quantum Setting up
Front of device
Rear of device
Contents
Support
Operating instructions MAESTRO Quantum Setting up
Front of device
Rear of device
Contents
Support
3.4 Connecting antennas
For reception in the wireless network, connect the two Wi-Fi antennas.
An aerial and a telescopic antenna are available for radio reception (FM/DAB).
Alternatively, the device can be connected directly to a connection on the house aerial
using a suitable aerial cable (F connector not included in the scope of delivery).
3.4.1 Wi-Fi-antennas
<Screw on the antennas.
<Point the antennas upwards.
3.4.2 FM/DAB telescopic antenna
<Screw on the antenna.
<Pull out the antenna completely.
<Align the antenna so that the reception
is optimal.

20 21
Operating instructions MAESTRO Quantum Setting up
Front of device
Rear of device
Contents
Support
Operating instructions MAESTRO Quantum Setting up
Front of device
Rear of device
Contents
Support
3.4.3 FM/DAB aerial
<Screw on the antenna.
A B <Unfold the antenna so that both ends
and the cable form a “T”.
<Align the antenna so that the reception
is optimal.
A Recommendation for FM radio
reception: Both ends horizontal.
B Recommendation for DAB radio
reception: Both ends vertical.
3.5 Connecting loudspeakers
WARNING!
<Danger from electric shock!
<Touching live parts can cause electric shock, burns or death.
<Disconnect the mains plug from the socket before connecting the speakers.
<Make sure that the power supply is disconnected and remains disconnected.
<Use speakers with an impedance of 4–16 Ω.
<Make sure that the speaker cables are
correctly assigned to the connections on
the unit. Note the orientation (right/left)
and the polarity (+/–).
3.5.1 Direct connection
The following points must be observed for the direct connection of the loudspeaker
cables:
<Make sure that the bare wires of the cables do not touch each other.
<Make sure that the bare wires of the cable do not come into contact with the back
and screws of the unit.
<Remove approx. 1 cm of the insulation at the end of each cable.
<Twist the bare wires of the cable tightly together.

22 23
Operating instructions MAESTRO Quantum Setting up
Front of device
Rear of device
Contents
Support
Operating instructions MAESTRO Quantum Setting up
Front of device
Rear of device
Contents
Support
1
2
<Loosen the corresponding knob and
insert the bare wire into the opening.
<Tighten the knob again to secure the
wire.
3.5.2 Connection with banana plug
12
<Turn the knob on the unit tight.
<Insert the banana plug into the
appropriate connection socket.
3.6 Connecting external units (optional)
3.6.1 PRE-OUT
The pre-amplifier output “PRE-OUT” enables the connection of the following external
devices:
• One active subwoofer (2.1 system)
• Two active subwoofers (2.2 system)
• Further power amplifier
• Mixing desk
• Recording device
)The instructions for the external device must be observed.
Settings on the unit for volume and sound also affect the signal of the pre-amplifier
output.
<Insert the plugs into the appropriate
connection sockets.
The unit and subwoofer must be set to the same high-pass filter frequency.
See chapter “4.4.2 Sound settings” (page35).

24 25
Operating instructions MAESTRO Quantum Setting up
Front of device
Rear of device
Contents
Support
Operating instructions MAESTRO Quantum Setting up
Front of device
Rear of device
Contents
Support
3.6.2 PHONO-IN (MM)
The “PHONO IN (MM)” connection allows you to connect a turntable with an
MMcartridge (“moving magnet”).
)The instructions for the turntable must be followed.
Observe the following points:
• The turntable and, if present, a connected pre-amplifier must be switched off when
establishing the connection.
• The GND connection is used to connect the earth cable from the turntable to reduce
disturbing noises (e.g. humming, hissing).
• Depending on the turntable, disturbing noises may increase when the earth cable is
connected. In this case, remove the earth cable.
• The GND connection is not a safety earth.
<Insert the plugs into the appropriate
connection sockets.
<Connect the earth cable.
3.7 Establishing a power supply
<Plug the power cable into the device.
WARNING!
<Danger from electric shock!
<The polarity of the mains plug may affect the sound quality. A red marking is applied
to the mains plug to indicate the live side (phase). The corresponding side on the
socket can be determined with the help of a phase detector. Touching live parts can
cause electric shock, burns or death.
<Observe the safety information for the use of a phase detector.
<If you are unsure, consult a qualified electrician.
<Connect the power cable to the mains
socket.
<Make sure that the mains socket used is
accessible at all times.
<Switch on the main switch.

26 27
Operating instructions MAESTRO Quantum Setting up
Front of device
Rear of device
Contents
Support
Operating instructions MAESTRO Quantum Setting up
Front of device
Rear of device
Contents
Support
3.8 Initial setup
<Switch on the device.
<Wait a few seconds.
The setup wizard starts automatically.
Information on the control and operation of the setup wizard:
See chapter “4.1 Control on the device” (page30).
<Follow the instructions shown on the
display.
<Accept the privacy policy.
<Set the language, region, country and
time zone.
For immediate use, Chromecast built-in can be started directly during setup or
alternatively at a later time.
See chapter “4.7.9 Chromecast built-in” (page58).
Setup includes the connection to the network.
See chapter “3.9 Network connection” (page27).
Completion of the setup is confirmed with a message on the display:
“Setup is complete - congratulations! The device is set up.”
3.9 Network connection
WLAN
<Briefly press the WPS button on the back
of the device.
<Then briefly press the WPS button on
your router.
The connection is established automatically .
LAN
<Connect the LAN cable with the device.
<Connect the LAN cable with your router.
The connection is established automatically .
Further connection options:
Main menu Settings Network wizard
See chapter “4.7.1 Network wizard” (page56).

28 29
Operating instructions MAESTRO Quantum Setting up
Front of device
Rear of device
Contents
Support
Operating instructions MAESTRO Quantum Setting up
Front of device
Rear of device
Contents
Support
3.10 Sound optimisation
To automatically adapt the sound to the room situation at the installation site, the unit is
prepared for the use of Dirac Live.
Dirac Live analyses the individual spatial conditions and uses acoustic processing
algorithms to reduce sound deviations and achieve optimal speaker performance.
The following components are required to use Dirac Live:
• Dirac Live app or Dirac Live software
• Measuring microphone
• Microphone extension cable
• Microphone stand
The Dirac Live app is available for iOS and Android.
Apple App Store Google Play Store
(iOS) (Android)
The Dirac Live software is available for Windows or MacOS.
https://www.dirac.com/live/downloads/
A measuring microphone, microphone extension cable and microphone stand can be
ordered on our website:
https://messmikrofon.sonoro.com/
Using the Dirac Live app
<Connect the measuring microphone and microphone extension cable.
<Connect the measuring microphone and the unit (USB-A connection).
<Press the main menu button ( ) on the unit.
<Select the sound settings Dirac Live.
<Open the Dirac Live app on your smartphone or tablet.
<Follow the instructions.
Using the Dirac Live software
<Connect the measuring microphone and microphone extension cable.
<Connect the measuring microphone and computer.
<Press the main menu button ( ) on the unit.
<Select the sound settings Dirac Live.
<Open Dirac Live on your computer.
<Make sure that your computer has recognised the measuring microphone.
<Follow the instructions.
Please note that this is a limited license, which guarantees the functionality of room
correction with limited frequency response correction (20Hz-500Hz). You can upgrade
this license to a full version (20Hz-20kHz) at a later date via our online shop.

30 31
Operating instructions MAESTRO Quantum Operation
Front of device
Rear of device
Contents
Support
Operating instructions MAESTRO Quantum Operation
Front of device
Rear of device
Contents
Support
4. Operation
The following options are available for operating the device:
• Directly on the device.
See chapter “4.1 Control on the device” (page30).
• Via the remote control.
See chapter “4.2 Control via the remote control” (page32).
• Via the app.
See chapter “5. sonoroaudioapp” (page60).
• Via the web client.
See chapter “6. sonoroweb client” (page60).
4.1 Control on the device
The device is controlled and operated
using the navigation keys and the rotary
control (e.g. to select menu items or follow
the instructions on the display).
If a menu is currently being displayed:
<Turn the controller to select a menu item or input.
If a source is currently playing:
<Turn the controller to adjust the volume.
If a menu is currently being displayed:
<Press the OK button to confirm the selection.
When a source is playing and a station image or music track cover appears
on the display:
• Pressing the OK button briefly displays information about the station or
track.
• Pressing and holding the OK button enlarges the display.
• By briefly pressing the OK button again, the previous display reappears.
If a menu is currently being displayed:
<Press the back button to go back to the previous menu.
If a source is currently playing:
<Press the back button to enter the submenu of the source.
<Press the main menu button to access the main menu.

32 33
Operating instructions MAESTRO Quantum Operation
Front of device
Rear of device
Contents
Support
Operating instructions MAESTRO Quantum Operation
Front of device
Rear of device
Contents
Support
4.2 Control via the remote control
The device can also be controlled and operated via the remote control (e.g. to select
menu items or follow the instructions on the display).
OK
If a menu is currently being displayed:
<Use the up and down buttons to select a menu item or item of information
within a menu.
<Use the left and right buttons to change the menu.
<Press the OK button to confirm the selection.
OK If a menu is currently being displayed:
<Press the button to confirm the selection.
If a source is currently playing:
<Press the button to mute / unmute.
If a menu is currently being displayed:
<Press the back button to go back to the previous menu.
If a source is currently playing:
<Press the back button to enter the submenu of the source.
<Press the main menu button to access the main menu.
If a source is currently playing:
<Use the + and - buttons to change the volume.
4.3 Functions
The following functions are accessed
directly via buttons on the device or on the
remote control.
• Switch on
The device starts with the last selected playback source.
• Turn off
The device switches to standby mode.
When the device is switched on but not playing and not being operated:
After the standby timeout has expired (default setting 15 minutes), the device
automatically switches to standby mode.
See chapter “4.7.12 Power management” (page59).
• Play
Playing a playback source is continued.
• Pause
Playing a playback source is paused.
• Press
The playback source changes to the previous title, station or frequency.
• Press and hold
If the playback source allows it, a rewind within the current title takes place
(e.g. with CD, podcast or My Music) or a station scan (with FM radio).

34 35
Operating instructions MAESTRO Quantum Operation
Front of device
Rear of device
Contents
Support
Operating instructions MAESTRO Quantum Operation
Front of device
Rear of device
Contents
Support
• Press
The playback source changes to the next title, station or frequency.
• Press and hold
If the playback source allows it, fast forward within the current title
(e.g. with CD, podcast or My Music) or station scan (with FM radio).
• Play
Inserting a sound carrier into the CD drive automatically starts playback of
the sound carrier.
Further information on playing sound carriers:
See chapter “4.5.11 Streaming” (page52).
• Eject
The sound carrier in the CD drive is ejected.
• Listen
Inserting the jack plug into the headphone socket on the device results
in playback on the connected headphones; playback on the speakers is
deactivated.
When headphones are connected via the headphone jack, playback via
loudspeakers is not possible.
See chapter “4.6 Favorites” (page54).
More information on selecting playback sources via dedicated buttons:
See chapter “4.5 Sources” (page39).
4.4 Main menu
Setting options can be reached via the main menu.
4.4.1 Menu
To select the desired playback source.
See chapter “4.5 Sources” (page39).
4.4.2 Sound settings
To adjust the sound to your own preferences (e.g. treble, bass).
The following options are available for selection in the menu:
• Adaptive loudness
Depending on the volume, the function compensates for an uneven tonal balance in
the lower frequency range. Fine tones can be heard clearly even with soft music.
• Bass - from –12 dB to +12 dB
• Treble - from –12 dB to +12 dB
• Balance control - from –6 dB (left) to –6 dB (right)
• Loudspeaker selection
Maximum power - for speakers with high power consumption (full frequency
response, no limit)
Medium power - for speakers with medium power consumption (full frequency
response, limited to 100 W at 4 Ω or 50 W at 8 Ω)
sonoro speakers - for presets matched to sonoro devices
- ORCHESTRA SLIM
- ORCHESTRA
- ORCHESTRA (Gen.2)
- GRAND ORCHESTRA
Dynamic Bass EQ
The function extends the lower frequency range and boosts the bass depending
on the signal level.
Dynamic Bass EQ is only available for the selected Sonoro speakers.

36 37
Operating instructions MAESTRO Quantum Operation
Front of device
Rear of device
Contents
Support
Operating instructions MAESTRO Quantum Operation
Front of device
Rear of device
Contents
Support
• Audio system setup
Stereo system (standard setting)
For two loudspeakers.
2.1 system
For two loudspeakers and one subwoofer.
2.2 system
For two loudspeakers and two subwoofers.
Speaker high-pass filter
If the unit is operated with subwoofers (2.1 system or 2.2 system), the connected
speakers (left and right) with speaker high-pass filters (2nd order or 4th order) can
be used. The speaker high pass filters relieve the speakers of low tones, and the
system‘s dynamics and volume are improved.
The bass volume is adjusted on the subwoofer - starting with a low volume and
slowly increasing until the subwoofer can just be heard.
- Speaker high pass filter 2nd order (12 dB/octave)
- Speaker high pass filter 4th order (24 dB/octave)
- Off
High-pass filter frequency
The unit and subwoofer must be set to the same high-pass filter frequency
between 40 Hz and 160 Hz. Low frequencies (e.g. 40 Hz) are suitable for large
subwoofers, higher frequencies for smaller subwoofers.
• DiracLive
See chapter “3.10 Sound optimisation” (page28).
4.4.3 Sleep timer
For selecting and setting the automatic switch-off function. The desired time interval can
be set in 5-minute steps up to a maximum of 120 minutes.
The activated sleep timer is indicated by the icon. The sleep timer can be ended
immediately by switching off the device.
4.4.4 Alarm
To set up the alarm function with your own settings. The menu includes the following
options:
• Alarm list
Stored wake-up times are managed in the alarm list. After selecting an alarm time,
the stored settings can be confirmed, changed or deleted. Each editing of a wake-up
time must be confirmed by saving.
• Add alarm
To appear in the alarm list, a desired alarm time must be added with the following
settings saved:
Active - Off, Daily, Once, Weekdays, Weekends or a specific day of the week.
Time - Time to the minute.
Sound - Alarm tone “Morning vibes” or a source from the favorites.
Volume
The setting of the alarm time must be confirmed by saving.
The activated alarm is indicated by the icon. In standby, the alarm time is displayed at
the bottom.
Snooze function
The alarm can be temporarily silenced by pressing the OK, Play / Pause or Mute button.
The snooze function icon flashes and the remaining time is displayed.
The duration (default setting 10 minutes) can be changed (5, 10, 15, 20, 30, 45 or
60 minutes) using the rotary control or the Up / Down buttons on the remote control.
Pressing the standby button ends the snooze function.

38 39
Operating instructions MAESTRO Quantum Operation
Front of device
Rear of device
Contents
Support
Operating instructions MAESTRO Quantum Operation
Front of device
Rear of device
Contents
Support
4.4.5 Recently played
Calls up the list with the most recently played sources.
If the storage spaces are exceeded, the oldest entry is overwritten.
4.4.6 Recall from favorites
To call up a previously saved source (e.g. radio stations, titles from streaming services or
podcast programmes).
See chapter “4.6 Favorites” (page54).
4.4.7 Settings
For selecting general setting options of the device (e.g. network, language, time,
factory reset).
See chapter “4.7 Settings” (page56).
4.5 Sources
Selection of the desired playback source.
The following options are available:
• Dedicated buttons directly on the device.
The following buttons offer the option of selecting other sources:
AUX – See chapter “4.5.8 Analogue” (page49).
DIGITAL – See chapter “4.5.7 Digital” (page48).
My Music – See chapter “4.5.6 My Music” (page46).
• Main menu selection Menu.
• MENU button on the remote control.
When a source is playing and shown on the display:
• Pressing the back button or selecting the source again calls up the source submenu.
• After pressing the back button in the submenu, the source is shown again on the
display.
Buttons on the device or on the remote control (e.g. favorites, play, pause, change to
the next or previous title) are available for all play sources.
Table of contents
Other Sonoro Receiver manuals
