This is the Internet version of the user’s guide
© Print only for private use. 11
The effect applies until you select another effect or turn
the effect off by selecting No effect,
YES
.
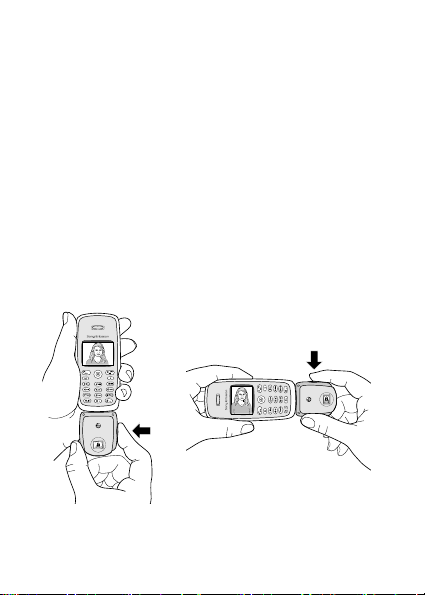
Tip: When in viewfinder mode, press repeatedly
to view the different effects. When you take the picture,
the current effect in the display is selected. Press
to return to viewfinder mode without an effect.
Important information
Since the network on which your phone operates is
provided by a carrier independent from Sony Ericsson,
Sony Ericsson shall not be liable in any way for the
operation, availability, coverage, services, or ranges of
such a network. Sony Ericsson does not warrant that the
network connection will be uninterrupted or error-free.
Do not expose your product to liquid or moisture or to
humidity.
Do not expose your product to extreme high or low
temperatures.
Do not expose your product to lit candles, cigarettes, or
cigars, or to open flames etc.
Do not drop, throw or try to bend the product as rough
treatment could damage it.
Do not attempt to disassemble your product. The
product does not contain consumer serviceable
components.
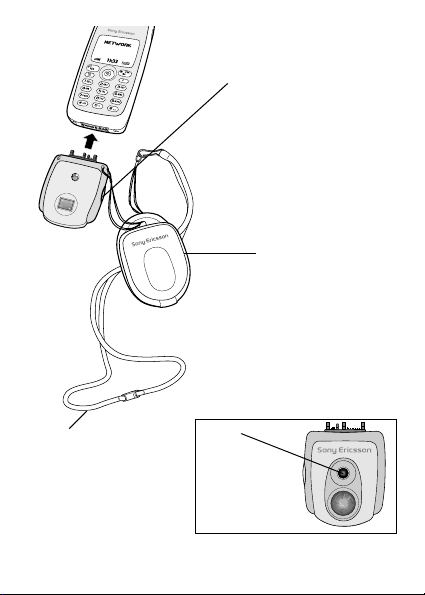
Do not carry your phone using the CommuniCam™
strap.
Treat your product with care, keep it in a clean and
dust-free place.