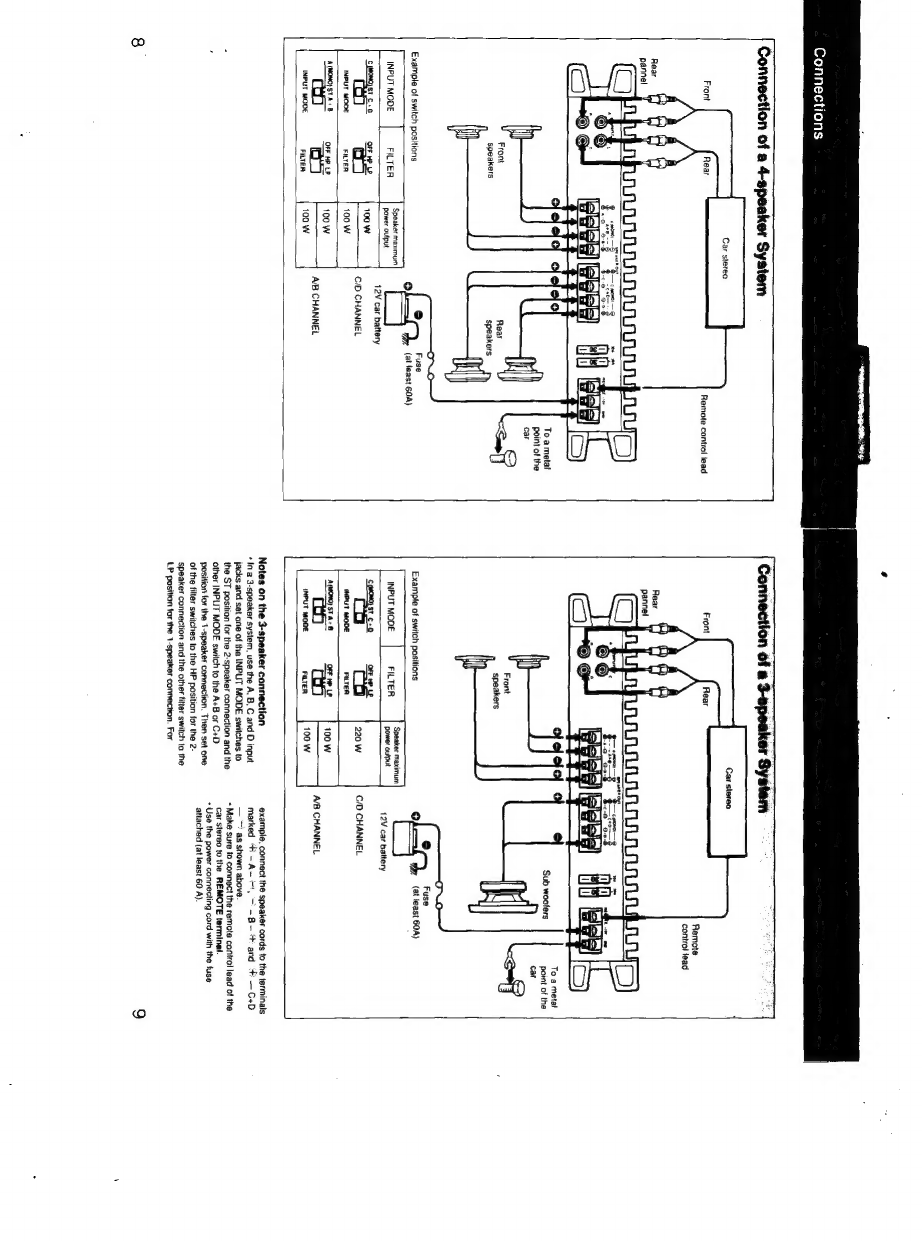
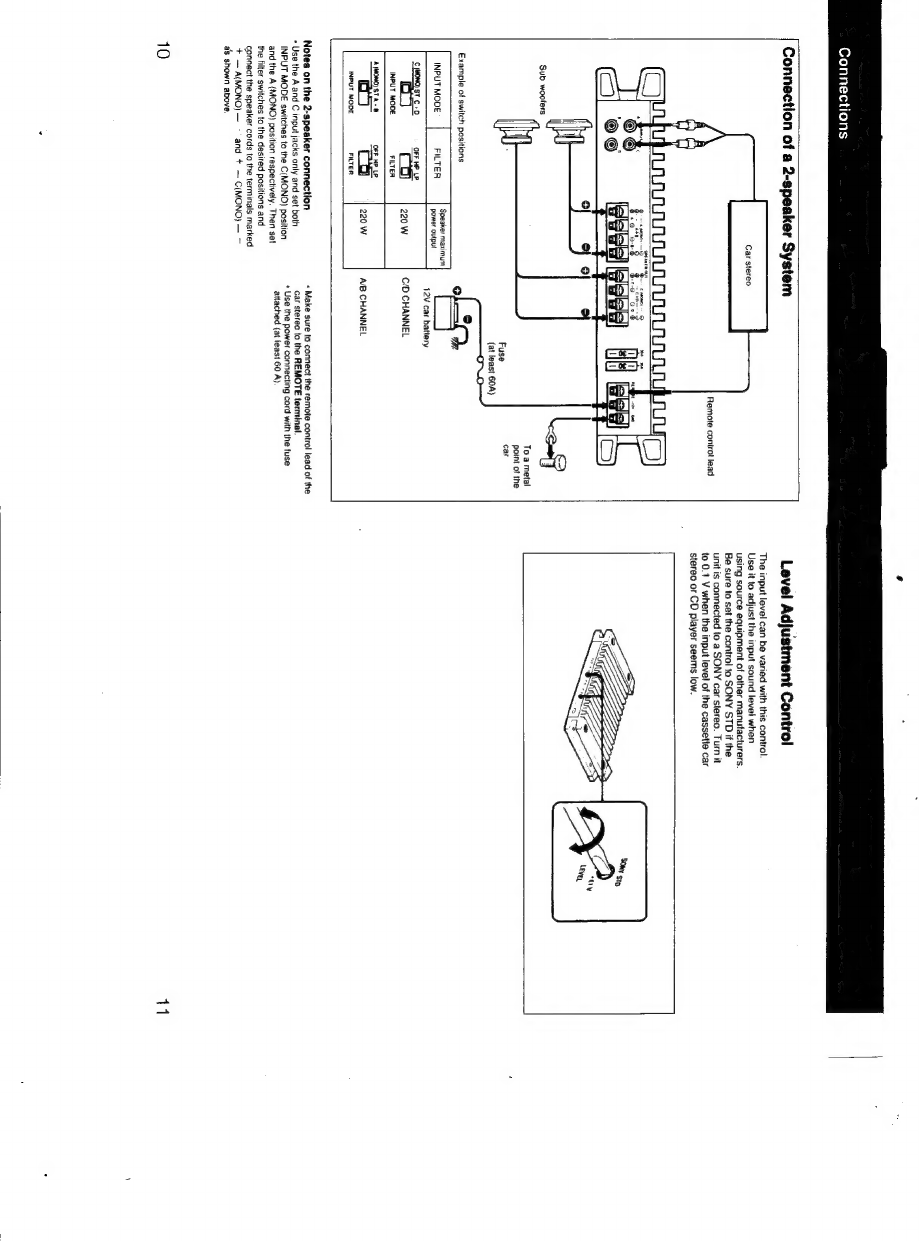
Sony XM-5540F User manual
Other Sony Amplifier manuals

Sony
Sony TA-MR2ES - 2 Channel Amplifier User manual

Sony
Sony TA-E9000ES - Stereo Preamplifier User manual

Sony
Sony TA-S9D User manual

Sony
Sony TA-DK2 User manual

Sony
Sony XM-4060GTX Operating & Connection User manual

Sony
Sony XM4S - XM 4S Amplifier User manual

Sony
Sony XM-2040 User manual

Sony
Sony TA-V606 User manual

Sony
Sony XM-460GTX Marketing Specifications User manual

Sony
Sony XM-SD14X User manual

Sony
Sony TA-AX5 User manual

Sony
Sony TA-F45 User manual

Sony
Sony XM-1ES User manual

Sony
Sony XDP-4000X Operating Instructions (primary... User manual

Sony
Sony TA-P9000ES - Amplifier User guide

Sony
Sony XM-DS1600P5 Operating & Mounting User manual

Sony
Sony TA-F110 User manual

Sony
Sony TA-SB500WR User manual

Sony
Sony TA-F3000 User manual

Sony
Sony XM-604M - Amplifier User manual