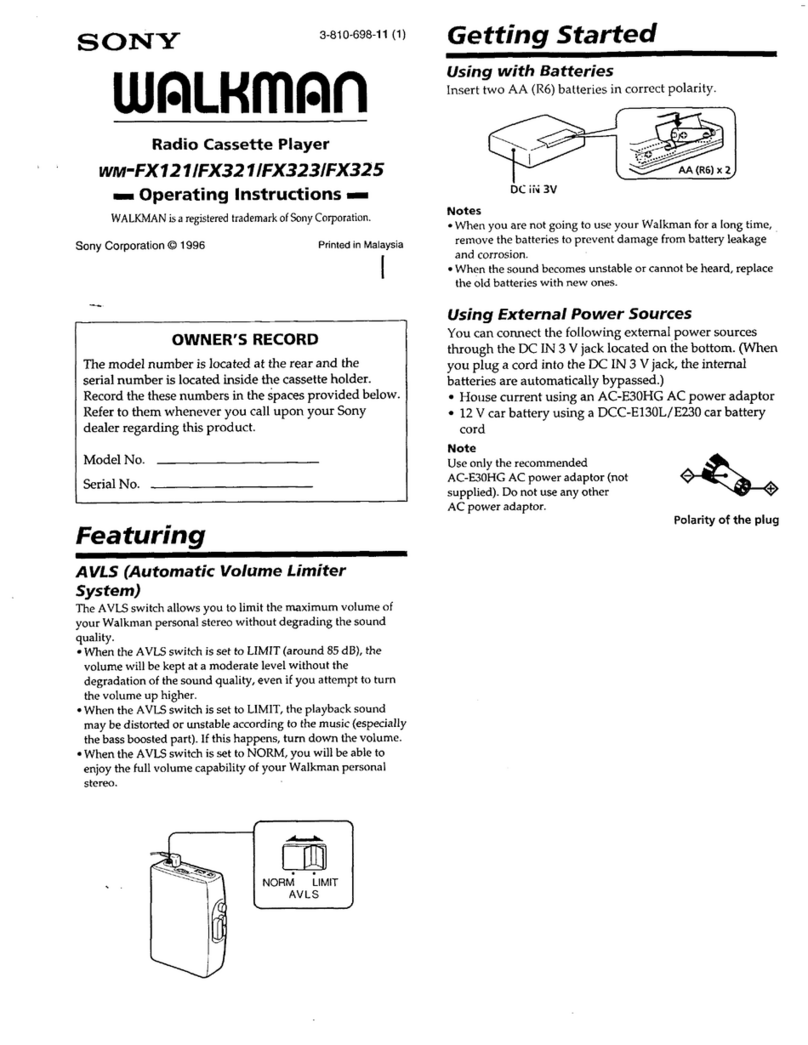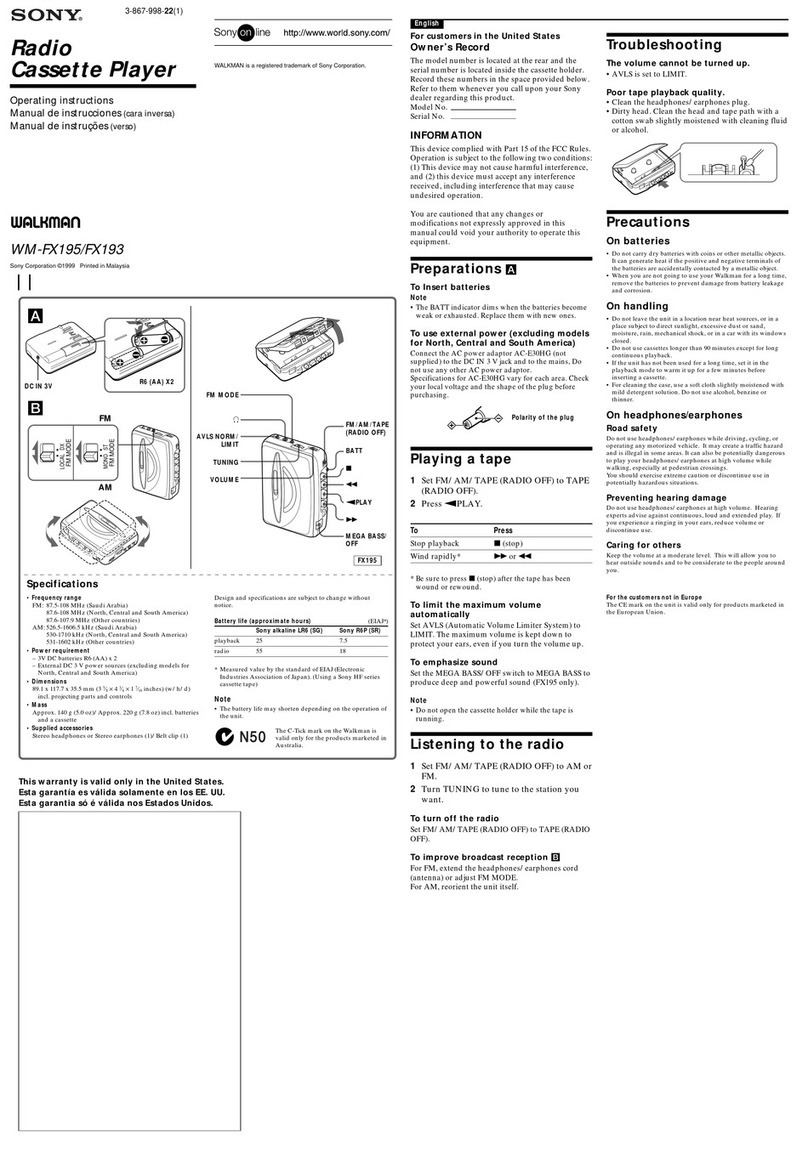
CFD-RG880CP
5
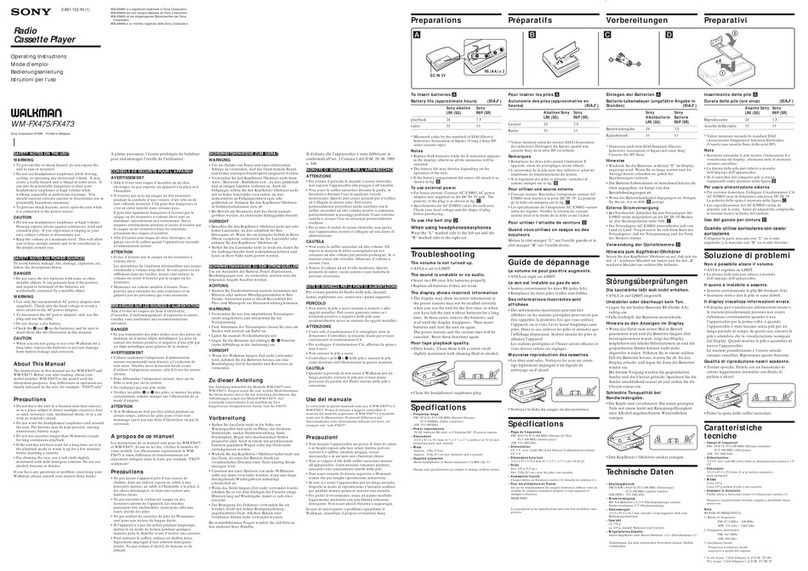
Recording on a tape
Use the buttons on the unit for the operation.
1
Press Y;
on the unit to open the tape
compartment and insert a blank tape with the side
you want to record on facing upward. Use TYPE I
(normal) tape only. Close the compartment.
2Select the program source you want to record.
To record from the CD player, press CD on the
unit and place a CD.
To record from a USB device, press USB XT on the
unit and connect the USB device.
To record from the radio, tune in the station you want
(see “Listening to the radio”).
3Press [on the unit to start recording (/is
depressed automatically).
To Press
Pause recording 9on the unit.
Press the button again to
resume recording.
Stop recording Y; on the unit.
Tips
[Adjusting the volume or the audio emphasis will not aect the
recording level.
[If the AM program makes a whistling sound aer you have pressed
[in step 3, press MODE RG on the unit to select the position of
ISS (Interference Suppress Switch) that most decreases the noise.
[For the best results, use the AC power as a power source for
recording.
[To erase a recording, proceed as follows:
1 Insert the tape whose recording you want to erase.
2 Makesurethat“TAPE”isdisplayed.(If“TAPE”isnotdisplayed,
press /on the unit or press FUNCTION XI on the remote
until it appears in the display.)
3Press[on the unit.
Listening to the radio
1Press RADIO/BAND[AUTO PRESET on the unit
(RADIO/BAND on the remote) repeatedly.
Each time you press the button, the indication
changesasfollows:
“FM” U“A M ”
2Hold down TUNE + or – until the frequency
digits begin to change in the display.
e unit automatically scans the radio frequencies
and stops when it nds a clear station.
If you cannot tune in a station, press TUNE +or–
repeatedly to change the frequency step by step.
When an FM stereo broadcast is received, “ST”
appears.
Tip
If the FM broadcast is noisy, press MODE RG until “Mono” appears in
the display and the radio will play in monaural.
Changing the AM tuning interval
(except for Mexican model)
If you need to change the AM tuning interval, do the
following:
1Press RADIO/BAND•AUTO PRESET on the unit
until “AM” is displayed.
2Hold down DSPL/ENT XG until the preset number
ashes in the display, then press RADIO/
BAND•AUTO PRESET on the unit for 2 seconds.
3Press PRESET + or – on the unit to select “9K
STEP” for 9 kHz interval or “10K STEP” for 10 kHz
interval.
4Press DSPL/ENT XG on the unit.
Aer changing the tuning interval, you need to reset
your preset radio stations.
Playing a tape
Use the buttons on the unit for the operation.
1Press Y; on the unit, and insert the tape into
the tape compartment with the side you want to
play facing upward. Use TYPE I (normal) tape only.
Close the compartment.
Makesurethereisnoslackinthetapetoavoid
damaging the tape or the unit.
2Press /on the unit.
e unit starts playing.
To Press
Pause playback 9on the unit. To resume play,
press it again.
Stop playback Y; on the unit.
Fast-forward or
rewind
Nor .(rewind or fast
forward) on the unit.
Eject the cassette Y; on the unit.
Listening to music of a USB device
You can listen to music stored on a USB device (digital
music player or USB storage media).
Music les in WMA and MP3 format* can be played on
this unit.
See “Playable/Recordable USB devices” on the back page
for a list of USB devices that can be connected to this
unit.
* Files with copyright protection (Digital Rights Management) cannot
be played on this unit.
1Press USB XT on the unit.
2Connect the USB device to the (USB) port X.
e blue indicator lights up and “USB MEMORY”
appears in the display.
3Press V.
e unit starts playing.
File number After the le name is displayed,
the playing time will appear.
4Press VOL + or – (or VOLUME + or – on the remote)
to adjust the volume.
Other operations
To Press
Pause playback V. To resume play, press the
button again*.
Stop playback Y.
Select a folder + or – .
Select a le or .
Find a point in a
le
Hold down or during
playback, and release the button at
the desired point (Nor .XL
on the remote).
Select Repeat Play REPEAT RE on the unit repeatedly
until “ ” or “ 1” appears.
Remove the USB
device
Hold down Yuntil “NO DEV”
appears, then remove the USB
device.
* When playing a VBR MP3 le, the unit may resume playback from
a dierent point.
Tips
[Playback starts from the MP3/WMA le you last stopped playing
(Resume play). During stop, the MP3/WMA le number and the
playingtimetobeplayedaredisplayed.
[To cancel resume play (to start play from the beginning of the rst
MP3/WMA le), press Y.
Note
Always hold down Yandmakesurethat“NODEV”appears
before removing the USB device. Removing the USB device while
“NO DEV” is not displayed may corrupt the data on the USB device
or damage the USB device itself.
To change the play mode
Press MODE RG repeatedly while the USB device is not
playing. You can select Normal Play (“ ” for all les in
the folder on the USB device), Shue Play (“SHUF” or
“SHUF”), or Program Play (“PGM”).
Notes on the USB device
[Youcannotchangetheplaymodeduringplayback.
[Some time may be needed before playback starts when:
– the folder structure is complex.
– the USB device is close to capacity.
[When a USB device is connected, the unit reads all the les on the
device. If there are many folders or les on the device, it may take a
long time for the unit to nish reading them.
[Do not connect a USB device to the unit through a USB hub.
[
In the case of some USB devices, when an operation is performed on
the USB device, there may be a delay before it is carried out on this unit.
[is unit may not support all the functions provided on the
connected USB device.
[
Files recorded by this unit are played back in the order of folder
creation. Files recorded by a device other than this unit (such as a
computer) may not play back in the order in which they were recorded.
[e playback order on this unit may dier from the playback order
on the connected USB device.
[Do not save non-MP3/WMA les or unnecessary folders to a USB
device that contains MP3/WMA les.
[During playback, folders that contain no MP3/WMA les are
skipped.
[is unit can play only MP3/WMA les that have the “.mp3” or
“.wma” le extension.
[If there are les on the disc that have the “.mp3” or “.wma” le
extension, but are not MP3/WMA les, the unit may produce noise
or malfunction.
[A maximum of 999 MP3/WMA les and 255 folders can be
contained on a single USB device.
e maximum number of MP3/WMA les and folders may vary,
depending on the le and folder structure.
[Compatibility with all MP3/WMA encoding/writing soware,
recording devices, and recording media cannot be guaranteed. If
you use an incompatible USB device, the sound skipping or noise
may be produced, or the device may not play at all.
Recording from a disc to a USB device
By connecting a USB device (digital music player or USB
storagemedia)tothe (USB)portX on the unit, you
can record music from a disc to the USB device.
is unit supports recording from CD-DA and MP3/
WMA discs only. Sound from this unit’s cassette player
or radio cannot be recorded to a USB device.
Audio les are recorded on this unit in the MP3 or
WMA format.
e approximate recording size is about 1 MB per
minute of recording time from a CD. e le size may be
larger for recordings made from an MP3/WMA disc.
See “Playable/Recordable USB devices” on the back page
for a list of the USB devices that can be connected to this
unit.
Synchro Recording
is function allows you to easily record an entire disc
onto a USB device.
1Connect a USB device with recording capability to
the (USB) port X.
If a USB cable is necessary, use the USB cable supplied
with the device to be connected.
Refer to the operation manual supplied with the USB
device for connection details.
2Press CD and insert the disc that you want to
record.
To Press
Pause playback Von the unit (9on the remote)
.Toresumeplay,pressitagain.
Stop playback Y.
Go to the next
track/MP3/WMA
le
.
Go back to the
previous track/
MP3/WMA le
.
Select a folder on
an MP3/WMA
disc
+ to go forward and – to go
backward .
Locate a point
while listening to
the sound
(forward) or (backward)
whileplayingandholdituntil
you nd the point (Nor .XL
on the remote).
Locate a point
while observing
the display
(forward) or (backward)
in pause and hold it until you
nd the point (Nor .XL on
the remote).
Remove the CD ;PUSH OPEN/CLOSE .
Tips
[Playback starts from the track/MP3/WMA le you last stopped
playing (Resume play). During stop, the track/MP3/WMA le
number to be played is displayed.
[To cancel the resume play (to start play from the beginning of the
rst track/MP3/WMA le), press Ywhile the CD is stopped.
When you open the CD compartment or turn o the unit, the
resume play is also canceled.
Note
You cannot locate a specic track if “SHUF” or “PGM” is lit in the
display.
Press Y, and then press MODE RG repeatedly until “SHUF” and
“PGM”disappearfromthedisplay.
Example of folder structure and playing order
e playing order of the folders and les is as follows:
Folder
MP3/WMA le
Notes on MP3/WMA discs
[When the disc is inserted, the unit reads all the les on that disc.
During this time, “READING” is displayed. If there are many folders
or non-MP3/WMA les on the disc, it may take a long time for play
to begin or for the next MP3/WMA le to start play.
We recommend that you do not save unnecessary folders or les
other than MP3/WMA ones in the disc to be used for MP3/WMA
listening.
[A folder that does not include an MP3/WMA le is skipped.
[Maximum number of les: 511
Maximum number of folders: 511 (including the root folder)
Maximum directory levels: 8
[Folder names and le names can be displayed with up to 32
characters including quotation marks.
[e characters A - Z, 0 - 9, and _ can be displayed on this unit.
Other characters are displayed as “_”.
[is unit conforms to Version 1.0, 1.1, 2.2, 2.3 and 2.4 of the ID3 tag
format. When the le has the ID3 tag information, “song title”,
“artist name” and “album name” can be displayed. If the le does not
have the ID3 tag information, “NO TITLE” appears instead of song
title, “NO ARTIST” appears instead of artist name and “NO
ALBUM” appears instead of album name. e ID3 tag information
can be displayed with up to 32 characters.
[When naming, be sure to add the le extension “.mp3” or “.wma” to
the le name.
[If you put the extension “.mp3” or “.wma” to a le other than an
MP3/WMA le, the unit cannot recognize the le properly and will
generate random noise that could damage your speakers.
[e le name does not correspond to the ID3 tag.
3Press Von the unit (/on the remote) .
e unit plays all the tracks/MP3/WMA les once.
When you place MP3/WMA discs, “MP3” or “WMA”
appears in the display aer the unit reads the le
information.
Audio CD
Track number Playing time
MP3/WMA disc (Example: When you place MP3 disc)
MP3/WMA le number After the song title is displayed,
the playing time* will appear.
*If the playing time is more than 100 minutes, it appears as “--:--” in
the display.
* VOL + (VOLUME + on the remote) ,Vand /(on the
unit) have a tactile dot.
Before using the unit
To turn on/o the power
Press POWER .
To adjust the volume
Press VOL +, – (VOLUME +, – on the remote) .
To listen through headphones
Connect the headphones to the J(headphones) jack XH.
To select the sound characteristic
Press ROCK, DANCE, SALSA, REGGAETON or FLAT
to select the kind of audio emphasis that you want.
(On the remote, press SOUND repeatedly.)
e level meter in the display shows the sound signal
strength.
To reinforce the bass sound
Press POWER DRIVE WOOFER (WOOFER on the
remote) RI.
e eectiveness of the WOOFER function can be
changed as follows:
(o)
When the LIGHT SYNC function is on, the ring around
the woofer speaker lights up, in accordance with the
sound signal strength.
To return to normal sound, press the button repeatedly
until the indication disappears from the display.
Notes
[While the sleeping timer is on, the ring does not light, even if the
WOOFER function is used.
[When you use the headphones, the WOOFER function does not
work.
To turn o the demo mode
When you connect the power cord to a wall outlet, the
demo mode will start automatically. To turn o the demo
mode, press POWER .
If you do not want to turn on the power of the unit,
operate the following steps to turn o:
1While holding down DSPL/ENT XG, press STOP .
To resume the demo mode, perform the same step again.
Note
When you operate the unit on batteries, the demo mode is not
activated.
Playing a CD/MP3/WMA disc
1Press CD on the unit.
(On the remote, press POWER and then press CD
.)
2Press ;PUSH OPEN/CLOSE on the unit, and
place a disc with the label side up into the CD
compartment.
To close the CD compartment, press ;PUSH OPEN/
CLOSE on the unit.
SECTION 2
GENERAL This section is extracted
from instruction manual.
• Basic Operations
