Chapter
1
Getting
Started
Features
....
Precautions
Unpacking
Checking
the
supplied
accessories
.
Notes
on
installation
............
Checking
the
operating
voltage
Hooking
up
the
system...
Before
you
begin
..
Hook-up
example
........
Hook-up
for
tape
AubDING
0.0.0...
eeeeeeeseeeeserestesateeeeeneee
5
Identifying
the
Parts
0.0...
eecceessessescssesesssseeeseecsecaeneseseneeeeans
6
VON
DANel
sfc
icecdeccsseksssereccsoratenaessecsotedes
snosuasnveedeoneuseed
6
Chapter
2
Playback
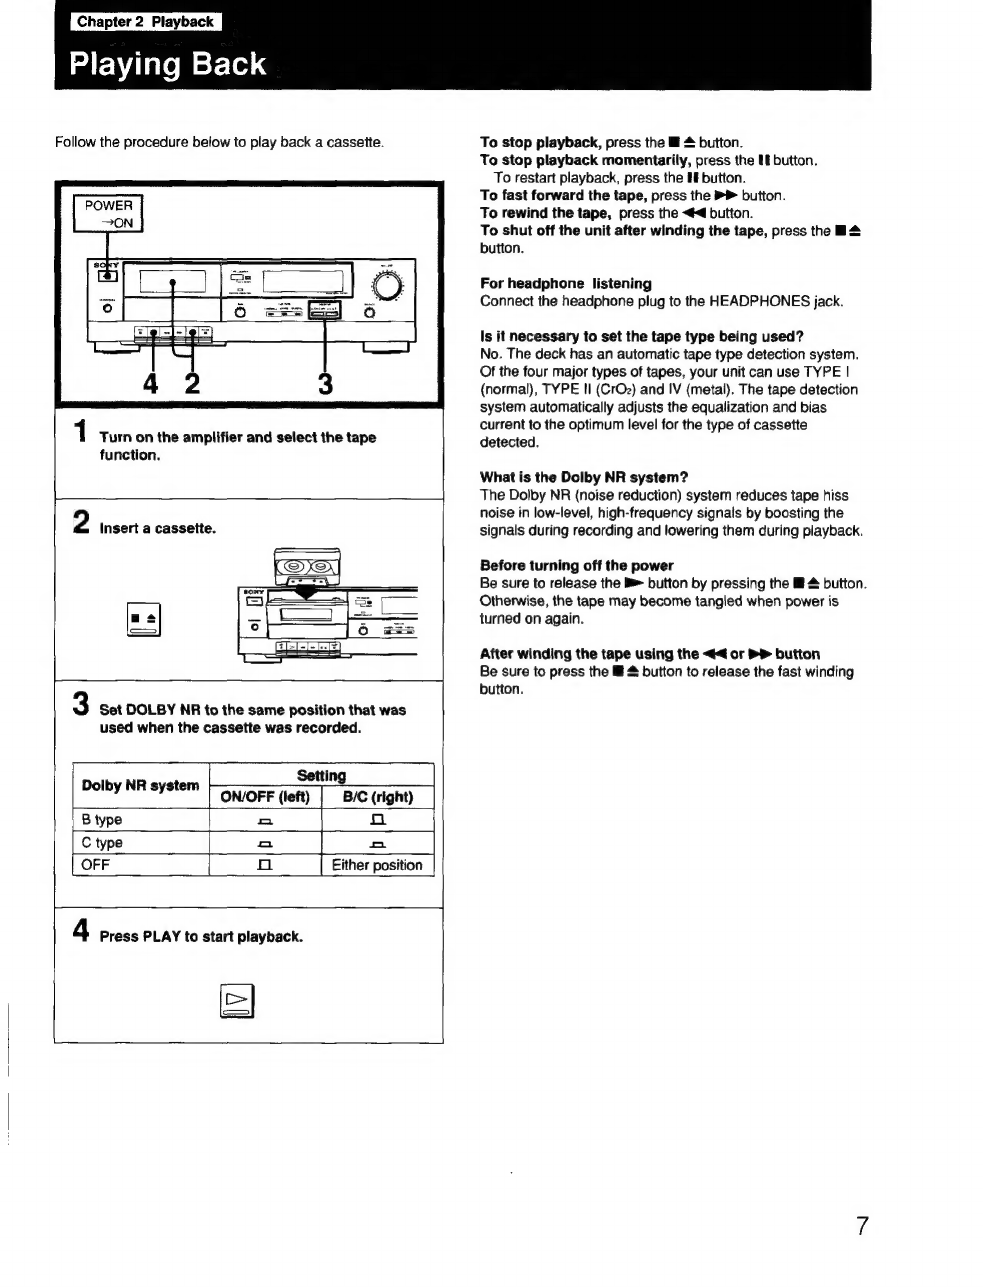
Playing
back
iscsi
Seivcces
tava
ecsidednnssetilevesdaveedsaanesddiagiesisaclouve
7
Chapter
3
Recording
FROGOPING
55:
ccezkcccesgcetnsviduceesevsueens
tvateas
ovGvevae
yeccecvesboasversctetects
How
to
record
to
a
cassette
...
ms
Adjusting
the
recording
level
0.0.0...
cesceeceeereeeeeneteneeeee
Making
an
optimum
recording
according
to
the
tape
type
—
Bias
adjustment
To
protect
a
recording
Chapter
4
Additional
Information
Maintenance
..........
ees
esssesesesceacsessnesstseecsscsesenesseneeseegenseeasess
10
Cleaning
the
heads
and
tape
path...
ce
ceeeeeeeeneeees
10
Demagnetizing
the
heads
wee
Cleaning
the
Cabinet...
ccsssessseeesesssceeseseersetseseees
Specifications
........eecsecscecerssescessseessecsssetstessssesesetaeeeseeeees
Troubleshooting
QUIde
...........ecc
sees
te
tsteeteteeeeaeeee
Chapter
1
Getting
Started
Features
For
higher
quality
recording/playback
-
B
and
C
type
Dolby
NR*
systems
which
reduce
tape
noise.
+
Automatic
tape type
selection
during
playback
and
recording.
+
Bias
control
which
ensures
optimum
recording
conditions
to
bring
out
the
best
in
every
tape.
*
Dolby
noise
reduction
manufactured
under
license
from
Dolby
Laboratories
Licensing
Corporation.
“DOLBY”
and
the
double-D
symbol
D0
are
trademarks
of
Dolby
Laboratories
Licensing
Corporation.