manuals.online logo
Brands
  1. Home
  2. •
  3. Brands
  4. •
  5. Sony
  6. •
  7. Digital Camera
  8. •
  9. Sony ILCE-6400 User manual

Sony ILCE-6400 User manual

SERVICE MANUAL
Sony Imaging Products & Solutions Inc.
Conditions of Use:
(1) Please use this information only for the purpose of performing repair, maintenance and/or configuration services of the Sony products (hereinafter the “Repair services”) under the
service agreement entered into with the Sony group company (hereinafter the “Service agreement”). Using this information for any purpose other than the purpose described foregoing
is forbidden.
(2) Only the Authorized Servicer’s officers, employees or subcontractors (including their officers and employees) whose duties justify a need-to-know and who have agreed to hold
confidential this information (collectively hereinafter the “Permitted users”) are permitted to access and use this information. To disclose or disseminate to any person other than the
Permitted users is forbidden.
(3) Destroy or erase any and all portion of this information promptly in an irrecoverable and secure fashion after achieving the purpose described in Section (1) above.
(4) Do not copy, replicate, reproduce, alter, translate, transmit, sell, lease, or distribute this information in whole or in part without the prior written permission of the author.
(Notwithstanding foregoing, it is permitted to copy and distribute this information to the Permitted users.)
(5) Please notify immediately any leakage, loss, theft, misappropriation, or other misuse of this information by e-mail to the following address:
[email protected].com
(6) In addition to the above, the terms and conditions of the Service agreement shall be applied to using this information.
Revision of Information:
This information may be changed or updated at any time without any prior notice. Please confirm that this information is up-to-date before using it.
US Model
Canadian Model
AEP Model
UK Model
E Model
Indian Model
Chinese Model
Korea Model
Tourist Model
INTERCHANGEABLE LENS DIGITAL CAMERA
© 2019.01
2019A33-1
9-896-854-31
Ver. 1.0 2019.01
ILCE-6400/6400L/
6400M
LEVEL 2
Note:
Be sure to keep your PC used for service and
checking of this unit always updated with the
latest version of your anti-virus software.
In case a virus affected unit was found during
service, contact your Service Headquarters.
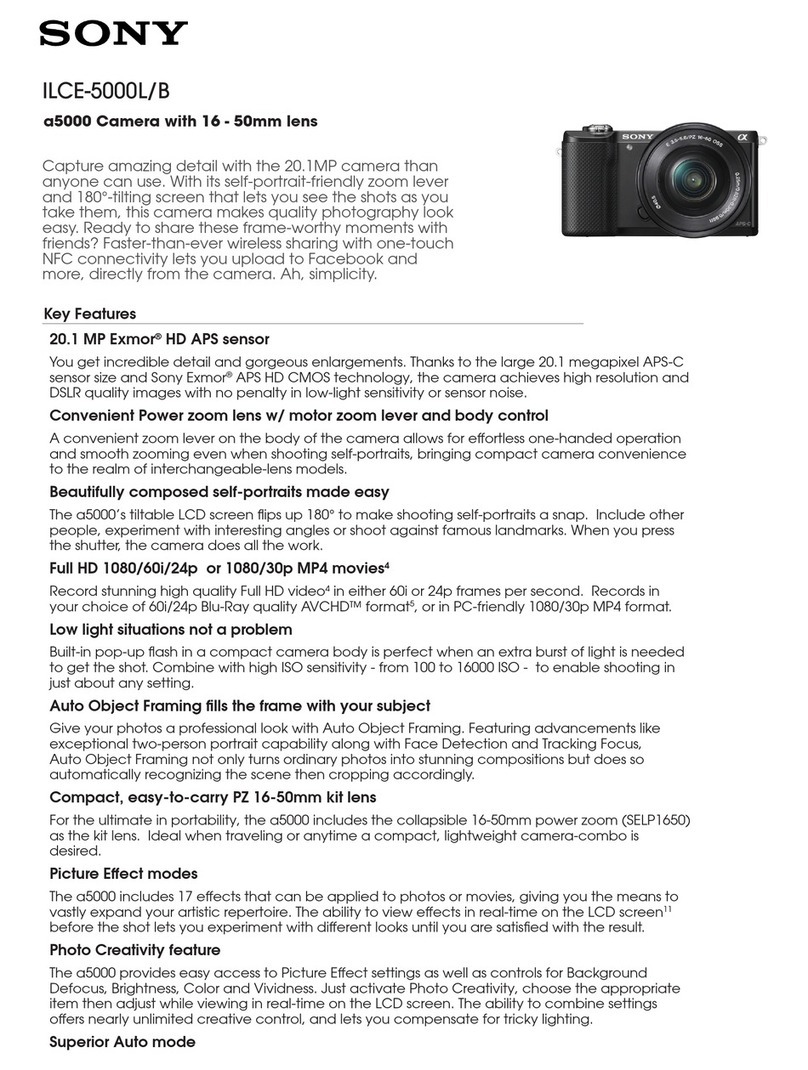
Photo: ILCE-6400 (Main body)/BLACK
[About the service of this model]
ILCE-6400L/6400M is commodity that packed the Interchangeable Lens Digital Camera and Interchangeable Lens.
Refer to each following service manual the Interchangeable Lens kit, when you repair.
Model Lens Service Manual of Lens
ILCE-6400 No supplied lens No supplied lens
ILCE-6400L SELP1650 (E PZ 16-50mm F3.5-5.6 OSS) 9-834-693-1[]
ILCE-6400M SEL18135 (E 18-135mm F3.5-5.6 OSS) 9-896-833-1[]
SYSSET
2019/01/3002:39:50(GMT+09:00)
2
ILCE-6400/6400L/6400M
SPECIFICATIONS
Model information table
Model ILCE-6400 ILCE-6400L ILCE-6400M
Destination US, CND, E, KR AEP, UK, E,
IND, CH, JE US, CND, E, KR AEP, UK, E,
IND, CH, JE
Color system NTSC PAL NTSC PAL NTSC PAL
Lens ––
E PZ 16-50mm
F3.5-5.6 OSS
E PZ 16-50mm
F3.5-5.6 OSS
E 18-135mm
F3.5-5.6 OSS
E 18-135mm
F3.5-5.6 OSS
• Abbreviation
CH : Chinese model
CND : Canadian model
IND : Indian model
JE : Tourist model
KR : Korea model
Camera
[System]
Camera Type
Interchangeable Lens Digital Camera
Lens
Sony E-mount lens
[Image sensor]
Image format
APS-C size (23.5 mm × 15.6 mm), CMOS image sensor
Effective pixel number of camera
Approx. 24 200 000 pixels
Total pixel number of camera
Approx. 25 000 000 pixels
[Anti-Dust]
System
Charge protection coating on Optical Filter and ultrasonic vibration mechanism
[Auto focus system]
Detection system
Phase detection system/Contrast detection system
Sensitivity Range
–2 EV to +20 EV (at ISO 100 equivalent, F2.0)
[Electronic Viewfinder]
Type
1.0 cm (0.39 type) Electronic Viewfinder
Total number of dots
2 359 296 dots
Frame coverage
100%
Magnification
Approx. 1.07×
Approx. 0.70× (35 mm-format equivalent) with 50 mm lens at infinity, –1 m–1
Eye Point
Approx. 23 mm from the eyepiece and approx. 21.4 mm from the eyepiece frame at –1 m–1
Diopter Adjustment
–4.0 m–1 to +3.0 m–1
[Monitor]
LCD monitor
Wide, 7.5 cm (3.0 type) TFT drive, touch panel
Total number of dots
921 600 dots
[Exposure control]
Metering method
1 200-zone evaluative metering
Metering Range
–2 EV to +20 EV (at ISO 100 equivalent with F2.0 lens)
ISO sensitivity (Recommended exposure index)
Still images: ISO 100 to ISO 32 000 (Extended ISO: Maximum ISO 102 400), [ISO AUTO] (ISO 100 to 6 400, Maximum/Minimum can be
set.)
Movies: ISO 100 to ISO 32 000 equivalent, [ISO AUTO] (ISO 100 to ISO 6 400 equivalent, Maximum/Minimum can be set.)
Exposure compensation
±5.0 EV (switchable between 1/3 EV and 1/2 EV steps)
*%
[Shutter]
Type
Electronically-controlled, vertical-traverse, focal-plane type
Speed range
Still images: 1/4 000 second to 30 seconds, BULB
Movies: 1/4 000 second to 1/4 second (1/3 EV step)
1080 60i-compatible devices (1080 50i-compatible devices): up to 1/60 (1/50) second in AUTO mode (up to 1/30 (1/25) second in Auto
slow shutter mode)
Flash sync speed
1/160 second (when using a flash manufactured by Sony)
[Flash]
Guide number
6 (in meters at ISO100)
Recycling time
Approx. 4 seconds
Flash coverage
Covering 16 mm lens (focal length that the lens indicates)
Flash compensation
±3.0 EV (switchable between 1/3 EV and 1/2 EV steps)
[Recording format]
File format
JPEG (DCF Ver. 2.0, Exif Ver. 2.31, MPF Baseline) compliant, RAW (Sony ARW 2.3 format)
Movie (XAVC S format)
MPEG-4 AVC/H.264 XAVC S ver.1.0 format compliant
Video: MPEG-4 AVC/H.264
Audio: LPCM 2ch (48kHz 16bit)
Movie (AVCHD format)
AVCHD format Ver. 2.0 compatible
Video: MPEG-4 AVC/H.264
Audio: Dolby Digital 2ch, equipped with Dolby Digital Stereo Creator
Manufactured under license from Dolby Laboratories.
[Recording media]
Memory Stick, SD cards
[Input/output terminals]
Multi/Micro USB Terminal*
Hi-Speed USB (USB 2.0)
HDMI
HDMI type D micro jack
(Microphone) terminal
Ø3.5 mm Stereo mini jack
[Power, general]
Model No.
WW715296
Rated input
7.2 V
V
Power consumption (while shooting)
Using an E PZ 16-50mm F3.5-5.6 OSS
When using the viewfinder: Approx. 2.4 W
When using the monitor: Approx. 2.1 W
Operating temperature
0 to 40°C (32 to 104°F)
Storage temperature
–20 to 55°C (–4 to 131°F)
Supports Micro USB compatible devices.
*
Dimensions (W/H/D) (Approx.)
120×66.9×59.7 mm
120×66.9×49.9 mm (from grip to monitor)
4 3/4 ×2 3/4×2 3/8 in.
4 3/4 ×2 3/4×2 in. (from grip to monitor)
Mass (Approx.)
403 g (14.3 oz) (including battery pack, SD card)
Microphone
Stereo
Speaker
Monaural
Exif Print
Compatible
DPOF
Compatible
PRINT Image Matching III
Compatible
[Wireless LAN]
Supported format
IEEE 802.11 b/g/n
Frequency band
2.4 GHz
Security
WEP/WPA-PSK/WPA2-PSK
Connection method
Wi-Fi Protected Setup™ (WPS)/Manual
Access method
Infrastructure mode
[NFC]
Tag type
NFC Forum Type 3 Tag compliant
[Bluetooth communications]
Bluetooth standard Ver. 4.1
Frequency band
2.4 GHz
AC Adaptor AC-UUD12/AC-UUE12
Rated input
100 – 240 V
V
, 50/60 Hz, 0.2 A
Rated output
5 V , 1.5 A
Rechargeable battery pack NP-FW50
Rated voltage
7.2 V
V
Design and specifications are subject to change without notice.
SYSSET
2019/01/3002:39:50(GMT+09:00)
3
ILCE-6400/6400L/6400M
SAFETY-RELATED COMPONENT WARNING!!
COMPONENTS IDENTIFIED BY MARK 0OR DOTTED LINE WITH
MARK 0ON THE SCHEMATIC DIAGRAMS AND IN THE PARTS
LIST ARE CRITICAL TO SAFE OPERATION. REPLACE THESE
COMPONENTS WITH SONY PARTS WHOSE PART NUMBERS
APPEAR AS SHOWN IN THIS MANUAL OR IN SUPPLEMENTS
PUBLISHED BY SONY.
ATTENTION AU COMPOSANT AYANT RAPPORT
À LA SÉCURITÉ!
LES COMPOSANTS IDENTIFIÉS PAR UNE MARQUE 0SUR LES
DIAGRAMMES SCHÉMATIQUES ET LA LISTE DES PIÈCES SONT
CRITIQUES POUR LA SÉCURITÉ DE FONCTIONNEMENT. NE
REMPLACER CES COMPOSANTS QUE PAR DES PIÈCES SONY
DONT LES NUMÉROS SONT DONNÉS DANS CE MANUEL OU
DANS LES SUPPLÉMENTS PUBLIÉS PAR SONY.
Caution
Danger of explosion if battery is incorrectly replaced.
Replace only with the same or equivalent type.
Dispose of used batteries according to the instructions.
CHEMICALS
Some chemicals used for servicing are highly volatile.
Their evaporation caused by improper management affects your
health and environment, and wastes resources.
Manage the chemicals carefully as follows.
• Store chemicals sealed in a specific place to prevent from expo-
sure to high temperature or direct sunlight.
• Avoid dividing chemicals into excessive numbers of small con-
tainers to reduce natural evaporation.
• Keep containers sealed to avoid natural evaporation when chemi-
cals are not in use.
• Avoid using chemicals as much as possible. When using chemi-
cals, divide only required amount to a small plate from the con-
tainer and use up it.
EXTERIOR PARTS
Be careful to the following points for plastic parts used in this unit.
• Use a piece of cleaning paper or cleaning cloth for cleaning
plastic parts. Avoid using chemicals.
Even if you have to use chemicals to clean heavy dirt, don’t use
paint thinner, ketone, nor alcohol.
• Insert the specific screws vertically to the part when installing a
plastic part.
Be careful not to tighten screws too much.
SAFETY CHECK-OUT
After correcting the original service problem, perform the following
safety checks before releasing the set to the customer.
1. Check the area of your repair for unsoldered or poorly-soldered
connections. Check the entire board surface for solder splashes
and bridges.
2. Check the interboard wiring to ensure that no wires are “pinched”
or contact high-wattage resistors.
3. Look for unauthorized replacement parts, particularly transistors,
that were installed during a previous repair. Point them out to the
customer and recommend their replacement.
4. Look for parts which, through functioning, show obvious signs
of deterioration. Point them out to the customer and recommend
their replacement.
5. Check the B+ voltage to see it is at the values specified.
6. Flexible Circuit Board Repairing
• Keep the temperature of the soldering iron around 350°C dur-
ing repairing.
• Do not touch the soldering iron on the same conductor of the
circuit board (within 3 times).
• Be careful not to apply force on the conductor when soldering
or unsoldering.
UNLEADED SOLDER
This unit uses unleaded solder.
Boards requiring use of unleaded solder are printed with the lead
free mark (LF) indicating the solder contains no lead.
(Caution: Some printed circuit boards may not come printed with
the lead free mark due to their particular size.)
: LEAD FREE MARK
Be careful to the following points to solder or unsolder.
• Set the soldering iron tip temperature to 350°C approximately.
If cannot control temperature, solder/unsolder at high temperature
for a short time.
Caution: The printed pattern (copper foil) may peel away if the
heated tip is applied for too long, so be careful!
Unleaded solder is more viscous (sticky, less prone
to flow) than ordinary solder so use caution not to let
solder bridges occur such as on IC pins, etc.
• Be sure to control soldering iron tips used for unleaded solder
and those for leaded solder so they are managed separately.
Mixing unleaded solder and leaded solder will cause detachment
phenomenon.
注意
如果电池更换不当会有爆炸危险。
只能用同样类型或等效类型的电池来更换。
务必按照说明处置用完的电池。
SYSSET
2019/01/3002:39:50(GMT+09:00)
1-1
ILCE-6400/6400L/6400M
1. SERVICE NOTE
1-1. PRECAUTION ON REPLACING THE
SY-1094 BOARD
Destination Data
When you replace to the repairing board, the written destination data
of repairing board also might be changed to original setting.
Start the Adjust manual in the Adjust station and execute the “Des-
tination Data Write”.
Restore Data
When you replace to the repairing board, get the data from the
former one.
Start the Adjust manual in theAdjust station and perform “RESTORE
DATA” to get the data.
The data getting for this model is as follows.
• Product ID & USB Serial Data
• WB Adjustment Data
• AORI Adjustment Data
• Eyepiece Detection Adjustment Data
• Imager DRA Data
USB Serial No. and Product ID
The unit is shipped after an ID (USB Serial No.) unique to each unit
and an ID (Product ID) unique to each model have been written.
These IDs have not been written in a new board for service, and
therefore they must be entered after the board replacement.
After the board has been replaced with a board for service, start the
Adjust manual in the Adjust station and execute the “Product ID &
USB Serial No. Input” and enter these IDs.
Note:A newly entered Product ID is not always equal to the ID before
board replacement. If the new ID differs from the previous ID, it may
cause a difference from the ID registered by the customer.
Imager DRA Data
• When the imager data is extracted from the set before the SY board
replacement, extract the imager data from the set before the SY
board replacement using [READ and SAVE (Imager DRA)] of
“Restore Data” in the DATA tab of the Adjust manual.
After the SY board has been replaced, write the data extracted from
the set before the SY board replacement in the set using “Imager
DRA Data Write” in the ADJUST tab of the Adjust manual.
• When the imager data is not extracted from the set before the SY
board replacement, write the fixed data to the set using [Failed
reading old board data] of “Imager DRA Data Write” in the AD-
JUST tab of Adjust manual.
Update of MAC Address and Device Address
When a board that contains Wi-Fi and Bluetooth has been replaced
or when replacing a board that contains the main IC (CPU), the IC’s
unique number (MAC address and device address) must be reloaded.
Perform the following procedure to reload the IC’s unique number
(MAC address and device address).
Note: Perform the following operations after all work has been done.
1. Download the latest-version Adjust manual.
2. Install the downloaded Adjust manual.
3. Start the Adjust manual, and execute “Wireless LAN Setting
(MAC Address)” on the ADJUST tab.
4. Perform the following operations for the unit to initialize.
[MENU] button →[ ] →[Reset Network Set.] →[Enter]
5. Perform the following operations for the unit to display MAC
address.
[MENU] button →[ ] →[Wi-Fi Settings] →[Disp MAC Ad-
dress]
6. Confirm that the displayed MAC address has been updated.
7. Perform the following operations for the unit to display device
address.
[MENU] button →[ ] →[Bluetooth Settings] →[Disp Device
Address]
8. Confirm that the displayed device address has been updated.
Applicable parts
• SY-1094 BOARD, COMPLETE (SERVICE)
Note: The LOAD AND WRITE function in ADJUSTMENT DATA
BACKUP on the DATA tab in the Adjust manual overwrites all data
of the unit.
Therefore, the MAC address and device address updated during the
above procedure is also overwritten.
After the replacement and repair, the MAC address and device ad-
dress are changed, and thus the re-setting for connection devices is
required. Accordingly, download the Flyer of WLAN Reset (Flyer
of WLAN Reset_9834752[][].pdf) and print out it, and attach it to
the set when returning the set to customer.
SYSSET
2019/01/3002:39:50(GMT+09:00)
1-2E
ILCE-6400/6400L/6400M
1-2. PRECAUTION FOR REPLACEMENT
OF THE MECHA DEVICE SERVICE
(IMAGER)
Capture the data to PC from CD-ROM supplied with the mecha
device service when it is ordered.
Write the captured data in the set using “Imager DRA Data Write”
in the ADJUST tab of the Adjust manual.
After all adjustment items have been completed, execute “Phase
Difference AF Check” on the SERVICE tab of the Adjust manual.
1-3. CHECKING THE Wi-Fi FUNCTION
Perform the following procedure to check the Wi-Fi function.
Required equipment: Windows personal computer with Wi-Fi
interface
1. Turn on the power of the unit.
2. Perform the following operations for the unit.
[MENU] button →[ ] →[Ctrl w/ Smartphone] →[ Connec-
tion]
3. QR code is displayed.
4. Press the [ ] button and then a password for Wi-Fi connection
is displayed..
SSID DIRECT-XXXX:MODEL-NAME
Password XXXXXXXX
Device Name ILCE-XXXX
5. Confirm on the personal computer that the unit is detected as a
connectable wireless network.
6. To further confirm that the unit is connectable, connect the unit
to the personal computer and double-click the “current connec-
tion” from the icon displayed on the notice field, make sure that
the unit is displayed in the Wireless internet access column.
DIRECT-XXXX:MODEL-NAME
SYSSET
2019/01/3002:39:50(GMT+09:00)
2-1
ILCE-6400/6400L/6400M
OPERATION NOTES
Make sure that the conductive side of a flexible board does not have any stain or foreign materials.
Do not touch the conductive side of flexible boards with bare hands.
Plug in a flexible board straight, fully into the connector until it reaches the end inside. (Fig. 1, Fig. 2, Fig. 3)
OK
(The flexible board was plugged in straight
and completely)
NG
(The flexible board was plugged in
crooked.)
NG
(The flexible board was not plugged in
completely.)
Flexible
Board Flexible
Board
Connector Connector
Reference
line
Flexible
Board
Connector Connector
Flexible
Board
Reference
line
Connector Connector
Flexible
Board
Flexible
Board
Reference
line
Fig. 1 Fig. 2 Fig. 3
When opening the connector's holder in direction A, do not open
it with excessive force.
When closing the connector's holder, press it evenly while pushing
a flexible board in direction B.
Holder
Connector Flexible Board
A
AHolder
Insulation side
Connector Flexible Board
B
• Make sure that the flat cable and flexible board are not cracked
or bent at the contact end.
• Do not apply excessive force to the gilded flexible board.
Cut and remove the part of gilt
which comes off at the point.
(Be careful or some
pieces of gilt may be left inside)
• The proper way to disconnect a connector is to grab the con-
nector instead of the wires. If you pull on the wires, they might
be broken.
• The proper way to connect a connector is to grab the connector
instead of the wires. If you push on the wires, they might be
broken.
2. DISASSEMBLY & ASSEMBLY
Display Use Part No.
G-85 Grease (G-85) J-6082-626-A
SERVICE TOOLS
DISCHARGING OF THE CHARGING CA-
PACITOR FOR THE FLASH
The charging capacitor for the flash has been charged at high voltage.
Therefore, there is a possibility of an electric shock if you directly handle
the charging capacitor for the flash.
The high-voltage charge will not be discharged by simply turning off
the unit’s power.
Make sure any remaining voltage is discharged by short-circuiting the
charging capacitor for the flash with a short jig.
Preparing a Short Jig
Make a short jig by connecting a small clip to each lead of a resistor
with a rated value of approximately 1 kΩ/1 W.
In order to prevent an electric shock, wrap insulating tape completely
around the resistor and its leads.
Resistor with a rated value of approximately
Nȍ:UHVLVWRU3DUW1R
small clip small clip
:UDSLQVXODWLQJWDSHFRPSOHWHO\
DURXQGWKHUHVLVWRUDQGLWVOHDGV
C901
Turn the SY WP sheet (upper).
Note: High-voltage cautions
Discharging the Capacitor
Short-circuit between two points with
the short jig about 10 seconds.
5Nȍ:
(Part code: 1-215-869-11)
ST-1035 flexible board
SYSSET
2019/01/3002:39:50(GMT+09:00)
2-2
ILCE-6400/6400L/6400M
2-1. CONSTITUTION DIAGRAM
MB charge unit
IM imager unit
shutter unit (AFE-3032)
MB N frame block
strap bracket (L) assy
SY-1094 board block
VF block
shoe block
JK-1024 flexible board
LC panel block
cabinet (rear) block
SY heat sink block
cabinet (upper) block
BT block
SY base block
cabinet (front) block JK base assy
SYSSET
2019/01/3002:39:50(GMT+09:00)
2-3
ILCE-6400/6400L/6400M
MAIN UNIT
2-2-35. MB CHARGE UNIT,
SHUTTER UNIT (AFE-3032)
(Page 2-28)
2-2-36. MB N PLATE A,
MB N PLATE SP
(Page 2-29)
2-2-34. SHUTTER BLOCK
(Page 2-27)
2-2-33. IMAGER, GLASS ASSY
(Page 2-26)
2-2-38. MB N CONTACT UNIT
(Page 2-30)
2-2-37. MB L LOCK PIN ASSY
(Page 2-29)
2-2-32. IM IMAGER UNIT
(Page 2-26)
2-2-31. LENS LOCK BUTTON,
DP SHEET N FRAME
(Page 2-25)
2-2-30. ISP-2004 FLEXIBLE BOARD,
ISL-2005 FLEXIBLE BOARD
(Page 2-25)
2-2-6. REAR BUTTON FRAME BLOCK
(Page 2-7)
2-2-29. GRIP ASSY
(Page 2-24)
2-2-28. DEVICE UNIT
(Page 2-24)
2-2-21. SY-1094 BOARD BLOCK
(Page 2-19)
2-2-27. RL-1060 FLEXIBLE BOARD
(Page 2-23)
2-2-24. ST-1035 FLEXIBLE BOARD BLOCK
(Page 2-22)
2-2-26. RL BASE BLOCK
(Page 2-23)
2-2-25. BT BLOCK
(Page 2-22)
2-2-23. MC BASE BLOCK
(Page 2-21)
2-2-22. SY BASE BLOCK
(Page 2-20)
2-2-20. SHOE BLOCK ASSY
(Page 2-18)
2-2-19. VF BLOCK
(Page 2-18)
2-2-18. SY HEAT SINK BLOCK
(Page 2-17)
2-2-17. CABINET (UPPER) BLOCK
(Page 2-16)
2-2-15. LC-1042 FLEXIBLE BOARD
(Page 2-15)
2-2-14. LC-1045 BOARD
(Page 2-14)
2-2-13. LCD BLOCK ASSY
(Page 2-13)
2-2-16. LC MAGNET1/2 HOLDER
(Page 2-15)
2-2-12. LC INNER BLOCK
(Page 2-12)
2-2-11. LC CABNET REAR BLOCK
(Page 2-11)
2-2-10. HINGE FPC COVER2 PLATE
(Page 2-10)
2-2-9. HINGE FPC COVER1 PLATE
(Page 2-9)
2-2-8. RS-1013 FLEXIBLE BOARD
(Page 2-8)
2-2-7. CONTROL SWITCH BLOCK
(Page 2-8)
2-2-5. REC BUTTON PLATE
(Page 2-7)
2-2-4. REAR FRAME BLOCK
(Page 2-6)
2-2-2. CABINET (REAR) BLOCK
(Page 2-4)
2-2-3. LC PANEL BLOCK
(Page 2-5)
• Disassembled in the order shown in the flowchart below.
2-2-1. DISASSEMBLY FLOW
2-2. DISASSEMBLY
SYSSET
2019/01/3002:39:50(GMT+09:00)
2-4
ILCE-6400/6400L/6400M
top side
1eye cup assy
wa three screws (M1.7 u4)
5cabinet (rear SP)
3Remove the cabinet (rear SP)
in the direction of the arrow.
4claw
9Open the JK lid.
rear side
ws Open the cabinet (rear) block
in the direction of the arrow.
qj Open the battery lid.
wg cabinet (rear) block
bottom side
wf LC-1042 flexible board
wd RS-1013 flexible board
ql screw (M1.7 u4)
w; screw (M1.7 u4)
0screw (M1.7 u4)
qd screw (M1.7 u4)
7tapping screw (1.7 u5)
8diopter adjust dial
qk screw (M1.7 u2.5)
qa screw (M1.7 u2.5)
2screw (M1.7 u4)
– Bottom view –
qg screw (M1.7 u2.5)
– Rear view –
rear side
qs Pop-up the flash unit.
6diopter adjust dial sheet
Note: Diopter adjust dial sheet cannot be reused.
Be sure to replace them with new parts.
qf Open the LCD panel.
qh Open the LCD panel.
wh Discharging.
(Refer to page 2-1)
Note: Disassemble in the order indicated by the numbers assigned to the parts in the figures such as 1.
2-2-2. CABINET (REAR) BLOCK
SYSSET
2019/01/3002:39:50(GMT+09:00)
2-5
ILCE-6400/6400L/6400M
3four screws (M1.7 u2.5)
5LC panel block
2hook 2hook
1Peel off the LC-1042 flexible board.
– Front view –
4Draw the LC-1042 flexible
board out of the hole.
2-2-3. LC PANEL BLOCK
SYSSET
2019/01/3002:39:50(GMT+09:00)
2-6
ILCE-6400/6400L/6400M
top side
front side
6yoke magnet holder block
5rear frame block
4claw
2two tapping screws (1.7 u4)
3two screws (M1.7 u2.5)
1four screws (M1.7 u2.5)
top side
rear side
2-2-4. REAR FRAME BLOCK
SYSSET
2019/01/3002:39:50(GMT+09:00)
2-7
ILCE-6400/6400L/6400M
top side
5rear button frame block
cabinet rear block
front side
4claw
3tapping screw (1.7 u4)
1Peel off the RS-1013 flexible board.
Note: Take care not to damage the chip parts.
2two bosses
Note: Take care not to damage
the
chip parts.
2-2-6. REAR BUTTON FRAME BLOCK
top side
front side
3rear flame cover
2rib
1tapping screw (1.7 u4)
9REC button plate
6Slide the REC button plate
in the direction of the arrow.
4tapping screw (1.7 u4) 5rib
7rib
8rib
2-2-5. REC BUTTON PLATE
SYSSET
2019/01/3002:39:50(GMT+09:00)
2-8
ILCE-6400/6400L/6400M
8RS-1013 flexible board
5hook
3hook
4hook
7rear button frame block
1FP protection sheet (C)
top side
rear side
– Rear view –– Side view –
2Peel off the RS-1013
flexible board.
6Draw the RS-1013 flexible
board out of the hole.
2-2-8. RS-1013 FLEXIBLE BOARD
4control switch block
– Rear view –
3two claws
2rib
1flexible board.
top side
rear side
2-2-7. CONTROL SWITCH BLOCK
SYSSET
2019/01/3002:39:50(GMT+09:00)
2-9
ILCE-6400/6400L/6400M
7hinge FPC cover1 plate
bottom side
front side
3Slide the hinge FPC cover1 plate
in the direction of the arrow.
1Push up the hinge FPC cover1 plate
from the hole on the back.
5Open the hinge FPC cover1 plate
in the direction of the arrow. 4two claws
2two bosses
6two claws
8Peel off the LC-1042 flexible board.
2-2-9. HINGE FPC COVER1 PLATE
SYSSET
2019/01/3002:39:50(GMT+09:00)
2-10
ILCE-6400/6400L/6400M
7hinge FPC cover2 plate
6three claws
5Open the hinge FPC cover2 plate
in the direction of the arrow.
3Slide the hinge FPC cover2 plate
in the direction of the arrow.
4two claws 2two bosses
8Peel off the LC-1042 flexible board.
bottom side
front side
1Push up the hinge FPC cover2 plate
from the hole on the back.
2-2-10. HINGE FPC COVER2 PLATE
SYSSET
2019/01/3002:39:50(GMT+09:00)
2-11
ILCE-6400/6400L/6400M
bottom side
front side
7LC cabnet rear block
3two screws (M1.4 u2)
2two screws (M1.4 u1.4)
1two screws (M1.4 u1.4)
4claw
6claw
6claw
5two claws
2-2-11. LC CABNET REAR BLOCK
SYSSET
2019/01/3002:39:50(GMT+09:00)
2-12
ILCE-6400/6400L/6400M
5LC inner block
2claw
1four claws
2claw
3claw
bottom side
front side
4Draw the LC-1042 flexible
board out of the hole.
2-2-12. LC INNER BLOCK
SYSSET
2019/01/3002:39:50(GMT+09:00)
2-13
ILCE-6400/6400L/6400M
5Lift up the LC hinge block.
7LCD block assy
4two claws
3claw
bottom side
1BL flexible board
2LCD flexible board
front side
6Draw the flexible board
out of the hole.
2-2-13. LCD BLOCK ASSY
SYSSET
2019/01/3002:39:50(GMT+09:00)
2-14
ILCE-6400/6400L/6400M
2LC-1042 flexible board.
4Peel off the LC-1045 board.
5LC PC board fixed tape
1Peel off the LC FPC protection sheet.
3Draw the LC-1042 flexible
board out of the hole.
2-2-14. LC-1045 BOARD
SYSSET
2019/01/3002:39:50(GMT+09:00)
2-15
ILCE-6400/6400L/6400M
1two screws (M1.4 u2)
4LC magnet1 holder
4LC magnet2 holder
bottom side
front side
rear side
rear side
bottom side
bottom side
3magnet
3magnet
2retainer cushion (HG)
LC hinge block
2-2-16. LC MAGNET1/2 HOLDER
5LC-1042 flexible board
– Rear view –
4sheet EM shield LC FPC
Note: Do not touch the red frame part.
1Peel off the sensor part of the
LC-1042 flexible board.
3Peel off the LC-1042
flexible board.
2hook
2-2-15. LC-1042 FLEXIBLE BOARD
SYSSET
2019/01/3002:39:50(GMT+09:00)

Other manuals for ILCE-6400

1

This manual suits for next models

2

Other Sony Digital Camera manuals

Sony DSC-T70/W - Cyber-shot Digital Still Camera User manual

Sony

Sony DSC-T70/W - Cyber-shot Digital Still Camera User manual

Sony Cyber-shot DSC-W560 User manual

Sony

Sony Cyber-shot DSC-W560 User manual

Sony DSC-V1 Operating Instructions (English) User manual

Sony

Sony DSC-V1 Operating Instructions (English) User manual

Sony A6300 User manual

Sony

Sony A6300 User manual

Sony Mavica FD87 User guide

Sony

Sony Mavica FD87 User guide

Sony Cyber-shot DSC-HX20V User manual

Sony

Sony Cyber-shot DSC-HX20V User manual

Sony DSC-H50/B - Cyber-shot Digital Still Camera User manual

Sony

Sony DSC-H50/B - Cyber-shot Digital Still Camera User manual

Sony Cyber-shot DSC-S600 User manual

Sony

Sony Cyber-shot DSC-S600 User manual

Sony Cyber-shot DSC-W690 User manual

Sony

Sony Cyber-shot DSC-W690 User manual

Sony DSC S730 - Cyber-shot Digital Camera User manual

Sony

Sony DSC S730 - Cyber-shot Digital Camera User manual

Sony DSC-WX220 User manual

Sony

Sony DSC-WX220 User manual

Sony DXC-S500 Dimensional drawing

Sony

Sony DXC-S500 Dimensional drawing

Sony Cyber-shot DSC-S600 Manual

Sony

Sony Cyber-shot DSC-S600 Manual

Sony Cyber-shot DSC-W200 User manual

Sony

Sony Cyber-shot DSC-W200 User manual

Sony a7 R III User manual

Sony

Sony a7 R III User manual

Sony DSC-H70/B User manual

Sony

Sony DSC-H70/B User manual

Sony DSC-W120/B User manual

Sony

Sony DSC-W120/B User manual

Sony DSC-H7B - Cyber-shot Digital Still Camera User manual

Sony

Sony DSC-H7B - Cyber-shot Digital Still Camera User manual

Sony Cyber-shot DSC-HX300 User manual

Sony

Sony Cyber-shot DSC-HX300 User manual

Sony Cyber-shot DSC-W710 User manual

Sony

Sony Cyber-shot DSC-W710 User manual

Sony Cyber-shot DSC-F77A User manual

Sony

Sony Cyber-shot DSC-F77A User manual

Sony Cyber-shot DSC-TX20 User manual

Sony

Sony Cyber-shot DSC-TX20 User manual

Sony Cyber-shot DSC-W620 User manual

Sony

Sony Cyber-shot DSC-W620 User manual

Sony Alpha DSLR-A500 User manual

Sony

Sony Alpha DSLR-A500 User manual

Popular Digital Camera manuals by other brands

Samsung CJ050501C user manual

Samsung

Samsung CJ050501C user manual

Ganz ZC-NH250P Instructions for use

Ganz

Ganz ZC-NH250P Instructions for use

Dato CL200 Quick operation guide

Dato

Dato CL200 Quick operation guide

Swann Atom HD user manual

Swann

Swann Atom HD user manual

HP s300 Product information

HP

HP s300 Product information

iClick Fremont 300 user manual

iClick

iClick Fremont 300 user manual

Nikon D800E user manual

Nikon

Nikon D800E user manual

Huawei IPC6225-VRZ quick start guide

Huawei

Huawei IPC6225-VRZ quick start guide

Nikon COOLPIX 885 user guide

Nikon

Nikon COOLPIX 885 user guide

Nytech DS-8210 User manual and service information

Nytech

Nytech DS-8210 User manual and service information

BoX Medical Solutions Meibox user manual

BoX Medical Solutions

BoX Medical Solutions Meibox user manual

Canon PowerShot S1 IS quick start guide

Canon

Canon PowerShot S1 IS quick start guide

Rydeen CM-R1000P owner's manual

Rydeen

Rydeen CM-R1000P owner's manual

Olympus FE-5035 specification

Olympus

Olympus FE-5035 specification

eufy Security T8424 quick start guide

eufy Security

eufy Security T8424 quick start guide

Hyundai Micro Life instruction manual

Hyundai

Hyundai Micro Life instruction manual

Olympus SP-320 quick start guide

Olympus

Olympus SP-320 quick start guide

Stealth Cam STC-V550MTR user manual

Stealth Cam

Stealth Cam STC-V550MTR user manual

manuals.online logo
manuals.online logoBrands
  • About & Mission
  • Contact us
  • Privacy Policy
  • Terms and Conditions

Copyright 2025 Manuals.Online. All Rights Reserved.