Startup guide
1Charge the headphones.
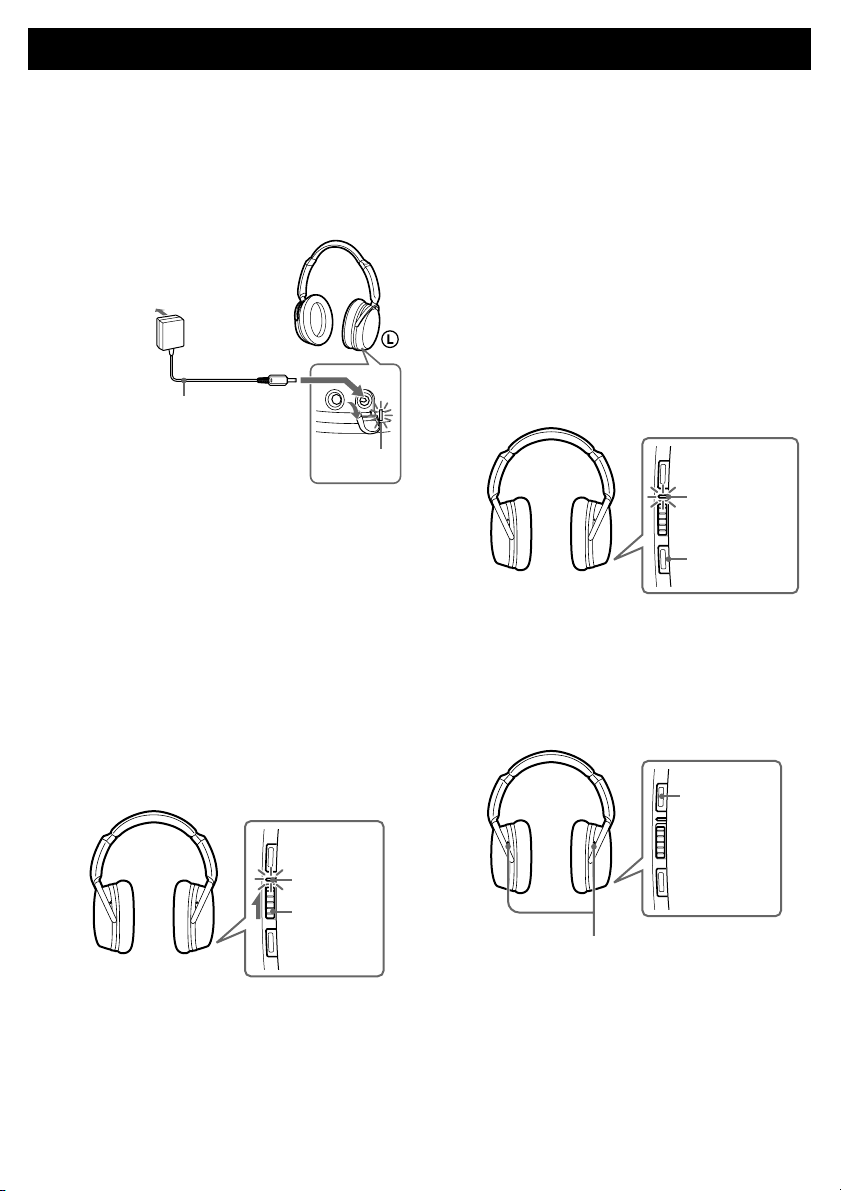
Connect the supplied AC power adaptor to the DC IN
6V jack on the headphones and an AC outlet. The
charge indicator lights up in orange and charging
starts.
Charging is completed after about three hours, and
the charge indicator goes out. Disconnect the AC
power adaptor after the charging has finished.
z Tip
You can use the supplied connecting cord with battery case.
See the Operating Instructions for details.
2Connect the headphones to the AV
equipment.
See the Operating Instructions for details.
3Set the POWER switch to “ON.”
The POWER indicator lights up in blue, and a short
beep sounds from the unit.
4Put on the headphones.
After confirming the cord on the left and the POWER
switch on the right, put on the headphones.
English
RL
POWER
switch
POWER
indicator
5Start playing on the AV equipment
connected to the headphones.
Note
Playback is not available when there is no power.
6Press the AI NC MODE button.
Sounds come from the headphones to inform you that
the unit has started analyzing ambient sound
components (approx. 3 seconds). During analysis,
sound reproduction from the unit is stopped and the
POWER indicator lights in pink. When analysis is
completed, the most effective noise canceling mode
is set automatically, and sound reproduction from the
headphones starts.
z Tip
You can also set the noise canceling mode manually (manual
noise canceling). See the Operating Instructions for details.
Hearing environmental sound for safety
If the MONITOR button is pressed and held while
the POWER switch is set to ON, playback silences
then you can hear the surrounding environment.
7Set the POWER switch to “OFF”
after use.
RL
POWER
indicator
AI NC MODE
button
RL
MONITOR
button
Monitor microphone
AC power adaptor
(supplied)
To an AC outlet
Charge
indicator
To DC IN 6V
jack
Headphones


 User manual")


