manuals.online logo
Brands
  1. Home
  2. •
  3. Brands
  4. •
  5. Sony
  6. •
  7. Home Theater System
  8. •
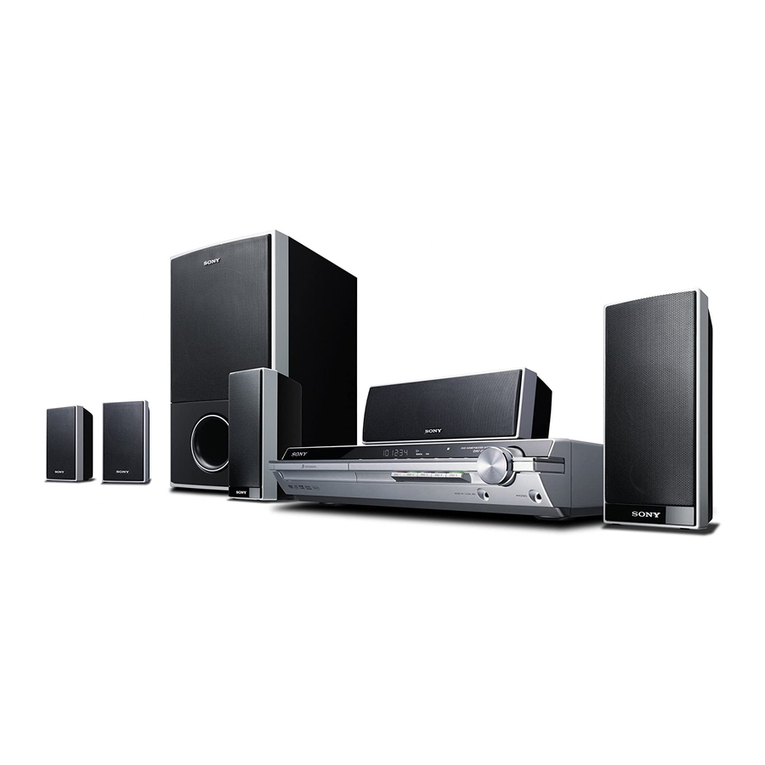
  9. Sony BRAVIA DAV-HDX589W User manual

Sony BRAVIA DAV-HDX589W User manual

Other manuals for BRAVIA DAV-HDX589W

2

Other Sony Home Theater System manuals

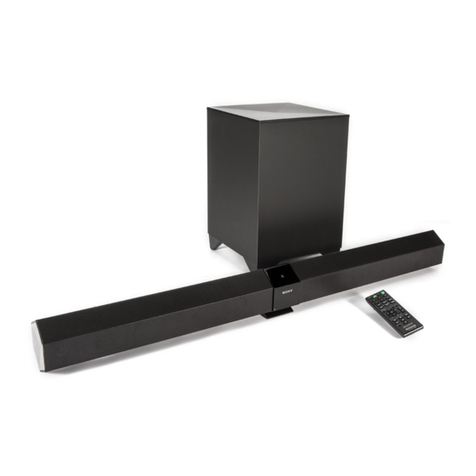
Sony HT-CT260 User manual

Sony

Sony HT-CT260 User manual

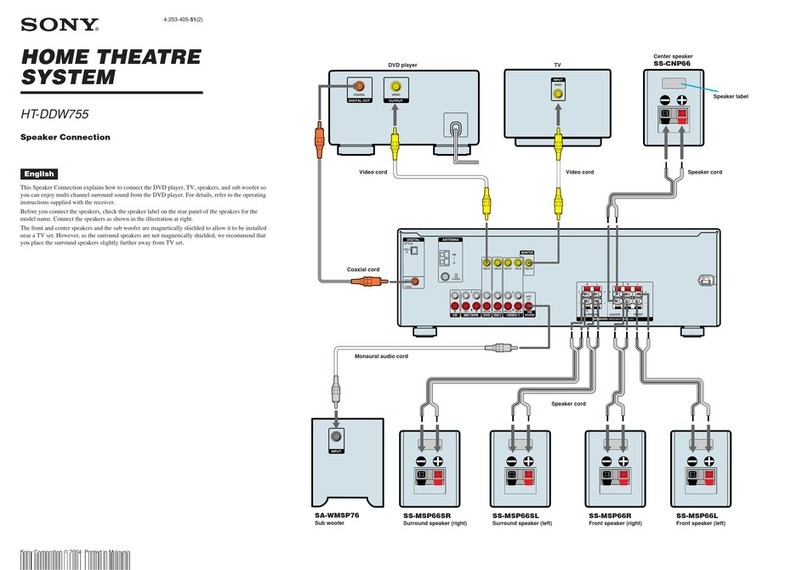
Sony HT-DDW755 Instruction manual

Sony

Sony HT-DDW755 Instruction manual

Sony DAV-DZ340K Specification sheet

Sony

Sony DAV-DZ340K Specification sheet

Sony BDV-Z7 User manual

Sony

Sony BDV-Z7 User manual

Sony BRAVIA DAV-HDX275 Instruction Manual

Sony

Sony BRAVIA DAV-HDX275 Instruction Manual

Sony HT-SF470 User manual

Sony

Sony HT-SF470 User manual

Sony HT-DDW990 User manual

Sony

Sony HT-DDW990 User manual

Sony HT-S20R User manual

Sony

Sony HT-S20R User manual

Sony DAV-X1V - 5 Disc 2.1 Channel Platinum Dvd Dream... User manual

Sony

Sony DAV-X1V - 5 Disc 2.1 Channel Platinum Dvd Dream... User manual

Sony SAVA-D900 User manual

Sony

Sony SAVA-D900 User manual

Sony BDV-N9100W User manual

Sony

Sony BDV-N9100W User manual

Sony HT-DDW880 User manual

Sony

Sony HT-DDW880 User manual

Sony BDV-N990W User manual

Sony

Sony BDV-N990W User manual

Sony DAV-FX80 - Dvd Dream System User manual

Sony

Sony DAV-FX80 - Dvd Dream System User manual

Sony BDV-E370 - Blu-ray Disc™ Player Home Theater... User manual

Sony

Sony BDV-E370 - Blu-ray Disc™ Player Home Theater... User manual

Sony HT-DDW890 User manual

Sony

Sony HT-DDW890 User manual

Sony HT-CT660 User manual

Sony

Sony HT-CT660 User manual

Sony BDV-NF720 User manual

Sony

Sony BDV-NF720 User manual

Sony HT-M7 User manual

Sony

Sony HT-M7 User manual

Sony 3-283-375-11(2) User manual

Sony

Sony 3-283-375-11(2) User manual

Sony DAV-C770 - Compact Av System User manual

Sony

Sony DAV-C770 - Compact Av System User manual

Sony HT-CT150 User manual

Sony

Sony HT-CT150 User manual

Sony BDV-E290 User manual

Sony

Sony BDV-E290 User manual

Sony HT-SL7 User manual

Sony

Sony HT-SL7 User manual

Popular Home Theater System manuals by other brands

Samsung HT-DL200 instruction manual

Samsung

Samsung HT-DL200 instruction manual

Samsung HT-ES6600 user manual

Samsung

Samsung HT-ES6600 user manual

Curtis DVD6010 instruction manual

Curtis

Curtis DVD6010 instruction manual

Philips MCD716/12 user manual

Philips

Philips MCD716/12 user manual

Sherwood ST-4108 operating instructions

Sherwood

Sherwood ST-4108 operating instructions

Philips HTS5520/12 quick start

Philips

Philips HTS5520/12 quick start

LG HT503PHW owner's manual

LG

LG HT503PHW owner's manual

Samsung HT-ES4200K user manual

Samsung

Samsung HT-ES4200K user manual

Samsung HT-P10 instruction manual

Samsung

Samsung HT-P10 instruction manual

Philips HTS5131 User manaul

Philips

Philips HTS5131 User manaul

Goodmans GDVD19SWS user manual

Goodmans

Goodmans GDVD19SWS user manual

Moxi media center user guide

Moxi

Moxi media center user guide

Samsung HT-EM35 user manual

Samsung

Samsung HT-EM35 user manual

Manta GK-500 user manual

Manta

Manta GK-500 user manual

Sharp SBW800 user manual

Sharp

Sharp SBW800 user manual

Philips HTS3541 user manual

Philips

Philips HTS3541 user manual

LG LHT799 specification

LG

LG LHT799 specification

Samsung HT-TWZ415 user manual

Samsung

Samsung HT-TWZ415 user manual

manuals.online logo
manuals.online logoBrands
  • About & Mission
  • Contact us
  • Privacy Policy
  • Terms and Conditions

Copyright 2025 Manuals.Online. All Rights Reserved.

SUBWOOFER
SUR L
SUR R
FRONT R
CENTER
FRONT L
Main unit
Surround amplifier
4-136-139-11(1)
©2009 Sony Corporation Printed in China
(1)
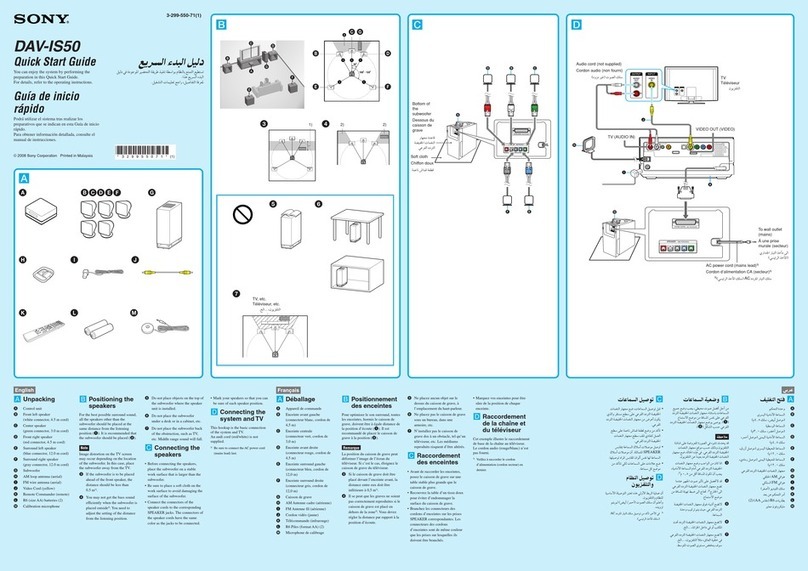
Quick Setup Guide
1Connecting the speakers
Rear panel of the main unit
CENTER
SUBWOOFER
OPTIC
SPEAKER
Green Purple
2Connecting the TV
To connect speaker cords to the speaker
DAV-HDX589W
Connect the speaker cords to match the color of the SPEAKER jacks of the unit. Depending on the jacks on your TV, select the video and audio connection method.
Video connection method
Method 1
FRONTRFRONTL
COAXIAL75
AM
FM
DC5V
0.7AMAX
AUDIOI
N
P
B
/C
B
P
R
/C
R
YLR
DIGITALIN
COAXIAL
OPTICAL
ANTENNA
TV/VIDEO
COMPONENTVIDEOOUT
VIDEO
OUT
EZW-RT10
SPEAKER
HDMIOUT
DMPORT
TV
P
B
/C
B
P
R
/C
R
Y
COMPONENTVIDEOIN
HDMIIN
AUDIOOUTL
R
TV/VIDEO
DIGITALOUT
COAXIAL
OPTICAL
TV
VIDEOIN
VIDEO IN
Video cord
Method 2
HDMI cable*
FRONTRFRONTL
COAXIAL75
AM
FM
DC5V
0.7AMAX
AUDIOIN
P
B
/C
B
P
R
/C
R
YLR
DIGITALIN
COAXIAL
OPTICAL
ANTENNA
TV/VIDEO
COMPONENTVIDEOOUT
VIDEO
OUT
EZW-RT10
SPEAKER
HDMIOUT
DMPORT
TV
P
B
/C
B
P
R
/C
R
Y
COMPONENTVIDEOIN
AUDIOOUTL
R
TV/VIDEO
DIGITALOUT
COAXIAL
OPTICAL
TV
VIDEOIN
HDMIIN
VIDEO IN
HDMI IN
Video cord
Method 3
FRONTRFRONTL
COAXIAL75
AM
FM
DC5V
0.7AMAX
AUDIOIN
P
B
/C
B
P
R
/C
R
YL
R
DIGITALIN
COAXIAL
OPTICAL
ANTENNA
TV/VIDEO
COMPONENTVIDEOOUT
VIDEO
OUT
EZW-RT10
SPEAKER
HDMIO
UT
DMPORT
TV
HDMIIN
AUDIOOUTL
R
TV/VIDEO
DIGITALOUT
COAXIAL
OPTICAL
TV
VIDEOIN
P
B
/C
B
P
R
/C
R
Y
COMPONENTVIDEOIN
VIDEO IN
PB/CBPR/CRY
COMPONENT VIDEO IN
Video cordComponent video cable*
Audio connection method
Method 1
Audio cord*
FRONTRFRONTL
COAXIAL75
AM
FM
DC5V
0.7AMAX
AUDIOIN
P
B
/C
B
P
R
/C
R
YLR
DIGITALIN
COAXIAL
OPTICAL
ANTENNA
TV/VIDEO
COMPONENTVIDEOOUT
VIDEO
OUT
EZW-RT10
SPEAKER
HDMIOUT
DMPORT
TV
OPTICAL
DIGITALOUT
COAXIAL
DIGITALOUT
HDMIIN
P
B
/C
B
P
R
/C
R
Y
COMPONENTV
IDEOIN
VIDEOIN
L
R
AUDIOOUTPUT
LR
AUDIO OUTPUT
Method 2
FRONTRFRONTL
COAXIAL75
AM
FM
DC5V
0.7AMAX
AUDIOI
N
P
B
/C
B
P
R
/C
R
YLR
DIGITALIN
COAXIALOPTICAL
ANTENNA
TV/VIDEO
COMPONENTVIDEOOUT
VIDEO
OUT
EZW-RT10
SPEAKER
HDMIOUT
DMPORT
TV
COAXIAL
DIGITALOUT
AUDIOOUTL
R
TV/VIDEO
HDMIIN
P
B
/C
B
P
R
/C
R
Y
COMPONENTV
IDEOIN
VIDEOIN
OPTICAL
DIGITALOUT
OPTICAL
DIGITAL OUT
Digital optical cord*
Method 3
FRONTRFRONTL
COAXIAL75
AM
FM
DC5V
0.7AMAX
AUDIOIN
P
B
/C
B
P
R
/C
R
YL
R
DIGITALIN
COAXIAL
OPTICAL
ANTENNA
TV/VIDEO
COMPONENTVIDEOOUT
VIDEO
OUT
EZW-RT10
SPEAKER
HDMIO
UT
DMPORT
TV
OPTICAL
DIGITALOU
T
AUDIOOUTL
R
AUDIOO
UTPUT
HDMIIN
P
B
/C
B
P
R
/C
R
Y
COMPONENTVIDEOIN
VIDEOIN
COAXIAL
DIGITALOUT
COAXIAL
DIGITAL OUT
Digital coaxial cord*
FRONTRFRONT L
DC5V
0.7AMAX
SPEAKER
HDMIOUT
DMPORT
Red
White
Rear panel of the surround amplifier
Rear of the speaker
You can confirm that the System and TV are connected correctly
using the Setup Disc.
For details, see the Operating Instructions.
*Not supplied
*Not supplied
R
SURROUNDSELECTOR
S-AIR ID
SPEAKER
SURROUND
PAI R ING
C
B
A
SURROUND
BACK
L
Blue
Gray
Continued 
1 Press FUNCTION +/– to display“TV/VIDEO.”
2 Press SYSTEM MENU.
3 Press /to display“DEC. MODE,” then press
.
4 Press /to display“PRO LOGIC,” then press
.
5 Press SYSTEM MENU to exit the menu.
Note
Do not insert a disc before performing the Quick Setup.
1 Switch the input selector on your TV to
display “SONY Home Theatre System.”
2 Set each following item, using ///and
.
///,
(ENTER)
Note
Displayed items vary depending on the area.
Home Theatre System
Select an on-screen
language.
LANGUAGE SETUP
MENU:
OSD:
AUDIO:
SUBTITLE:
ENGLISH
ENGLISH
FRENCH
SPANISH
PORTUGUESE
/,
Select the aspect ratio
of the connected TV.
VIDEO SETUP
PROGRESSIVE
(COMPONENT OUT)
:
TV TYPE:
4:3 OUTPUT:
BLACK LEVEL:
PAUSE MODE:
16:9
OFF
AUTO
BLACK LEVEL
(COMPONENT OUT)
:
16:9
4:3 LETTER BOX
4:3 PAN SCAN
/,
Select [ON] when you
connect the main unit
and the TV with an
HDMI cable.
HDMI SETUP
HDMI RESOLUTION:
VOLUME LIMIT:
AUTO
(1920x1080p)
OFF
SD
YCBCR/RGB(HDMI):
JPEG RESOLUTION:
AUDIO(HDMI):
CONTROL FOR HDMI: ON
ON
OFF
/,
1 Insert the wireless transceiver.
COAXIAL75
AM
FM
AUDIOIN
P
B
/C
B
P
R
/C
R
YL
R
ANTENNA
TV/VIDEO
COMPONENTVIDEOOUT
VIDEO
OUT
EZW-RT10
R
SURROUNDSELECTOR
S-AIRID
SPEAKER
SURROUND
PAIRING
C
B
A
SURROUND
BACK
L
EZW-RT
10
Wireless transceiver Wireless transceiver
2 Set the S-AIR ID switch to “A.”
R
SURROUND SELECTOR
S-AIR ID
EZW-RT
10
SPEAKER
SURROUND
PAIRING
C
B
A
SURROUND
BACK
L
A
3 Connect the AC power cord.
R
SURROUNDSELECTOR
S-AIRID
SPEAKER
SURROUND
PAIRING
C
B
A
SURROUND
BACK
L
EZW-RT
10
4 Turn on the power of the main unit, the
surround amplifier, and the TV.
/
/(power)
POWER
Select the speaker
formation.
SPEAKER FORMATION
STANDARD
/,
Connect the calibration
mic and set it at the
listening position.
Select [YES] to perform
[AUTO CALIBRATION].
NO
Connect calibration mic. Start
measurement?
AUTO CALIBRATION
YES
/,
Select [YES] to save the
measurement results.
FRONT L :
FRONT R :
CENTER :
SUBWOOFER :
SURROUND L :
SURROUND R :
If OK, unplug calibration mic and select
“YES”.
YES
YES
YES
YES
YES
YES
Measurement complete.
NOYES
/,
QUICK SETUP is complete.
Home Theatre System
3Enabling wireless transmission 4Performing the Quick Setup Listening to TV sound from all speakers