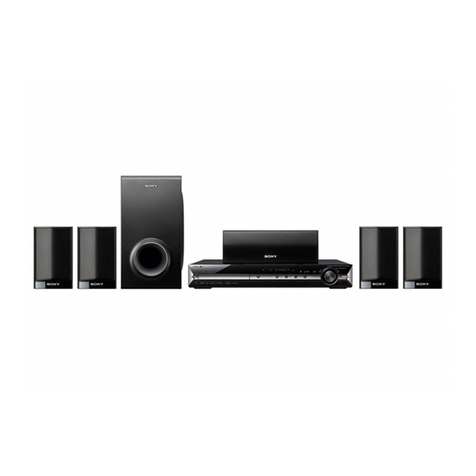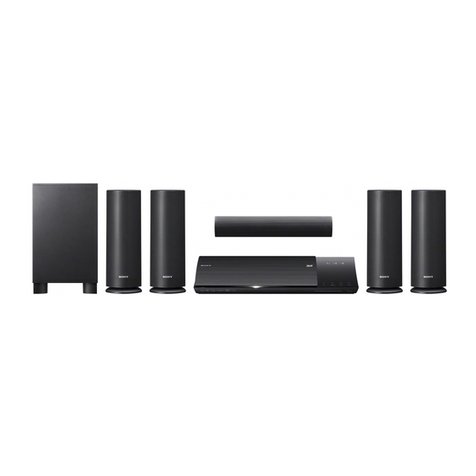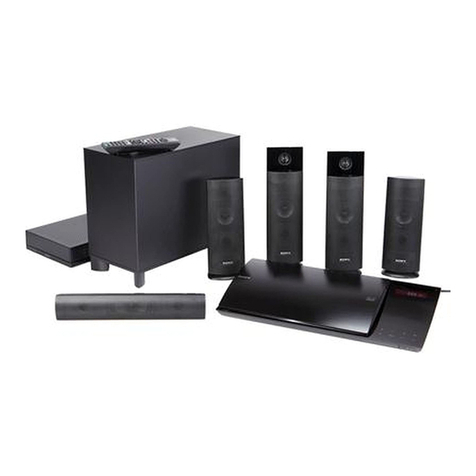
HT-SF1100 2-319-197-01(1) GB/FR/ES/DE
2-319-197-01(1)
Sony Corporation © 2007 Printed in Malaysia
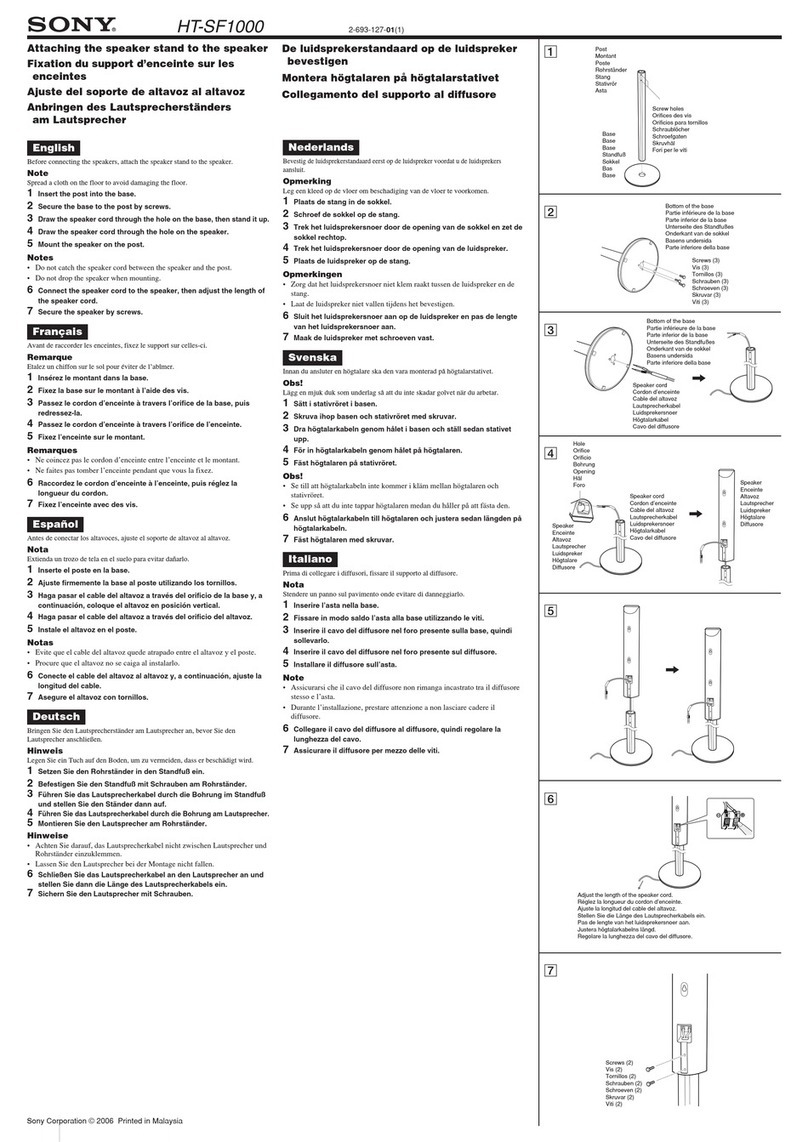
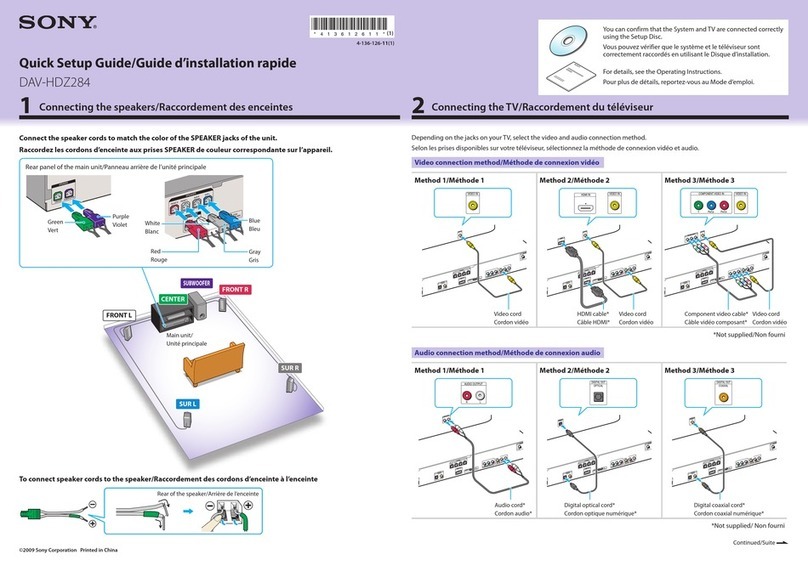
Video components/ Eléments vidéo/ Componentes de vídeo/Videokomponenten
OPT IN
VIDEO 2/BD
COAX IN AUDIO IN
DVD
DVD IN VIDEO 2/BD IN OUT
ANTENNA
SA-CD/CD
TV
AUDIO IN
VIDEO 1
DIGITAL
HDMI
AM
R
L
R
L
AUDIO
OPTICAL
OUTPUT
VIDEO
OUTPUT
L
R
INPUT
OUTPUT
OPT IN
SAT
OPT IN
VIDEO 2/BD
COAX IN AUDIO IN
DVD
DVD IN VIDEO 2/BD IN OUT
ANTENNA
SA-CD/CD
AUDIO IN
TV
AUDIO IN
FRONT R SUR L CENTER SUBWOOFERSUR RFRONT L
VIDEO 1
DMPORT
DIGITAL
SPEAKERS
HDMI
AM
R
L
R
L
OPT IN
SAT
AUDIO IN
VIDEO
INPUT
OPT IN
SAT
OPT IN
VIDEO 2/BD
COAX IN AUDIO IN
DVD
DVD IN VIDEO 2/BD IN OUT
ANTENNA
SA-CD/CD
AUDIO IN
TV
AUDIO IN
FRONT R SUR L CENTER SUBWOOFERSURRFRONT L
VIDEO 1
DMPORT
DIGITAL
SPEAKERS
HDMI
AM
R
L
R
L
CENTER SUBWOOFER
SS-WP2000
OPT IN
SAT
OPT IN
VIDEO 2/BD
COAX IN AUDIO IN
DVD
DVD IN VIDEO 2/BD IN OUT
ANTENNA
SA-CD/CD
AUDIO IN
TV
AUDIO IN
FRONT R SUR L CENTER SUBWOOFERSURRFRONT L
VIDEO 1
DMPORT
DIGITAL
SPEAKERS
HDMI
AM
R
L
R
L
SS-MSP2000
L
SS-MSP2000
R
FRONT R SUR L CENTER SUBWOOFERSUR RFRONT L
SPEAKERS
OPT IN
SAT
OPT IN
VIDEO 2/BD
COAX IN AUDIO IN
DVD
DVD IN VIDEO 2/BD IN OUT
ANTENNA
SA-CD/CD
AUDIO IN
TV
AUDIO IN
FRONT R SUR L CENTER SUBWOOFERSURRFRONT L
VIDEO 1
DMPORT
DIGITAL
SPEAKERS
HDMI
AM
R
L
R
L
CENTER SUBWOOFER
SS-CNP2000
SS-SRP2000 SS-SRP2000
OPT IN
SAT
OPT IN
VIDEO 2/BD
COAX IN AUDIO IN
DVD
DVD IN VIDEO 2/BD IN OUT
ANTENNA
SA-CD/CD
AUDIO IN
TV
AUDIO IN
FRONT R SUR L CENTER SUBWOOFERSURRFRONT L
VIDEO 1
DMPORT
DIGITAL
SPEAKERS
HDMI
AM
R
L
R
L
FRONT R SUR L CENTER SUBWOOFERSUR RFRONT L
SPEAKERS
1: Installing speakers/
1: Installation des enceintes/
1: Instalación de los altavoces/
1: Installieren der Lautsprecher
HT-SF1100
Quick Setup Guide
Guide d’installation
Guía de instalación rápida
Kurzanleitung
2: Connecting the speakers/2: Raccordement des enceintes/
2: Conexión de los altavoces/2: Anschließen der Lautsprecher
3: Connecting other components/3: Raccordement d’autres
éléments/3: Conexión de otros componentes/
3: Anschließen anderer Komponenten
English
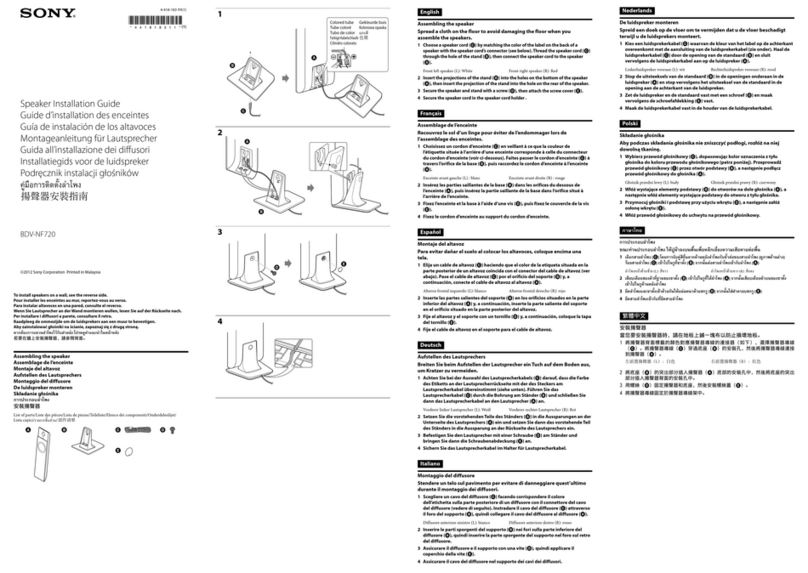
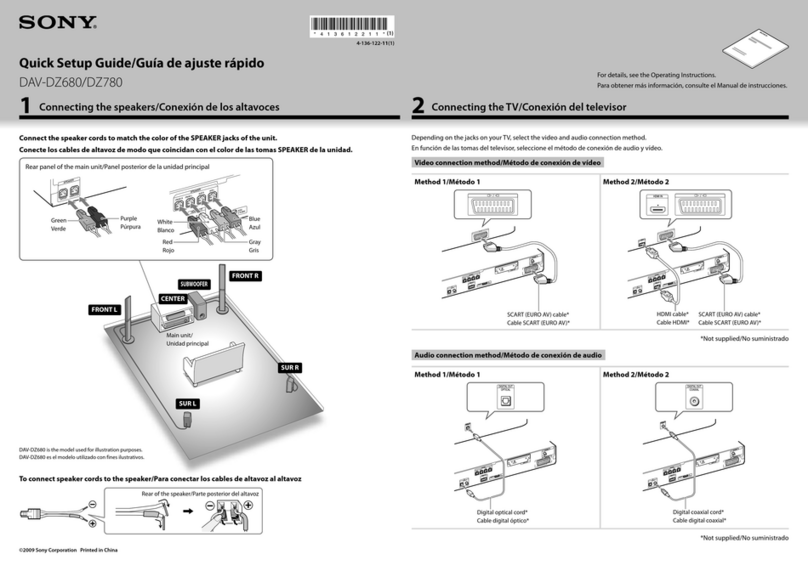
This Quick Setup Guide describes how to connect
a DVD player, satellite tuner or set-top box, TV,
speakers, and a sub woofer so that you can enjoy
multi channel surround sound. Refer to the operating
instructions supplied with the receiver for details.
The illustrations in the guide designate speakers as
through .
Front speaker (Left)
Front speaker (Right)
Center speaker
Surround speaker (Left)
Surround speaker (Right)
Sub woofer
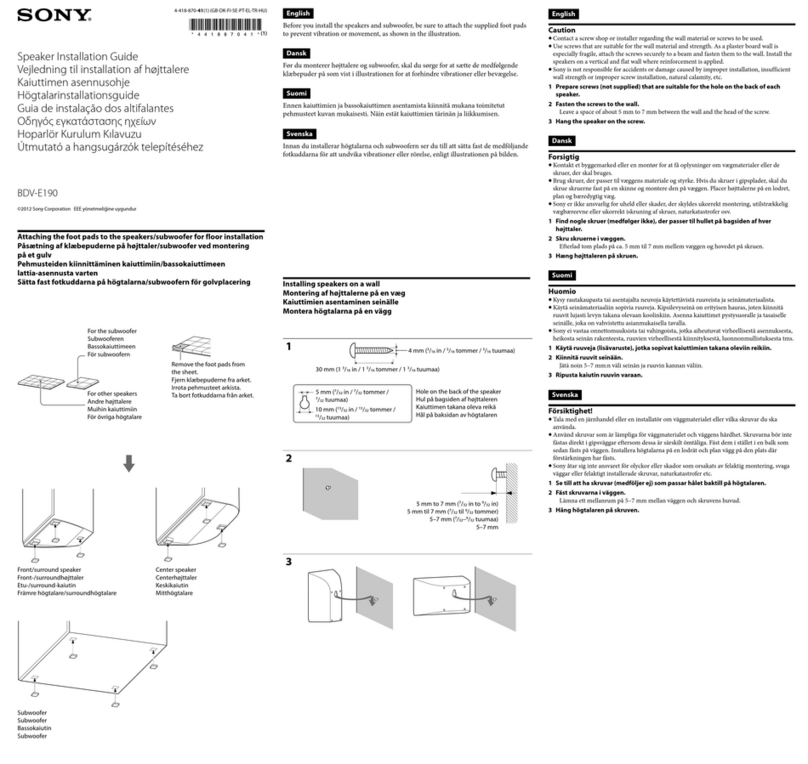
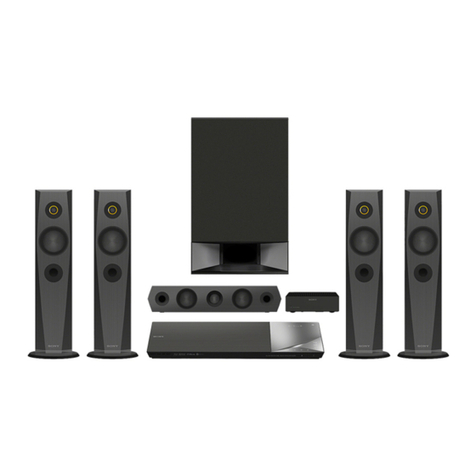
1: Installing speakers
The illustrations above show an example of a 5.1
channel speaker system (five speakers and one
sub woofer) configuration. Refer to the operating
instructions supplied with the receiver.
About speaker placement
The front speakers, center speaker and sub woofer are
magnetically shielded to allow it to be installed near
a TV set. However, as the surround speakers are not
magnetically shielded, we recommend that you place
them slightly further away from a TV set.
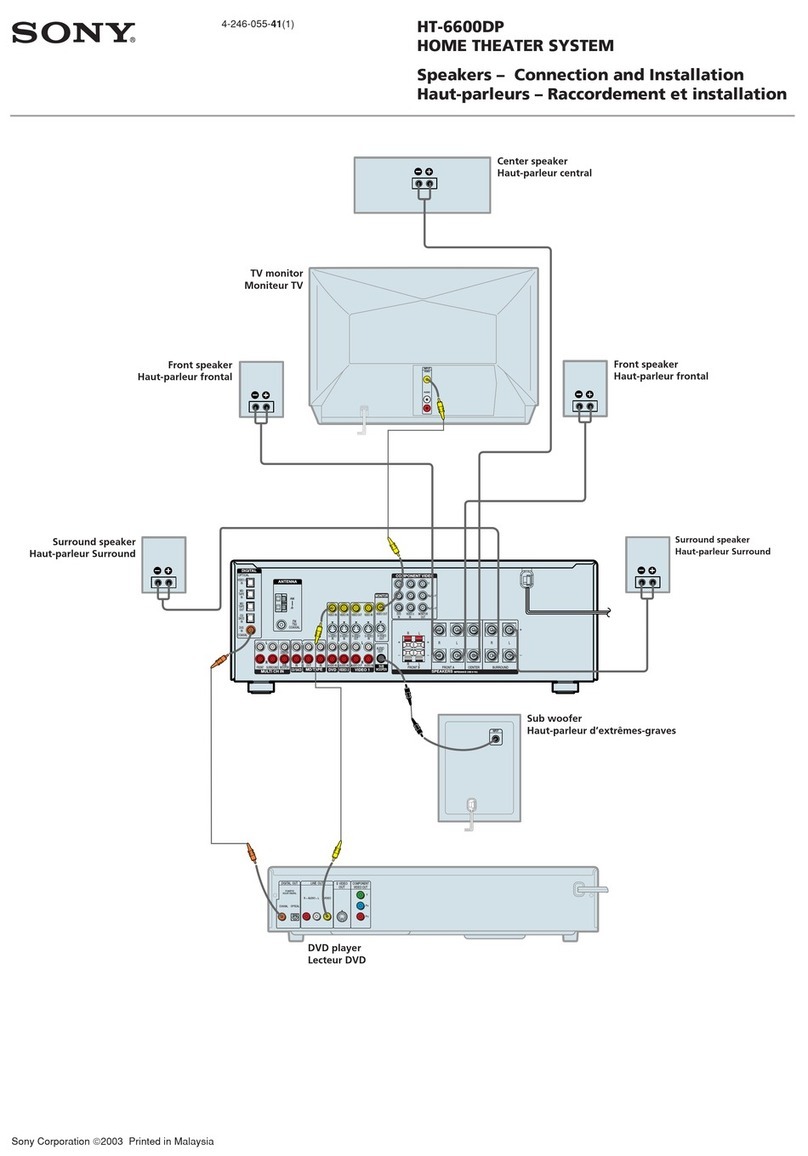
2: Connecting the speakers
The illustrations above show how to connect the
speakers. Before you connect the speakers, check the
speaker label on the rear panel of the speakers for the
speaker type.
About speaker cords
• Black striped wire is minus (–) in polarity and
should be connected to the minus (–) speaker
terminal.
• Use the long speaker cords to connect the surround
speakers and the short speaker cords to connect the
front and center speakers.
About speaker jacks
• Connect the
jack to the jack of the receiver and
connect the jack to the jack of the receiver.
• Refer to the illustration above for details of
connecting speaker cords.
3: Connecting other components
This is an example of how to connect this receiver
and your components. Refer to step 3 of “Getting
started” of the operating instructions supplied with
this receiver for details on other connections and other
components.
4: Connect all power cords last
Connect the AC power cord to a wall outlet.
Refer to “Connecting the AC power cord” in the
operating instructions supplied with the receiver.
10 mm
Français
Ce guide d’installation décrit comment raccorder un lecteur
DVD, un tuner satellite ou un décodeur, un téléviseur, des
enceintes et un caisson de graves afin que vous puissiez
bénéficier du son surround multicanal. Reportez-vous au
mode d’emploi fourni avec l’ampli-tuner pour plus de détails.
Les illustrations du guide désignent les différentes
enceintes, de
à
.
Enceinte avant (gauche)
Enceinte avant (droite)
Enceinte centrale
Enceinte surround (gauche)
Enceinte surround (droite)
Caisson de graves
1: Installation des enceintes
Les illustrations ci-dessus montrent l’exemple d’une
configuration de système à 5.1 canaux (cinq enceintes
et un caisson de graves). Reportez-vous au mode
d’emploi fourni avec l’ampli-tuner.
A propos de la position des enceintes
Les enceintes avant, l’enceinte centrale et le caisson
de graves disposent d’un blindage magnétique afin de
permettre leur installation à proximité d’un téléviseur.
Toutefois, étant donné que les enceintes surround
ne disposent pas d’un blindage magnétique, il est
recommandé de les éloigner légèrement du téléviseur.
2: Raccordement des enceintes
Les illustrations ci-dessus indique comment raccorder
les enceintes. Avant de procéder au raccordement des
enceintes, vérifiez l’étiquette des enceintes située sur le
panneau arrière des enceintes pour en connaître le type.
A propos des cordons d’enceintes
• La polarité du fil rayé noir est moins (–), il doit donc
être raccordé à la borne moins (–) des enceintes.
• Utilisez les cordons d’enceintes longs pour
raccorder les enceintes surround et les cordons
d’enceintes courts pour raccorder les enceintes avant
et centrale.
A propos des prises d’enceinte
• Raccordez la prise à la prise de l’ampli-tuner et
la prise à la prise de l’ampli-tuner.
• Reportez-vous à l’illustration ci-dessus pour plus de
détails sur le raccordement des cordons d’enceinte.
3: Raccordement d’autres
éléments
Ce guide donne un exemple de raccordement de
cet ampli-tuner et de vos éléments. Reportez-vous
à l’étape 3 de la section « Préparatifs » du mode
d’emploi fourni avec cet ampli-tuner pour plus de
détails sur le raccordement à d’autres éléments.
4: Raccordez tous les cordons
d’alimentation en dernier lieu
Raccordez le cordon d’alimentation secteur à la prise
murale.
Reportez-vous à la section « Raccordement du cordon
d’alimentation secteur » dans le mode d’emploi fourni
avec l’ampli-tuner.
Español
Esta guía de instalación rápida describe cómo conectar
un reproductor de DVD, un sintonizador vía satélite
o un decodificador, un televisor, los altavoces y un
altavoz potenciador de graves para que pueda disfrutar
del sonido envolvente multicanal. Consulte el manual
de instrucciones suministrado con el receptor para
obtener más información.
En las ilustraciones de la guía, los altavoces se
identifican de a .
Altavoz frontal (izquierdo)
Altavoz frontal (derecho)
Altavoz central
Altavoz de sonido envolvente (izquierdo)
Altavoz de sonido envolvente (derecho)
Altavoz potenciador de graves
1: Instalación de los altavoces
Las ilustraciones anteriores muestran un ejemplo
de configuración de un sistema de altavoces de 5.1
canales (cinco altavoces y un altavoz potenciador
de graves). Consulte el manual de instrucciones
suministrado con el receptor.
Sobre la ubicación del altavoz
Los altavoces frontales, el altavoz central y el
altavoz potenciador de graves están protegidos
magnéticamente para que puedan instalarse cerca
de un televisor. Sin embargo, debido a que los
altavoces de sonido envolvente no están protegidos
magnéticamente, se recomienda situarlos a una
distancia considerable del televisor.
Deutsch
In dieser Kurzanleitung wird beschrieben, wie Sie
einen DVD-Player, eine Satellitentuner oder eine
Set-Top-Box, ein Fernsehgerät, Lautsprecher und
einen Subwoofer so anschließen, dass Sie Mehrkanal-
Raumklang wiedergeben lassen können. Einzelheiten
finden Sie in der Bedienungsanleitung zum Receiver.
In den Abbildungen in dieser Anleitung sind die
Lautsprecher mit bis gekennzeichnet.
Frontlautsprecher (links)
Frontlautsprecher (rechts)
Centerlautsprecher
Surroundlautsprecher (
links
)
Surroundlautsprecher (rechts)
Subwoofer
1: Installieren der Lautsprecher
Die Abbildungen oben zeigen ein 5.1-Kanal-
Lautsprechersystem (fünf Lautsprecher und
ein Subwoofer). Schlagen Sie bitte in der
Bedienungsanleitung zum Receiver nach.
Aufstellung der Lautsprecher
Die Frontlautsprecher, der Centerlautsprecher sowie
der Subwoofer sind magnetisch abgeschirmt, so dass
sie in der Nähe eines Fernsehgeräts aufgestellt werden
können. Die Surround- Lautsprecher sind jedoch nicht
magnetisch abgeschirmt. Es empfiehlt sich daher, die
Lautsprecher etwas weiter entfernt vom Fernsehgerät
aufzustellen.
2: Anschließen der Lautsprecher
In der Abbildung oben ist das Anschließen der
Lautsprecher dargestellt. Sehen Sie vor dem
Anschließen der Lautsprecher auf der Rückseite der
Lautsprecher nach, welcher Lautsprechertyp auf dem
Lautsprecheraufkleber angegeben ist.
Die Lautsprecherkabel
• Ein schwarz gestreiftes Kabel hat negative
(–) Polarität und muss an einen negativen (–)
Lautsprecheranschluss angeschlossen werden.
• Schließen Sie mit den langen Lautsprecherkabeln
die Surround- Lautsprecher und mit den
kurzen Lautsprecherkabeln die Front- und den
Centerlautsprecher an.
Die Lautsprecherbuchsen
• Verbinden Sie die Buchse mit der Buchse am
Receiver und die Buchse mit der Buchse am
Receiver.
• Näheres zum Anschließen der Lautsprecherkabel
entnehmen Sie bitte der Abbildung oben.
3: Anschließen anderer
Komponenten
Hier sehen Sie ein Beispiel für das Anschließen anderer
Komponenten an den Receiver. Nähere Informationen zum
Anschließen anderer Komponenten finden Sie in Schritt 3
unter „Vorbereitungen“ in der Bedienungsanleitung zum
Receiver.
4: Zum Schluss: Anschließen
der Netzkabel
Schließen Sie das Netzkabel an eine Netzsteckdose an.
Näheres dazu finden Sie unter „Anschließen des
Netzkabels“ in der Bedienungsanleitung zum Receiver.
2: Conexión de los altavoces
Las ilustraciones que aparece más arriba muestra
cómo conectar los altavoces. Antes de conectarlos,
compruebe la etiqueta del altavoz situada en el panel
posterior de los mismos para conocer el tipo de altavoz.
Acerca de los cables de los altavoces
• El cable con rayas negras tiene una polaridad
negativa (–) y se debe conectar al terminal de
altavoz negativo (–).
• Utilice los cables largos de conexión de altavoces
para conectar los altavoces de sonido envolvente,
y los cables cortos de conexión de altavoces para
conectar el altavoz frontal y el central.
Acerca de las tomas de los altavoces
• Conecte la toma a la toma del receptor, y
conecte la toma a la toma del receptor.
• Consulte la ilustración anterior para obtener más
información sobre cómo conectar los cables de los
altavoces.
3: Conexión de otros componentes
Este es un ejemplo de cómo conectar este
receptor a los componentes. Consulte el paso
3 de “Procedimientos iniciales” del manual de
instrucciones suministrado con el receptor para
obtener más información sobre cómo realizar otras
conexiones y sobre otros componentes.
4: Conecte todos los cables de
alimentación en último lugar
Conecte el cable de alimentación de ca a una toma de pared.
Consulte el apartado “Conexión del cable de alimentación
de ca” del manual de instrucciones suministrado con el
receptor.
A
A
TV/
Téléviseur
/
Televisor/Fernseher
CHDMI cable (not supplied)/Câble HDMI (non fourni)/Cable HDMI (no suministrado)/HDMI-Kabel
(nicht mitgeliefert)
DCoaxial digital cord (supplied)/Cordon numérique coaxial (fournie)/Cable digital coaxial (suministrada)/
Koaxiales Digitalkabel (mitgeliefert)
EOptical digital cord (not supplied)/Cordon numérique optique (non fourni)/Cable digital óptico
(no suministrado)/Optisches Digitalkabel (nicht mitgeliefert)
FAudio cord (not supplied)/Cordon audio (non fourni)/Cable de audio (no suministrado)/
Audiokabel (nicht mitgeliefert)
GVideo cord (not supplied)/Cordon vidéo (non fourni)/Cable de vídeo (no suministrado)/
Videokabel (nicht mitgeliefert)
AB
B
B
B
Note
• Be sure to connect the video output of the DVD player and
satellite tuner/set-top box to the TV so that the image is
displayed on the TV. Refer to the operating instructions of
each component connected for details.
• To fully enjoy surround sound while watching TV
programmes, connect the audio output of your TV jacks as
shown and turn off or mute the TV’s volume.
• To enjoy multi channel surround sound when connecting
HDMI, be sure to connect the digital audio jack as shown and
turn off or mute the TV's volume.
Remarque
• Assurez-vous de raccorder la sortie vidéo du lecteur DVD
et du tuner satellite/du décodeur au téléviseur de sorte
que l’image soit affichée sur ce dernier. Pour obtenir plus
d’informations, reportez-vous au mode d’emploi de chaque
appareil raccordé.
• Pour profiter pleinement du son surround lorsque vous
regardez la télévision, raccordez les prises de sortie audio
de votre téléviseur comme indiqué et éteignez le volume du
téléviseur ou mettez-le en sourdine.
• Pour profiter du son surround multicanal avec un
raccordement HDMI, veillez à raccorder la prise audio
numérique comme indiqué et éteignez le volume du téléviseur
ou mettez-le en sourdine.
Nota
• Asegúrese de conectar la salida de vídeo del reproductor de
DVD y el sintonizador vía satélite/decodificador al televisor
para poder visualizar las imágenes en la pantalla del televisor.
Para obtener más información, consulte el manual de
instrucciones de cada uno de los dispositivos conectados.
• Para disfrutar plenamente del sonido envolvente mientras
ve programas de televisión, conecte la salida de audio de las
tomas del televisor tal como se indica y desactive o silencie el
volumen del televisor.
• Para disfrutar del sonido envolvente multicanal con conexión
HDMI, asegúrese de conectar la toma de audio digital como
se muestra en la ilustración, así como de desactivar o
silenciar el volumen del televisor.
Hinweis
• Achten Sie darauf, den Videoausgang des DVD-Players und
des Satellitentuners/der Set-Top-Box mit dem Fernsehgerät zu
verbinden, so dass das Bild auf dem Fernsehschirm angezeigt
wird. Einzelheiten schlagen Sie in der Bedienungsanleitung
zur jeweiligen Komponente nach.
• Um beim Fernsehen optimalen Raumklang zu erzielen,
verbinden Sie die Audioausgangsbuchsen des Fernsehgeräts
wie in der Abbildung gezeigt mit dem Receiver und schalten
den Ton am Fernsehgerät aus oder stumm.
• Wenn Sie eine HDMI-Verbindung vornehmen und
Mehrkanalraumklang wiedergeben möchten, müssen Sie
die digitale Audiobuchse wie dargestellt anschließen und
die Lautstärke des Fernsehgeräts herunterdrehen oder
stummschalten.
DVD player/Lecteur DVD/
Reproductor de DVD/
DVD-Player
Satellite tuner or Set-top box/
Tuner satellite ou Décodeur/
Sintonizador vía satélite o decodificador/
Satellitentuner oder Set-Top-Box
ASpeaker cord (supplied)/Cordons d’enceintes (fournie)/
Cables de los altavoces (suministrada)/Lautsprecherkabel
(mitgeliefert)
BSpeaker label/Etiquette de l’enceinte/Etiqueta del altavoz/
Lautsprecheraufkleber
GBFRESDE+SF1100_2UC.indd 1GBFRESDE+SF1100_2UC.indd 1 1/16/2007 2:45:47 PM1/16/2007 2:45:47 PM

