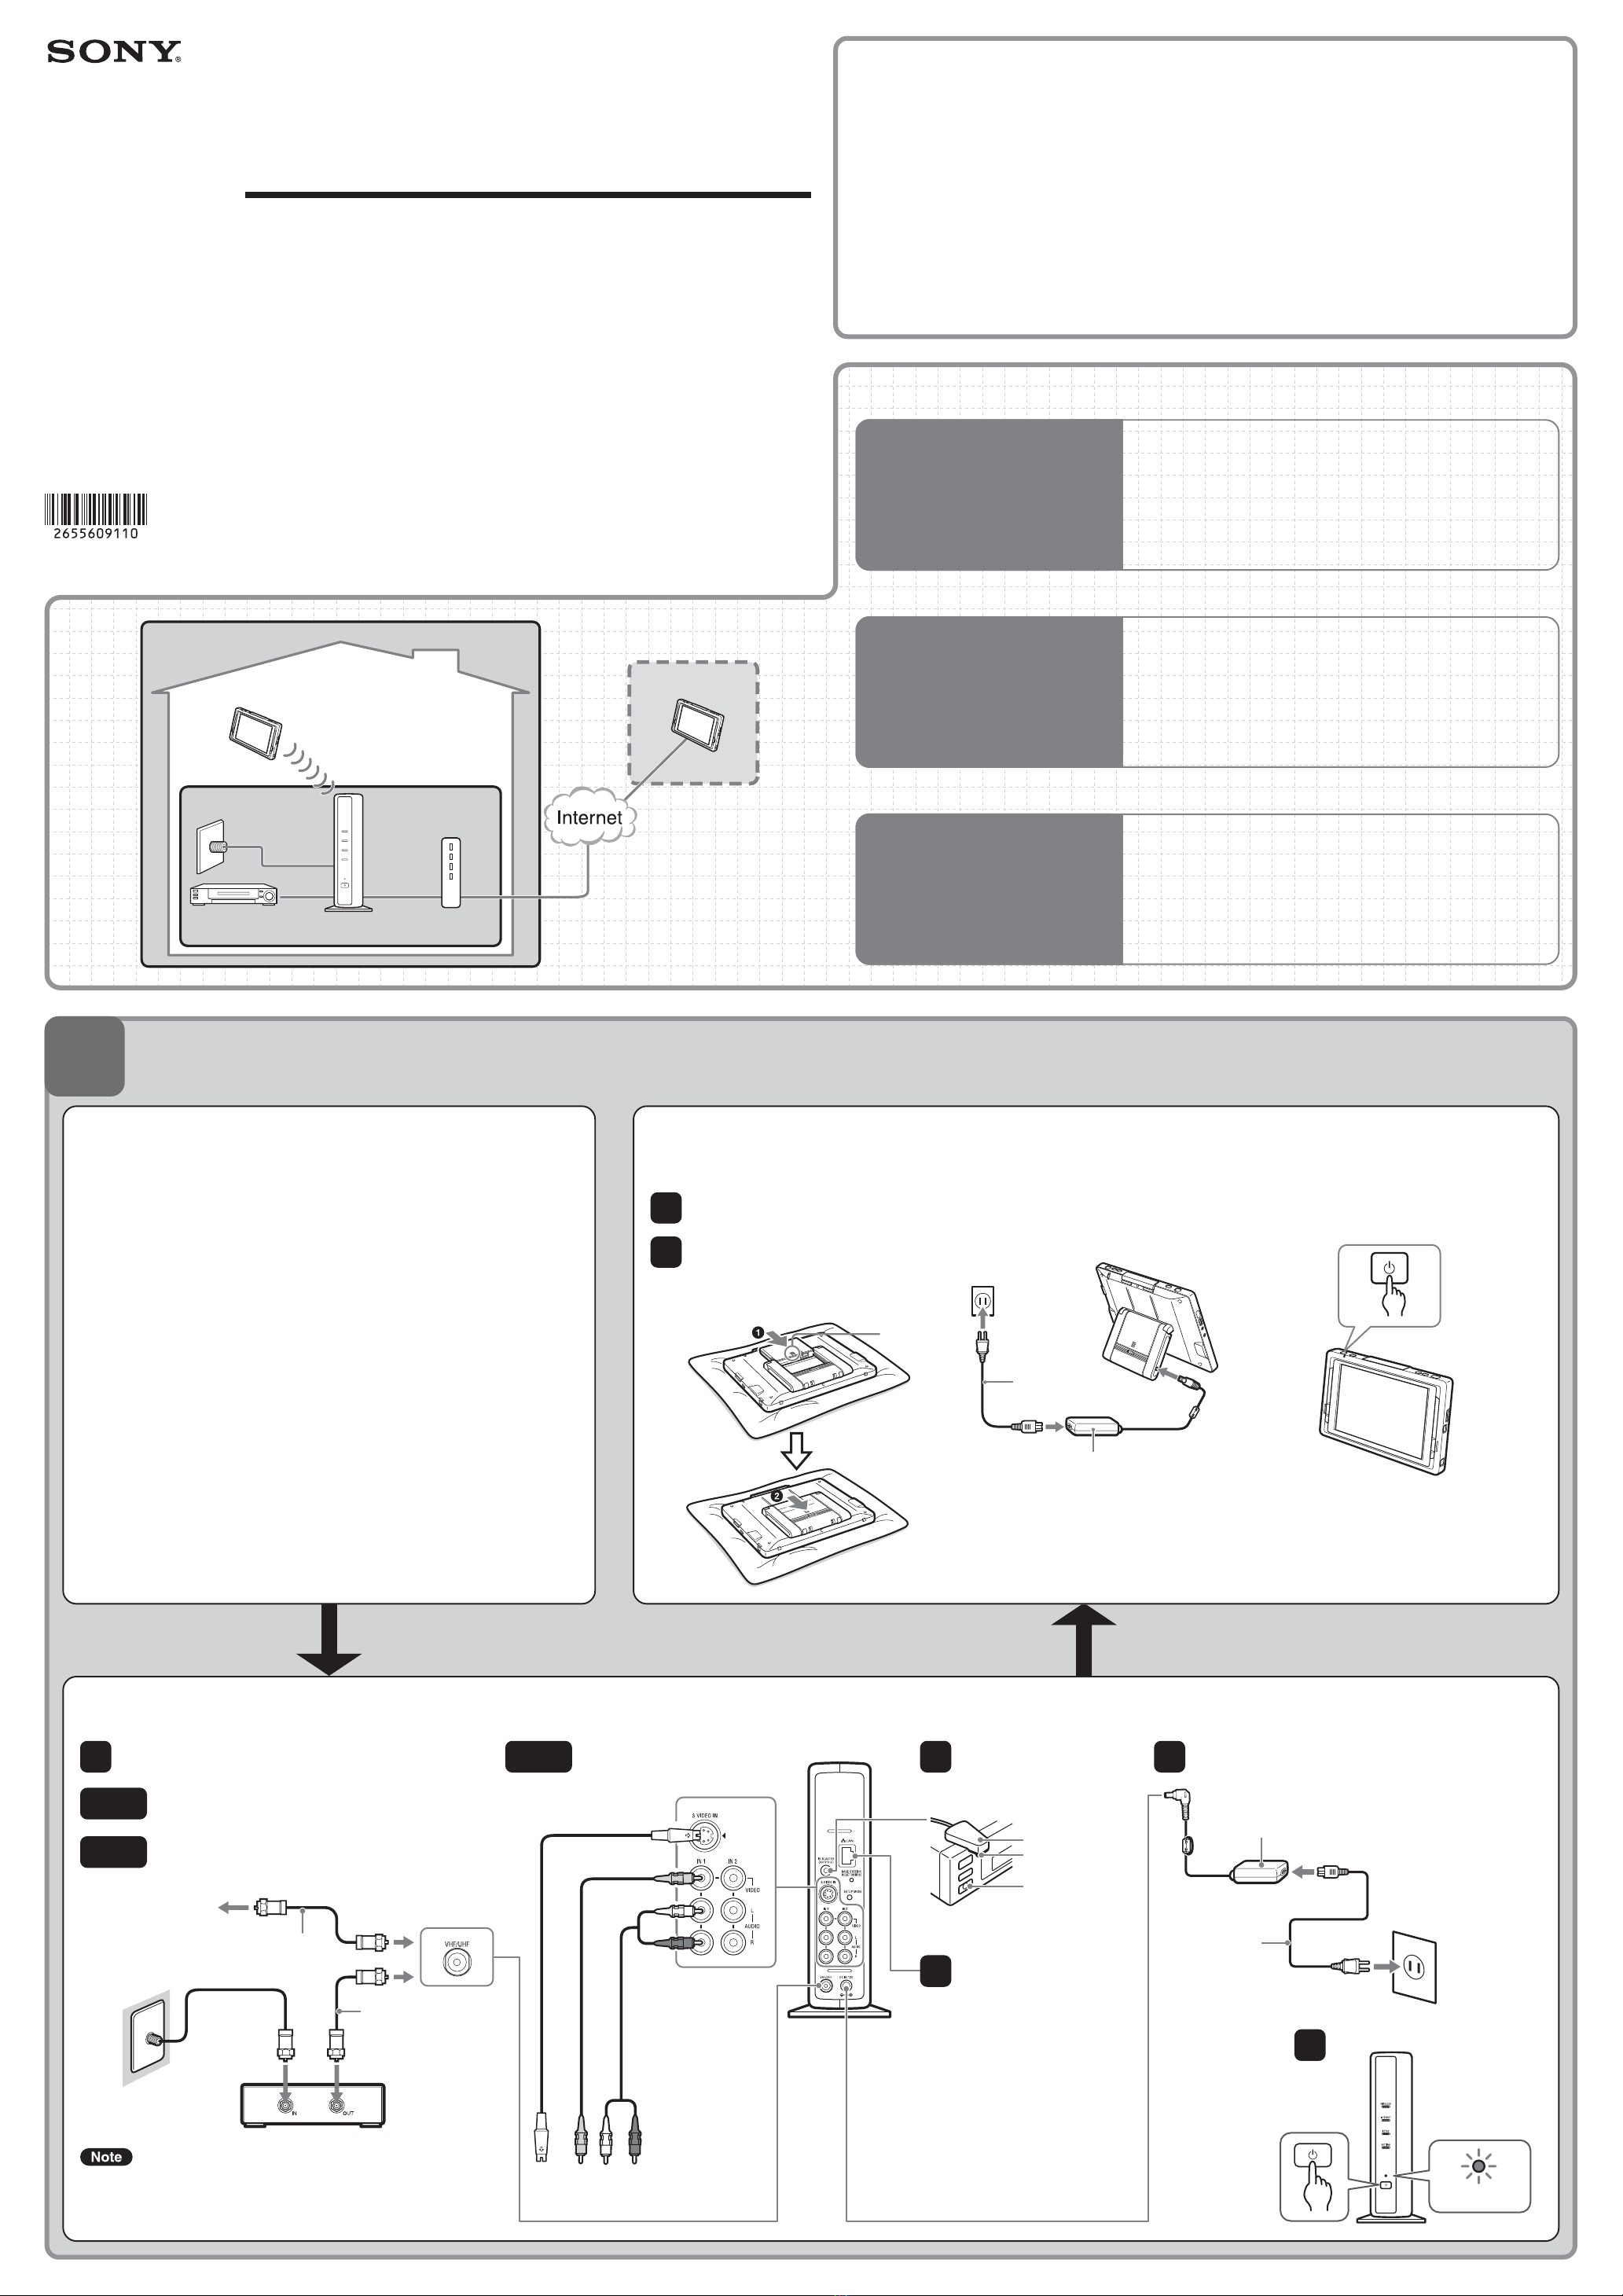
STEP
2
STEP
3
Setup to Watch TV at Home
In “Easy Setup (Basic)”, follow the instructions on the screen and make the following settings.
■Start “Easy Setup” Manually
When the “Welcome” screen does not appear, perform the
following steps to start “Easy Setup”.
Touch anywhere on the screen and select [Settings] at
the bottom right of the screen.
Display the [Settings] window, and then select [Easy
Setup].
Select the [Start] button of [Easy Setup (Basic)].
1
2
Before making the settings
Setup to Watch TV On the Go
To use the NetAV function away from home, you need to make the following settings before leaving home.
Select the [Start] button of [Easy Setup
(NetAV)].
The “Get Started” window appears.
Select [Next].
•After completing the setup in STEP 2, make sure
that you are able to watch TV at home and
connect to the Internet.
•Turn on the UPnP function of the router you are
using.
Touch anywhere on the screen and select
[Settings] at the bottom right of the screen,
and then select [Easy Setup].
Remove the stylus from its compartment.
Make sure that the following icon appears in the upper right corner of the
screen.
Select [Go] on the “Welcome” screen.
The “Welcome” screen only appears when starting up for the first time. For
details on starting “Easy Setup” again after the first time, see “Start ‘Easy
Setup’ Manually” below.
Select [Next].
Check that the antenna cable is connected to the Base
Station, select [ON] or [OFF] for [CABLE], and then select
[Next].
If an external TV tuner or STB is connected with an AV cable,
select [Skip Automatic Scan] and proceed to step 7.
When a message appears, select [OK].
Automatic Channel Scan begins.
When the channel scan finishes and a message appears,
select [OK].
Check the other device connections and IR Blaster
connections, and then select [Next].
From the list in the upper (and lower) part of the window,
select the [Make] and [Type] of the connected device, and
then select [Next].
Confirm that the NETAV LED on the Base
Station turned off, and select [NetAV Check].
The “NetAV Check” web page opens.
If the result is “Success”, the setup is complete.
If the NetAV Check fails, follow the instructions on
the screen.
It takes approximately one minute for the NETAV LED to
turn off.
If you connect a device to the Video 2 input terminal, make
the same settings as in step 8, and then select [Next].
zTip
The preceding settings are required for watching TV and video at home.
From step 10 onward, the necessary settings for Internet and E-mail are
configured. If you do not need to make Internet and E-mail settings, you
can skip them by selecting [Next].
Confirm that “OK” is displayed on the screen, and select
[Next].
Network settings can also be configured from the [Settings] window.
Refer to your ISP, make the E-mail settings, and then select
[Next].
Touching any character entry field will cause the on-screen keyboard to
appear.
Select the time zone for the area where you will use the
LocationFree TV, set the current date and time with [+] and
[–], and then select [Finish].
Daylight Savings Time is not set automatically when you select [City
(standard)] for the time zone, even if the city is in Daylight Savings Time. If
you want to set Daylight Savings Time, select [City (DST)].
Select [OK].
This completes the “Easy Setup (Basic)”.
The TV window appears.
The system restarts automatically after [Finish] is selected if the time zone
is changed.
3
2
1 3
4
5
6
7
8
10
11
12
13
1
2
3
4
5
If you select the correct [Make]
and [Type], the connected
device is turned on or off each
time you press [Power].You can
confirm if the power is on or off
by looking at the sub-screen.
When you connect a second device via a first device,
continue selecting the [Make] and [Type] of the second
device from the list in the lower part of the window.
Move on to STEP 3 to watch TV away from home.
■To use NetAV
Switch the Monitor to “On the Go” mode,
and connect to the Internet.
Touch anywhere on the screen and
select [Settings] at the bottom right
of the screen.
Display the [Settings] window, and
then select [Monitor].
Select [On the Go], and then select
[Back] twice.
Connect the Monitor to the Internet
according to your operating
environment.
1
2
3
4
9
For details, refer to the operating instructions
and Instructional DVD.
Read the “Dynamic DNS Terms-of-Use
Agreement” included in the LocationFree TV
carton box, select [Agree], and then select [Next].