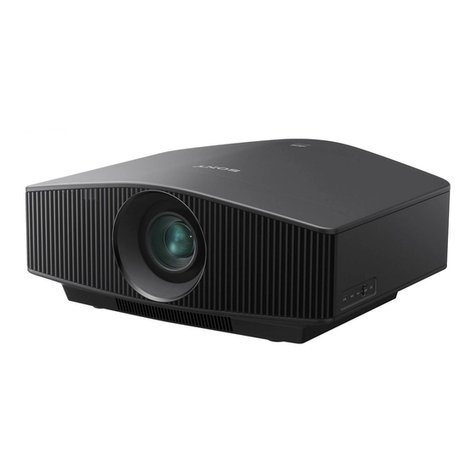
Sony VPL-CX85 User manual

© 2004 Sony Corporation
4-103-417-11 (1)
Data Projector
Operating Instructions for Air Shot
VPL-CX85

2
Table of Contents
Features ..............................................3
System Requirement ..........................4
Inserting Card ....................................4
Installation .........................................5
Connecting Examples ........................6
When Simple Mode is Used ..............8
When Simple Mode is not Used ......10
Setting/Operating the Projector from
the Computer (via Web) ..................12
Accessing from the Computer ....12
Confirming the State of Projector
Settings (Information) .....13
Setting the Connecting Mode
(Simple Mode) ................13
Operating the Projector on the
Computer (Control) .........14
Setting (Setup) ............................14
Troubleshooting ...............................17
Technical Terms ..............................20

3Features
Features
This unit is equipped with the Air Shot
(wireless connection) function. Any image
of a computer can be projected by using the
projectorwithoutconnectingcables. Images
from several computers can also be easily
switched and projected.
Easy setting and connection in
Simple Mode
Simple Mode is an easy connection mode
with no need for network and wireless
settings. The wireless connection of the
projector and computer can be done easily
by using the Simple Mode function. Insert
the supplied wireless LAN card into the
projector and the supplied USB wireless
LAN module into the computer, and an
image from the computer can be easily
projected.
Installation by the USB storage
media
For using Air Shot, install the application
software, Projector Station for Air Shot, in
the computer. The installation can be done
easily in accordance with the instructions on
the screen by using the supplied CD-ROM
or USB storage media.
Speedy and high quality
transportation/display
The image data is efficiently compressed so
that a high-quality image can be transported
speedily. An animation function can be used
at a presentation by the transportation. (It is
not suitable for a movie such as a DVD.)
Security system
Datacanbeencodedandtransported(WEP).
Data is also encoded in Simple Mode for the
communication of the projector and the
computer. You can feel confident about data
communication.
Control by using Web browser
Youcan controltheprojectorandconfirmits
setting.
Connection to a LAN
You can not only connect the projector and
computer directly but also connect to a LAN
by using the access point. Power on/off,
input selecting, confirmation, etc. of the
projector can be done from the computer
connected to LAN. And viewing an image
in the internet, you can transport it to the
projector.
Multiple connections
A maximum of five projectors can be
connected to one computer without using a
distributor and an image can be projected on
the projectors at the same time.
Presentation tool with laser pointer
PowerPoint images can be played back
forward or backward or muted by using the
supplied presentation tool.

4System Requirement / Inserting Card
System Requirement
Recommended system requirements for the
installedProjectorStationforAirShotareas
follows.
Available computer
CPU: Intel Pentium III 600 MHz or higher
Memory: 64 MB or more, recommended
128MBormore(WindowsXP:128MB
or more)
Hard disc: 10 MB or more
Other hardware requirements: CD-
ROM drive or USB terminal
Available OS
Microsoft Windows 98SE,
Microsoft Windows Me,
Microsoft Windows 2000,
Microsoft Windows XP Home Edition,
Microsoft Windows XP Professional
Available resolution
Size: VGA (640 × 480), SVGA (800 ×
600), XGA (1024 × 768), SXGA (1280
× 1024)
Color number: 16 bit, 24 bit, 32 bit
Usable browser: Internet Explorer 5.0 or
higher
Usable wireless LAN device (used on
the computer)
Standard: IEEE802.11b
Channel: 1 to 11
Access system: Access point mode or
Ad-hoc (peer-to-peer) mode
WEP: 128 (104)/64 (40) bit
Air Shot will not work on some computers
even though they satisfy the above
requirements.
Inserting Card
Insert the supplied wireless LAN card into
the slot of the projector.
Before inserting or removing the card,
disconnect the power cord of the projector.
Inserting the card
Insert the card facing the right side towards
the front panel of the projector until it stops.
• Never use a wireless LAN card other than the
supplied one.
• When the projector is carried, remove the
card from the slot.
Removing the card
1Press the eject button at the upper side
of the slot.
The eject button pops out.
2Press the eject button again.
The card pops out.
Note
Note
Notes

5Installation
3Remove the card.
After the card is removed, press the eject
button. If the button remains popped out, it
may cause breakage of the button.
Installation
For using Air Shot, install the application
software, Projector Station for Air Shot, in
the computer.
1Connect the supplied USB storage
media to the USB terminal of the
computer.
2Select the appropriate [Removable
Disc] in [My computer], and double-
click [As_Inst.exe].
The window for installing the Projector
Station for Air Shot appears.
3Click [Install].
4Install the software according to the
"wizard" within the installer.
After the installation is completed, [Exit
installation procedure.] appears.
Note
USB storage media (supplied)
Computer

6Connecting Examples
Continue to install the software even if a
confirmation window of digital
signature appears while installation.
Projector Station for Air Shot can also be
installed by using the supplied CD-ROM.
• If you use Windows 2000 Professional or
Windows XP Home Edition/Professional on
your computer, log on using the
administrator privileges.
• When Windows 98SE is used, the driver of
the USB storage media must be installed.
For details, see the Operating Instructions of
the USB storage media.
• When Simple Mode is set to [Off], use “USB
Wireless LAN Module Utility” saved in the
supplied CD-ROM for wireless setting.
• If you delete a file in the USB storage media,
copy the file in the “USB Storage Media”
folder saved in the supplied CD-ROM.
Connecting
Examples
Connecting to one projector
When Simple Mode is used
See “When Simple Mode is Used” on page
8.
When Simple Mode is not used
See “When Simple Mode is not Used” on
page 10.
* When Simple Mode is not used, you can also
use a wireless LAN device (IEEE802.11b
compliant) other than the supplied USB
wireless LAN module.
Notes
Projector
USB wireless LAN
module (supplied)*
Wireless LAN card
(supplied)
Computer

7Connecting Examples
Connecting to several projectors at
the same time
For setting and operations, see “When
Simple Mode is not Used” on page 10.
*1 A maximum of five projectors can be
connected at the same time.
Five projectors may not be able to be
connected due to the computer.
*2 You can also use a wireless LAN device
(IEEE802.11b compliant) other than the
supplied USB wireless LAN module.
Connecting to wireless LAN using
the wireless LAN access point
For setting and operations, see “When
Simple Mode is not Used” on page 10.
* You can also use a wireless LAN device
(IEEE802.11b compliant) other than the
supplied USB wireless LAN module.
For a network connection, consult the network
administrator.
Note
Projector Wireless LAN card
(supplied)
Computer
Projector
Projector*1
Wireless LAN card
(supplied)
Wireless LAN card (supplied)
USB
wireless
LAN
module
(supplied)*2
Note
Projector
Wireless LAN module
(supplied)
Access point
(IEEE802.11b
compliant)
USB wireless
LAN module
(supplied)*
Computer
Computer
Computer

8When Simple Mode is Used
When Simple Mode
is Used
Setting the projector
1Insert the supplied wireless LAN card
into the slot of the projector.
2Turn on the projector.
3Press the AIR SHOT key on the
remote commander.
The home display of Air Shot appears.
Check that [Simple Mode] is set to [On].
If the home display does not appear
Select [Air Shot] in [Input-C Select] of the
“SET SETTING” menu or press the AIR
SHOT key on the remote commander.
For details of the “SET SETTING” menu,
see the attached Operating Instructions.
If Simple Mode is not set to [On]
See steps 4and 5of “When Simple Mode is
not Used” on page 10 and set it to [On].
To change the network channel for
Simple Mode
The default setting is [11]. See steps 4and
5of "When Simple Mode is not Used" on
page 10 and set [Network Channel] to
another channel. The channel is selected
from among 1 to 11.
• If the USB wireless LAN module is
connected to the computer, remove it before
setting.
• You may not be able to use some channels
according to the country/region.
Setting the computer
1Start the Projector Station for Air
Shot.
When it starts, the [ ] icon appears in
the task bar.
When [Create Shortcut Icon into Startup
Folder.] is selected at installation, the
Projector Station for Air Shot starts
automatically.
2Connect the USB wireless LAN
module to the USB terminal of the
computer.
The wireless setting is automatically
done. After the connectable projector is
searched, the image of the computer is
projected on the searched projector.
It may take time to project an image due to the
computer.
When the projector you want to use
cannot be found
Change the projector or add the projector to
be used. The changed or added projector
appears in the select list.
Setting
1Right-click the [ ] icon in the task
bar and select [Open].
The main window of Projector Station
for Air Shot opens.
Notes
Note

9When Simple Mode is Used
2Click the [ ] button of the main
window to open the [Option] dialog
box.
The [Option] dialog box is opened when
the computer is not connected to the
projector.
For details of the [Option] dialog box,
see the help manual.
3Click the [Change Projector] button of
[Simple Mode Setting].
The dialog box with a projector name
and serial number is displayed.
4Whentheprojector tobeusedis listed,
select the projector and click the [Ok]
button.
When the projector to be used is not
listed, click the [Add] button and enter
the serial number (five-digit-number).
The projector is added to the list.
• Even when the setting to add a projector is
completed, the projector name is listed
"Unknown" until the projector has been
connected once.
• The serial number appears at the bottom of
the Air Shot home display.
• A maximum of ten projectors can be
registered.
Connecting/disconnecting the
projector and computer
You can connect or disconnect the projector
manually.
Disconnect the projector and the computer in
one of the following two ways to stop the
projection on the projector and remove the
USB wireless LAN module.
When accessing from the computer
Open the main window of Projector Station
for Air Shot and connect the computer and
the projector referring to the help manual.
When accessing from the projector
1Press the AIR SHOT key on the
remote commander.
The connectable computer list appears.
2Press Mor mkey on the remote
commander to select the computer to
be connected, and then press the
ENTER key.
For disconnecting
PressMormkey to select the computer to be
disconnected, and then press the ENTER
key.
Notes
Note
Yamada PC
Connect PC?
Connecting PC:Yamada PC
(xxx. xxx. xx. x)
Tanaka PC ( xx. x. xx. xx )
Suzuki PC (xxx. xxx. xx. x)
Saito PC ( xx. x. xx. xx )
Sakuma PC (xxx. xxx. xx. x)
Appears when the computer is connected.

10 When Simple Mode is not Used
When Simple Mode
is not Used
Setting the projector
1Insert the supplied wireless LAN card
into the slot of the projector.
2Turn on the projector.
3Press the AIR SHOT key on the
remote commander.
The home display of Air Shot appears.
If the home display does not appear,
select [Air Shot] in [Input-C Select] of
the “SET SETTING” menu or press the
AIR SHOT key on the remote
commander.
For details of the “SET SETTING”
menu, see the attached Operating
Instructions.
4Press the ENTER key.
The setting menu display appears.
5Select [Off] in [Simple Mode] and set
[Setting].
UserName:thesettingitemscanbe saved.
There are five memories and you can
select from among [User 1] to [User 5].
When you want to change the user name,
see “Projector setting” on page 15
(“Setting/Operating the Projector from
the Computer (via Web)”).
Network Mode: select [Ad-hoc (Peer-to-
peer)] or [Wireless Access Point].
• Ad-hoc (Peer-to-peer): for wireless
LAN connection without the access
point
• Wireless Access Point: for wireless
LAN connection with the access point
Network Name (SSID): enter the same
network name as that of the connected
computer.
A maximum of 32 characters/numbers
can be entered.
Network Channel: when [Ad-hoc (Peer-
to-peer)] is selected in [Network Mode],
you can select from 1 to 11.
When [Wireless Access Point] is
selected in [Network Mode], [Auto] is
selected automatically.
• If the USB wireless LAN module is
connected to the computer, remove it before
setting.
• You may not be able to use some channel
according to the country.
Data Encryption (WEP): select the data
encryption system.
You can select from among [Off], [64
(40) bit ASCII], [128 (104) bit ASCII],
[64 (40) bit HEX], [128 (104) bit HEX].
When [Off] is selected, [Key] becomes
invalid.
Key: when [Data Encryption (WEP)] is
used, enter the key.
Enter the same key as that of the
computer or access point.
The number of the characters/figures is
due to the setting of the [Data
Encryption (WEP)].
• 64 (40) bit ASCII: max. five characters/
numbers/symbols
• 128 (104) bit ASCII: max. 13 characters/
numbers/symbols
• 64 (40) bit HEX: max. ten numbers from 0
to 9/characters from a to f
• 128 (104) bit HEX: max. 26 numbers from 0
to 9/characters from a to f
When [64 (40) bit ASCII] or [128 (104) bit
ASCII] is selected, the capital and small letters
are discriminated.
IP Address Setting: select [Auto
(DHCP)] or [Manual].
When the [Manual] is selected, set [IP
Simple Mode
Setting
Ok
Cancel
Off
User Name : User 1
Network Mode : Ad-hoc (Peer-to-peer)
Network Name (SSID) : VPL1234
Network Channel : 11
Data Encryption (WEP) : Off
Key :
IP Address Setting : Auto (DHCP)
IP Address : 192. 168. 0. 1
Subnet Mask : 255. 255. 255. 0
Default Gateway : 255. 255. 255. 255
MAC Address : 01-23-45-67-89-AB
Notes
Note
11When Simple Mode is not Used
Address], [Subnet Mask] and [Default
Gateway].
A DHCP server is needed to make DHCP
valid.
IP Address: select the IP address setting
from among 0 to 255.
Subnet Mask: select the subnet mask
setting from among 0 to 255.
Default Gateway: select the default
gateway setting from among 0 to 255.
MAC Address: the MAC address of the
attached wireless module is displayed.
You can set the projector by using the
browser. See “Projector setting” on page
15 (“Setting/Operating the Projector from
the Computer (via Web)”).
To save the setting
Select the [Ok] button and press the ENTER
key. The settings are saved and the home
display appears.
To clear the setting menu without
saving the setting
Select the [Cancel] button and press the
ENTER key.
Setting the computer
1Right-click the [ ] icon in the task
bar and select [Open].
The main window of Projector Station
for Air Shot opens.
2Click the [ ] button of the main
window to open the [Option] dialog
box.
The [Option] dialog box is opened when
the computer is not connected to the
projector.
For details of the [Option] dialog box,
see the help manual.
3Select [Off] in [Simple Mode].
4Close the main window.
5WhenthesuppliedUSBwirelessLAN
module is used, set the wireless LAN
referring to the User’s Guide of the
USB wireless LAN module.
When a device other than the supplied
USB wireless LAN module is used,
set the wireless setting of the
computer so that the projector and
computer can be connected.
Close the main window for setting.
Note
Note

12 Setting/Operating the Projector from the Computer (via Web)
Setting/Operating
the Projector from
the Computer (via
Web)
You can check the information of the
projector from the computer or operate the
projector on the computer. Check the
connection and turn on the equipment.
You can access the Web page of the
projector by either of the following two
ways.
Right-click the projector button in the
main window of Projector Station for
Air Shot.
Start a browser of the computer
(Internet Explorer 5.0 or higher) and
enter the address “http://
xxx.xxx.xxx.xxx (IP address of the
projector.)”
If the browser of your computer is set to
“Access the Internet using a proxy server,”
enter the IP address of the projector in the box
“Access the Internet without using a proxy
server” when you have access to the projector
from your computer.
After access, the following display appears.
Accessing from the
Computer
Note

13Setting/Operating the Projector from the Computer (via Web)
Click [Information].
You can confirm the current state of the
projector on the computer. You cannot
change the settings of the projector. Click
[Refresh] when the setting of the projector is
changed after displaying the information
window.
Click [Simple Mode].
Set the Simple Mode and user name.
Click the [Apply] button to reflect the
projector.
Simple Mode: set the Simple Mode.
When [On] is selected, the mode is set to
easy connection mode with no need for
network and wireless settings. When
[Off] is selected, the user settings are
needed.
User Memory: select the user name.
Confirming the State of
Projector Settings
(Information)
Setting the Connecting Mode
(Simple Mode)

14 Setting/Operating the Projector from the Computer (via Web)
Click [Control].
You can control the projector on the
computer.
Click [Setup].
The dialog box for input of the password
appears. Enter the administrator’s name and
password. Theadministrator’snameisfixed
to [root]. No password is set at the factory.
Set for using the network function.
Click [Projector Setting] or [Password] and
set each item.
The current state is reflected in the projector
by clicking the [Apply] button.
Operating the Projector on
the Computer (Control) Setting (Setup)

15Setting/Operating the Projector from the Computer (via Web)
Projector setting
Click [Projector Setting].
Projector Name: enter a projector name.
Simple Mode: set [On] or [Off].
When [Off] is selected, set the
following.
Setting: select [Ad-hoc (peer-to-peer)] or
[Wireless Access Point].
Network Name (SSID): enter the same
network name as that of the connected
computer. A maximum of 32
characters/numbers can be entered.
Network Channel: when [Ad-hoc (peer-
to-peer)] is selected in [Setting], you can
select from 1 to 11.
When [Wireless Access Point] is
selected in [Setting], [Auto] is selected.
• If the USB wireless LAN module is
connected to the computer, remove it before
setting.
• You may not be able to use some channel
according to the country.
Data Encryption (WEP): select the data
encryption system.
You can select from among [Off], [64
(40) bit ASCII], [128 (104) bit ASCII],
[64 (40) bit HEX], [128 (104) bit HEX].
When [Off] is selected, [Key] does not
function.
Key: when [Data Encryption (WEP)] is
used, enter the key. Enter the same key
as that of the computer.
The number of the characters/figures is
due to the setting of the [Data
Encryption (WEP)].
• 64 (40) bit ASCII: max. five characters/
numbers/symbols
• 128 (104) bit ASCII: max. 13 characters/
numbers/symbols
• 64 (40) bit HEX: max. ten numbers from 0
to 9/characters from a to f
• 128 (104) bit HEX: max. 26 numbers from 0
to 9/characters from a to f
When [64 (40) bit ASCII] or [128 (104) bit
ASCII] is selected, the capital and small letters
are discriminated.
IP Address setting: normally select
[Auto (DHCP)].
When [Manual] is selected, set [IP
Address], [Subnet Mask] and [Default
Gateway].
A DHCP server is needed to make DHCP
valid.
User Memory: select from [User 1] to
[User 5].
Edit: click when you want to enter a new
user name. The [User Name], [Setting]
and [Cancel] button function.
User Name: enter the user name.
Set to List: click to register the added user
name.
Cancel: click to cancel the user name.
Notes
Note
Note

16 Setting/Operating the Projector from the Computer (via Web)
Password
Click [Password].
Administrator: enter [Password] and
[Confirm Password]. The name is fixed
to [root].
Guest: enter [Name], [Password] and
[Confirm Password] of the user.

17Troubleshooting
Troubleshooting
Symptom Cause and Remedy
The projector is not displayed
in the main window.
(Computer)
The computer is not displayed
in the PC list. (Projector)
• Projector Station for Air Shot is not installed in the computer.
cInstall it.
• The supplied wireless LAN card is not inserted into the slot of
the projector or a card other than the supplied one is inserted.
cInsert the supplied wireless LAN card.
• The signal is extremely poor (the computer is distant from the
projector or there is an obstacle such as a concrete wall or a
steel partition/door between the computer and projector).
cPlace the computer and projector near to each other or ensure
there is no such intervening obstacle.
Simple Mode [On]
• Simple Mode of the projector or computer (Projector Station
for Air Shot) is not set to [On].
cSet Simple Mode to [On].
• [Connected Projector] of the computer is not set to the
projector you want to connect.
cAdd or select the projector to be connected by using [Change
Projector] in Projector Station for Air Shot.
Simple Mode [Off]
• The wireless and network settings of the projector or computer
are not set correctly.
cCheck that the IP address, SSID, WEP, etc. settings are the
same as those of the connected equipment.
The computer and projector
are connected in Projector
Station for Air Shot but the
image cannot be projected on
the projector.
• The projector is set to a picture muting.
cPress the PIC MUTING key on the remote commander to
release the muting.
• INPUT C is not selected on the projector.
cPress the AIR SHOT key on the remote commander or select
INPUT C using the INPUT button.
• [Memory Stick] is selected in INPUT C.
cPress the AIR SHOT key on the remote commander.
Some part of the image
displayed on the projector is
not correct.
The following application softwares may not be transported
correctly.
• Application software that uses DirectX
• Application software that plays back a movie
• Microsoft Office assistant
• Microsoft IME tool bar
• Tool tip displayed by mouse over
The image of one computer
cannot be projected on several
projectors. (Only one
projector is displayed in
Projector Station for Sir Shot.)
• Simple Mode [On] is used.
cSet Simple Mode of the projector and computer (Projector
Station for Air Shot) to [Off] and set the nerwork and
wireless settings.

18 Troubleshooting
Warning Messages PC: Computer
PJ: Projector
The computer cannot access
the Web page of the projector. • The projector is not displayed in the main window of Projector
Station for Air Shot.
cSee “The projector is not displayed in the main window.” on
page 17.
• The browser of the computer is set to "Access the Internet
using a proxy server."
cSet to "Access the Internet without using a proxy server".
• The version of the browser is old.
cUse Internet Explorer version 5.0 or higher.
Message PC PJ Cause and Remedy
Could not find
connectable projector. a• The connectable projector cannot be found after
searching it.
cSimple Mode [On]
Check that the projector to be connected is selected in
[Option], [Simple Mode Setting] and [Connected
Projector]. (Computer)
Check that the Simple Mode is set to [On] in the setting
menu. (Projector)
cSimple Mode [Off].
Check the wireless and network settings of the
computer and the projector.
You can connect up to 5
projectors. a• You tried to connect more than 5 projectors to one
computer.
cA maximum of five projectors can be connected to one
projector.
Turn off Simple Mode? a• A module other than the USB wireless LAN module is
selected with Simple Mode set to [On].
cSimple Mode [On] cannot be used for a module other
than the USB wireless LAN module.
Simple Mode is ON. To
use a module other than
the USB wireless LAN
module, Simple Mode
must be turned OFF by a
user with administrator
privileges.
a• Simple Mode is set to [On] and a module other than the
USB wireless LAN module is selected (when Windows
XP/2000 is logged on without using the administrator
plivileges).
cSimple Mode cannot be changed when Windows XP/
2000 is logged on without using the administrator
privileges. Log on using the administrator privileges
and set Simple Mode to [Off].
Insert the USB wireless
LAN module for Simple
Mode initialization.
Pressing Cancel sets
Simple Mode to OFF.
a• Projector Station for Air Shot is started to install for the
first time (when Windows XP/2000 is used).
cBefore using Projector Station for Air Shot, set the
Simple Mode initial setting. Insert the USB wireless
LAN module to set the Simple Mode initial setting.
When [Cancel] is selected in setting mode, Simple
Mode is set to [Off] and the initial setting cannot be
done. (The Simple Mode initial setting is done
automatically when Simple Mode is set to [On].)
Symptom Cause and Remedy

19Troubleshooting
For Simple Mode
initialization, restart
Projector Station for Air
Shot as a user with
administrator privileges.
a• The Simple Mode initial setting is not done (when
Windows XP/2000 is logged on without using the
administrator privileges).
cLog on using the administrator privileges and start
Projector Station for Air Shot. (The Simple Mode
initial setting is done.)
Unable to switch the
screen resolution.
a• The resolution switching of the computer cannot be done
when the main window is started or ended.
cSet the [Option] and [Resolution Switching] settings to
[PC Setup] when this message appears every time.
Set the USB wireless
LAN module's IP address
to the automatic setting
(DHCP).
a• The Windows network setting of the USB wireless LAN
module is not set to [DHCP] (when Windows 98SE/Me is
used).
cSet the network setting of the USB wireless LAN
module to [Auto].
No response from
projector. a• During connection the projector, communication cannot
be done because the power of the projector is turned off,
etc.
cConfirm the projector.
The projector is busy. a• The computer cannot communicate with the projector as
the other computer turns the projector on or off.
cAfter a while, communicate again.
Cannot set the IP address. a• The IP address of the computer cannot be set.
cAfter a while, start the main window again, disconnect
the USB wireless LAN module and connect it again,
and confirm the IP address setting of the computer
(when Simple Mode is set to [Off]).
Cannot set the Simple
Mode. a• Simple Mode cannot be set.
cAfter a while, start the main window again and
disconnect the USB wireless LAN module and connect
it again.
The same IP address
already exists. aa• The set IP address is already in use.
cInput a new IP address.
Wireless LAN card not
inserted. a• The wireless LAN card is not inserted correctly into the
slot of the projector.
cCheck the card direction and insert until it stops.
Incompatible card
mounted. a• The supplied wireless LAN card is not used.
cUse the supplied wireless LAN card.
The setting is invalid. a• The setting in the setting menu is not valid.
cCheck the displayed setting.
Cannot start the network. a• The network setting cannot be done.
cCheck the setting in the setting menu.
Message PC PJ Cause and Remedy

20 Technical Terms
Technical Terms
Air Shot
The function to connect the computer and
the projector in wireless mode.
DHCP
The function to share the IP address
automatically with the equipment connected
to the network. The DHCP server does not
share a fixed IP address but shares the IP
address with each equipment according to
the situation.
IP address
The address to recognize each connected
machine in the TCP/IP network.
LAN (Local Area Network)
Thenetworktobe usedinalimitedareasuch
as an office or home.
MAC address
The individual address to be shared at the
factory when it is produced.
There is no other machine with the same
address and the address cannot be changed
by the user.
Projector Station for Air Shot
The application software to use Air Shot.
Install in the used computer.
SSID (Service Set Identifier)
The data to recognize the equipment to be
connected in a wireless LAN.
Equipment with the same SSID can be
connected.
TCP/IP
The protocol to use in a network.
Each computer on the internet uses TCP/IP
to communicate with any other computer
and this is used as the protocol for LAN.
WEP (Wired Equivalent Privacy)
The security system to communicate the
encrypted data.
Register the same key as that of the
connected computer to communicate.
Access point mode
The mode using the wireless access point in
a wireless LAN.
Ad-hoc (peer-to -peer) mode
Themodenotusingthewirelessaccesspoint
in a wireless LAN.
Subnet mask
A means of allocating an IP address
according to the individual need.
Simple Mode
The simple setting mode to connect the
projector and computer without the network
and wireless settings.
Channel
Channel allotted to a wireless LAN to avoid
interference.
Some channels cannot be used according to
the country.
Default gateway
This means a router address.
Other manuals for VPL-CX85
4
Table of contents
Other Sony Projector manuals

Sony
Sony Cineza VPL-HS60 User manual

Sony
Sony VPL-HW20A User manual

Sony
Sony VPL-PX11 User manual

Sony
Sony VPL-MX20 User manual

Sony
Sony SRX-R220 User manual

Sony
Sony VPL-SX125 User manual

Sony
Sony VPLSW525 User manual

Sony
Sony VPL-FH500 Service manual

Sony
Sony BrightEra VPL-SW526M User manual

Sony
Sony BRAVIA VPL-VW90ES User manual

Sony
Sony VPL-FH65 User manual

Sony
Sony VPL-FX30 User manual

Sony
Sony VPL-EX5PLUS User manual

Sony
Sony Supersmart VPL-PX15 User manual

Sony
Sony VPL-FHZ700LB User manual

Sony
Sony VPL-FX52 User manual

Sony
Sony SRX-R220 User manual

Sony
Sony VPL-HW65ES Service manual

Sony
Sony VPL-VW11HT - Lcd Video Projector User manual

Sony
Sony SRX-R320P User manual