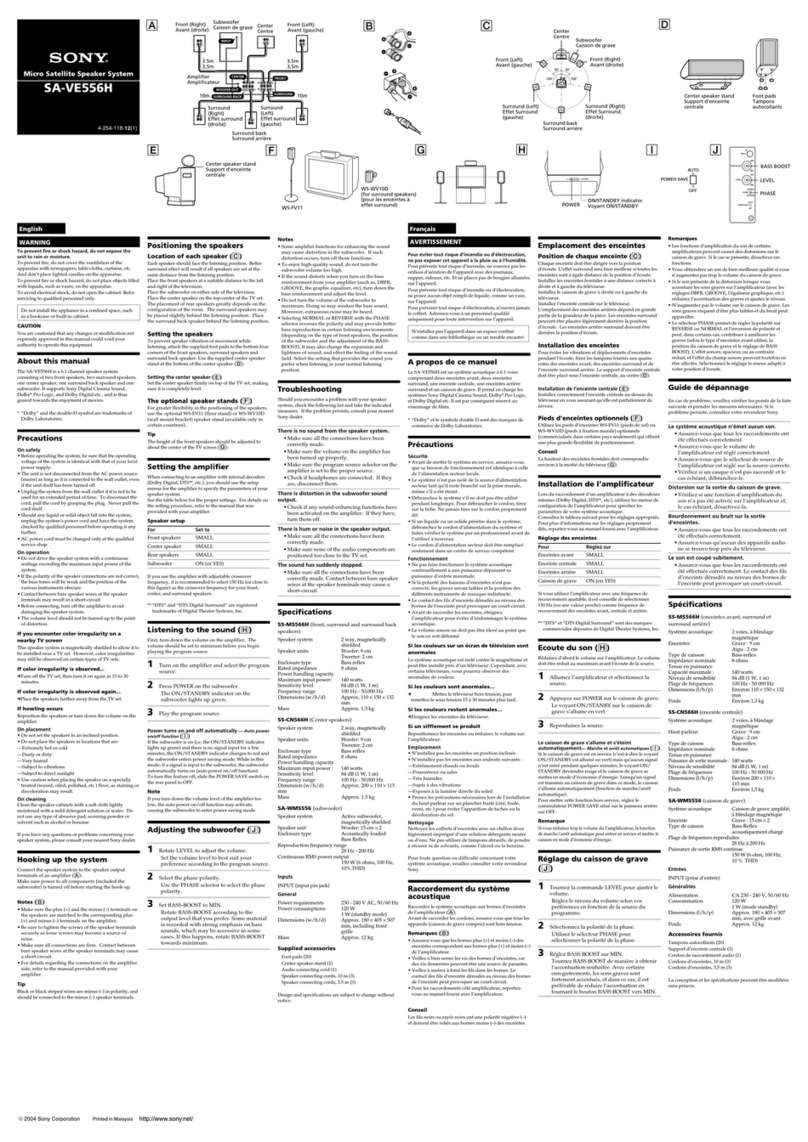
Sony CMT-RB5 - Micro Hi Fi Component System User manual

Micro Hi-Fi
Component
System
4-230-861-11(1)
©2000 Sony Corporation
CMT-RB5
Operating Instructions

2
WARNING
To prevent fire or shock hazard, do not expose the unit to rain or moisture.
To avoid electrical shock, do not open the cabinet. Refer servicing to qualified personnel only.
Do not install the appliance in a confined space, such as a bookcase or built-in cabinet.
This appliance is classified as a CLASS 1 LASER product.
The CLASS 1 LASER PRODUCT MARKING is located on the rear exterior.

3
Table of Contents
Getting Started
Step 1: Hooking up the system ................ 4
Step 2: Setting the time ............................ 6
Step 3: Presetting radio stations ............... 7
Saving the power in standby mode* ......... 8
Basic Operations
Playing a CD ............................................. 9
Listening to the radio
— Preset Tuning............................... 10
The CD Player
Playing CD tracks repeatedly
— Repeat Play .................................. 11
Playing CD tracks in random order
— Shuffle Play ................................. 11
Programing CD tracks
— Program Play ............................... 12
Using the CD display .............................. 13
Other Features
Adjusting the sound ................................ 15
Using the Radio Data System
(RDS)**............................................ 16
Falling asleep to music
— Sleep Timer ................................. 16
Waking up to music — Daily Timer....... 17
Connecting optional
components
Connecting optional A/V components .... 19
Listening to the sound of
connected components ..................... 20
Recording to connected components ...... 21
Connecting external antennas ................. 21
Additional Information
Precautions .............................................. 23
Troubleshooting ...................................... 24
Specifications .......................................... 26
Parts descriptions for the remote............. 28
Index........................................................ 30
* North American and European models only
** European model only

4
Getting Started
Step 1: Hooking up the system
Perform the following procedure 1to 4to hook up your system using the supplied cords and
accessories.
11
2
4
1
3
1Connect the speakers.
Connect the speaker cords to the SPEAKER
terminals as shown below.
Main unit
L
+
–
+
–
R
Speaker
–
+
Note
Keep the speaker cords away from the
antennas to prevent noise.
AM loop antenna
FM antenna
Left speakerRight speaker
Red (3)
Black (#)
Insert this portion Red (3)
Black (#)
Insert this portion

5
Getting Started
2Connect the FM/AM antennas.
Set up the AM loop antenna, then connect it.
Jack type A
FM75Ω
COAXIAL
AM
U
Jack type B
FM
75Ω
AM
U
U
3For models with a voltage selector, set
VOLTAGE SELECTOR to the local
power line voltage.
VOLTAGE
SELECTOR
110-120V 220-240V
4Connect the power cord to a wall outlet.
If the plug does not fit the wall socket,
detach the supplied plug adaptor (only for
models equipped with an adaptor).
Inserting two size AA (R6)
batteries into the remote
E
e
eE
Tip
With normal use, the batteries should last for about
six months. When the remote no longer operates the
system, replace both batteries with new ones.
Notes
• If you do not use the remote for a long period of
time, remove the batteries to avoid possible damage
from battery leakage.
• Be sure to insert the batteries in correct direction.
• Do not mix new batteries with old ones.
• Do not use different types of batteries together.
• Do not use a battery that is leaking.
• If the battery leaks, clean the battery compartment
and replace all the batteries with new ones.
AM loop
antenna
Extend the FM
lead antenna
horizontally
AM loop
antenna
Extend the FM
lead antenna
horizontally

6
Step 2: Setting the time
You must set the time beforehand to use the timer
functions.
The clock is on a 24-hour system for the European
model, and a 12-hour system for other models.
The 24-hour system is used for illustration
purposes.
>
Mm
NX x
?/1
.
21
4,6
4
3,5
DISPLAY
m
1Turn on the system.
2Press CLOCK/TIMER SET.
The clock appears and the hour indication
flashes.
0:00
3Press ./>to set the hour.
4Press ENTER or M.
The minute indication flashes.
11:00
5Press ./>to set the minute.
6Press ENTER.
The clock starts.
If you made a mistake
Press m/Mrepeatedly until the incorrect item
flashes, then set it again.
To change the preset time
You can change the preset time while the system
is off.
1Press DISPLAY to display the clock.
2Press CLOCK/TIMER SET.
3Repeat steps 3 to 6 of “Setting the time.”
Tips
• The upper dot of the colon flashes for the first 30
seconds, and the lower dot flashes for the last 30
seconds of each minute.
• Each time you press DISPLAY while the system is
off, the display switches between no display and the
clock display.

7
Getting Started
Step 3: Presetting radio
stations
You can preset up to 30 stations, 20 for FM and
10 for AM.
>
Mm
NX x
?/1
.
5
21
4
3
STEREO/
MONO
PRESET +/–
1Press TUNER/BAND to select “FM” or
“AM.”
Pressing TUNER/BAND turns on the
system.
2Press MODE repeatedly until “AUTO”
appears.
FM 78.50
3Press TUNING +/–.
The frequency indication changes and the
scanning stops when the system tunes in a
station. “TUNED” and “STEREO” (for a
stereo program) appear.
4Press MEMORY.
A preset number flashes in the display. The
stations are stored from preset number 1.
MEMORY MF1
5Press ENTER.
“COMPLETE !!” appears, and then the
station is stored.
6Repeat steps 1 to 5 to preset other
stations.
To stop scanning
Press MODE.
To tune in a station with a weak
signal
Press MODE repeatedly until “MANUAL”
appears in step 2, then press TUNING +/–
repeatedly to tune in the station manually.
To set another station to an
exist preset number
Start over from step 1. After step 4, press
PRESET +/– repeatedly to select the preset
number that you want to overwrite to. And then,
press ENTER.
continued

8
To erase a preset station
1Press down MEMORY until “ERASE” and a
preset number appear in the display.
2Press PRESET +/– repeatedly to select the
preset number that you want to erase.
Select “ALL ERASE” when you want to erase
all the preset stations.
3Press ENTER.
“COMPLETE !!” appears.
When you erase a preset number, the preset
number decreases by one and all preset numbers
following the erased one are renumbered.
To change the AM tuning
interval (except for the European
model)
The AM tuning interval is factory-set to 9 kHz
(10 kHz in some areas). To change the AM tuning
interval, tune in any AM station first, then turn off
the system. While pressing down the JL
button on the unit, turn the system back on. When
you change the interval, all the AM preset stations
are erased. To reset the interval, repeat the same
procedure.
Tips
• The preset stations are retained for about a day even
if you disconnect the power cord or if a power
failure occurs.
• When an FM stereo program has static noise, press
STEREO/MONO until “MONO” appears in the
display. There will be no stereo effect, but the
reception will improve. Press the button again to
restore the stereo effect.
Saving the power in
standby mode
(North American and European models only)
You can lower the power consumption to a
minimum and save energy in the standby mode.
The system is set at the factory not to display the
clock when the system is off (Power Saving
Mode). To display the clock even when the
system is off, deactivate the Power Saving Mode.
7
s
J L
Z
l j
c
DISPLAY
,Press DISPLAY when the system is off.
The system switches off the Power Saving
Mode and the clock appears.
To activate Power Saving Mode
Press DISPLAY.
The clock disappears.
Tip
Each time you press DISPLAY in the standby mode,
the display switches between the Power Saving Mode
and the clock display.
Step 3: Presetting radio stations
(continued)

9
Basic Operations
Basic Operations
Playing a CD
To turn on the system, press ?/1(power).
7
s
J L
Z
l j
c
21
l j J L VOLUMEs
1Press Zand place a CD on the disc
tray.
7
s
J L
Z
l j
c
To close the disc tray, press Zagain.
2Press HS.
The disc tray closes and play starts.
The CD TEXT indicator lights up when the
system detects a CD TEXT disc.
CD1 30m s5
Track number Playing time
To Do this
Stop play Press s.
Pause Press HS. Press again to resume
play.
Select a track Press lj/JL
repeatedly.
Press down lj/JL
during play and release it at the
desired point. “–OVER–” appears
at the end of the CD.
Turn VOLUME.
Remove the CD Press Z.
Adjust the
volume
Tips
• If there is no CD in the player, “CD No Disc”
appears in the display.
• Pressing HS when the system is off automatically
turns on the system and starts CD play if there is a
CD on the disc tray (One Touch Play).
• You can switch from another source to the CD
player and start playing a CD just by pressing HS
(Automatic Source Selection).
• You can start playing from the desired track in
step 2.
1Press lj/JLrepeatedly until the
desired track appears.
2Press HS.
Notes
• Do not use a CD with tape, seals or paste on it as
this may damage the CD player.
• Do not push the disc tray to close it, as this may
damage the CD player. Press Zto close the disc
tray.
• The disc cannot be viewed through the front
window when a CD single (8 cm CD) is loaded.
• The characters printed on the CD appear upside
down when viewed through the front window.
With the
label side up.
When you
play a CD
single (8 cm
CD), place it
on the inner
circle of the
tray.
Find a point in
a track
CD TEXT
indicator
?/1(power)
Getting Started/Basic Operations
9

10
Listening to the radio
— Preset Tuning
Preset radio stations in the tuner’s memory first
(see page 7).
To turn on the system, press ?/1(power).
>
Mm
NX x
?/1
.
21
STEREO/
MONO
VOL –
TUNING – TUNING +
VOL +
33
1Press TUNER/BAND to select “FM” or
“AM.”
2Press MODE repeatedly until
“PRESET” appears.
FM 78.50
3Press PRESET +/– to select the desired
preset station.
FM 1 785.0
When you preset only one station,
“ONE PRESET” appears in the display.
* European model only
?/1
(power)
To Do this
Turn off the radio Press ?/1to turn off the
system.
Adjust the volume Press VOL +/– repeatedly
Listening to non-preset radio
stations
• Press MODE repeatedly until “MANUAL”
appears in step 2, then press TUNING +/–
repeatedly to tune in the desired station
(Manual Tuning).
• Press MODE repeatedly until “AUTO” appears
in step 2, then press TUNING +/–. The
frequency indication changes and the scanning
stops when the system tunes in a station
(Automatic Tuning).
To cancel Automatic Tuning
Press MODE.
Tips
• Pressing TUNER/BAND when the system is off
automatically turns on the system and tunes in the
last received station (One Touch Play).
• You can switch from another source to the tuner
just by pressing TUNER/BAND (Automatic
Source Selection).
• To improve broadcast reception, adjust the supplied
antennas, or connect a commercially available
external antenna (see page 21).
• When an FM stereo program has static noise, press
STEREO/MONO until “MONO” appears in the
display. There will be no stereo effect, but the
reception will improve. Press the button again to
restore the stereo effect.
Frequency (or RDS
station name*)
Preset number

11
The CD Player
The CD Player
Playing CD tracks
repeatedly — Repeat Play
You can repeat a CD in normal play, Shuffle Play
and Program Play.
>
Mm
NX x
.
REPEAT
,Press REPEAT repeatedly during play
until “REPEAT” or “REPEAT 1”
appears.
CD1 3m2s5
REPEAT: For all the tracks on the CD.
REPEAT 1: For a single track only.
To cancel Repeat Play
Press REPEAT repeatedly until “REPEAT” or
“REPEAT 1” disappears.
Note
When “REPEAT” is selected, the CD player
automatically stops after playing five times.
Playing CD tracks in
random order — Shuffle Play
You can play all the tracks on a CD in random
order.
>
Mm
NX x
?/1
.
3
2>
x
1
1Press CD to switch the function to CD.
2Press PLAY MODE repeatedly until
“SHUFFLE” appears.
CD16 62m00s
3Press N.
Shuffle Play starts.
To cancel Shuffle Play in stop
mode
Press PLAY MODE repeatedly until “SHUFFLE”
and “PROGRAM” disappear.
Tip
To skip a track, press >.
Note
The play mode cannot be changed while playing a
disc. To change the play mode, press xfirst to stop
play.
Basic Operations/The CD Player
11

12
Programing CD tracks
— Program Play
You can make a program of up to 25 tracks in the
order you want them to be played.
>
Mm
NX x
?/1
.
DISPLAY
4
6
2
CLEAR
x
1
3
1Press CD to switch the function to CD.
2Press PLAY MODE repeatedly until
“PROGRAM” appears.
3Press ./>repeatedly until the
desired track number appears in the
display.
CD7 0m4s9
Selected
track number Total playing
time
4Press ENTER.
The track is programed.
“STEP” appears, followed by the selection
number. The last programed track number
appears, followed by the total playing time of
the program. If you have made a mistake,
you can clear the last programed track from
the program by pressing CLEAR.
CD7 0m4s9
5To program additional tracks, repeat
steps 3 and 4.
6Press N.
Program Play starts.
All the tracks play in the order you selected.
To check the total number of
programed tracks
Press DISPLAY in stop mode. The total number
of programed steps appears, followed by the last
programed track number and the total playing time
of the program.
CD 110m82s8
To check the program order
Press ./>repeatedly during Program Play.
To Do this
Last programed
track number Total playing
time
Last programed
track number Total playing time
of the program
Press x, then press PLAY MODE
repeatedly until “PROGRAM” and
“SHUFFLE” disappear.
Cancel
Program Play
Perform steps 3 and 4.Add a track to
the program
(in stop mode)

13
The CD Player
continued
Tips
• The program you made remains after Program Play
finishes. To play the same program again, press
N.
• “STEP FULL” appears when you try to program 26
or more tracks (steps).
• “--m--s” appears when the total CD program time
exceeds 100 minutes, or when you select a CD track
whose number is 21 or over.
Note
The play mode cannot be changed while playing a
disc. To change the play mode, press xfirst to stop
play.
Using the CD display
You can check the total number of tracks, the total
playing time and the remaining time on the current
track or on the CD. When a CD TEXT disc is
loaded, you can check the information recorded on
the disc, such as the titles or artist names.
NX x
?/1
DISPLAY
,Press DISPLAY.
Each time you press the button during
normal play or in stop mode, the display
changes as follows:
During normal play
tElapsed playing time of the current track
r
Remaining time of the current track
r
Remaining time of the CD*
r
Track title of the current track**
r
Clock display (for eight seconds)
r
BASS level (for three seconds)
r
TREBLE level (for three seconds)

14
Using the CD display (continued)
In stop mode
During Program Play with a program
tLast track number and total playing time
of the program
r
Total number of programed tracks
(for eight seconds)
r
Disc title and artist name**
r
Clock display (for eight seconds)
r
BASS level (for three seconds)
r
TREBLE level (for three seconds)
During other times
tTotal number of tracks and total playing
time
r
Disc title and artist name**
r
Clock display (for eight seconds)
r
BASS level (for three seconds)
r
TREBLE level (for three seconds)
* “--m--s” appears during Program Play.
** • Only for CD TEXT discs (certain characters
cannot be displayed). Depending on the disc,
some CD TEXT information may not appear.
• If the CD contains 21 or more tracks, CD TEXT
information will not appear in the display for
each track after the 21st.
• After the title or name has scrolled across the
display, the original display returns.

15
Other Features
Other Features
Adjusting the sound
Not only can you adjust the bass and treble, you
can turn on the DBFB (Dynamic Bass Feedback)
function to produce more powerful sound and
enhanced bass.
>
Mm
NX x
?/1
.
DBFB
TREBLE +/–BASS +/–
Reinforcing the bass sound
,Press DBFB.
Each time you press the button, the display
changes as follows:
DBFB ON
Y
DBFB OFF
“DBFB” appears in the display, when the
DBFB is on.
Adjusting the bass
,Press BASS +/– repeatedly.
You can adjust the bass in 9 steps (from MIN
to MAX).
The CD Player/Other Features
Adjusting the treble
,Press TREBLE +/– repeatedly.
You can adjust the treble in 9 steps (from
MIN to MAX).
Tip
You can enjoy the original sound by turning off the
DBFB and setting BASS and TREBLE to 0.

16
Using the Radio Data
System (RDS)
(European model only)
What is the Radio Data
System?
Radio Data System (RDS) is a broadcasting
service that allows radio stations to send
additional information along with the regular
program signal. RDS is available only on FM
stations*.
Note
RDS may not work properly if the station you are
tuned in is not transmitting the RDS signal properly
or if the signal is weak.
* Not all FM stations provide RDS service, nor do
they provide the same types of services. If you are
not familiar with the RDS system, check with your
local radio stations for details on RDS services in
your area.
Receiving RDS broadcasts
,Simply select a station from the FM
band.
When you tune in a station that provides
RDS services, the station name appears in
the display.
To check the RDS information
Each time you press DISPLAY, the display
changes as follows:
tStation name*
r
Frequency
r
Clock display (for eight seconds)
r
BASS level (for three seconds)
r
TREBLE level (for three seconds)
* If the RDS broadcast is not received, the station
name may not appear in the display.
Falling asleep to music
— Sleep Timer
You can set the system to turn off after a certain
amount of time, so that you can fall asleep to
music. You can preset the time to turn off in
10 minutes increments.
NX x
?/1
SLEEP
,Press SLEEP repeatedly to select a
desired time.
Each time you press the button, the minute
display (the remaining time) changes as
follows:
t
SLEEP OFF tAUTO
10min T... T80min T90min T
“SLEEP” flashes in the display, except when
“SLEEP OFF” is selected.
To check the remaining time
Press SLEEP once. However, the remaining time
is not displayed when “AUTO” is selected.
To change the time to turn off
Select the time you want by pressing SLEEP.
To cancel the Sleep Timer
function
Press SLEEP repeatedly until “SLEEP OFF”
appears.

17
Other Features
Waking up to music
— Daily Timer
You can wake up to music at a preset time.
Make sure you have set the clock (see page 6).
>
Mm
NX x
?/1
.
4,5
6,8
5,6,
72
9
3
2
5,6,
7
CLOCK/
TIMER
SELECT
1Prepare the sound source you want to
play.
• CD: Place a CD. To start from a specific
track, make a program (see page 12).
• Radio: Tune in a station (see page 10).
2Press VOL +/– repeatedly to adjust the
volume.
3Press CLOCK/TIMER SET.
“SET DAILY” appears.
“DAILY” and the cindicator start flashing.
4Press ENTER.
“ON” lights up, and the hour indication
flashes.
ON 0:00
When you select “AUTO”
The system automatically turns off after the CD
finishes playing (up to 100 minutes).
When the function is TUNER, the system turns off
in 100 minutes.
Tip
You can use the Sleep Timer, even if you have not set
the clock.
continued

18
5Set the time to start playing.
Press ./>repeatedly to set the hour,
then press ENTER.
The minute indication flashes.
ON 8:00
Press ./>repeatedly to set the minute,
then press ENTER.
The hour indication flashes again.
6Set the time to stop playing following
the procedure in step 5.
7Press ./>to select the desired
sound source.
The display changes as follows:
TUNER
Y
CD PLAY
8Press ENTER.
The start time, the stop time, and the sound
source appear in turn, then the original
display returns.
“DAILY” and the cindicator light
continuously.
9Press ?/1to turn off the system.
To change the setting
Start over from step 1.
To check the setting/activate
the timer
1Press CLOCK/TIMER SELECT.
2Press ./>repeatedly until
“SEL DAILY” appears, then press ENTER.
Waking up to music (continued)
To cancel the timer
Press CLOCK/TIMER SELECT, then press
./>repeatedly until “TIMER OFF”
appears. Then press ENTER.
Notes
• Do not perform any operation from the time the
system is turned on until the time play starts (about
15 seconds before the preset time).
• If the system is on at the preset time, the set sound
source starts playing.
• You cannot use the optional components connected
to the MD/VIDEO (AUDIO) IN jack as the sound
source for Daily Timer.

19
Connecting optional components
Connecting optional
components
Connecting optional A/V
components
To enhance your system, you can connect optional
components. Refer to the operating instructions of
each component.
Connecting audio components
Connecting an MD deck for
digital recording
You can record from CD into the MD deck
digitally by connecting a commercially available
optical cable.
To the digital input connector
on the MD deck
Connecting an MD deck for
analog recording
You can connect an MD deck to the system with
commercially available audio cords. Be sure to
match the color-coded pins to the appropriate
jacks. To listen to the MD deck after connecting it,
press FUNCTION until “MD” appears.
To the audio input jacks on the
MD deck
To the audio output jacks on
the MD deck
Other Features/Connecting optional components
continued
Tip
If you cannot select “MD” by pressing FUNCTION,
turn off the system, and then press ?/1while pressing
down FUNCTION. The function will be switched
from “VIDEO” to “MD”. To go back to “VIDEO”,
repeat this procedure.
Connecting a VCR
You can connect a VCR to the system with a
commercially available audio cord. Be sure to
match the color-coded pins to the appropriate
jacks. To listen to the VCR after connecting it,
press FUNCTION until “VIDEO” appears.
To the audio output jacks on
the VCR
Tip
If you cannot select “VIDEO” by pressing
FUNCTION, turn off the system, and then press ?/1
while pressing down FUNCTION. The function will
be switched from “MD” to “VIDEO”. To go back to
“MD”, repeat this procedure.

20
Connecting headphones
Connect headphones to the PHONES jack.
7
s
J L
Z
l j
c
PHONES jack
Connecting optional A/V
components (continued)
Listening to the sound
of connected
components
7
s
J L
Z
l j
c
2
1Prepare the audio components.
2Press FUNCTION repeatedly until
“MD” or “VIDEO” appears.
Each time you press the button, the display
changes as follows:
tTUNER tMD (or VIDEO)
CD T
To switch between the “MD” or
“VIDEO” display
1Turn off the system.
2Press ?/1while pressing down FUNCTION.
To go back to the previous display, repeat this
procedure.
?/1(power)
Table of contents
Other Sony Stereo System manuals

Sony
Sony MEX-BT4750U User manual

Sony
Sony MHC-GNX660 User manual

Sony
Sony SRS-XB3 User manual

Sony
Sony GigaJuke NAS-E35HD User manual

Sony
Sony GTK-XB60 User manual

Sony
Sony HCD-GTZ4 User manual

Sony
Sony MHC-G101 Primary User manual

Sony
Sony CMT-HP8V User manual

Sony
Sony SA-WMS556 User manual

Sony
Sony HCD-SHAKE7 User manual

Sony
Sony CMT-AH10 Guide

Sony
Sony DHC-MD5 User manual

Sony
Sony ZS-S3iPN User manual

Sony
Sony SRS-X3 User manual

Sony
Sony SRS-X1 User manual

Sony
Sony CMT-GS30DAB User manual

Sony
Sony ZS-D55 User manual

Sony
Sony HCD-ED1 User manual

Sony
Sony CMT-GPZ6 User manual

Sony
Sony LBT-D390 - Compact Hi-fi Stereo System User manual