Sony HCD-GTX999 User manual

SERVICE MANUAL
Sony Corporation
Audio&Video Business Group
Published by Sony Techno Create Corporation
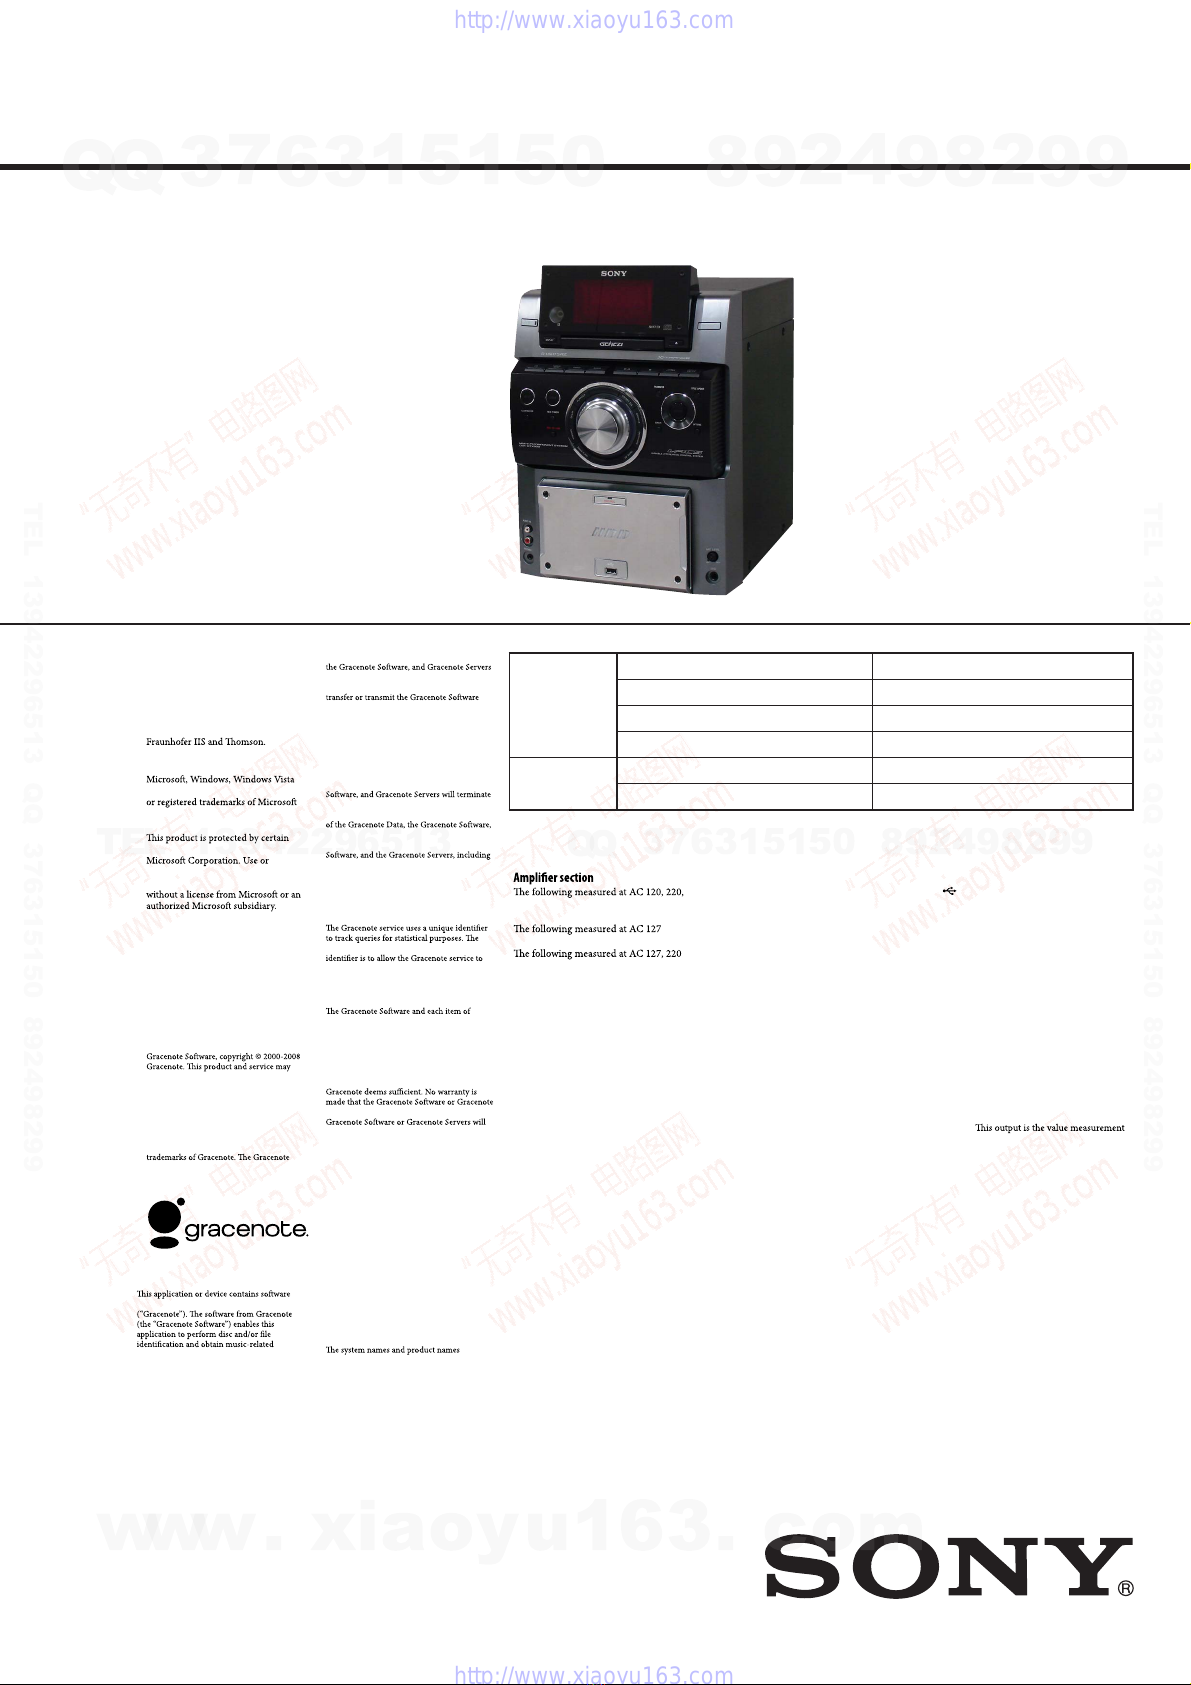
HCD-GTX999
SPECIFICATIONS
HDD AUDIO SYSTEM
9-889-164-02
2008I05-1
© 2008.09
E Model
Ver. 1.1 2008.09
• HCD-GTX999 is the amplifier, USB, CD player,
HDD Jukebox and tuner section in DSK-GTX999.
CD Section
Model Name Using Similar Drive NEW
CD Mechanism Type CDM77B-F2BD82F-WAO
Base Unit Name BU-F2BD82F-A
Optical Pick-up Block Name KSM215DHAP
HD Section Model Name Using Similar Drive NEW
Hard Disc Drive Name HDD/SG-NIGHTHAWK-S (80GB)
•“WALKMAN” and “WALKMAN”
logo are registered trademarks of Sony
Corporation.
•MICROVAULT is a trademark of Sony
Corporation.
•MPEG Layer-3 audio coding
technology and patents licensed from
•Title Updater is a trademark of Sony
Corporation.
•
and Windows Media are trademarks
Corporation in the United States and/
or other countries.
•
intellectual property rights of
distribution of such technology
outside of this product is prohibited
•BuiltwithLinterDatabase.
Copyright © 2006-2007, Brycen Corp.,
Ltd.
Copyright © 1990-2003, Relex, Inc., All
rights reserved.
• Music recognition technology and
related data are provided by Gracenote®.
Gracenote is the industry standard in music
recognition technology and related content
delivery. For more information, please visit
www.gracenote.com.
CD and music-related data from Gracenote,
Inc., copyright © 2000-2008 Gracenote.
practice one or more of the following U.S.
Patents: #5,987,525; #6,061,680; #6,154,773,
#6,161,132, #6,230,192, #6,230,207,
#6,240,459, #6,330,593, and other patents
issued or pending. Some services supplied
under license from Open Globe, Inc. for U.S.
Patent: #6,304,523.
Gracenote and CDDB are registered
logo and logotype, and the “Powered
by Gracenote” logo are trademarks of
Gracenote.
Gracenote®End User License
Agreement
from Gracenote, Inc. of Emeryville, California
information, including name, artist, track,
and title information (“Gracenote Data”)
from online servers or embedded databases
(collectively, “Gracenote Servers”) and
to perform other functions. You may use
Gracenote Data only by means of the intended
End-User functions of this application or
device.
You agree that you will use Gracenote Data,
for your own personal non-commercial
useonly.Youagreenottoassign,copy,
or any Gracenote Data to any third party.
YOU AGREE NOT TO USE OR EXPLOIT
GRACENOTE DATA, THE GRACENOTE
SOFTWARE, OR GRACENOTE SERVERS,
EXCEPT AS EXPRESSLY PERMITTED
HEREIN.
You agree that your non-exclusive license
to use the Gracenote Data, the Gracenote
if you violate these restrictions. If your license
terminates, you agree to cease any and all use
and Gracenote Servers. Gracenote reserves
all rights in Gracenote Data, the Gracenote
all ownership rights. Under no circumstances
will Gracenote become liable for any payment
to you for any information that you provide.
You agree that Gracenote, Inc. may enforce
its rights under this Agreement against you
directly in its own name.
purpose of a randomly assigned numeric
count queries without knowing anything about
who you are. For more information, see the
web page for the Gracenote Privacy Policy for
the Gracenote service.
Gracenote Data are licensed to you “AS IS.”
Gracenote makes no representations or
warranties, express or implied, regarding the
accuracy of any Gracenote Data from in the
Gracenote Servers. Gracenote reserves the right
to delete data from the Gracenote Servers or
to change data categories for any cause that
Servers are error-free or that functioning of
be uninterrupted. Gracenote is not obligated to
provide you with new enhanced or additional
data types or categories that Gracenote may
provide in the future and is free to discontinue
its services at any time.
GRACENOTE DISCLAIMS ALL
WARRANTIES EXPRESS OR IMPLIED,
INCLUDING, BUT NOT LIMITED
TO, IMPLIED WARRANTIES OF
MERCHANTABILITY, FITNESS FOR A
PARTICULAR PURPOSE, TITLE, AND
NON-INFRINGEMENT. GRACENOTE
DOES NOT WARRANT THE RESULTS
THAT WILL BE OBTAINED BY YOUR
USE OF THE GRACENOTE SOFTWARE
OR ANY GRACENOTE SERVER. IN NO
CASE WILL GRACENOTE BE LIABLE FOR
ANY CONSEQUENTIAL OR INCIDENTAL
DAMAGES OR FOR ANY LOST PROFITS OR
LOST REVENUES.
indicated in this manual are generally the
trademarks or registered trademarks of the
manufacturer.
™and ®marks are omitted in this manual.
240 V, 50/60 Hz (Latin American models
(except for Brazilian model))
V,
50/60 Hz (Brazilian model)
Except for Brazilian model
Front speaker:
Power output (rated):
120 W + 120 W (at 6 ohms, 1 kHz,
1% THD)
RMS output power (reference):
200 W + 200 W (per channel at 6
ohms, 1 kHz, 10% THD)
Subwoofer:
RMS output power (reference):
190 W (100 Hz, 10% THD)
Brazilian model
Front speaker:
Power output (rated):
120 W + 120 W (at 6 ohms, 1 kHz,
1% THD)
RMS output power (reference):
150 W + 150 W (at 6 ohms, 1 kHz,
10% THD)
Subwoofer:
RMS output power (reference):
190 W (100 Hz, 10% THD)
Inputs
AUDIO IN L/R (phono jacks):
voltage 250 mV, impedance
47 kilohms
VIDEO AUDIO IN L/R (phono jacks):
voltage 250 mV, impedance
47 kilohms
MIC (phone jack):
sensitivity 1 mV, impedance
10 kilohms
Outputs
PHONES (stereo mini jack):
accepts headphones with an
impedance of 8 ohms or more
FRONT SPEAKER:
Use only the supplied speaker
SS-GTX999
SUBWOOFER:
Use only the supplied subwoofer
SS-WG999
HDD Jukebox section
Capacity:
80 GB*
*A portion of the memory is used for
system management functions. Actual
available memory is approx. 72 GB.
Recording system:
MP3
Maximum recording time (measured with
MP3 128 kbps):
About 1,300 h
Maximum number of tracks:
20,000
Maximum number of albums:
2,000
Supported bit rate:
MP3 (MPEG 1 Audio Layer-3):
32 −320 kbps, VBR
WMA: 48 −192 kbps, VBR
AAC: 48 −320 kbps
Sampling frequencies:
MP3 (MPEG 1 Audio Layer-3):
32/44.1/48 kHz
WMA: 44.1 kHz
AAC: 44.1 kHz
USB section
(USB) port:
Type A
Supported bit rate:
MP3 (MPEG 1 Audio Layer-3):
32 −320 kbps, VBR
WMA: 48 −192 kbps, VBR
AAC: 48 −320 kbps
Sampling frequencies:
MP3 (MPEG 1 Audio Layer-3):
32/44.1/48 kHz
WMA: 44.1 kHz
AAC: 44.1 kHz
CD player section
System:
Compact disc and digital audio
system
Laser Diode Properties
Emission duration: Continuous
Laser Output*: Less than 44.6μW
*
at a distance of 200mm from the
objective lens surface on the Optical
Pick-up Block with 7mm aperture.
Frequency response:
20 Hz −20 kHz
Signal-to-noise ratio:
More than 90 dB
Dynamic range:
More than 88 dB
V, 60 Hz
(Mexican model)
– Continued on next page –
w
w
w
.
x
i
a
o
y
u
1
6
3
.
c
o
m
Q
Q
3
7
6
3
1
5
1
5
0
9
9
2
8
9
4
2
9
8
T
E
L
1
3
9
4
2
2
9
6
5
1
3
9
9
2
8
9
4
2
9
8
0
5
1
5
1
3
6
7
3
Q
Q
TEL 13942296513 QQ 376315150 892498299
http://www.xiaoyu163.com

HCD-GTX999
2
1. SERVICING NOTES ............................................. 3
2. GENERAL .................................................................. 6
3. DISASSEMBLY
3-1. Disassembly Flow........................................................... 8
3-2. Case (Top)....................................................................... 8
3-3. Front Panel Block ........................................................... 9
3-4. USB CONNECTOR Board............................................. 9
3-5. USB MICOM Board....................................................... 10
3-6. HDD Assy (80 GB)......................................................... 10
3-7. CD Mechanism Block..................................................... 11
3-8. Bracket (CDM) Block..................................................... 11
3-9. Back Panel Block............................................................ 12
3-10. MAIN Board ................................................................... 12
4. TEST MODE ............................................................ 13
5. ELECTRICAL CHECKS ...................................... 15
6. DIAGRAMS
6-1. Block Diagram - CD SERVO, PANEL Section -............ 16
6-2. Block Diagram - USB, HDD Section -........................... 17
6-3. Block Diagram - MAIN Section -................................... 18
6-4. Block Diagram - AMP Section -..................................... 19
6-5. Block Diagram - POWER SUPPLY Section -................ 20
6-6. Printed Wiring Board - CD Board - ................................ 22
6-7. Schematic Diagram - CD Board -................................... 23
6-8. Printed Wiring Board - USB MICOM Board -............... 24
6-9. Schematic Diagram - USB MICOM Board (1/4) -......... 25
6-10. Schematic Diagram - USB MICOM Board (2/4) -......... 26
6-11. Schematic Diagram - USB MICOM Board (3/4) -......... 27
6-12. Schematic Diagram - USB MICOM Board (4/4) -......... 28
6-13. Printed Wiring Boards - USB, LED Section - ................ 29
6-14. Schematic Diagram - USB, LED Section -..................... 29
6-15. Printed Wiring Board - MAIN Board - ........................... 30
6-16. Schematic Diagram - MAIN Board (1/3) -..................... 31
6-17. Schematic Diagram - MAIN Board (2/3) -..................... 32
6-18. Schematic Diagram - MAIN Board (3/3) -..................... 33
6-19. Printed Wiring Boards - INPUT, OUTPUT Section -..... 34
6-20. Schematic Diagram - INPUT, OUTPUT Section -......... 34
6-21. Printed Wiring Board - MOTOR Board - ....................... 35
6-22. Schematic Diagram - MOTOR Board -.......................... 35
6-23. Printed Wiring Board - AMP Board - ............................. 36
6-24. Schematic Diagram - AMP Board - ................................ 37
6-25. Printed Wiring Board - KEY Section (1/2) -................... 38
6-26. Schematic Diagram - KEY Section (1/2) - ..................... 39
6-27. Printed Wiring Boards - KEY Section (2/2) -................. 40
6-28. Schematic Diagram - KEY Section (2/2) - ..................... 41
6-29. Printed Wiring Board - DISPLAY Board - ..................... 42
6-30. Schematic Diagram - DISPLAY Board - ........................ 43
6-31. Printed Wiring Board - TRANS Board -......................... 44
6-32. Schematic Diagram - TRANS Board - ........................... 45
6-33. Printed Wiring Board - SUB TRANS Board -................ 46
6-34. Schematic Diagram - SUB TRANS Board -................... 47
7. EXPLODED VIEWS
7-1. Top Case, Side Panel Section.......................................... 63
7-2. Center Panel Section....................................................... 64
7-3. Base Panel Section.......................................................... 65
7-4. HDD Section................................................................... 66
7-5. Chassis Section ............................................................... 67
7-6. CD Mechanism Section
(CDM77B-F2BD82F-WAO) .......................................... 68
7-7. Base Unit Section (BU-F2BD82F-A)............................. 69
8. ELECTRICAL PARTS LIST .............................. 70
Accessories are given in the last of the electrical parts list.
TABLE OF CONTENTS
NOTES ON CHIP COMPONENT REPLACEMENT
• Never reuse a disconnected chip component.
• Notice that the minus side of a tantalum capacitor may be dam-
aged by heat.
FLEXIBLE CIRCUIT BOARD REPAIRING
• Keep the temperature of soldering iron around 270 °C during
repairing.
• Do not touch the soldering iron on the same conductor of the
circuit board (within 3 times).
• Be careful not to apply force on the conductor when soldering
or unsoldering.
SAFETY-RELATED COMPONET WARNING!
COMPONENTS IDENTIFIED BY MARK 0OR DOTTED LINE
WITH MARK 0ON THE SCHEMATIC DIAGRAMS AND IN
THE PARTS LIST ARE CRITICAL TO SAFE OPERATION.
REPLACE THESE COMPONENTS WITH SONY PARTS
WHOSE PART NUMBERS APPEAR AS SHOWN IN THIS
MANUAL OR IN SUPPLEMENTS PUBLISHED BY SONY.
CAUTION
Use of controls or adjustments or performance of procedures
other than those specified herein may result in hazardous radia-
tion exposure.
This appliance is classified as
a CLASS 1 LASER product.
This marking is located on the
rear exterior.
Tuner section
FM stereo, FM/AM superheterodyne tuner
Antenna:
FM lead antenna
AM loop antenna
FM tuner section:
Tuning range:
Brazilian model: 87.5 −108.0 MHz
(100 kHz step)
Other models: 87.5 −108.0 MHz
(50 kHz step)
Intermediate frequency: 10.7 MHz
AM tuner section:
Tuning range
530 −1,710 kHz
(with 10 kHz tuning interval)
531 −1,710 kHz
(with 9 kHz tuning interval)
Intermediate frequency: 450 kHz
General
Power requirements
Latin American models (except for
Brazilian model):
AC 120, 220, 230 −240 V, 50/60 Hz,
adjustable with voltage selector
Argentine model:
AC 220 V, 50/60 Hz
Brazilian model:
AC 127 or 220 V, 50/60 Hz, adjustable
with voltage selector
Power consumption
230 W
Dimensions (w/h/d) (excl. speakers)
Approx. 280 × 397 × 428 mm
Mass (excl. speakers)
Approx. 12.3 kg
Operating temperature:
+5 °C (+41 °F) to +35 °C (+95 °F)
Operating humidity:
25 % to 80 %
change without notice.
Mexican model:
AC 127 V, 60 Hz
Ver. 1.1
w
w
w
.
x
i
a
o
y
u
1
6
3
.
c
o
m
Q
Q
3
7
6
3
1
5
1
5
0
9
9
2
8
9
4
2
9
8
T
E
L
1
3
9
4
2
2
9
6
5
1
3
9
9
2
8
9
4
2
9
8
0
5
1
5
1
3
6
7
3
Q
Q
TEL 13942296513 QQ 376315150 892498299
http://www.xiaoyu163.com

HCD-GTX999
3
SECTION 1
SERVICING NOTES
UNLEADED SOLDER
Boards requiring use of unleaded solder are printed with the lead-
free mark (LF) indicating the solder contains no lead.
(Caution: Some printed circuit boards may not come printed with
the lead free mark due to their particular size)
: LEAD FREE MARK
Unleaded solder has the following characteristics.
• Unleaded solder melts at a temperature about 40 °C higher
than ordinary solder.
Ordinary soldering irons can be used but the iron tip has to be
applied to the solder joint for a slightly longer time.
Soldering irons using a temperature regulator should be set to
about 350 °C.
Caution: The printed pattern (copper foil) may peel away if
the heated tip is applied for too long, so be careful!
• Strong viscosity
Unleaded solder is more viscous (sticky, less prone to flow)
than ordinary solder so use caution not to let solder bridges
occur such as on IC pins, etc.
• Usable with ordinary solder
It is best to use only unleaded solder but unleaded solder may
also be added to ordinary solder.
NOTES ON HANDLING THE OPTICAL PICK-UP
BLOCK OR BASE UNIT
The laser diode in the optical pick-up block may suffer electrostat-
ic break-down because of the potential difference generated by the
charged electrostatic load, etc. on clothing and the human body.
During repair, pay attention to electrostatic break-down and also
use the procedure in the printed matter which is included in the
repair parts.
The flexible board is easily damaged and should be handled with
care.
NOTES ON LASER DIODE EMISSION CHECK
The laser beam on this model is concentrated so as to be focused
on the disc reflective surface by the objective lens in the optical
pickup block. Therefore, when checking the laser diode emission,
observe from more than 30 cm away from the objective lens.
RELEASING THE DISC TRAY LOCK
The disc tray lock function for the antitheft of an demonstration
disc in the store is equipped.
Releasing Procedure:
1. Press [?/1] button to turn the power on.
2. Press the [FUNCTION] button to select CD function.
3. While pressing the [x] button, press the [Z] button for more 5
seconds).
4. The message “UNLOCKED” is displayed and the disc tray is
unlocked.
Note: When “LOCKED”is displayed, the slot lock is not released by
turning power on/off with the [?/1]button.
NOTE THE HANDLING OF HDD
1. Note The Transported
Do not give set the high impact when you transport this set. HDD
might be damaged by the impact.
2. Note The Repairing
Do not move the set for state power on, and for at least 30 seconds
after the set is power off. HDD might be damaged by the impact.
NOTE THE IC5 AND IC13 ON THE USB MICOM
BOARD REPLACING
IC5 and IC13 on the USB MICOM board cannot exchange with
single. When these parts on the USB MICOM board are damaged,
exchange the entire mounted board.
NOTE THE DISASSEMBLY OF USB CONNECTOR
BOARD
USB CONNECTOR board and HDD LED (A)/(B) board connec-
tion part are damaged easily. Note the printed pattern may peel,
remove carefully.
NOTE THE IC202 ON THE MAIN BOARD
REPLACING
Excecute the following procedures immediately after the IC202 on
the MAIN board is exchanged, and the cold reset is executed.
Procedure:
1. Press the [?/1] button to turn the power on.
2. Press the [TUNER/BAND] button to select TUNER (FM)
function.
3. Press the [TUNING MODE] button on the remote commander
to preset menu displayed.
4. Press the [M]/[m] buttons to select “FM2 88.00 MHz”.
5. Press the [TUNER MEMORY] button on the remote com-
mander.
6. Press the [M]/[m] buttons to select “FM9”.
7. Press the [ENTER] button to preset memory.
Note: Do not disconnect the AC plug while this operation.
MODEL IDENTIFICATION
PART No.
– Rear View –
Model Part No.
120V AC area in E model,
Chilean and Peruvian models 3-294-738-0[]
Mexican model 3-294-738-1[]
Argentina model 3-294-738-2[]
Brazilian model 3-294-738-3[]
Ver. 1.1
w
w
w
.
x
i
a
o
y
u
1
6
3
.
c
o
m
Q
Q
3
7
6
3
1
5
1
5
0
9
9
2
8
9
4
2
9
8
T
E
L
1
3
9
4
2
2
9
6
5
1
3
9
9
2
8
9
4
2
9
8
0
5
1
5
1
3
6
7
3
Q
Q
TEL 13942296513 QQ 376315150 892498299
http://www.xiaoyu163.com

HCD-GTX999
4
REPLACEMENT PROCEDURE OF HDD
1. Prior Notes
• It is backup in the customer in preparation for the HDD exchange as for the tune recorded to HDD beforehand.
• Note that all recorded tunes are deleted when “Factory Reset" is done.
2. Common Check
Procedure:
1. Execute “COLD RESET” (Refer to page 13) after confirming the symptom.
2. Confirm the installation of HDD.
3. Confirm the power supply to HDD.
4. Confirm the state to HDD of the connecting cable and the connector.
3. Procedure According To Symptom
4. Processing After HDD Is Replaced
Procedure:
1. Confirm the execution of “HDD Writing/Reading Test” (Refer to page 14), and not becoming NG.
2. Execute “CDDB Version Display” (Refer to page 14), and confirm the CDDB version is 989 (South American model) or 988(Except
South American model).
3. Confirm the tune can be recorded from CD to HDD, and the tune be reproduced normally.
4. Execute “Initialization Mode For Factory” (Refer to page 14) at the end.
Symptom 1 : HDD doesn't rotate.
The set symptom : HDD doesn't rotate.
Correspondence : If the power supply is normal, HDD is a
defective possibility size.
Yes
Symptom 2 : The allophone does from HDD.
The set symptom : “HDD Reading” doesn't end, or the
HDD function doesn't operate nor-
mally.
Correspondence : It judges compared with normal goods,
and if it is an obviously abnormal sound,
HDD is a defective possibility size.
Yes
Another symptom
Symptom 3 : “HDD Reading” doesn't end.
The set symptom : Can CD reproduce?
Another symptom
Both the HDD and USB MICOM board are defective doubts.
The USB MICOM board is a defective doubt.
Not possible to reproduce
Possible to reproduce
Symptom 4 : HDD cannot reproduction/record-
ing/be forwarded.
Confirmation 1 : Did “HDD Reading” end?
Another symptom
Reconfirm symptom 2.
It doesn't end
Confirmation 2 : Can USB reproduce?
It ended
HDD is a defective possibility size.
Both the HDD and USB MICOM board are defective doubts.
Not possible to reproduce
Another symptom
Symptom 5 : “Data Error” is displayed by a spe-
cific tune.
Confirmation 1 : Is it a tune where the copyright is
protected?
It becomes this symptom if the tune where the copy-
right is protected is taken by way of USB, and it is
not possible to reproduce (product specification).
Yes
Confirmation 2 : Is the extension of the
file of the tune cor-
rect?
No
This display appears when the extension of the file is not
corresponding to the content (product specification).
Another symptom
Symptom 6 : “Data Error” is always displayed.
Confirmation 1 : Does this symptom occur even if
“COLD RESET” (Refer to page 13)
is executed?
When this symptom occurs even if “Initializa-
tion Mode For Factory” (Refer to page 14) is
executed, HDD is a defective possibility size.
Yes
Yes
Possible to reproduce
Execute “HDD Writing/Reading Test” (Refer to page 14) 3 times when these symptoms do not reproduce it. It can be judged that HDD
is normal if NG is not generated.
w
w
w
.
x
i
a
o
y
u
1
6
3
.
c
o
m
Q
Q
3
7
6
3
1
5
1
5
0
9
9
2
8
9
4
2
9
8
T
E
L
1
3
9
4
2
2
9
6
5
1
3
9
9
2
8
9
4
2
9
8
0
5
1
5
1
3
6
7
3
Q
Q
TEL 13942296513 QQ 376315150 892498299
http://www.xiaoyu163.com

HCD-GTX999
5
Precautions
Discs that this system CAN play
•Audio CD
•CD-R/CD-RW (audio data/MP3 files)
Discs that this system CANNOT play
•CD-ROM
•CD-R/CD-RW other than those recorded in music CD format or MP3
format conforming to ISO9660 Level 1/Level 2, Joliet
•CD-R/CD-RW recorded in multisession that have not ended by “closing
the session”
•CD-R/CD-RW of poor recording quality, CD-R/CD-RW that have
scratches or are dirty, or CD-R/CDRW recorded with an incompatible
recording device
•CD-R/CD-RW which is finalized incorrectly
•Discs containing files other than MPEG 1 Audio Layer-3 (MP3) files
•Discs of non-standard shape (for example, heart, square, star)
•Discs that have adhesive tape, paper, or sticker attached to them
•Rental or used discs with attached seals where the glue extends beyond
the seal
•Discs that have labels printed using ink that feels tacky when touched
Notes on discs
•Before playing, wipe the disc with a cleaning cloth from the centre out to
the edge.
•Do not clean discs with solvents, such as benzine thinner, or commer-
cially available cleaners or anti-static spray intended for vinyl LPs.
•Do not expose discs to direct sunlight or heat sources such as hot air
ducts, nor leave it in a car parked in direct sunlight.
•Do not use a commercial cleaning disc as it may cause the unit to mal-
function.
On safety
•Completely disconnect the power cord (mains lead) from the wall outlet
(mains) if it is not going to be used for an extended period of time. When
unplugging the unit, always grip the plug. Never pull the cord itself.
•Should any solid object or liquid get into the system, unplug the system,
and have it checked by qualified personnel before operating it again.
•AC power cord must be changed only at the qualified service shop.
On placement
•Do not place the system in an inclined position or in locations that are ex-
tremely hot, cold, dusty, dirty, or humid or lacking adequate ventilation,
or subject to vibration, direct sunlight or a bright light.
•Be careful when placing the unit or speakers on surfaces that have been
specially treated (for example, with wax, oil, polish) as staining or discol-
oration of the surface may result.
•If the system is brought directly from a cold to a warm location or is
placed in a very damp room, moisture may condense on the lens inside
the CD player, and cause the system to malfunction. In this situation,
remove the disc, and leave the system turned on for about an hour until
the moisture evaporates.
On heat buildup
•Heat buildup on the unit during operation is normal and is not cause for
alarm.
•Do not touch the cabinet if it has been used continuously at a high volume
because the cabinet may have become hot.
•Do not obstruct the ventilation holes.
On the speaker system
This speaker system is not magnetically shielded, and the picture on nearby
TV sets may become magnetically distorted. In this situation, turn off the
TV, wait 15 to 30 minutes, and turn it back on. If there is no improvement,
move the speakers far away from the TV.
On volume adjustment
CDs reproduce sound with considerably less noise than vinyl records. For
this reason, if you raise the volume while listening to a segment containing
only noise (as you might do in the case of a vinyl record), a sudden output
of highvolume sound may cause damage to the speakers.
Make sure to lower the volume before the start of playback.
Consideration for others
Keep the volume at a moderate level out of consideration of your neigh-
bors, especially at night.
About the Hard Disk Drive
Because of its high storage density, the hard disk drive can read and write
data a very high speeds. It is, however, easily damaged by mechanical vi-
bration, shock, or dust. Although the hard disk drive is equipped with safe-
ty mechanisms to prevent the lost of data due to these factors, the following
precautions should be taken during the handling of the system.
•Do not subject the system to strong shocks or vibrations.
•Do not place the system in a location subject to mechanical vibration or
at an unstable location.
•Do not move the system while the power cord is connected to a wall
outlet.
•Do not disconnect the power cord while the system is recording or play-
ing a track.
•Do not use the system in a place subject to extreme changes in tempera-
ture (a temperature gradient greater than 18°F (10°C)/hour).
•Do not attempt to replace or upgrade the hard disk drive by yourself, as
this may cause the system to malfunction.
Sony cannot provide compensation for any loss of data caused by a dam-
aged hard disk drive.
Note on the power cord
Before you unplug the power cord from the wall outlet, make sure that the
system is turned off. If you unplug the power cord while the system is oper-
ating, data that was recorded may be lost or the system may malfunction.
Cleaning the cabinet
Clean this system with a soft cloth slightly moistened with a mild detergent
solution. Do not use any type of abrasive pad, scouring powder, or solvent,
such as thinner, benzine, or alcohol.
Note on playing MP3/WMA/AAC files
Compatibility with all MP3/WMA/AAC encoding/writing software, re-
cording device, and recording media cannot be guaranteed. Incompatible
MP3/WMA/AAC files may produce noise or interrupted audio or may not
play at all.
w
w
w
.
x
i
a
o
y
u
1
6
3
.
c
o
m
Q
Q
3
7
6
3
1
5
1
5
0
9
9
2
8
9
4
2
9
8
T
E
L
1
3
9
4
2
2
9
6
5
1
3
9
9
2
8
9
4
2
9
8
0
5
1
5
1
3
6
7
3
Q
Q
TEL 13942296513 QQ 376315150 892498299
http://www.xiaoyu163.com
Table of contents
Other Sony Stereo System manuals

Sony
Sony CMT-EP315 User manual

Sony
Sony HCD-GR5 User manual

Sony
Sony CMT-HX70BTR User manual

Sony
Sony SRS-X11 User guide

Sony
Sony S2 Sports ZS-X10 User manual

Sony
Sony MHC-V02 Reference guide

Sony
Sony HCD-H11 User manual

Sony
Sony LBT-XB3S User manual

Sony
Sony CMT-PX333 User manual

Sony
Sony SRS-XB3 User manual

Sony
Sony HCD-MC1 User manual

Sony
Sony HCD-CPZ1DAB User manual

Sony
Sony MHC-F150 - Mini Hi Fi System User manual

Sony
Sony HCD-DR4 User manual

Sony
Sony SRS-BTX300 User guide

Sony
Sony CMT-HX3 User manual

Sony
Sony MHC-EC55 User manual

Sony
Sony CMT-CP11 User manual

Sony
Sony ICF-C11iP User manual

Sony
Sony HCD-CPX1 User manual