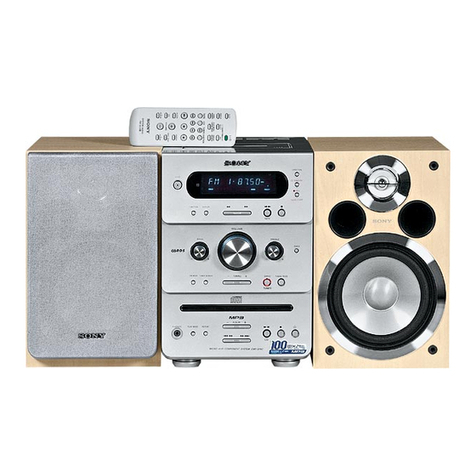
Sony MHC-2600 User manual

SONY
Mini
Hi-Fi
Component
System
Operating
Instructions
Mode
d’emploi
WIS
MHC-2600
FH-E737CD

To
prevent
fire
or
shock
hazard,
do
not
expose
the
unit
to
rain
or
moisture.
To
avoid
electrical
shock,
do
not
open
the
cabinet.
Refer
servicing
to
qualified
personnel
only.
CAUTION
RISK
OF
ELECTRIC
SHOCK
DO
NOT
OPEN
CAUTION
:
TO
REDUCE
THE
RISK
OF
ELECTRIC
SHOCK,
DO
NOT
REMOVE
COVER
(OR
BACK).
NO
USER-SERVICEABLE
PARTS
INSIDE.
REFER
SERVICING
TO
QUALIFIED
SERVICE
PERSONNEL.
This
symbol
is
intended
to
alert
the
user
to
the
presence
of
uninsulated
“dangerous
voltage”
within
the
product's
enclosure
that
may
be
of
sufficient
magnitude
to
constitufe
a
risk
of
electric
shock
to
persons.
This
symbol
is
intended
to
alert
the
user
to
the
presence
of
important
operating
and
maintenance
(servicing)
instructions
in
the
literature
accompanying
the
appliance.
For
the
customers
in
Canada
CAUTION:
TO
PREVENT
ELECTRIC
SHOCK,
DO
NOT
USE
THIS
POLARIZED
AC
PLUG
WITH
AN
EXTENSION
CORD,
RECEPTACLE
OR
OTHER
OUTLET UNLESS
THE
BLADES
CAN
BE
FULLY
INSERTED
TO
PREVENT
BLADE
EXPOSURE.
For
the
customers
in
the
U.S.A.
Owner’s
Record
The
model
and
serial
numbers
are
located
at
the
rear
of
the
unit.
Record
these
numbers
in
the
spaces
provided
below.
Refer
to
them
whenever
you
call
upon
your
Sony
dealer
regarding
this
product.
Model
No.
ST-H3600
Serial
No.
Model
No.
TA-H2600
Serial
No.
Model
No.
TC-H3600
Serial
No.
Mode!
No.
CDP-H3600
Serial
No.
Model
No.
SS-H2600U
Serial
No.
INFORMATION
This
equipment
generates
and
uses
radio
frequency
energy
and
if
not
installed
and
used
properly,
that
is,
in
strict
accordance
with
the
manufacturer's
instructions,
may
cause
interference
to
radio
and
television
reception.
It
has
been
type
tested
and
found
to
comply
with
the
limits
for
a
Class
B
computing
device
in
accordance
with
the
specifications
in
Subpart
J
of
Part
15
of
FCC
Rules,
which
are
designed
to
provide
reasonable
protection
against
such
interference
in
a
residential
installation.
However,
there
is
no
guarantee
that
interference
will
not
occur
ina
particular
installation.
If
this
equipment
does
cause
interference
to
radio
or
television
reception,
which
can
be
determined
by
turning
the
equipment
off
and
on,
the
user
is
encouraged
to
try
to
correct
the
interference
by
one
or
more
of
the
following
measures:
Reorient
the
receiving
antenna
Relocate
the
equipment
with
respect
to
the
receiver
Move
the
equipment
away
from
the
receiver
Plug
the
equipment
into
a
different
outlet
so
that
equipment
and
receiver
are
on
different
branch
circuits.
{f
necessary,
the
user
should
consult
the
dealer
or
an
experienced
radio/television
technician
for
additional
suggestions.
The
user
may
find
the
following
booklet
prepared
by
the
Federal
Communications
Commission
helpful:
“How
to
Identify
and
Resolve
Radio-TV
Interference
Problems”.
This
booklet
is
available
from
the
U.S.
Government
Printing
Oftice,
Washington,
DC
20402,
Stock
No.
004-000-00345-4.
CAUTION
The
use
of
optical
instruments
with
this
product
will
increase
eye
hazard.
Note
to
CATV
system
installer:
This
reminder
is
provided
to
call
the
CATV
system
installer’s
attention
to
Article
820-40
of
the
NEC
that
provides
guidelines
for
proper
grounding
and,
in
particular,
specifies
that
the
cable
ground
shail
be
connected
to
the
grounding
system
of
the
building,
as
close
to
the
point
of
cable
entry
as
practical.
Laser
component
in
this
product
is
capable
of
emitting
radiation
exceeding
the
limit
for
Class
1.
This
appliance
is
classified
as
a
CLASS
1
LASER
product.
The
CLASS
1
LASER
PRODUCT
label
is
located
on
the
rear
exterior.
CLASS
1
LASER
PRODUCT
LUOKAN
1
LASERLAITE
KLASS
1
LASERAPPARAT

Avertissement
Afin
d'éviter
tout
risque
d'incendie
ou
d'électrocution,
ne
pas
exposer
cet
appareil
a
la
pluie
ou
a
I'humidite.
Afin
d’écarter
tout
risque
d’électrocution,
garder
le
coffret
fermé.
Ne
confier
entretien
de
l'appareil
qu’a
un
personnel
qualifié.
=
Le
laser
utilisé
dans
cet
appareil
peut
émettre
des
radiations
dépassant
la
limite
de
Classe
1.
=
CLASS
1
LASER
PRODUCT
LUOKAN
1
LASERLAITE
KLASS
1
LASERAPPARAT
L'appareil
est
classé
comme
appareil
a
laser
de
classe
1.
L’étiquette
CLASS
1
LASER
PRODUCT
se
trouve
a
|’extérieur
sur
le
panneau
arriére.
Pour
les
utilisateurs
au
Canada
ATTENTION:
POUR
PREVENIR
LES
CHOCS
ELECTRIQUES,
NE
PAS
UTILISER
CETTE
FICHE
POLARISEE
AVEC
UN
PROLONGATEUR,
UNE
PRISE
DE
COURANT
OU
UNE
AUTRE
SORTIE
DE
COURANT,
SAUF
SI
LES
LAMES
PEUVENT
ETRE
INSEREES
A
FOND
SANS
EN
LAISSER
AUCUNE
PARTIE
A
DECOUVERT.
=}
BE)
6)
(-We)
MODY
CT
Getting
Started
Warning:
.orsuiioe
ct
tiverdeata
tiie
Shwe
Sete
2
How
to
use
this
manual
«0.00.00...
4
OVOIMIOW'
icc
eA
tee
ede
tod
sats
bes:
5
Precautions
.......
occ
cccceceeeeeeceteseveeeeees
6
Preparations:
5...
:..0...
sccse.ctes
ot
earedecsie
eee:
7
Connections
oo...
cceccccceseesseceeeesceseeees
8
Clock’
setting
=...
15
avis
tahiti
11
Audio
adjustment
o.....00..cccececcceeeceeeee
12
CD
playing
oe.
cceeeccceceseesteseeees
14
RAGIO
2533
spceececPetepscete
Masts
duecase
Aeditectesecsiet.¢
25
Tape
playback
oo...
ecccceeeseereceees
28
Using
the
graphic
equalizer...
32
RECORDING
1.55:
artes
asset
hereto
ac
eeead
35
Tape
dubbing
..........
ce
ceecceececcesseeeee
38
CD
recording
Timer-activated
operation
.....0..0...ccceccccc
52
Storing
the
volume
setting
for
timer-activated
operation
..0..0.0.000....
56
Sleep
timer
operation
;
Microphone
mixing
.........cccccccecseccseeeseee
Maintenance
o.oo...
ceeeeescesseesceseeeee
59
Specifications
...
Troubleshooting
guide
oo...
cecccceeccceeees
Parts
identification
..........
Table
des
matiéres
Pour
commencer
Avertissement
2...
ccceccsetesceececces
3
Comment
utiliser
ce
manuel
oo...
4
Présentation
du
produit
oo...
cece.
5
Pr@CauUtions
2...
cee
ececceececeteeececeeseeeees
6
PréparatifS:
.....0..c.cc.scccsseeeesacesseedsteveescsesenceecss
7
Connexions
.............
oi
cdiceheyienc
tates
Aa
the
cel
8
Réglage
de
Il’horloge
o.......ececeecceeeccceeeee
1
Réglage
du
son
oo...
ccccccseeesseeeees
12
Lecture
d’un
disque
compact
............0.0....
14
PRAGIO
ee,
Fiscccenasesiexa
sv
evgs
couevdess
pied
cdedalccd,
25
Lecture
d'une
cassette
oo...
ceccccecee
28
Utilisation
de
l’égaliseur
graphique
.........
32
Enregistrement
.......
Copie
de
cassette
Enregistrement
d’un
disque
compact
......
41
Déclenchement
par
minuterie
..................
52
Mémorisation
du
volume
pour
le
déclenchement
par
minuterie
...............
56
Fonctionnement
par
minuterie
d'arrét
.....
57
Mixage
des
sons
d'un
microphone
..........
58
Entretion
......cccccccccccsssssccccsesssssesssssseceseeses
59
Specifications
ooo...
ccecceccccssseescsseseseees
60
Guide
de
dépannage
............ceeeccecceees
64
Nomenclature
......0..cccccccecceececcsceeeesceceeeses
66

How
to
Use
This
Manual
This
manual
applies
MHC-2600
for
U.S.A.,
Canada,
and
U.K.,
and
FH-E737CD
for
Australia.
The
differences
depending
on
the
destination
are
indicated
below:
|
U.S.A.
and
U.K.
Australia
Canada
FM/AM
_
|
FM/LW/
FM/MW/
MW
SW
How
this
manual
is
composed
Please
read
the
instructions
in
this
manual
referring
to
the
illustrations.
@The
letters
in
the
illustrations
correspond
to
the
letters
in
the
text:
ex.
Speaker
Cord
Connection
By
e@The
step
numbers
in
the
ilfustrations
correspond
to
the
step
numbers
in
the
text.
e@Use
the
page
numbers
in
‘‘Parts
Identification”
at
the
end
of
this
manual
as
an
index
to
find
out
how
to
use
the
buttons
and
controls.
e@
Subsidiary
information
is
located
at
the
bottom
of
the
pages.
Comment
utiliser
ce
manuel
Ce
manuel
concerne
le
modéle
MHC-2600
a
destination
des
Etats-Unis,
du
Canada
et
du
Royaume-Uni,
et
le
modéle
FH-E737CD
a
destination
de
!'Australie.
Les
differences
en
fonction
du
lieu
de
destination
sont
indiquées
ci-dessous:
E-U
et
Royaume-
Australie
Canada
Uni
FM/GO/
FM/PO/
PO
oc
Composition
du
manuel
Priére
de
lire
les
explications
de
ce
manuel
en
consultant
les
illustrations.
,
eLes
lettres
figurant
sur
les
illustrations
correspondent
a
celles
du
texte
explicatif.
Ex:
Connexion
des
cordons
des
enceintes
e@Les
numéros
des
étapes
figurant
sur
les
illustrations
correspondent
a
ceux
du
texte
explicatif.
eSe
référer
aux
numéros
des
pages,
présentés
dans
!a
section
“Nomenclature”
a
la
fin
du
manuel,
pour
trouver
rapidement
les
explications
sur
les
touches
et
les
commandes.
@On
trouvera
des
explications
complémentaires
dans
le
bas
des
pages.

Présentation
du
Tuner
section
produit
Section
tuner
For
the
models
for
U.S.A.
and
Canada:
e@You
can
store
up
to
30
stations;
20
stations
for
FM,
10
stations
for
AM.
For
the
models
for
U.K.
and
Australia:
@
You
can
store
up
to
40
stations;
20
stations
for
FM,
10
stations
for
MW,
and
10
stations
for
LW
or
SW.
Amplifier
section
@OBFB
(Dynamic
Bass
Feedback)
system
reinforces
bass
sound.
e
You
can
easily
adjust
the
music
to
your
taste
by
selecting
from
10
factory-preset
the
graphic
equalizer
settings.
e@You
can
store
up
to
5
individual
settings
of
graphic
equalizer.
@You
can
select
the
desired
program
source
directly
just
by
pressing
the
operation
buttons
on
the
program
source
equipment
(BAND
or
-/+
to
select
the
tuner,
[>fl
to
select
the
CD
player,
and
>
or
<] to
select
the
cassette
deck).
(Automatic
Source
Selection)
CD
player
section
e
You
can
enjoy
listening
in
various
playing
modes.
@Time
Edit
and
Just
Edit
functions
allow
you
to
program
selections
automatically
to
fit
in
a
desired
duration.
Cassette
deck
section
e@
Auto-reverse
decks
enable
repeated
playback
of
both
sides
of
the
cassette.
@CD-synchro
function
enables
easy
recording
of
a
CD.
@
Double
decks
enable
continuous
playback
and
two
types
of
tape
dubbing
(normal
and
high
speed).
About
the
remote
commander
The
supplied
remote
commander
of
the
U.S.A.
model
is
different
from
that
of
the
models
for
other
countries.
For
the
U.S.A.
model:
You
can
also
operate
the
TV
or
DAT
manufactured
by
Sony
with
the
remote
commander.
For
the
models
for
other
countries:
You
can
directly
choose
the
selections,
the
preset
stations
and
the
graphic
equalizer
settings
using
the
numeric
buttons
on
the
remote
commander.
Sur
les
modéles
pour
les
Etats-Unis
et
ie
Canada:
@Un
maximum
de
30
stations
peut
étre
mémorisé;
20
stations
pour
la
gamme
FM,
10
stations
pour
la
gamme
AM.
Modeéles
pour
le
Royaume-Uni
et
‘Australie:
@Un
maximum
de
40
stations
peut
étre
mémorisé;
20
stations
pour
la
gamme
FM,
10
stations
pour
la
gamme
PO,
et
10
stations
pour
la
gamme
GO
ou
OC.
Section
amplificateur
eLe
systeme
DBFB
(Dynamic
Bass
Feedback:
rétroaction
de
basses
dynamiques)
est
prévu
pour
renforcer
les
sons
des
basses
fréquences.
e@
ii
est
facile
d'ajuster
la
musique
selon
ses
préférences
en
sélectionnant
|'un
des
dix
réglages
d'égaliseur
graphique
preréglés
en
usine.
@\l
est
possible
de
mémoriser
5
réglages
individuels
de
l’égaliseur
graphique.
e@\l
est
possible
de
sélectionner
directement
la
source
de
programme
souhaitée
par
simple
pression
d'une
touche
de
fonction
(BAND
ou
~/+
pour
sélectionner
le
tuner,
Coll
pour
sélectionner
le
lecteur
CD,
et
>
ou
<J
pour
sélectionner
la
platine-cassette)
sur
le
composant
de
la
source
de
programme.
(Fonction
automatique)
Section
lecteur
CD
e||
est
possible
de
profiter
de
l'écoute
dans
divers
modes
de
lecture.
e@Les
fonctions
de
montage
par
temps
et
de
montage
exact
permettent
de
programmer
automatiquement
les
plages
correspondant
a
la
durée
souhaitée.
Section
platine-cassette
eLes
platines
a
auto-inversion
autorisent
une
lecture
répétée
des
deux
faces
d'une
cassette.
@La
fonction
de
CD
synchro
permet
de
synchroniser
la
lecture
d'un
CD
et
son
enregistrement
sur
une
cassette.
@Les
deux
platines
rendent
possible
la
copie
de
cassette
et
la
tecture
en
continu
(vitesse
normale
et
accelérée).
A
propos
de
la
télécommande
La
télécommande
fournie
avec
le
modéle
des
Etats-Unis
est
differente
de
celle
du
modeles
pour
les
autres
pays.
Modele
pour
les
Etats-Unis:
Avec
cette
telecommande,
on
pourra
également
commander
un
téléviseur
ou
une
platine
DAT
fabriqués
par
Sony.
Modéles
pour
les
autres
pays:
On
pourra
sélectionner
directement
les
plages,
les
stations
préréglées
et
jes
réglages
de
l’égaliseur
graphique
avec
les
touches
numériques
de
fa
telecommande.

Precautions
On
operating
voltage
Précautions
Tension
de
fonctionnement
Before
operationg
the
stereo
system,
check
that
the
operating
voltage
of
your
system
is
identical
with
the
voltage
of
your
local
power
supply.
120
V
AC,
60
Hz
240
V
AC,
50
Hz
On
safety
@As
the
laser
beam
used
in
this
unit
is
harmful
to
the
eyes,
do
not
attempt
to
disassemble
the
cabinet.
Refer
servicing
to
qualified
personne!
only.
e@Unpiug
the
system
from
the
wall
outlet
if
it
is
not
to
be
used
for
an
extended
period
of
time.
To
disconnect
the
cord,
pull
it
out
by
the
plug.
Never
pull
the
cord
itseif.
e@
Should
any
solid
object
or
liquid
fall
into
the
component,
unplug
the
system
and
have
it
checked
by
qualified
personnel
before
operating
it
any
further.
@AC
power
cord
must
be
changed
only
ata
qualified
service
shop.
Notice
for
the
Customers
in
the
United
Kingdom
IMPORTANT
The
wires
in
this
mains
lead
are
coloured
in
accordance
with
the
following
code:
Blue:
Neutral
.
:
Brown:
Live
As
the
colours
of
the
wires
in
the
mains
lead
of
this
apparatus
may
not
correspond
with
the
coloured
markings
identifying
the
terminals
in
your
plug
proceed
as
follows:
"
The
wire
which
is
coloured
blue
must
be
connected
to
the
terminal
which
is
marked
with
the
letter
N
or
coloured
black.
The
wire
which
is
coloured
brown
must
be
connected
to
the
terminal
which
is
marked
with
the
letter
L
or
coloured
red.
Do
not
connect
either
wire
to
the
earth
terminal
in
the
plug
which
is
marked
by
the
letter
E
or
by
the
safety
earth
symbol
+or
coloured
green
of
green-
and-yellow.
For
the
customers
in
the
U.S.A.
For
detailed
safety
precautions,
see
the
“IMPORTANT
SAFEGUARDS"
leaflet.
If
you
have
any
question
or
problem
concerning
your
stereo
system,
please
consult
your
nearest
Sony
dealer.
Avant
la
mise
en
service
de
la
chaine
stéréo,
confirmer
que
sa
tension
de
fonctionnement
soit
identique
a
la
tension
du
secteur
local.
Secteur
120
V,
60
Hz
Secteur
240
V,
50
Hz
Sécurité
e@Etant
donné
que
le
faisceau
laser
utilisé
dans
cet
appareil
est
dangereux
pour
les
yeux,
ne
pas
essayer
de
démonter
le
coffret.
Pour
toute
opération
d’entretien,
s'adresser
a
un
technicien
Sony
uniquement.
e@
Débrancher
la
chaine
au
niveau
de
la
prise
secteur
si
l'on
prévoit
de
ne
pas
utiliser
pendant
longtemps.
Pour
débrancher
le
cordon,
saisir
la
fiche.
Ne
jamais
tirer
sur
le
cordon
proprement
dit.
@Si
un
liquide
ou
un
solide
venait
a
s'infiltrer
dans
l'appareil,
le
débrancher
et
le
faire
examiner
par
un
personnel
qualifié
avant
de
le
remettre
en
service.
e@tLe
cordon
d’alimentation
secteur
doit
étre
changé
uniquement
par
un
service
aprés-
vente
qualifié.
Pour
toute
question
ou
difficulté
au
sujet
de
cette
chaine
stéréo,
priére
de
consulter
le
concessionnaire
Sony
le
plus
proche.

Preparations
Installation
Place
the
stereo
system
in
a
location
with
adequate
ventilation
to
prevent
internal
heat
build-up
in
the
system.
On
moisture
condensation
in
the
CD
player
section
Préparatifs
Installation
Pour
éviter
un
échauffement
interne,
placer
la
chaine
stéréo
dans
un
endroit
suffisamment
ventilé.
Condensation
d’humidité
dans
la
section
lecteur
CD
If
the
system
is
brought
directly
from
a
cold
to
a
warm
location,
or
is
placed
in
a
very
damp
room,
moisture
may
condense
on
the
lens
inside
the
unit.
Should
this
occur,
the
CD
player
will
not
operate.
In
this
case,
remove
the
disc
and
leave
the
system
turned
on
for
about
an
hour
until
the
moisture
evaporates.
Battery
Installation
ZY
Install
two
size
AA
(R6)
batteries
in
the
supplied
remote
commander
for
remote
control
operation.
Battery
life
About
half
a
year
of
normal
operation
can
be
expected
when
using
the
Sony
SUM-3
(NS)
batteries.
When
the
batteries
are
exhausted,
the
commander
cannot
operate
the
stereo
system.
When
this
happens,
replace
all
the
batteries
with
new
onés.
To
avoid
battery
leakage
If
the
commander
is
not
to
be
used
for
a
long
time,
remove
the
batteries
to
avoid
damage
caused
by
battery
leakage
and
corrosion.
7
Si
le
lecteur
est
transporté
directement
d'un
endroit
froid
vers
une
piéce
chaude
ou
s'il
est
placé
dans
un
endroit
tres
humide,
de
la
condensation
risque
de
se
produire
dans
l'appareil.
En
pareil
cas,
l'appareil
ne
fonctionnera
pas.
Il
convient
alors
de
retirer
fe
disque
et
de
laisser
le
lecteur
sous
tension
pendant
une
heure
environ
pour
laisser
s'évaporer
I’humidité.
Mise
en
place
des
piles
EJ
Mettre
deux
piles
format
AA
en
place
(R6)
dans
la
télecommande
fournie
en
vue
d'une
exploitation
a
distance.
Autonomie
des
piles
Un
jeu
de
piles
Sony
SUM-3
(NS)
durera
environ
6
mois
a
raison
d'une
exploitation
normale.
Quand
les
piles
sont
épuisées,
la
télécommande
ne
permet
plus
de
transmettre
les
instructions
a
la
chaine
stéréo.
Dans
ce
cas,
remplacer
toutes
les
piles
par
des
neuves.
Protection
de
la
télécommande
Si
l'on
prévoit
de
ne
pas
utiliser
la
telecommande
pendant
longtemps,
retirer
les
piles
pour
éviter
les
dégats
que
causerait
un
suintement
corrosif
de
leur
électrolyte.

Connections
Notes
on
connection
Connexions
Remarques
sur
les
connexions
eConnect
the
AC
power
cord
last.
@Cord
plugs
and
jacks
are
colour
coded.
Red
plugs
and
jacks
are
for
the
right
channel
(R)
and
white
ones
for
the
left
channel
(L).
TT
ORc
Run
A
|
1
Strip
15
mm
of
the
speaker
cord
coating
from
the
end
of
the
cord.
2
Connect
the
right
speaker
to
R,
with
the
red
cord
to
+
and
the
black
cord
to
-.
Connect
the
left
speaker
to
L,
with
the
red
cord
to
+
and
the
black
cord
to
—
Flat
Cord
Connection
[EJ
Connect
the
system
with
the
supplied
flat
cords.
To
connect,
depress
the
middle
of
the
connector
until
it
clicks
into
the
male
connector.
To
disconnect,
pull
the
connector
out.
Never
pull
the
cord
itself.
AM
(MW/LW
or
SW)
Antenna
Connection
For
the
U.K.
model
[ead
For
the
models
for
other
countries
Connect
the
supplied
loop
antenna
to
the
AM
and
4,
terminals.
eBrancher
le
cordon
d’alimentation
en
dernier
fieu.
e@Les
fiches
et
prises
des
cordons
sont
identifiables
par
leur
couleur.
Les
fiches
et
prises
rouges
sont
destinées
au
canal
droit
(R),
les
blanches
au
canal
gauche
(L).
Connexion
des
cordons
des
enceintes
[J
1
Dénuder
le
cordon
des
enceintes
sur
15
mm
a
son
extrémité.
2
Raccorder
le
haut-parleur
droit
sur
R,
le
cordon
rouge
étant
relié
sur
+
et
le
cordon
noir
sur
—.
Raccorder
!e
haut-
parleur
gauche
sur
L,
le
cordon
rouge
étant
relié
sur
+
et
le
cordon
noir
sur
-.
Connexion
du
cordon
plat
[EJ
Raccorder
!a
chaine
a
|'aide
du
cordon
plat
fourni.
Pour
le
raccorder,
appuyer
sur
te
milieu
du
connecteur
jusqu'a
ce
qu’il
rentre
avec
un
déclic
dans
le
connecteur
male.
Pour
le
débrancher,
sortir
le
connecteur.
Ne
jamais
tirer
sur
je
cordon
proprement
dit.
Connexion
de
l’antenne
AM
(PO/GO
ou
OC)
Modéle
pour
le
Royaume-Uni
Modéles
pour
les
autses
pays
Raccorder
l'antenne
cadre
AM
fournie
sur
les
bornes
AM
et
4.

Connections
FM
Wire
Antenna
Connection
For
the
U.K.
model
[DXi
For
the
models
for
other
countries
Connect
the
supplied
FM
wire
antenna
to
the
FM
75Q
terminal
and
extend
horizontally.
For
Better
FM
Reception
For
the
U.K.
mode!
[3
Connexions
Connexion
de
Il’antenne
a
fil
FM
Modéle
pour
le
Royaume-Uni
|
D-1
|
Modéles
pour
les
autres
pays
|
D-2
|
Raccorder
l’antenne
a
fil
FM
fournie
a
la
borne
FM
759
et
la
déployer
a
l'horizontale.
Pour
ameéliorer
la
reception
FM
Modéle
pour
le
Royaume-Uni
[ESN
Connect
the
outdoor
FM
antenna
to
the
FM
75Q
terminal,
using
75-ohm
coaxial
cable.
For
the
models
for
other
countries
Connect
the
outdoor
FM
antenna
to
the
FM
75Q
and
4,
terminals,
using
75-ohm
coaxial
cable.
For
Better
AM
(MW/LW
or
SW)
Reception
For
the
U.K.
model
For
the
models
for
other
countries
Use
the
6-
to
15-meter
(20-
to
50-feet)
insulated
wire
for
connecting
the
terminal.
Connect
the
4,
terminal
to
a
good
ground.
Raccorder
|'antenne
FM
extérieure
sur
la
borne
FM
750
a
l'aide
d'un
cable
coaxial
de
75
ohms.
Modéles
pour
les
autres
pays
|
E-2
|
Raccorder
I’antenne
FM
extérieure
sur
les
bornes
FM
75Q
et
#
a
l'aide
d'un
cable
coaxial
de
75
ohms.
Pour
améliorer
la
reception
AM
(PO/GO
ou
OC)
Modéle
pour
fe
Royaume-Uni
[GSH
Modéles
pour
les
autres
pays
[GH
Utiliser
un
fil
isolé
de
6
a
15
métres
(20
a
50
pieds)
pour
raccorder
la
borne.
Raccorder
la
borne
4
a
une
bonne
terre.
ee
ae

Connections
mea
A
|
Connect
the
supplied
AC
power
cord
to
AC
IN
and
the
other
end
to
a
wall
outlet.
Adding
Other
Components
to
Your
System
Active
Super
Woofer
[J
Connexions
CR
UCC
A
|
Brancher
te
cordon
d’alimentation
fourni
sur
le
connecteur
AC
IN
et
sur
une
prise
secteur.
Pour
ajouter
d’autres
composants
a
la
chaine
Woofer
super
actif
EJ
You
can
connect
an
Active
Super
Woofer
speaker
system
EJ
(Sony
SA-W55xX:
not
supplied)
to
the
SUPER
WOOFER
OUT
jack.
Turntable
system,
VCR,
or
DAT
You
can
connect
a
turntable
system
EJ
to
the
PHONO
jacks,
a
VCR
[J
to
the
VIDEO
jacks,
and
a
DAT
system
[J
to
the
DAT
jacks.
To
listen
to
each
piece
of
equipment,
press
the
FUNCTION
buttons
on
the
front
panel
until
“PHONO”
(for
the
turntable
system),
“VIDEO”
(for
VCR),
or
“DAT”
appears
on
the
display.
For
recording
from
the
CD
Connect
an
optical
cord
to
the
OPTICAL
DIGITAL
OUT
jack
on
the
CD
player.
AU
Bus
[J
:
You
can
connect
other
Sony
equipment
with
AU
BUS
to
the
AU
BUS
jack.
tl
est
possible
de
raccorder
un
haut-parleur
des
graves
super
actif
EJ
(Sony
SA-W55x:
non
fourni)
a
la
prise
SUPER
WOOFER
OUT.
Platine
tourne-disque,
magnétoscope
ou
platine
DAT
On
pourra
raccorder
une
platine
tourne-
disque
[J
sur
les
prises
PHONO,
un
magnétoscope
[J
sur
les
prises
VIDEO,
et
une
platine
DAT
J,
sur
les
prises
DAT.
Pour
faire
fonctionner
chaque
appareil,
appuyer
sur
les
touches
FUNCTION
du
panneau
avant
jusqu’a
ce
que
‘‘PHONO”
(pour
la
platine
tourne-disque),
‘“VIDEO”’
(pour
le
magnétoscope),
ou
“DAT”
(pour
la
platine
DAT)
apparaisse
sur
I'affichage.
Pour
l’enregistrement
d’un
disque
compact
Raccorder
un
cordon
optique
a
la
prise
OPTICAL
DIGITAL
OUT
du
lecteur
CD.
AU
Bus
Pp)
On
pourra
raccorder
un
autre
appareil
Sony
avec
BUS
AU
4a
la
prise
AU
BUS.
LINE
OUT

Clock
Setting
Setting
the
Clock
Example:
Set
to
9:25
in
the
morning.
1
Press
CLOCK
SET.
2
Set
the
hour
with
the
-
or
+
button.
3
Press
MEMORY/NEXT.
4
Set
the
minute
with
the
—
or
+
button.
5
Press
MEMORY/NEXT.
The
clock
starts
operating.
Information
on
the
time
The
U.K.
model
shows
the
time
in
24-hour
cycle.
The
models
for
other
countries
show
the
time
in
12-hour
cycle.
AM
12:00
=
midnight
PM
12:00
=
noon
When
a
power
interruption
occurs
If
the
power
is
recovered
within
several
hours,
there
is
no
need
to
reset
the
clock,
timer,
and
Wake
Up
Volume
settings.
If
the
power
interruption
is
long,
all
the
above
settings
are
erased,
and
‘AM
12:00"
(‘0:00’)
will
flash
on
the
display.
To
change
the
frequency
display
to
the
time
display
Press
CLOCK
DISPLAY
on
the
remote
commander.
Press
it
again
to
change
to
the
frequency
display.
ie
{-YelF-(et-Me(-m
Muvelarere
i
Réglage
de
I’heure
Exemple:
Pour
régler
a
9:25
du
matin.
1
Appuyer
sur
CLOCK
SET.
2
Poser
I’heure
a
l'aide
des
touches
-
ou
+.
3
>
Appuyer
sur
MEMORY/NEXT.
4
Poser
les
minutes
a
l'aide
des
touches
—
ou
+.
5
Appuyer
sur
MEMORY/NEXT.
L'horloge
commence
a
fonctionner.
Informations
relatives
a
|’heure
Le
modéle
britannique
affiche
I’heure
suivant
un
cycle
de
24
heures.
Les
modéles
pour
les
autres
pays
affichent
I’heure
suivant
un
cycle
12
heures.
AM
12:00
=
minuit
PM
12:00
=
midi
En
cas
de
panne
de
courant
Si
l'alimentation
est
rétablie
dans
les
quelques
heures,
il
n'est
pas
nécessaire
de
ré-ajuster
l'horloge,
la
minuterie
et
le
volume
de
réveil.
Si
la
panne
de
courant
se
prolonge,
les
réglages
ci-dessus
sont
effacés
et
|'indication
‘AM
12:00’
(‘‘0:00"')
clignote
sur
|’affichage.
Commutation
de
l’affichage
de
fréquence
sur
lV’affichage
de
|I’heure
Appuyer
sur
CLOCK
DISPLAY
sur
la
telécommande.
Appuyer
de
nouveau
pour
modifier
l'affichage
de
fréquence.
MEMORY/
NEXT
CLOCK
SET

Audio
Adjustment
VCore
A
|
Turn
VOLUME
clockwise
to
increase
the
sound
level,
or
counterclockwise
to
decrease
it.
Balance
Adjustment
[E]
Possible
only
with
the
remote
commander.
Adjust
the
balance
of
the
speakers
to
correct
the
stereo
imaging
when
the
speaker
position
is
not
symmetrical.
1
Press
BALANCE.
2
Adjust
with
CURSOR
CONTROL
<
or
>.
at=xelE-ye[-MelVmyeln
Réglage
du
volume
[J
Tourner
le
reglage
VOLUME
dans
le
sens
des
aiguilles
d'une
montre
pour
augmenter
le
niveau
sonore
ou
dans
Je
sens
contraire
pour
l’atténuer.
Réglage
de
Ia
balance
EJ
Possible
uniquement
avec
la
télecommande.
Régler
la
balance
des
enceintes
de
facon
a
corriger
l'image
stéréo
lorsque
les
enceintes
ne
sont
pas
disposées
de
facon
symétrique.
1
Appuyer
sur
BALANCE.
2
Ajuster
avec
CURSOR
CONTROL
<4
ou
>.
1
Models
for
other
countries
Modéles
pour
les
autres
pays
BALANCE
U.S.A.
model
Modeéle
pour
les
Etats-Unis

Audio
Adjustment
To
Reinforce
Bass
Possible
only
with
the
remote
commander.
1
Press
DBFB*.
2
Adjust
with
CURSOR
CONTROL
&
or
V.
The
more
you
press
A
,
the
more
the
bass
is
emphasized.
When
you
do
not
want
to
apply
the
DBFB
effect
Press
DBFB
so
that
the
DBFB
OFF
appears
on
the
display.
+
DBFB
=
Dynamic
Bass
Feedback
To
Activate
Surround
Effect
for
Stereo
Sound
Press
S-SUR*
during
a
stereo
sound
reproduction.
This
creates
the
atmosphere
of
a
movie
theater
or
concert
hall.
This
function
is
not
effective
for
monaural
sound.
*
§-SUR
=
Simulated
Surround
aX=YelF-ye(-MelViyeln
Renforcement
des
graves
Possible
uniquement
avec
la
télécommande.
1
Appuyer
sur
DBFB*.
2
Ajuster
avec
CURSOR
CONTROL
A
ou
v.
Plus
on
appuie
sur
A,
plus
les
graves
sont
accentues
Si
l'on
ne
désire
pas
utiliser
l'effet
DBFB
Appuyer
sur
DBFB
de
facon
que
OBFB
OFF
apparaisse
sur
l’affichage.
*
DBFB
=
Dynamic
Bass
Feedback
(rétroaction
de
basses
dynamiques)
Mise
en
service
de
l’effet
ambiant
pour
sons
stéréo
Appuyer
sur
S-SUR*
pendant
t'écoute
d'un
son
stéréo
pour
obtenir
une
atmosphére
semblable
a
celle
d'une
salle
de
cinéma
ou
de
concert.
Cette
fonction
est
sans
effet
si
le
son
est
monaural.
*
S-SUR
=
Surround
simulé
For
personal
listening
Connect
headphones
to
HEADPHONES.
No
sound
comes
from
the
speakers.
Pour
une
écoute
en
prive
Brancher
un
casque
d'écoute
sur
fa
prise
HEADPHONES.
Le
son
des
haut-parleurs
est
coupe
U.S.A.
model
Modéle
pour
les
Etats-Unis
S-SUR
Models
for
other
countries
Modeles
pour
les
autres
pays
S$-SUR
DBFB
12

CD
Playing
Playing
the
Entire
Disc
1
Press
~
OPEN/CLOSE
to
open
the
tray.
Place
the
disc
with
the
printed
side
up.
2
Press
D4
(>
on
the
remote
commander).
The
tray
closes
and
play
starts.
The
display
shows
[EJ
the
current
track
number,
[EJ
the
current
INDEX
number
(of
the
track),
BJ
elapsed
playing
time
of
the
track
and
EJ
track
numbers.
Caution
on
adjusting
volume
Do
not
turn
up
the
volume
while
listening
to
a
portion
with
very
low
level
.
inputs
or
no
audio
signals.
If
you
do,
the
speakers
may
be
damaged
when
a
peak
level
portion
is
played.
To
stop
play
Press
Hf.
To
stop
for
a
moment
during
play
Press
Co
(
[J
on
the
remote
commander).
To
resume
play,
press
it
again.
To
stop
play
and
open
the
tray
Press
&
OPEN/CLOSE.
Lecture
d’un
disque
compact
Lecture
du
disque
en
entier
,
1
Appuyer
sur
&
OPEN/CLOSE
pour
ouvrir
le
plateau.
Mettre
le
disque
en
place
face
imprimée
vers
le
haut.
2
Appuyer
sur
il
(
®
sur
la
télécommande).
Le
plateau
se
referme
et
la
lecture
commence.
L'affichage
indique
EJ
le
numéro
de
la
plage
en
cours
de
lecture,
[J
le-numéro
INDEX
actuel
(de
la
plage),
[J
!e
temps
de
lecture
ecoulé
de
la
plage
et
EJ
le
nombre
de
plages.
Précaution
lors
du
réglage
du
volume
Ne
pas
élever'excessivement
le
volume.
pendant
I’écoute
d'un
passage
ou
les
signaux
audio
sont
trés
faibles
ou“
absents
car
tes
haut-parleurs
risqueraient
d'étre
endommagés.
par
Vapparition
soudaine
d'un
niveau
de
créte
trés
puissant.
EUR
Pour
arréter
la
lecture
Appuyer
sur
@
.
Pour
arréter
temporairement
la
lecture
Appuyer
sur
Dl
(
(f
sur
la
telecommande).
Appuyer
a
nouveau
pour
reprendre
la
lecture
interrompue.
‘Pour
arréter
1a
lecture
et
ouvrir
le
plateau
Appuyer
sur
&
OPEN/CLOSE.
To
play
an
8
cm
(3-inch)
CD
Place
it
on
the
inner
circle
of
the
tray.
If
the
disc
is
provided
with
an
adaptor,
first
remove
it.
Do
not
put
a
normal
CD
(12
cm/5-inch)
on
top
of
an
8
cm
CD.
14
Lecture
d’un
CD
de
8
cm
(3
pouces)
Placer
le
CD
sur
le
cercle
intérieur
du
plateau.
Si
le
disque
est
muni
d'un
adaptateur,
retirer
tout
d’abord
celui-ci.
Ne
jamais
placer
un
CD
normal
(12
cm/5
pouces)
au-dessus
d'un
CD
de
8
cm.
a

CD
Playing
Locating
a
Particular
Selection
—
Automatic
Music
Sensor
(AMS)
The
AMS
locates
the
beginning
of
a
selection.
To
locate
the
beginning
of
the
current
or
preceding
selection
Ey
Press
[kK]
as
many
times
as
required.
To
locate
the
beginning
of
a
succeeding
selection
[J
Press
D1
as
many
times
as
required.
Locating
a
Particular
Point
in
a
Selection
You
can
locate
any
particular
point
on
the
selection.
This
function
works
during
play
or
pause.
To
search
while
monitoring
the
sound
To
move
forward
at
high
speed
[[]
Keep
bf
depressed
and
release
it
at
the
desired
point.
To
move
backward
at
high
speed
J]
Keep
(kK)
depressed
and
release
it
at
the
desired
point.
To
search
quickly
4
Press
[ll
to
put
the
unit
in
the
pause
mode.
2
Keep
ick]
or
D1
pressed.
The
search
speed
increases,
but
there
is
no
sound.
Find
the
desired
point
by
observing
the
display.
Press
[>4l
again
at
the
desired
point
to
play.
To
locate
a
selection
directly
(except
for
U.S.A.
model)
Possible
only
with
the
Remote
commander.
1
Set
the
TUNER/EQ/CD
numeric
button
function
selector
to
CD.
2
Press
the
numeric
button
for
the
selection.
If
the
selection
number
is
greater
than
12
Use
the
>12
and
1
to
10
buttons.
"10"
functions
as
the
figure
‘‘0".
e.g.
To
play
from
selection
number
22,
press
>12,
2,
2.
To
play
from
selection
number
30,
press
>12,
3,
10.
Lecture
d’un
disque
compact
Localisation
d’une
plage
donnée
—
Recherche
automatique
CUES)
Le
systeme
AMS
permet
de
retrouver
le
début
des
plages.
Pour
localiser
le
début
de
la
plage
en
cours
de
lecture
ou
de
la
plage
précédente
[J
Appuyer
sur
Ikxk)
autant
de
fois
que
nécessaire.
Pour
localiser
le
début
d’une
plage
suivante
BI
Appuyer
sur
1
autant
de
fois
que
nécessaire.
Localisation
d’un
point
donné
dans
une
plage
ll
est
possible
de
retrouver
n'importe
quel
point
particulier
de
la
plage.
Cette
fonction
est
disponible
dans
le
mode
de
lecture
ou
de
pause.
Pour
rechercher
en
écoutant
le
son
Lecture
avant
accélérée
[E)
Maintenir
bt
enfonce
et
relacher
au
point
souhaitée.
Déplacement
rapide
vers
l’arriére
|
Al
Madintenir
kk]
enfoncé
et
relacher
au
point
souhaite.
Pour
rechercher
rapidement
1.
Appuyer
sur
[4
pour
mettre
l'appareil
en
mode
de
pause.
2
>
Maintenir
kK)
ou
D1
enfoncé.
La
vitesse
de
recherche
s'accélére,
mais
le
son
est
inaudible.
Rechercher
le
point
souhaité
en
observant
l'affichage.
Appuyer
a
nouveau
sur
[>i
au
point
souhaité
pour
la
lecture.
Pour
localiser
une
plage
directement
(sauf
sur
le
modéle
pour
les
Etats-Unis)
Possible
uniquement
avec
la
télécommande.
1
Régler
le
sélecteur
de
fonction
des
touches
numériques
TUNER/EQ/CD
sur
CD.
2
Appuyer
sur
les
touches
numériques
de
la
plage
souhaitee.
Si
le
numéro
de
la
plage
est
supérieur
a
12
Utiliser
les
touches
>12
et
14
10.La
touche
‘'10"'
fonctionne
comme
le
chiffre
“or.
Ex:
Pour
lire
a
partir
de
!a
plage
22,
appuyer
sur
>12,
2,
2.
Pour
lire
a
partir
de
la
plage
30,
appuyer
sur
>12.
3.
10
i
i
j
I
'

CD
Playing
Information
Display
Possible
only
with
the
remote
commander.
To
change
the
time
display
Al
Press
TIME
during
play.
The
display
changes
to
give
you
the
following
information
El
Elapsed
playing
time
of
the
current
selection
EX
Remaining
time
in
a
selection.
If
the
curkant
selection
number
is
over
20,
“.-.--""
is
displayed.
f
Remaining
time
of
the
disc.
To
know
the
total
playing
time
of
the
disc
BI
Press
TIME
during
stop.
The
following
appears
for
about
5
seconds.
E]
Last
track
number
EJ
Total
playing
time
of
the
disc
@
Track
numbers
This
information
appears
also
when
you
close
the
tray
by
pressing
=
OPEN/CLOSE.
Notes
on
handling
discs
eTo
keep
the
disc
clean,
handle
the
disc
by
its
edge.
Do
not
touch
the
surface.
E]
@Do
not
stick
paper
or
tape
onto
the
disc.
rb
J
3
@Do
not
expose
the
disc
to
direct
sunlight
or
heat
sources
such
as
a
hot
air
duct,
nor
leave
it
in
a
car
parked
in
direct
sunlight
as
there
can
be
a
considerable
rise
in
the
temperature.
e@Atter
playing,
store
the
disc
in
its
case.
Lecture
d’un
disque
compact
Affichage
d’informations
Possible
uniquement
avec
fa
telecommande.
Changement
de
l’affichage
horaire
EY
Appuyer
sur
TIME
de
Ita
télecommande
pendant
la
lecture
L’affichage
change
pour
fournir
les
informations
suivantes:
‘a
Temps
de
lecture
écoulé
de
!a
plage
en
cours
de
lecture.
J
Temps
restant
dans
une
plage
Si
le
numéro
de
la
plage
en
cours
de
lecture
est
supérieur
a
20,
l'indication
“_
.""
s'affiche.
Temps
restant
du
disque.
Affichage
du
temps
de
lecture
total
du
disque
E]
Appuyer
sur
TIME
pendant
|’arrét.
Les
indications
suivantes
apparaissent
pendant
5
secondes
environ
E]
Numéro
de
la
derniére
plage
EJ
Temps
de
lecture
total
du
disque
(J
Numeros
des
plages
Ces
informations
s’affichent
également
quand
on
ferme
le
plateau
en
appuyant
sur
“
OPEN/CLOSE.
Remarques
sur
la
manipulation
des
disques
[]
“@Pour
maintenir
les
disques
propres,
les
tenir
par
leur
aréte
et
ne
pas
toucher
leur
surface.
E]
e@Ne
pas
coller
de
papier
ou
de
bande
sur
un
disque.
[J
@Ne
pas
laisser
de
disques
en
plein
soleil
ou
pres
d'une
source
de
chaleur
telle
qu'une
bouche
d’air
chaud,
ni
dans
un
vehicule
stationné
en
plein
soleil
ou
la
température
risque
de
s'élever
considérablement.
e@Apres
lecture,
replacer
le
disque
dans
son
étul.
U.S.A.
model
Modéle
pour
les
Etats-Unis
aon
anal
ei
memati
Ont
ee
Models
for
other
countries
Modéles
pour
les
autres
pays

Lecture
d’un
disque
CD
Playing
Playing
Repeatedly
—
Repeat
Play
Possible
only
with
the
remote
commander.
To
repeat
all
the
selections
FJ
Press
REPEAT
once
during
play
so
that
“REPEAT”
appears
on
the
display.
To
repeat
a
single
selection
EJ
Press
REPEAT
twice
while
playing
the
desired
selection
so
that
“REPEAT
1”
appears
on
the
display.
To
cancel
repeat
play
Press
REPEAT
so
that
neither
“REPEAT”
nor
“REPEAT
1”
appears.
compact
Lecture
répétée
—
Fonction
“repeat”
Possible
uniquement
avec
la
télecommande.
Pour
répéter
toutes
les
plages
Al
Appuyer
une
fois
sur
REPEAT
pendant
la
lecture
de
maniére
a
ce
que
“REPEAT”
apparaisse
sur
l'affichage.
Répétition
d’une
seule
plage
BI
Appuyer
deux
fois
sur
REPEAT
pendant
la
lecture
de
la
plage
souhaitée
de
manieére
a
ce
que
“REPEAT
1"
apparaisse
sur
laffichage.
Pour
annuler
la
lecture
répétée
Appuyer
sur
REPEAT
de
maniére
que
ni
“REPEAT”
ni
‘REPEAT
1”
n'apparaisse.
U.S.A.
model
Modéle
pour
les
Etats-Unis
POWER
AUDIO
a
REPEAT
SHUFFLE
Models
for
other
countries
Modéles
pour
les
autres
pays
‘SYSTEM
“POWER
“SHUFFLE

CD
Playing
Playing
in
a
Random
Order
SCM
EEE
A
|
Shuffle
play
function
plays
all
selections
in
a
random
order.
Possible
only
with
the
remote
commander.
1
Press
SHUFFLE.
“SHUFFLE”
appears
on
the
display.
2
Press
>
.
{
J
appears
and
then
shuffle
play
starts.
To
stop
playing
Press
B.
To
cancel
shuffle
play
EJ
Press
CONTINUE.
“SHUFFLE”
disappears
(EJ),
and
play
continues
in
the
normal
play
mode.
To
play
only
the
desired
selections
in
a
random
order
—
Delete
Shuffle
Play
(Canadian
model
only)
You
can
delete
the
undesired
selections
before
or
during
shuffle
play.
To
delete
a
selection
Press
the
numeric
buttons
for
the
selection
you
want
to
delete.
The
number
of
the
selection
and
“OFF”
appears
on
the
display.
To
put
back
a
selection
which
you
have
deleted
Press
the
numeric
buttons
for
that
selection.
The
number
of
the
selection
and
‘‘ON”
appears
on
the
display.
To
put
back
all
selections
which
you
have
deleted
Press
Mf
during
stop.
When
you
press
REPEAT
during
shuffle
play
After
playing
all
the
selections
in
a
random
order,
shuffle
play
starts
again
ina
different
random
order.
During
delete
shuffle
play,
only
the
desired
selections
are
played
in
a
different
random
order.
To
check
the
remaining
time
Press
TIME
once
to
see
the
remaining
time
of
the
selection
being
played:
twice
to
see
the
total
remaining
time
of
the
selections
to
be
played:
once
more
to
return
to
the
initial
display.
MYei
(Vig
Mem
Uli
mel
xe
(UC:
compact
Lecture
dans
un
ordre
au
hasard
Fonctio
La
fonction
''shuffle”
reproduit
toutes
les
plages
dans
un
ordre
aléatoire.
Possible
uniquement
avec
la
telecommande.
1
Appuyer
sur
SHUFFLE.
“SHUFFLE”
apparait
sur
l'affichage.
2
Appuyer
sur
>
.
( J
apparait
et
la
lecture
aléatoire
commence.
Pour
arréter
la
lecture
Appuyer
sur
&
.
Pour
annuler
la
fonction
“shuffle”
EJ
Appuyer
sur
CONTINUE.
“SHUFFLE”
disparait
(Ej),
et
la
lecture
continue
selon
le
mode
normal.
Lecture
des
seules
plages
souhaitées
dans
un
ordre
aléatoire
—
Fonction
‘“‘shuffle”
avec
annulation
(sauf
sur
le
modéle
pour
les
Etats-
Unis)
Il
est
possible
d’annuler
la
programmation
de
plages
non
souhaitées
avant
ou
pendant
la
lecture
aléatoire.
Pour
annuler
une
plage
Appuyer
sur
jes
touches
numériques
correspondant
au
numéro
de
la
plage
que
l'on
désire
effacer.
Le
numéro
de
Ja
plage
et
OFF"
apparaissent
sur
l’affichage.
Pour
resélectionner
une
plage
annulée
Appuyer
sur
les
touches
numériques
correspondant
au
numéro
de
cette
plage.
Le
numéro
de
la
plage
et
''ON”
apparaissent
sur
l'affichage.
Pour
resélectionner
toutes
les
plages
annulées
Appuyer
sur
lf
pendant
I’arrét.
Quand
on
appuie
sur
la
touche
REPEAT
pendant
la
lecture
aléatoire
Lorsque
la
lecture
de
toutes
les
plages
dans
un
ordre
aléatoire
est
terminée,
fa
lecture
‘“‘shuffle’’
recommence
dans
un
autre
ordre
aléatoire.
Pendant
la
fonction
“shuffle”
avec
annulation,
seules
les
plages
souhaitées
sont
lues
dans
un
autre
ordre
aléatoire.
Pour
vérifier
le
temps
restant
Appuyer
une
fois
sur
TIME
pour
voir
le
temps
restant
de
la
plage
en
cours
de
lecture;
deux
fois
pour
voir
le
temps
total
restant
des
plages
a
lire;
et
une
nouvelle
fois
pour
revenir
a
laffichage
initial.
SHUFFLE
CONTINUE

CD
Playing
Playing
Only
the
Desired
Selections
—
Delete
Play
(Except
for
U.S.A.
model)
You
can
delete
the
undesired
selections
‘efore
or
during
play
assible
only
with
the
remote
commander
delete
a
selection
before
play
;
Press
SHUFFLE.
“SHUFFLE”
appears
in
the
display
Press
the
numeric
buttons
for
that
selection.
The
number
of
the
selection
and
“OFF”
appears
on
the
display
Press
CONTINUE.
"SHUFFLE"
disappears.
Press
>
.
Delete
play
starts.
o
delete
a
selection
during
play
Al
ress
CLEAR
while
that
selection
is
being
layed.
he
number
of
the
selection
and
‘‘OFF”
ppears
on
the
display
and
the
next
election
starts.
0
put
back
all
the
selections
which
you
ave
deleted
‘ress
Mf
during
stop.
Lecture
d’un
disque
compact
Lecture
des
seules
plages
souhaitées
—
Lecture
avec
annulation
(sauf
sur
le
modéle
pour
les
Etats-
Unis)
ll
est
possible
d’annuler
les
plages
non
souhaitees
avant
ou
pendant
la
lecture
Possible
uniquement
avec
fa
telecommande
Pour
annuler
une
plage
avant
la
lecture
1
Appuyer
sur
SHUFFLE.
SHUFFLE”
apparait
sur
l'affichage
2
Appuyer
sur
les
touches
numériques
correspondant
au
numéro
de
cette
plage.
Le
numero
de
ta
plage
et
“OFF”
apparaissent
sur
|affichage
3
Appuyer
sur
CONTINUE.
“SHUFFLE”
disparait
4
Appuyer
sur
>
.
La
lecture
avec
annulation
commence.
Pour
annuler
une
plage
pendant
la
lecture
EY
Appuyer
sur
CLEAR
pendant
la
lecture
de
la
plage.
Le
numéro
de
la
plage
et
“OFF”
apparaissent
et
la
lecture
de
la
plage
suivante
commence.
Pour
resélectionner
toutes
les
plages
annulées
Appuyer
sur
ff
pendant
|'arrét
Models
for
Canada,
U.K..
and
Australia
Modéles
pour
le
Canada,
le
Royaume-Uni
et
I'Australie
SYSTEM
POWER
3
TUNER
EQ
CD
——ae
SHUFFLE
{
Oo
&
Ca
Co
Coo
<a
cs
ane
a
CONTINUE
|
—
aah
7
an
N
’
|
7
o
1
-
a~
i i
é
uy
CLEAR

CD
Playing
Playing
in
a
Desired
Order
—
Program
Play
You
can
make
a
program
of
up
to
24
selections
in
the
order
you
want
them
to
be
played.
Possible
only
with
the
remote
commander.
1
Press
PROGRAM.
“PGM'"
appears
on
the
display.
2
Choose
the
desired
selection
to
be
programmed
with
Ké4@
or
DPI.
3
Press
PROGRAM.
The
selected
selection
number
is
stored.
Repeat
steps
2
and
3
to
program
the
desired
selections.
4
Press
>
.
To
program
selections
directly
(except
for
U.S.A.
model)
1
Press
PROGRAM.
“PGM"
appears
on
the
display.
2
Press
the
numeric
buttons
for
the
desired
selections
in
the
desired
order
-
to
be
programmed.
3
Press
>
.
To
program
a
pause
Press
[If
on
the
remote
commander.
“P"
appears
and
the
total
playing
time
is
reset
to
0.
To
stop
play
.
Press
fl
.
To
restart
the
same
program
play,
press
>
on
the
remote
commander.
To
cancel
the
program
play
Press
CONTINUE.
The
program
is
erased
and
the
play
continues
in
the
normal
play
mode.
To
check
the
program
Press
CHECK.
Each
time
you
press
CHECK,
the
number
of
the
selection
and
the
order
to
be
played
appear
on
the
display.
After
the
last
selection
is
displayed,
‘End’
appears
on
the
display.
(For
the
U.S.A.
model,
this
operation
is
not
possible
with
the
remote
commander.)
To
add
a
selection
to
the
end
of
the
program
(except
for
U.S.A.
model)
Press
the
numeric
buttons
on
the
remote
commander.
Lecture
d’un
disque
compact
Lecture
dans
un
ordre
donné
—
Lecture
programmée
2
ll
est
possible
de
programmer
jusqu’a
24
plages
qui
seront
reproduites
dans
ordre
choisi.
Possible
uniquement
avec
la
télecommande.
1
Appuyer
sur
PROGRAM.
“PGM"
apparait
sur
laffichage.
2
Sélectionner
la
plage
que
!’on
souhaite
programmer
avec
@<@
ou
DPI.
3
Appuyer
sur
PROGRAM.
Le
numéro
de
la
plage
sélectionnée
est
mémorisé.
Répéter
les
étapes
2
et
3
pour
programmer
les
autres
plages
4
Appuyer
sur
>
.
Pour
programmer
des
plages
directement
(sauf
sur
le
modéle
pour
les
Etats-Unis)
1
Appuyer
sur
PROGRAM.
“PGM"
apparait
sur
l'affichge.
2
Appuyer
sur
les
touches
numériques
correspondant
aux
numéros
des
plages
que
l'on
désire
programmer
et
dans
Vordre
souhaité.
1
3
Appuyer
sur
>
.
Pour
programmer
une
pause
Appuyer
sur
[I
de
la
telecommande.
“P"
apparait
et
le
temps
de
lecture
total
est
ramené
a
0.
Pour
arréter
la
lecture
Appuyer
sur
.
Pour
reprendre
le
méme
programme,
appuyer
sur
®
de
la
télecommande.
Pour
annuler
la
lecture
programmée
Appuyer
sur
CONTINUE.
;
La
programmation
est
annulée
et
la
lecture
continue
en
mode
de
lecture
normale.
3
Pour
vérifier
le
contenu
du
programme
Appuyer
sur
CHECK.
A
chaque
pression
sur
CHECK,
le
numero
et
l'ordre
de
lecture
de
la
plage
apparaissent
sur
l’affichage.
Apres
l'affichage
de
la
derniére
plage,
End”
apparait
sur
l'affichage.
(Sur
le
modeéle
pour
les
Etats-Unis
cette
opération
n'est
pas
possible
avec
la
telecommande.)
Pour
ajouter
une
plage
a
la
fin
du
programme
(sauf
sur
le
modele
pour
les
Etats-Unis)
Appuyer
sur
les
touches
numeriques
dela
télecommande
U.S.A.
model
Modéle
pour
les
Etats-Unis
POWER
AUDIO
Models
for
other
countries
Modéles
pour
les
autres
pays
1,3
SYSTEM
s~
8
on
PROGRAM
This manual suits for next models
1
Table of contents
Other Sony Stereo System manuals

Sony
Sony SVBK-170P User manual

Sony
Sony CMT-NEZ30 User manual

Sony
Sony HST-231 User manual

Sony
Sony CMT-CP100 User manual

Sony
Sony SRS-XB3 User manual

Sony
Sony LBT-XB88KS User manual

Sony
Sony MHC-WX7AV User manual

Sony
Sony dhc-zx50md User manual

Sony
Sony LBT-D670AV - Compact Hifi Stereo System User manual

Sony
Sony CMT-SBT40D User manual