Owner's
Record
The
model
and
serial
numbers
are
located
at
the
rear.
Record
the
these
numbers
in
the
spaces
provided
below.
Refer
to
these
numbers
whenever
you
call
upon
your
Sony
dealer
regarding
this
product.
Model
No.
Serial
No.
WARNING
To
prevent
fire
or
shock
hazard,
do
not
expose
the
unit
to
rain
or
moisture.
Oy
NEMEC)
OO
NOT
OPEN
CAUTION:
TO
REDUCE
THE
RISK
OF
ELECTRIC
SHOCK,
DO
NOT
REMOVE
COVER
(OR
BACK).
NO
USER-SERVICEABLE
PARTS
INSIDE.
REFER
SERVICING
TO
QUALIFIED
SERVICE
PERSONNEL.
This
symbol
is
intended
to
alert
the
user
to
the
presence
of
uninsulated
“dangerous
voltage”
within
the
prod-
uct's
enclosure
that
may
be
of
suffi-
cient
magnitude
to
constitute
a
risk
of
electric
shock
to
persons.
This
symbol
is
intended
to
alert
the
user
to
the
presence
of
important
operating
and
maintenance
(servicing)
instructions
in
the
literature
accompa-
nying
the
appliance.
*
The
graphical
symbols
are
on
the
rear
enclosure.
Note
to
CATV
system
installer
This
reminder
is
provided
to
call
the
CATV
system
installer's
attention
to
Articale
820-22
of
the
NEC
that
provides
guidelines
for
proper
grounding
and,
in
particular,
specifies
that
the
cable
ground
shall
be
connected
to
the
grounding
system
of
the
building,
as
close
to
the
point
of
cable
entry
as
practical.
Table
of
Contents
PYOCAULIONS
«..03505.icascstessoesSevenelestisbead
savk
acstnasts
ciniecat
eect
eeeys
3
Adjusting
the
AUGIO
200...
ececesctettersscecenessseeserscnsneeens
3
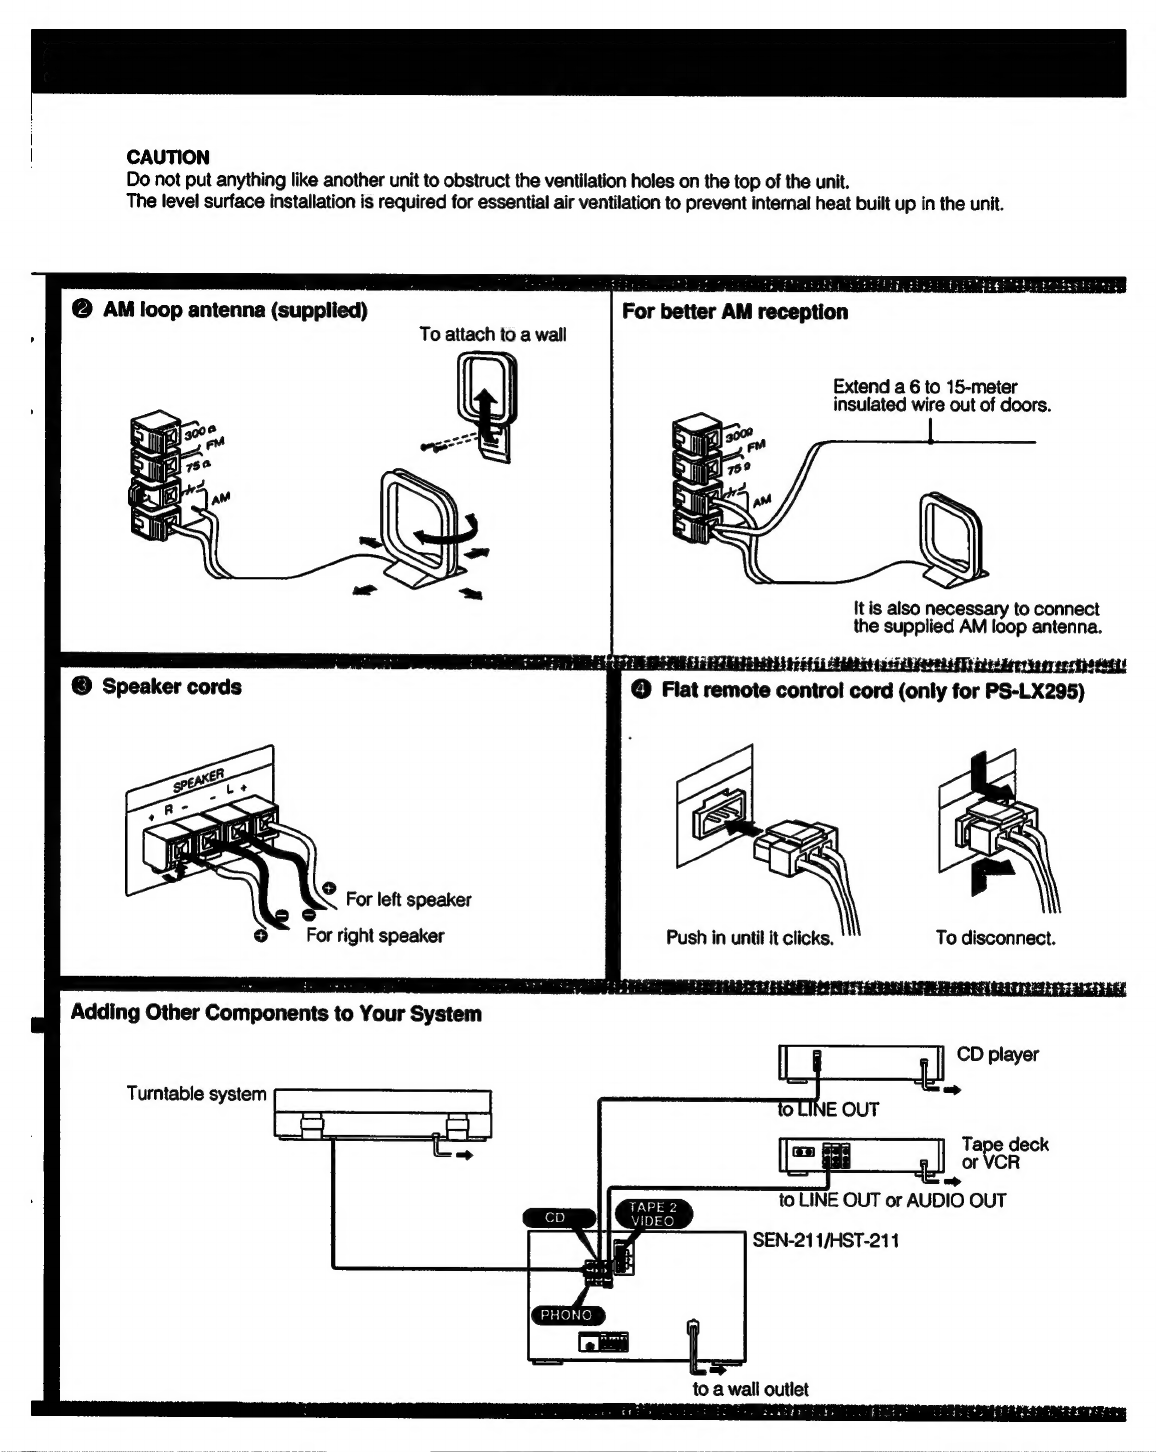
CONMOCHONS
5.5.55
cccedis
scecetsanciouesaoune
cdvsesedeudesstedbavevetenieicseyes
4
Receiving
brOadaSts
oo...
cscseessetssseseesseeeteesercessesenes
6
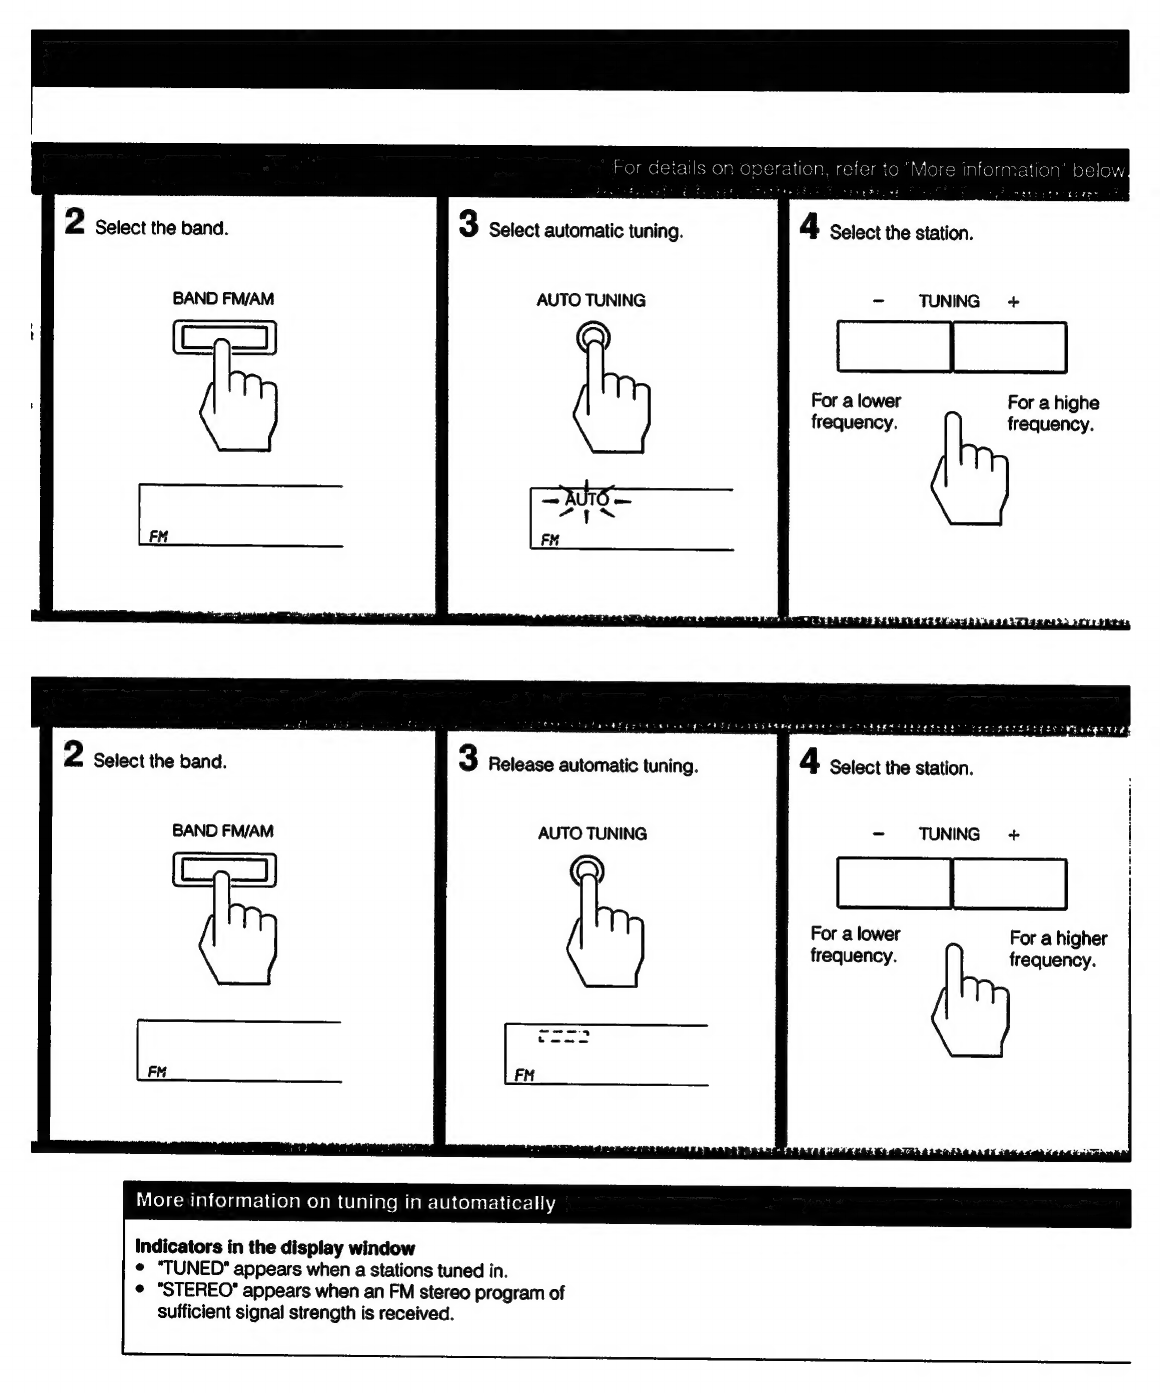
Tuning
in
aUtOMALICATlY
00...
cscrcetseteetsetscssseeesseeeeesees
6
Tuning
in
MANUAllly
........essecesetecsecrseetsresseretsrerscsenees
6
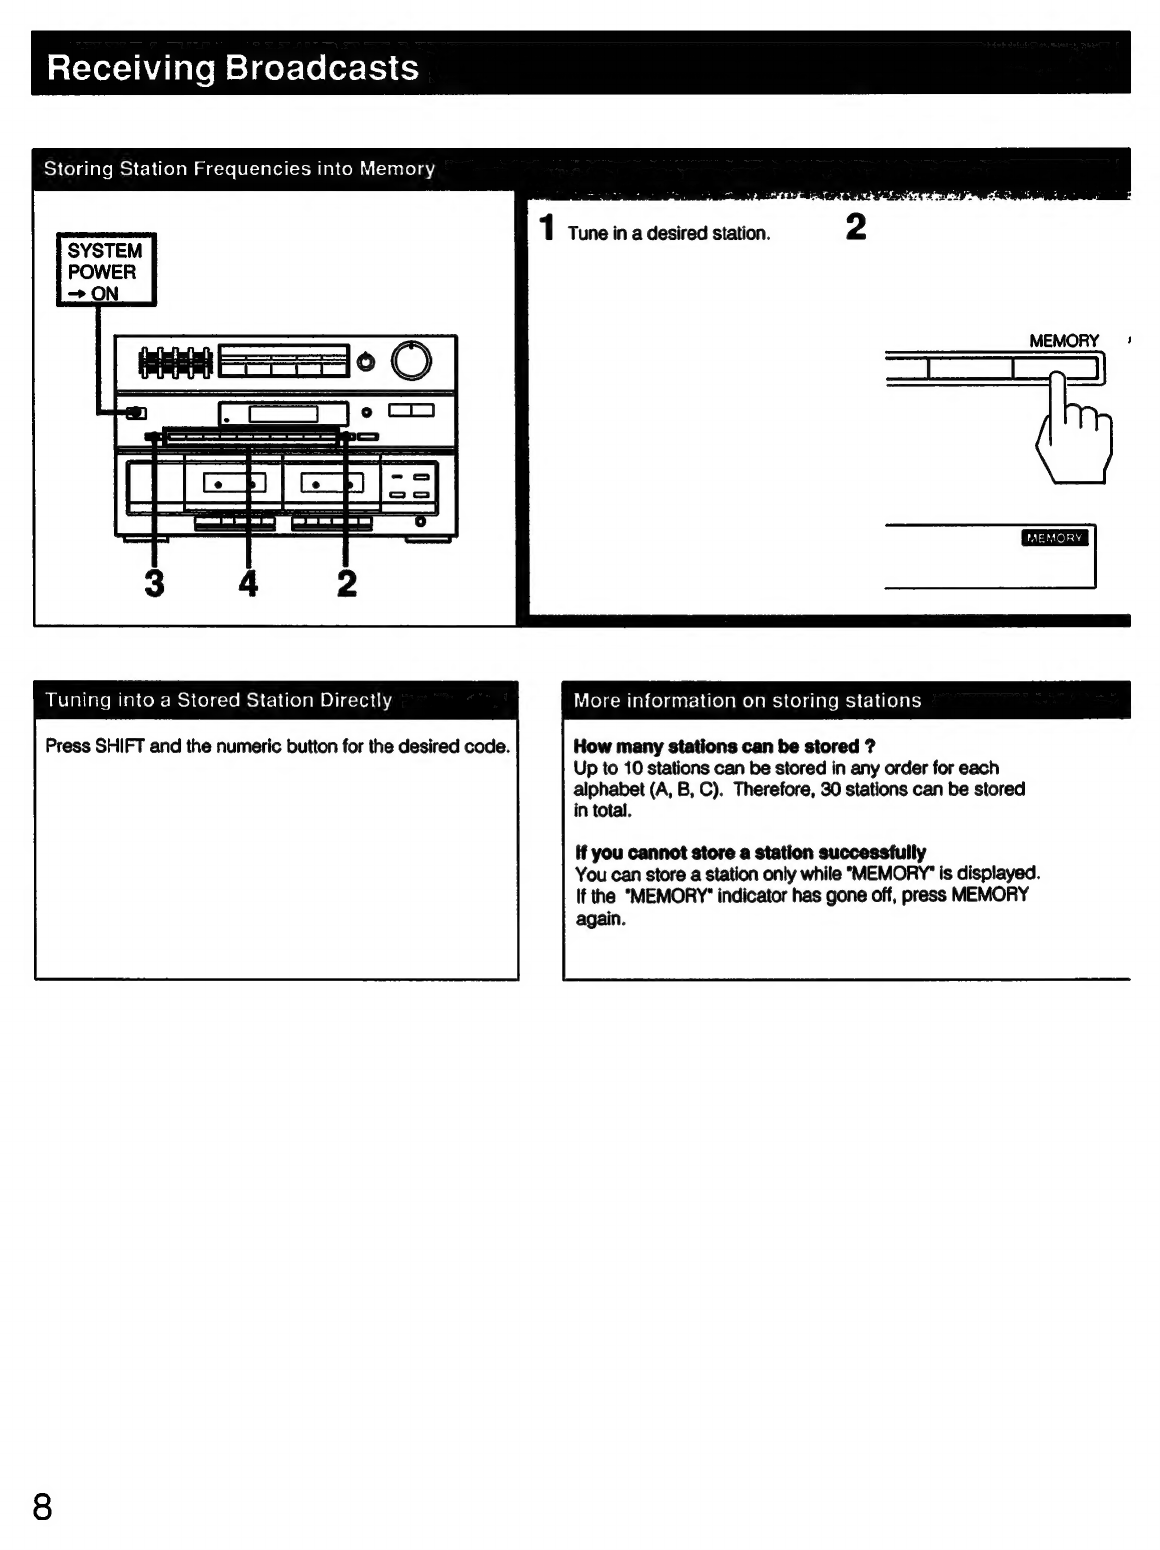
Storing
station
frequencies
into
MEMOTY
............ccseeseeees
8
Playing
Back
tape
........cscseeseteccerescessetersesesseseserasneeeees
10
RECOFING
ON
tAPC
0...
es
esesesessesssscssessescsscersscnseseseenseeees
10
DUbbING
tADES
5...
sissesrcscsecsssssesctvezeresedsecostovtessosssvssovtoecsbesee
12
PIAYING
NECOPAS
:.snicceccseseiscocesdesdiedeavedesigiuiavsdevesiniyeestea
tue
12
Remote
COMMANCET
...........secssescerstecsssercessescescecetscseenees
14
MaiMenaniCe
u..scisceiccsisssescsaveesassavestiecsesesiodeadusvasdvtvstanvesteene
14
SPOCIHICALIONS
vi
.csiisssiesssisocseossseasecuceseosesesasaseioetesdospavovesedve
16
TrOUDIESNOOLING
..........secceecssscscsscscssencerersererenecees
rear
cover


 User manual")