Sony CMT-DH7BT - Micro Hi Fi Component System User manual

CMT-DH7BT.GB.3-097-195-11(1)
Micro HI-FI
Component System
© 2007 Sony Corporation
CMT-DH7BT
3-097-195-11(1)
Operating Instructions
Owner’s Record
e model and serial numbers are located on the rear of the unit. Record these
numbers in the space provided below. Refer to them whenever you call upon your
Sony dealer regarding this product.
Model No. ______________ Serial No. ______________

CMT-DH7BT.GB.3-097-195-11(1)
2GB
CMT-
WARNING
To reduce the risk of re or
electric shock, do not expose
this apparatus to rain or
moisture.
CAUTION
e use of optical instruments with this
product will increase eye hazard.
Notice for the customers in the
U.S.A.
is symbol is intended
to alert the user to the
presence of uninsulated
“dangerous voltage”
within the product’s
enclosure that may be
of sucient magnitude
to constitute a risk
of electric shock to
persons.
is symbol is intended
to alert the user to the
presence of important
operating and
maintenance (servicing)
instructions in the
literature accompanying
the appliance.
Note to CATV system installer:
is reminder is provided to call the
CATV system installer’s attention to
Article 820-40 of the NEC that provides
guidelines for proper grounding and, in
particular, species that the cable ground
shall be connected to the grounding
system of the building, as close to the point
of cable entry as practical.
The following FCC statement applies
only to the version of this model
manufactured for sale in the U.S.A.
Other versions may not comply with
FCC technical regulations.
WARNING
is equipment has been tested and found
to comply with the limits for a Class B
digital device, pursuant to Part 15 of the
FCC Rules. ese limits are designed to
provide reasonable protection against
harmful interference in a residential
installation. is equipment generates,
uses and can radiate radio frequency
energy and, if not installed and used
in accordance with the instructions,
may cause harmful interference to
radio communications. However, there
is no guarantee that interference will
not occur in a particular installation.
If this equipment does cause harmful
interference to radio or television
reception, which can be determined
by turning the equipment o and on,
the user is encouraged to try to correct
the interference by one or more of the
following measures:
Reorient or relocate the receiving
antenna.
Increase the separation between the
equipment and receiver.
Connect the equipment into an outlet
on a circuit dierent from that to which
the receiver is connected.
Consult the dealer or an experienced
radio/TV technician for help.
CAU
T
You a
r
modi
this m
opera
t
is e
q
opera
t
anten
n
is e
q
radiat
i
unco
n
FCC r
Guide
l
is e
q
level t
h
FCC r
Guide
l
witho
u
evalu
a
it sho
u
least 2
and p
e
hands
,
U.S.
A
mod
e

CMT-DH7BT.GB.3-097-195-11(1)
3GB
d
es
,
in
o
und
e
point
p
plies
e
l
S
.A.
with
f
ound
B
the
d
to
t
e
s,
e
re
l
,
e
ct
e
h
e
tlet
w
hich
ed
CAUTION
You are cautioned that any changes or
modications not expressly approved in
this manual could void your authority to
operate this equipment.
is equipment must not be co-located or
operated in conjunction with any other
antenna or transmitter.
is equipment complies with FCC
radiation exposure limits set forth for
uncontrolled equipment and meets the
FCC radio frequency (RF) Exposure
Guidelines in Supplement C to OET65.
is equipment has a very low RF energy
level that is deemed to comply with
FCC radio frequency (RF) Exposure
Guidelines in Supplement C to OET65
without maximum permissive exposure
evaluation (MPE). But it is desirable that
it should be installed and operated with at
least 20cm and more between the radiator
and person’s body (excluding extremities:
hands, wrists, feet and legs).
U.S.A., Canadian and Australian
models only
ENERGY STAR®is a U.S.
registered mark. As an
ENERGY STAR®partner,
Sony Corporation
has determined that
this product meets
the ENERGY STAR®
guidelines for energy
eciency.
About this manual
Icons, such as , listed at the top
of each explanation indicate what kind
of media can be used with the function
being explained.
e English on-screen display is used
for illustration purposes only.
e Control Menu items may be
dierent depending on the disc.
e Setup Menu items may be dierent
depending on the area.

CMT-DH7BT.GB.3-097-195-11(1)
4GB
CMT-
Table of Contents
About this manual............................... 3
Playable discs ........................................ 5
Guide to parts and controls .............8
Getting Started
Hooking up the system....................14
Hooking up the TV.............................17
Setting the clock ................................19
Performing QUICK SETUP ...............20
Using the THEATRE SYNC
function .................................................21
Disc
Playing a disc.......................................23
Normal Play
Using play mode ................................27
Searching/selecting a disc..............31
Playing MP3/JPEG discs...................34
Adjusting the delay between the
picture and sound .............................39
A/V SYNC
Restricting playback of the disc....39
CUSTOM PARENTAL CONTROL,
PARENTAL CONTROL
Using the DVD setup menu............43
Tuner
Listening to the radio .......................48
Bluetooth
Using the Bluetooth function........52
Sound Adjustment
Adjusting the sound .........................58
Other operations
Using the timer...................................59
Changing the display .......................60
Viewing information about the
disc .........................................................61
Hooking up optional
components.........................................64
Additional Informa
tion
Troubleshooting.................................66
Precautions...........................................75
Specications ......................................76
Guide to the Control Menu
display....................................................79
Language code list ............................82
Bluetooth wireless technology.....84
Playable Bluetooth devices............85
Glossary.................................................86
Index...............................................................89
Pla
y
Type
DVD
V
VR m
o
VIDE
O
CD
DAT
A
DAT
A
is s
y
1) MP3
data.
2) JPE
G
File
S
Tech
n
3) A lo
g
Stan
d
“DV
D
trade
m

CMT-DH7BT.GB.3-097-195-11(1)
5GB
.
....52
.
....58
.
....59
.
....60
.
....61
.
....64
.
....66
.
....75
.
....76
.
....79
.
....82
.
....84
.
....85
.
....86
.
.....89
Playable discs
Type Characteristics Icon used in
this manual Logo
DVD VIDEO DVD VIDEO
DVD-R*/-RW*/+R/+RW
in DVD VIDEO format
* also in video mode
VR mode DVD-R/-RW
in VR (Video Recording) mode
VIDEO CD VIDEO CD
Super VCD*
CD-ROM*/-R*/-RW*
* in VIDEO CD or Super VCD format
CD AUDIO CD*
CD-R*/-RW*
* in AUDIO CD format
DATA CD CD-ROM/-R/-RW
in DATA CD format, containing
MP3 audio tracks1) and/or JPEG
image les2), and conforming to
ISO 96603) Level 1 or Level 2, or
Joliet (expansion format).
DATA DVD DVD-ROM/-R/-RW/+R/+RW
in DATA DVD format containing
MP3 audio tracks1) and/or JPEG
image les2), and conforming to
UDF (Universal Disk Format).
is system can also play back discs with the following disc logos:
1) MP3 (MPEG 1 Audio Layer 3) is a standard format dened by ISO/MPEG which compresses audio
data. MP3 audio tracks must be in MPEG 1 Audio Layer 3 format.
2) JPEG image les must conform to the DCF image le format. (DCF “Design rule for Camera
File System”: Image standards for digital cameras regulated by Japan Electronics and Information
Technology Industries Association (JEITA)).
3) A logical format of les and folders on CD-ROMs, dened by ISO (International Organization for
Standardization).
“DVD+RW”, “DVD-RW”, “DVD+R”, “DVD VIDEO”, and the “CD” logos are
trademarks.
Continued

CMT-DH7BT.GB.3-097-195-11(1)
6GB
CMT-
Discs that cannot be played
CD-ROMs recorded in PHOTO CD
format
DATA CDs recorded in MP3 PRO
format
Data part of CD-Extras1)
Data part of Mixed CDs2)
Super Audio CDs
DVD Audio discs
DVD-RAMs
A DVD VIDEO with a dierent region
code.
A disc that has a non-standard shape
(e.g., heart, square, star).
A disc that has the adhesive cellophane
tape or a sticker still le on it.
1) CD-Extra: is format records audio
(AUDIO CD data) on the tracks in session 1
and data on the tracks in session 2.
2) Mixed CD: is format records data on the
rst track and audio (AUDIO CD data)
on the second and subsequent tracks of a
session.
Region code of DVD VIDEOs you
can play back on this system
Your system has a region code printed
on the back of the unit and will only
play back DVD VIDEOs labeled with
identical region code.
DVD VIDEOs labeled ALL will also be
played back on this system.
If you try to play back any other region
code DVD VIDEO, the message
“Playback prohibited by area limitations.”
will appear on the TV screen. Depending
on the DVD VIDEO, no region code
indication may be labeled even though
playing the DVD VIDEO is prohibited by
area restrictions.
Note on DualDiscs
A DualDisc is a two sided disc product
which mates DVD recorded material
on one side with digital audio material
on the other side. However, since the
audio material side does not conform to
Compact Disc (CD) standard, playback
on this product is not guaranteed.
Notes on CD-R/-RW and
DVD-R/-RW/+R/+RW
In some cases, CD-Rs/-RWs and
DVD-Rs/-RWs/+Rs/+RWs cannot be
played back on this system due to the
recording quality or physical condition
of the disc, or the characteristics of
the recording device and authoring
soware. e disc will not be played
back if it has not been correctly
nalized. For more information, see
the operation instructions for the
recording device.
Note that some playback functions
may not work with some DVD+RWs/
+Rs, even if they have been correctly
nalized. In this case, view the disc by
normal playback.
A disc created in Packet Write format
cannot be played back.
Note on playback operations of
DVD VIDEOs and VIDEO CDs
Some playback operations of DVD
VIDEOs and VIDEO CDs may be
intentionally set by soware producers.
Since
t
VIDE
O
the di
s
desig
n
not b
e
instru
VIDE
O
Mus
cop
y
is p
discs
t
(CD)
s
discs
e
techn
o
recor
d
amon
g
do no
t
may
n
Not
e
i
s
Ses
s
(or
a
the
aud
i
rec
o
pla
y
If t
h
AU
D
onl
y
bac
k
e
Ses
s
is a
for
m
syst
e
the
CD

CMT-DH7BT.GB.3-097-195-11(1)
7GB
d
uct
a
l
r
ial
h
e
m
to
b
ack
o
t be
o
the
d
ition
o
f
n
g
y
ed
s
ee
n
s
R
Ws/
c
tly
s
c by
r
mat
s of
c
ers.
Since this system play back DVD
VIDEOs and VIDEO CDs according to
the disc contents the soware producers
designed, some playback features may
not be available. Also, refer to the
instructions supplied with the DVD
VIDEOs or VIDEO CDs.
Music discs encoded with
copyright protection technologies
is product is designed to play back
discs that conform to the Compact Disc
(CD) standard. Recently, various music
discs encoded with copyright protection
technologies are marketed by some
record companies. Please be aware that
among those discs, there are some that
do not conform to the CD standard and
may not be playable by this product.
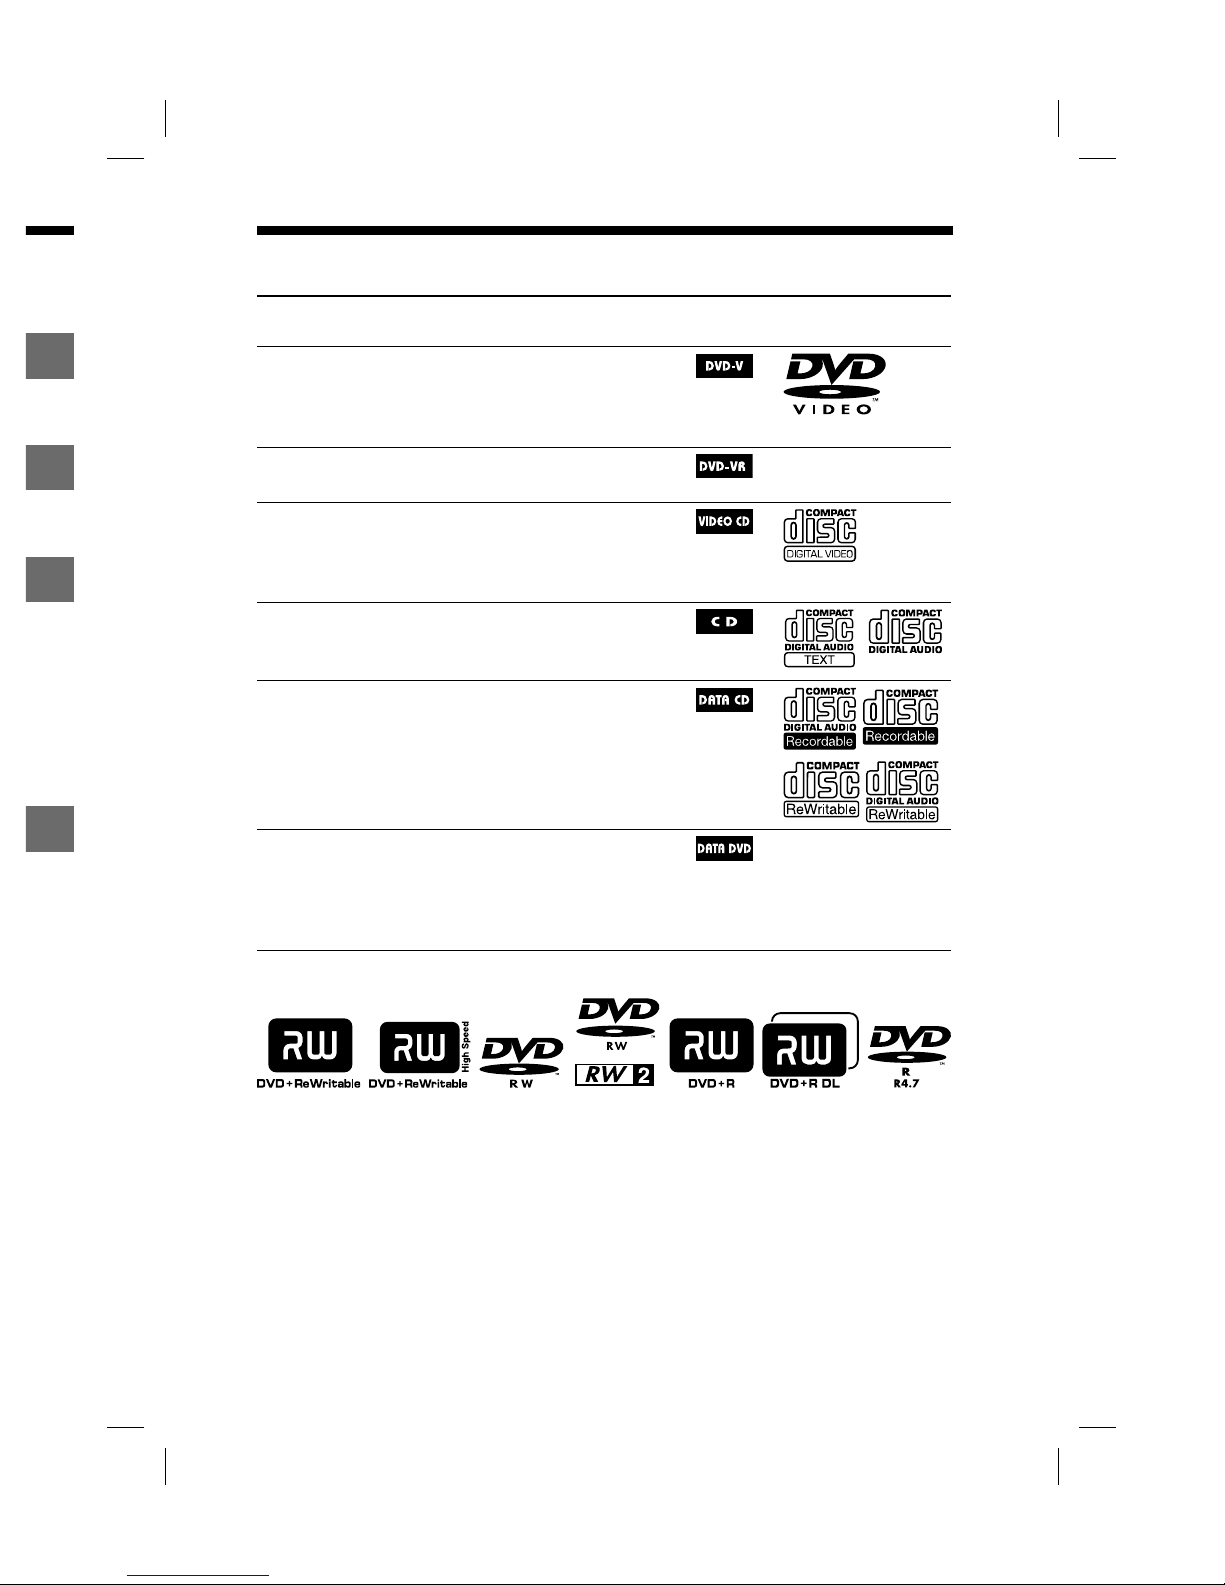
Notes on Multi Session disc
is system can play back Multi
Session discs when an MP3 audio track
(or a JPEG image le) is contained in
the rst session. Any subsequent MP3
audio tracks (or JPEG image les)
recorded in later sessions can also be
played back.
If the rst session is recorded in
AUDIO CD or VIDEO CD format,
only the rst session will be played
back.
e system will recognize a Multi
Session disc as an AUDIO CD if there
is a session recorded in AUDIO CD
format on the disc. However, the
system will only play back the disc if
the rst session is recorded in AUDIO
CD format.
Copyrights
is product incorporates copyright
protection technology that is protected
by U.S. patents and other intellectual
property rights. Use of this copyright
protection technology must be
authorized by Macrovision, and is
intended for home and other limited
viewing uses only unless otherwise
authorized by Macrovision. Reverse
engineering or disassembly is prohibited.
is system incorporates Dolby*
Digital and the DTS** Digital
Surround System.
* Manufactured under license from Dolby
Laboratories.
“Dolby” and the double-D symbol are
trademarks of Dolby Laboratories.
**Manufactured under license from Digital
eater Systems, Inc.
“DTS” and “ DTS Digital Surround” are
registered trademarks of Digital eater
Systems, Inc.
e Bluetooth word mark and logos
are owned by the Bluetooth SIG, Inc.
and any use of such marks by Sony
Corporation is under license. Other
trademarks and trade names are those
of their respective owners.
MPEG Layer-3 audio coding
technology and patents licensed from
Fraunhofer IIS and omson.
e XM name and related logos are
registered trademarks of XM Satellite
Radio Inc.
(c) 2006 SIRIUS Satellite Radio Inc.
“SIRIUS” and the SIRIUS dog logo
are registered trademarks of SIRIUS
Satellite Radio Inc.

CMT-DH7BT.GB.3-097-195-11(1)
8GB
CMT-
Guide to parts and controls
is manual mainly explains operations using the remote, but the same operations can
also be performed using the buttons on the unit having the same or similar names.
Unit (HCD-DH7BT/Compact Disc Receiver)
Front panel
Top panel
Rem
o
Unit:
79)
Rem
o
(11)
Press
t
Press
t
STA
N
Light
s

CMT-DH7BT.GB.3-097-195-11(1)
9GB
Guide to parts and controls
can
Remote control (RM-SCD30)
Unit: (on/standby) (11, 69,
79)
Remote: TV 2) (on/standby)
(11)
Press to turn on the system.
Press to turn on the TV.
STANDBY indicator (71)
Lights up when the system is turned o.
BLUETOOTH indicator (60, 80)
Lights up when the Bluetooth function
is active.
BLUETOOTH OPR (57)
Press to make a connection,
disconnection, or pairing with a
Bluetooth device.
(eject) (59, 72)
Press to eject the disc.
Disc slot (73)
+/(15, 19)
Press to select an album.
PRESET +/(XX)
Press to return the settings to the default
setting.
/(go backward/
forward) (19, 54)
Press to select a track or le.
Remote: TV CH +/2) (11)
Press to change the TV channels.
Remote: SLOW / (34)
Press to watch the slow-motion play.
Remote: TUNING +/(51)
Press to tune in the desired station.
/(rewind/fast forward)
(34, 54)
Press to nd a point in a track or le.
Continued

CMT-DH7BT.GB.3-097-195-11(1)
10GB
CMT-
AUDIO IN jack (55, 56, 68)
Connect to an optional audio
component.
PHONES jack (55)
Connect the headphones.
DISPLAY (19)
Press to display the disc information or
clock in the front panel display.
PROGRESSIVE (XX, XX)
Press to change the output video format
(INTERLACE or PROGRESSIVE
format).
DSGX (XX)
Press to select the sound eect.
IR Receptor (52)
Unit: DVD (play) (XX, XX)
Press to select the DVD function.
Press to start playback of a disc.
Unit: BLUETOOTH (XX, XX)
Press to select the Bluetooth function.
Press to start playback of the music on
the Bluetooth device (Bluetooth mobile
phone, etc.).
Unit: TUNER/BAND (XX, XX)
Press to select the TUNER function.
Press to switch among FM, AM, XM and
SIRIUS band.
Unit: AUDIO IN (XX, XX)
Press to select the AUDIO IN function.
FUNCTION +/(14, 51, 54, 63,
70, 78)
Press to select the function.
Unit: REPEAT/FM MODE (XX, XX)
Remote: FM MODE (53)
Remote: REPEAT (25)
Press to select FM reception mode
(monaural or stereo).
Press to listen to a disc, a single track or
le repeatedly.
(stop) (19, 39, 52, 54, 70, 81)
(pause) (19, 54)
Press to stop or pause playback.
Remote: 1) (play) (19, 42, 54,
56, 68, 70)
Press to start playback.
Remote: TV VOL +/1)2) (11)
Press to adjust the TV volume.
VOLUME +/1) (51, 69, 73, 79)
Press to adjust the volume.
DIMMER (20)
Press to adjust the brightness of the
display.
PICTURE NAVI (29)
Press to select the VIEWER format for
searching the chapters, titles and tracks.
Press to display the thumbnail pictures.
AUD
I
Press
t
on th
e
SUB
T
Press
t
subtit
l
ANG
L
Press
t
with
m
DVD
/
Press
t
TV sc
r
Press
t
EQ (
5
Press
t
DI
S
92)
Press
t
TV sc
r
TV2) (
Press
t
ADV
A
Press
t
playb
a
REPL
Press
t
playb
a

CMT-DH7BT.GB.3-097-195-11(1)
11GB
Guide to parts and controls
i
on.
3
,
X
X)
c
k or
1
)
4,
)
for
a
cks.
u
res.
AUDIO (29, 37, 63, 78)
Press to display the current audio signal
on the TV screen.
SUBTITLE (38)
Press to switch the language of the
subtitle (DVD VIDEO).
ANGLE (38)
Press to change the angle (DVD VIDEO
with multi-angles only).
DVD/TUNER MENU (25, 51)
Press to display the MENU items on the
TV screen.
Press to preset the radio station.
EQ (57, 78)
Press to adjust the sound level.
DISPLAY (15, 21, 23, 39, 63, 75,
92)
Press to display the Control Menu on the
TV screen.
TV2) (11)
Press to operate the TV functions.
ADVANCE (20)
Press to advance the current scene during
playback.
REPLAY (20)
Press to replay the previous scene during
playback.
STEP/ STEP (20)
Press to play one frame at a time when
playback is paused.
RETURN (26)
Press to return to the previous menu on
the TV screen.
///(14, 22, 39, 50, 58, 69,
84)
Press to select the MENU items.
ENTER (14, 19, 39, 50, 63, 69)
Press to enter the settings.
DVD TOP MENU (25)
Press to display the DVD title on the TV
screen.
CLEAR (15, 48)
Press to delete a pre-programmed track
or le.
Press to delete a SIRIUS Parental Lock
password entry.
Press to erase the pairing registration
information of the Bluetooth device.
-/--2) (11)
Press to change the entering mode for a
single digit and double digit number.
Numeric buttons1) (11, 19, 40, 53)
Press to select a track, le or satellite
channel.
Press to enter a SIRIUS Parental Lock
password.
Press to enter a Bluetooth passcode.
10/02)
Press to enter a double digit number.
Continued

CMT-DH7BT.GB.3-097-195-11(1)
12GB
CMT-
XM (XX, XX)
Press to select XM band.
SIRIUS (XX, XX)
Press to select SIRIUS band.
CATEGORY +/(XX, XX)
Press to select a satellite radio category.
CATEGORY MODE (XX, XX)
Press to select the tuning mode for XM
or SIRIUS band.
TIME/TEXT (73)
Press to change the information in the
front panel display.
TV/VIDEO2) (11)
Press to switch the input sources.
SLEEP (53, 69)
Press to set the Sleep Timer.
TIMER MENU (14, 69)
Press to set the clock and the timers.
THEATRE SYNC (XX, XX)
Press to register the input sources and
functions.
Press to activate the THEATRE SYNC
function.
1) e numeric button 5, TV VOL +,
VOLUME + and buttons have a tactile
dot. Use the tactile dot as a reference when
operating the system.
2) is button is used to operate a Sony TV.
For details, see “Operating a Sony TV” on
page 11.
Displ
a
In
d
In
d
Li
g
Li
g
(x
x
Li
g
(6
2
In
d
Li
g
Li
g
se
l
Li
g
is
s

CMT-DH7BT.GB.3-097-195-11(1)
13GB
Guide to parts and controls
Display
Indicates the selected function. (21)
Indicates the selected play mode. (16)
Lights up when timer is set. (56)
Lights up when a station is tuned in.
(xx)
Lights up when DSGX is turned on.
(62)
Indicates the Playback status. (xx)
Lights up when DTS is selected. (63)
Lights up when Dolby Digital is
selected. (xx)
Lights up when CATEGORY MODE
is selected. (xx)
Lights up when “P AUTO” or
“P VIDEO” is selected. (xx)
Lights up when playing VIDEO CD
with PBC. (xx)
Lights up when an MP3 disc is
loaded. (xx)
Indicates the track/le information.
(xx)
Lights up when chapter or title
number is displayed. (xx)
Indicates the type of disc being played
back. (xx)
Displays the text information. (xx)

CMT-DH7BT.GB.3-097-195-11(1)
14GB
CMT-
Getting Started
Hooking up the system
FM/AM antennas
Find a location and an orientation that
provide good reception, and then set up
the antenna.
Keep the antennas away from the speaker
cords and the power cord to avoid
picking up noise.
SiriusConnect Home tuner (not supplied)
Home indoor/outdoor antenna (not supplied)*
AC power adaptor (not supplied)*
DIN cable (not supplied)*
XM Mini-Tuner and Home Dock (not supplied)
FM lead antenna (Extend it horizontally.)
Connect white side.
AM loop antenna
*Supplied with SiriusConnect Home tuner
SI
Conn
e
Whe
n
tuner
w
the A
C
tuner
t
Keep
t
anten
n
from
t
cord t
o
X
M
Conn
e
Dock.
Satelli
t
S
p
P
o
Conn
e
If the
s
not t
the pl
u
an ad
a
Ins
e
bat
t
Note
If you
d
of tim
e
damag
e
Wall socket
Wall socket
Right speaker
Left speaker

CMT-DH7BT.GB.3-097-195-11(1)
15GB
Getting Started
h
at
e
t up
p
eaker
SIRIUS antenna
Connect the SiriusConnect Home tuner.
When you use the SiriusConnect Home
tuner with this system, be sure to connect
the AC power adaptor supplied with the
tuner to a wall socket.
Keep the SiriusConnect Home tuner,
antenna, and AC power adaptor away
from the speaker cords and the power
cord to avoid picking up noise.
XM antenna
Connect the XM Mini-Tuner and Home
Dock. For details, see “To receive the XM
Satellite Radio” (page xx)
Speakers
Power
Connect the power cord to a wall socket.
If the supplied adaptor on the plug does
not t your wall socket, detach it from
the plug (only for models equipped with
an adaptor).
Inserting two R6 (size AA)
batteries into the remote
Note
If you do not use the remote for a long period
of time, remove the batteries to avoid possible
damage from battery leakage and corrosion.
Tip
With normal use, the batteries should last for
about six months. When the remote no longer
operates the system, replace both batteries with
new ones.
Attaching the speaker pads
Attach the supplied speaker pads at each
corner on the bottom of the speakers
to stabilize the speakers and to prevent
them from slipping.
Front speaker of SS-CDH3
When carrying this system
Perform the following procedure to
protect the DVD mechanism.
Use buttons on the unit for the
operation.
1
Press /to turn on the
system, then press DVD .
2
Make sure that no disc is loaded
in the system and check that“No
Disc” appears.
3
Press /to turn o the
system and check that“STANDBY”
disappears.
4
Unplug the power cord.
Continued

CMT-DH7BT.GB.3-097-195-11(1)
16GB
CMT-
Receiving the XM Satellite
Radio
ABOUT XM SATELLITE RADIO
XM oers over 170 digital radio channels: the
most commercial-free music channels, premier
news, sports, talk, and trac and weather in
21 metro markets. XM’s on-air hosts broadcast
live from studios in Washington, D.C., New
York City and Nashville.
For more information or to subscribe in the
US, visit xmradio.com or call Listener Care at
1-800-XMRADIO (1-800-967-2346).
XM READY® LEGAL
XM monthly service subscription sold
separately. XM Mini-Tuner and Home Dock
required (each sold separately) to receive
XM service. Installation costs and other fees
and taxes, including a one-time activation
fee may apply. Subscription fee is consumer
only. All fees and programming subject to
change. Channels with frequent explicit
language are indicated with an XL. Channel
blocking is available for XM radio receivers by
calling 1-800-XMRADIO (1-800-967-2346).
For a full listing of the XM commercial-free
channels and advertising supported channels,
visit lineup.xmradio.com. Subscriptions
subject to Customer Agreement available at
xmradio.com. XM service only available in
the 48 contiguous United States. XM Satellite
Radio and XM Ready are trademarks of XM
Satellite Radio Inc. (C)2006 XM Satellite Radio
Inc. All rights reserved.
XM READY® SUBSCRIPTIONS
Once you have installed the XM Mini-Tuner
Dock, inserted the XM Mini-Tuner, connected
the XM Dock to your XM Ready®home audio
system, and installed the antenna, you are
ready to subscribe and begin receiving XM
programming.
ere are three places to nd your
eight character XM Radio ID: on the
XM Mini-Tuner, on the XM Mini-Tuner
package, and on XM Channel 0. Record the
Radio ID in the following eight squares for
reference.
Note: e XM Radio ID does not use the
letters “I”, “O”, “S” or “F”. Activate your XM
Satellite Radio service in the U.S. online
at http://activate.xmradio.com or call
1-800-XM-RADIO (1-800-967-2346). You
will need a major credit card. XM will send
a signal from the satellites to activate the full
channel lineup. Activation normally takes 10
to 15 minutes, but during peak busy periods
you may need to keep your XM Ready home
audio system on for up to an hour. When you
can access the full channel lineup on your XM
Ready home audio system you are done.
Rec
e
Rad
SIRIU
On R
a
With e
v
music
t
talk an
d
always
e
o
musi
musi
hear
d
Live
p
bigg
e
wee
k
and
o
a we
e
over
excl
u
Ente
r
be fo
of H
o
Je
F
Max
i
Espe
c
her t
e
Cos
m
Radi
o
Wor
l
Fox,
weat
h
Fam
i
with
Lau
g

CMT-DH7BT.GB.3-097-195-11(1)
17GB
Getting Started
t
he
fo
r
e
X
M
o
u
n
d
full
e
s 10
o
ds
o
me
n
you
u
r XM
Receiving the SIRIUS Satellite
Radio
SIRIUS Satellite Radio: The Best Radio
On Radio
With everything from 100% commercial-free
music to in-depth sports coverage, plus news,
talk and the hottest entertainment you can
always hear exactly what you want.
e only home of 100% commercial-free
music. Whether you’re discovering new
music, or rediscovering songs you haven’t
heard in years you’ll hear it all on SIRIUS.
Live play-by-play and expert talk from the
biggest leagues. NFL, every game, every
week, everywhere. Plus NFL Radio 24/7 news
and opinions from top NFL pros, 40 games
a week from NBA and College Sports from
over 150 schools. Plus NASCAR moving
exclusively to SIRIUS in January 2007.
Entertainment, Comedy and Talk that can’t
be found anywhere else. From 2 channels
of Howard Stern, Blue Collar Comedy with
Je Foxworthy and Larry the Cable Guy to
Maxim and Playboy Radio.
Especially for Women. Martha Stewart and
her team will inspire you 24/7 along with
Cosmo Radio, Deepak Chopra Wellness
Radio and other exclusive talk show hosts.
World Class News, trac and weather.
Fox, CNN, NPR and BBC. Local trac and
weather for the top 20 cities.
Family & Kids: G-rated fun for everyone
with Radio Disney, Discovery Kids Channel,
Laugh Comedy and more.
Hooking up the TV
Connect the video input jack of your
TV to the VIDEO OUT jack with the
supplied video cord.
When connecting a video deck
Connect the video deck to the TV using
a video cord (not supplied). However, do
not connect this unit to the TV through
the video deck. Otherwise, you may
experience video leakage when watching
video images from this system. Connect
this unit directly to the TV as shown
below.
TV
UnitVideo deck
Do not connect
directly
Continued

CMT-DH7BT.GB.3-097-195-11(1)
18GB
CMT-
Tip
For higher quality video images:
Use the optional component video cords to
connect the COMPONENT VIDEO input
jacks on your TV to the COMPONENT
VIDEO OUT jacks of this unit. If your
TV is compatible with progressive format
le signals, use this connection and press
PROGRESSIVE on the unit repeatedly until
“P AUTO” or “P VIDEO” appears in the
display (page 16).
You can use an optional S Video cord to
connect the S VIDEO input jack on your
TV to the S VIDEO OUT jack of this unit.
Changing the format of the
video signal output from
COMPONENT VIDEO OUT jacks
Progressive is a method for displaying
TV images that reduces ickering and
sharpens the image. To use this method,
you need to connect to a TV that can
accept progressive signals.
You can output video signals from
COMPONENT VIDEO OUT jacks in
INTERLACE or PROGRESSIVE format.
1
Press FUNCTION +/
repeatedly to select “DVD” (or
press DVD on the unit).
2
Press PROGRESSIVE on the
unit repeatedly.
Select “P AUTO” or “P VIDEO” if
your TV accepts progressive signals
and the TV is connected to the
COMPONENT VIDEO OUT jacks.
Otherwise, select “INTERLACE”.
P AUTO (PROGRESSIVE AUTO):
e system automatically detects
the soware type and selects the
appropriate conversion method.
P VIDEO (PROGRESSIVE VIDEO):
e system xes the conversion
method to PROGRESSIVE VIDEO
for video-based soware.
Select this if the image is not clear
when you select “P AUTO”.
About DVD VIDEO software types and
the conversion method
e DVD VIDEO soware can be
divided into 2 types:
Film-based soware
Film-based soware is derived from
lm and displays the images at 24
frames per second.
Video-based soware
Video-based soware is derived from
TV, such as dramas and sitcoms and
displays images at 30 frames or 60
elds per second.
Some DVD VIDEO contains both types
of soware. In order for these images to
appear in your TV naturally when the
video output is in progressive format, the
progressive signals need to be converted
to match your DVD VIDEO soware.
Note
ere would be no image on your TV or the
image is not clear if your setting does not
match your TV or connection.
Wh
e
Turn
o
input
s
from
t
Oper
a
You c
a
opera
t
been
m
To
Turn
t
or o
Switc
h
input
s
betwe
e
and o
t
sourc
e
Select
chan
n
Adjus
t
volu
m
speak
e
* For
d
and
p
(For
pres
s

CMT-DH7BT.GB.3-097-195-11(1)
19GB
Getting Started
O
):
EO
a
r
a
nd
o
m
4
r
om
a
nd
0
y
pes
e
s to
h
e
a
t, the
e
rted
r
e.
the
t
When using a TV
Turn on the TV and select the video
input so that you can view the pictures
from this system.
Operating a Sony TV
You can use the following buttons to
operate a Sony TV. ese buttons have
been marked in orange.
To Hold down TV
and press
Turn the TV on
or o
TV /
Switch the TV’s
input source
between the TV
and other input
sources
TV/VIDEO
Select the TV
channels
TV CH +/
or numeric
buttons *
Adjust the
volume of the TV
speaker(s)
TV VOL +/
* For double digit number, hold down TV
and press -/-- , then press the number.
(For example, hold down TV ,
press -/-- , then 2 and 5 for entering 25.)
Setting the clock
Use buttons on the remote to set the
clock.
1
Press /to turn on the
system.
2
Press TIMER MENU .
e hour indication ashes in the
display.
If “PLAY SET?” ashes in the
display, press or repeatedly
to select “CLOCK SET?”, then press
ENTER .
3
Press or repeatedly to set
the hour.
4
Press ENTER .
e minute indication ashes in the
display.
5
Press or repeatedly to set
the minute.
6
Press ENTER .
e clock starts functioning.
Note
e clock settings are canceled when you
disconnect the power cord or if a power failure
occurs.
To display the clock when the system
is o
Press DISPLAY .
e clock is displayed for about
8 seconds.
Continued

CMT-DH7BT.GB.3-097-195-11(1)
20GB
CMT-
Performing QUICK
SETUP
Before using the system, you can make
the minimum basic adjustments in
QUICK SETUP. If you do not want
to perform QUICK SETUP, press
CLEAR in step 3. e guide message
will disappear from the TV screen.
1
Turn on your TV and select the
video input.
2
Press /to turn on the
system.
Note
Make sure there is no disc in the unit.
Otherwise, the guide message does not
appear. To perform QUICK SETUP, press
on the unit to remove the disc.
3
Press FUNCTION +/
repeatedly to select “DVD” (or
press DVD on the unit).
e guide message appears at the
bottom of the TV screen.
4
Press ENTER without
inserting a disc.
e “LANGUAGE SETUP” display
appears on the TV screen.
5
Press or repeatedly to
select a language, then press
ENTER .
Tips
e selected language is for “OSD”,
“MENU” and “SUBTITLE ”.
e selectable language is dierent
depending on the area.
e setting is selected and the
“SCREEN SETUP” display appears on
the TV screen.
6
Press or repeatedly to
select the setting that matches
your TV type.
If you have a 4:3 standard TV:
Select 4:3 LETTER BOX or 4:3 PAN
SCAN (page 45)
If you have a wide-screen TV or a
4:3 standard TV with wide-screen
mode:
Select 16:9 (page 45)
7
Press ENTER .
e setting is selected and the
“QUICK SETUP is complete.” display
appears on the TV screen.
e system is ready for playback.
If you want to change each setting
individually, see “Using the DVD
setup menu” on page 43.
To quit QUICK SETUP
Press DISPLAY .
To re
c
1
Pre
is s
t
Th
e
scr
e
2
Pre
sel
e
EN
T
3
Pre
“Q
U
Note
e gu
i
the T
V
for the
(see pa
Other manuals for CMT-DH7BT - Micro Hi Fi Component System
3
Table of contents
Other Sony Stereo System manuals

Sony
Sony SRS-X33 User guide

Sony
Sony MEX-BT4100E User manual

Sony
Sony MHC-RV990D User manual

Sony
Sony DX10 User manual

Sony
Sony HCD-XB8 User manual

Sony
Sony HCD-H1000 User manual

Sony
Sony CHC-CL5MD User manual

Sony
Sony Personal audio system User manual

Sony
Sony FST-ZUX999 User manual

Sony
Sony CMT-SBT100 User manual

Sony
Sony HCD-H11 User manual

Sony
Sony HCD-GN880 User manual

Sony
Sony MHC-RXD3 - 3 Ch Mini System User manual

Sony
Sony ZS-S10CP User manual

Sony
Sony HCD-RXD6AV User manual

Sony
Sony CMT-VP1 User manual

Sony
Sony MEX-GS820BT User manual

Sony
Sony MHC-V6D User manual

Sony
Sony MHC-GT5D User manual

Sony
Sony CMTBX5BT - CMT Micro System User manual