Precautions
Discs that
this
unit CAN play
•Audio
CD
•CD-RlCD-RW (CD-DA'IMP3 files)
..
CD-DA is the abbreviation for Compacl Disc Digital Audio.
It
is a
recording standard used for Audio
CDs
Discs that
this
unit
CANNOT play
•
CD-RlCD-RW
other
than those recorded
in
music
CD
format
or
MP3 format conforming to 1509660 Level
l/Level 2
or
Joliet
•CD-RlCD-RW
of
poor recording quality, CD-R/CD-RW
that has scratches
or
is dirty,
or
CD-RlCD-RW recorded
with an incompatible recording device
•CD-R/CD-RW which
was
finalized incorrectly
Notes on
discs
•Before playing, clean the CD with acleaning cloth.
Wipe the CD from the center OUl. If there is ascratch,
dirt
or
fingerprints on the
CD,
it
may
cause
tracking
error.
•Do not use solvents such as benzine, thinner,
commercially available cleaners
or
anti-static spray
intended for vinyl LPs.
•
Do
not
expose
the
CD
to direct sunlight
or
heat sources
such as hot
air
ducts, nor leave it
in
acar parked
in
direct sunlight as there can be aconsiderable rise in
temperature inside the car.
•Do not stick paper
or
sticker on the
CD,
nor
scratch the
surface
of
the CD.
•After playing, store the
CD
in its case.
On safety
•As the laser
beam
used
in
the
CD
player section is
harmful to the eyes,
do
not attempt to disassemble the
casing. Refer servicing to qualified personnel only.
•Should any solid object
or
liquid fall into the unit,
unplug the unit, and have it checked by qualificd
personnel before operating
it
any further.
•Discs with non-standard shapes (e.g., heart, square,
star) cannot be played on this unit. Attempting to
do
so
may
damage
the unit. Do not use such discs.
•
When
inserting a
CD,
make sure to close the
CD
compartment until
it
clicks.
If
not, the
CD
might
pop
oul.
On
power
sources
•For AC operation, use the supplied AC power adaptor;
do
not use any
other
type.
•The unit is not disconnected from the AC power source
(mains) as long as it is connected to the wall outlet,
even if the unit itself has been turned off.
•Unplug the unit from the wall outlet when it is not be
used for an extended period
of
time.
•When the batteries are not to be used, remove them to
avoid
damage
that can be
caused
by battery leakage
or
corrosion.
•The nameplate indicating operating voltage, etc. is
located at the bottom.
On
placement
•Do not leave the unit in alocation
near
heat sources,
in
aplace subject to direct sunlight, excessive dust
or
mechanical shock
or
in a
car
subject to the direct rays
of
the sun.
•Do not place the unit
on
an inclined
or
unstable place.
•Since astrong magnet is used for the speakers, keep
personal credit cards using magnetic coding
or
spring-
wound watches away from the unit to prevent possible
damage from the magnet.
•Do not place any objects on top
of
the handle
on
this
unit.
Do
not
immerse
in
water
This product is not meant to be immersed in water
or
corne
in
continuous conlact with water.
•Before opening
or
shutting the
CD
compartment
or
battery
compartment
lid, be sure to wipe
off
water,
dust
or
sand on the outside
of
the unit.
•Water
in
the headphones
jacklDC
IN
9V
jack!
AUDIO IN
jack
may
cause rusting. Cover the
jacks
with the attached rubber
cap
when the
jacks
are not
used.
•
If
the unit is splashed with salt water, wipe clean with a
damp cloth,' then
dry
with asoft dry cloth. Do not wash
under running waleI';
do
not use soap
or
detergent;
do
not
dry
with an electric hair dryer.
•The supplied AC power adaptor is not water resistant.
To prevent
shock
hazard, avoid using the unit
near
water during
AC
operation.
•
The
storage
space
on
the back
of
this unit is not
waterproof.
Do
not use
it
to store anything that can be
damaged by water.
On
operation
•
If
the unit is brought directly from a
cold
to awarm
location,
or
is placed in avery
damp
room, moisture
may condense
011
the lens inside the
CD
player section.
Should this occur, the unit will not operate properly.
In
this case, remove the
CD
and wait about an hour for
the moisture
10
evaporate.
Cleaning the cabinet
•Clean the cabinet, panel
and
controls with asoft cloth
slightly moistened with amild detergent solution. Do
not use any type
of
abrasive pad, scouring powder,
or
solvent, such as alcohol
or
benzine.
If
you have any questions
or
problems concerning your unit, ple.1se
consult your nearest Sony dealcr
Troubleshooting
General
The
power
is
not
on
.
•Connect the AC power adaptor to the wall outlet
securely.
•Make sure the batteries are inserted correctly.
•Replace all the batteries with new
ones
if
they are
weak.
There
is
no
audio.
•Unplug the headphones when listening through
speakers.
Noise
is
heard.
•
Someone
is using aportable telephone
or
other
equipment that emits radio waves
near
the unit.
-..
Move the portable telephone, etc., away from the unit.
CD/MP3
player
The
CD
does
not
play
or
"NO DISC" is
displayed even when a
CD
is
in
place_
•Place the
CD
with the label surface up.
•Clean the CD.
•Take
outlhe
CD
and leave Ihe
CD
compartment open
for about an hour 10 dry moisture condensation.
•
The
CD-RlCD-RW
is blank.
•
There
is aproblem with lhe quality
of
the CD-RI
CD-RW, recording device
or
application software.
•Replace all the batteries with new
ones
if
they are
weak.
The
sound
drops
out.
•Reduce the volume.
•Clean the CD,
or
replace
it
if the
CD
is badly
damaged.
•Place the unit
in
alocation free from vibration.
•Clean the lens with acommercially available blower.
•The sound may drop out
or
noise may be heard when
using poor quality
CD-RlCD-RW
or
if
there is a
problem with the recording device
or
applicalion
software.
Starting playback takes more time than
usual.
•The following discs lake alonger time to start
playback.
- a disc recorded with acomplic,tted tree structure.
- a disc that has not been finalized (a disc to which
data can be added).
-a
disc that has many folders
or
non-MP3
files.
Radio
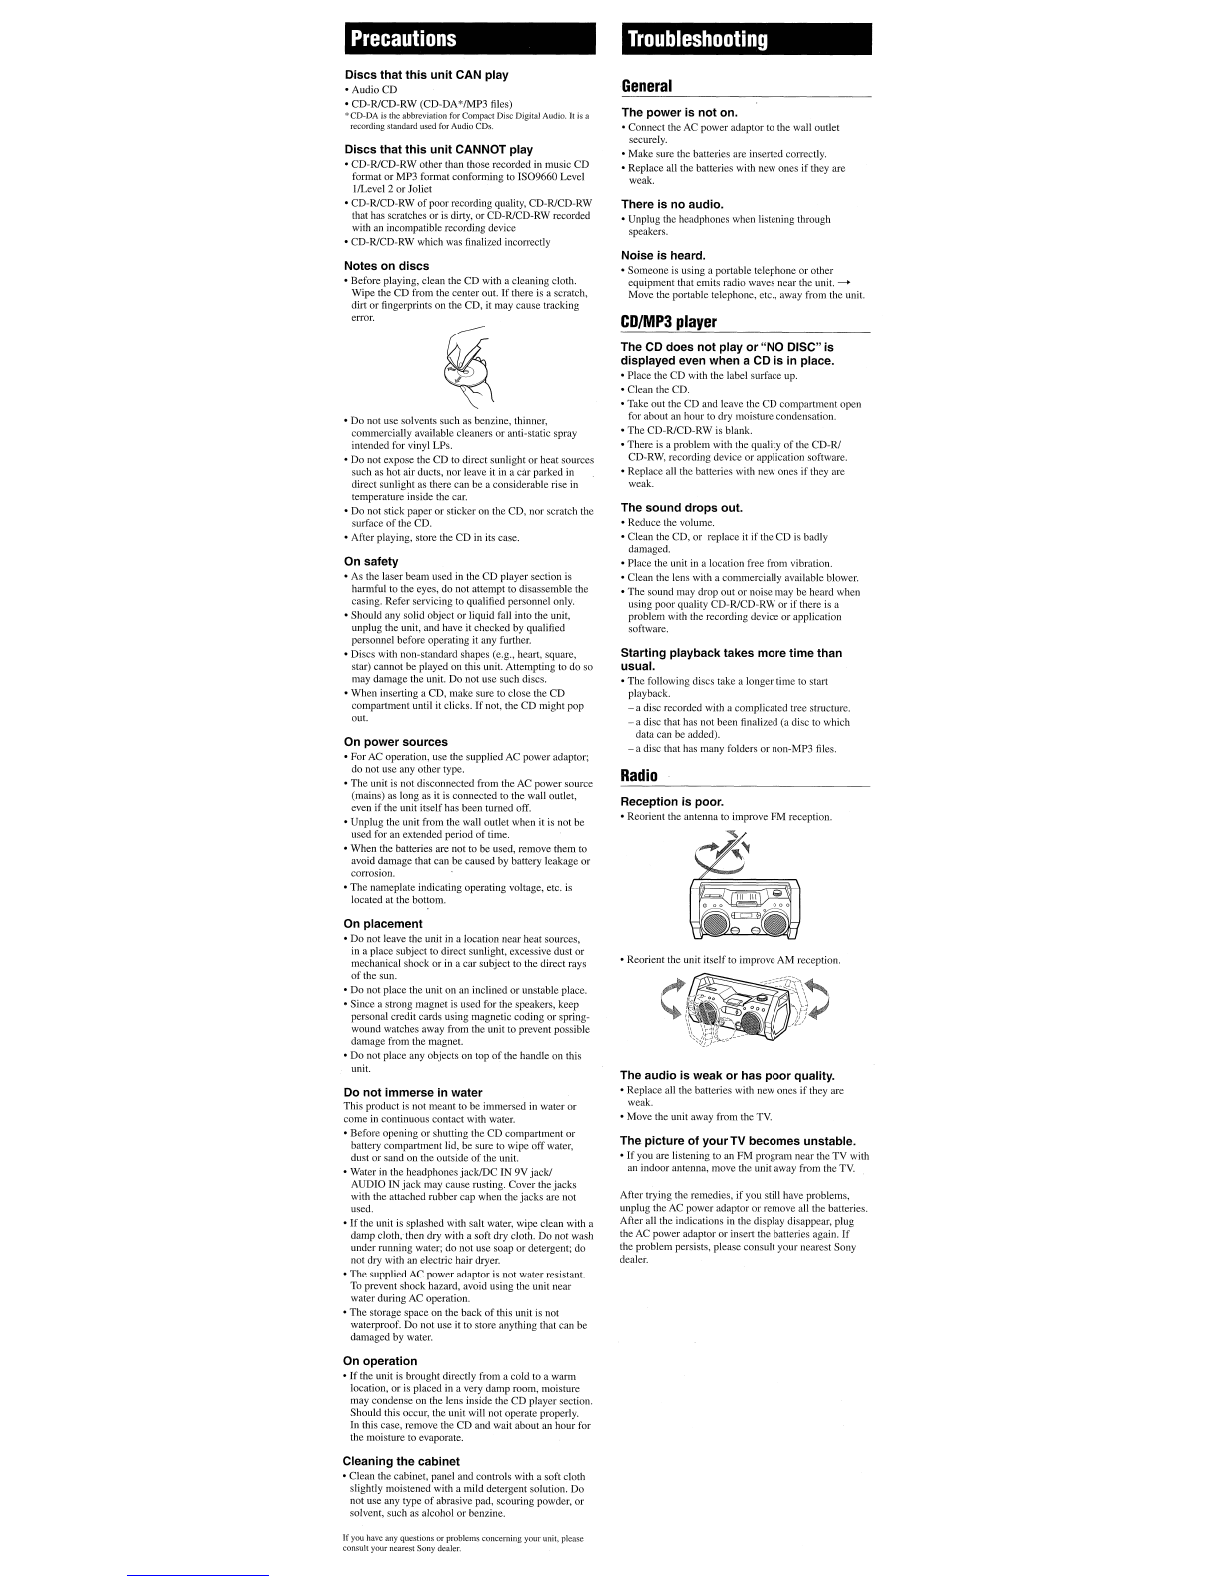
Reception
is
poor.
•Reorient the antenna to improve FM reception.
•Reorient the unit itselfto improve AM reception.
The
audio
is
weak
or
has
poor
quality.
•Replace all the batteries with new
ones
if they are
weak.
•Move the unit away from the
TV.
The picture
of
yourTV
becomes unstable_
•
If
you are listening to an FM
program
near the
TV
with
an indoor antenna, move the unit away from the
TV.
After trying the remedies, if you still have problems,
unplug the AC power adaptor
or
remove all the batteries.
After all the indications
in
the display disappear,
plug
the AC power adaptor
or
inserlthe
batteries again.
If
the problem persists, please consult
your
nearest Sony
dealer.