3-043-031-41 (1)
Operating Instructions
Mode d’emploi
Sony Corporation 2000 Printed in Taiwan R.O.C
XS-LE30
Box Subwoofer
System
Specifications
Speaker 30 cm (11 7/8in), cone
type woofer
Maximum input power 500 W
Rated input power 150 W
Impedance 4 ohms
Sensitivity 85 dB/W/m (at 50 Hz)
Frequency response 25 – 500 Hz
Mass Approx. 11 kg (24 lb.
4 oz.)
Supplied accessories Parts for installation and
connections (1 set)
Design and specifications are subject to change
without notice.
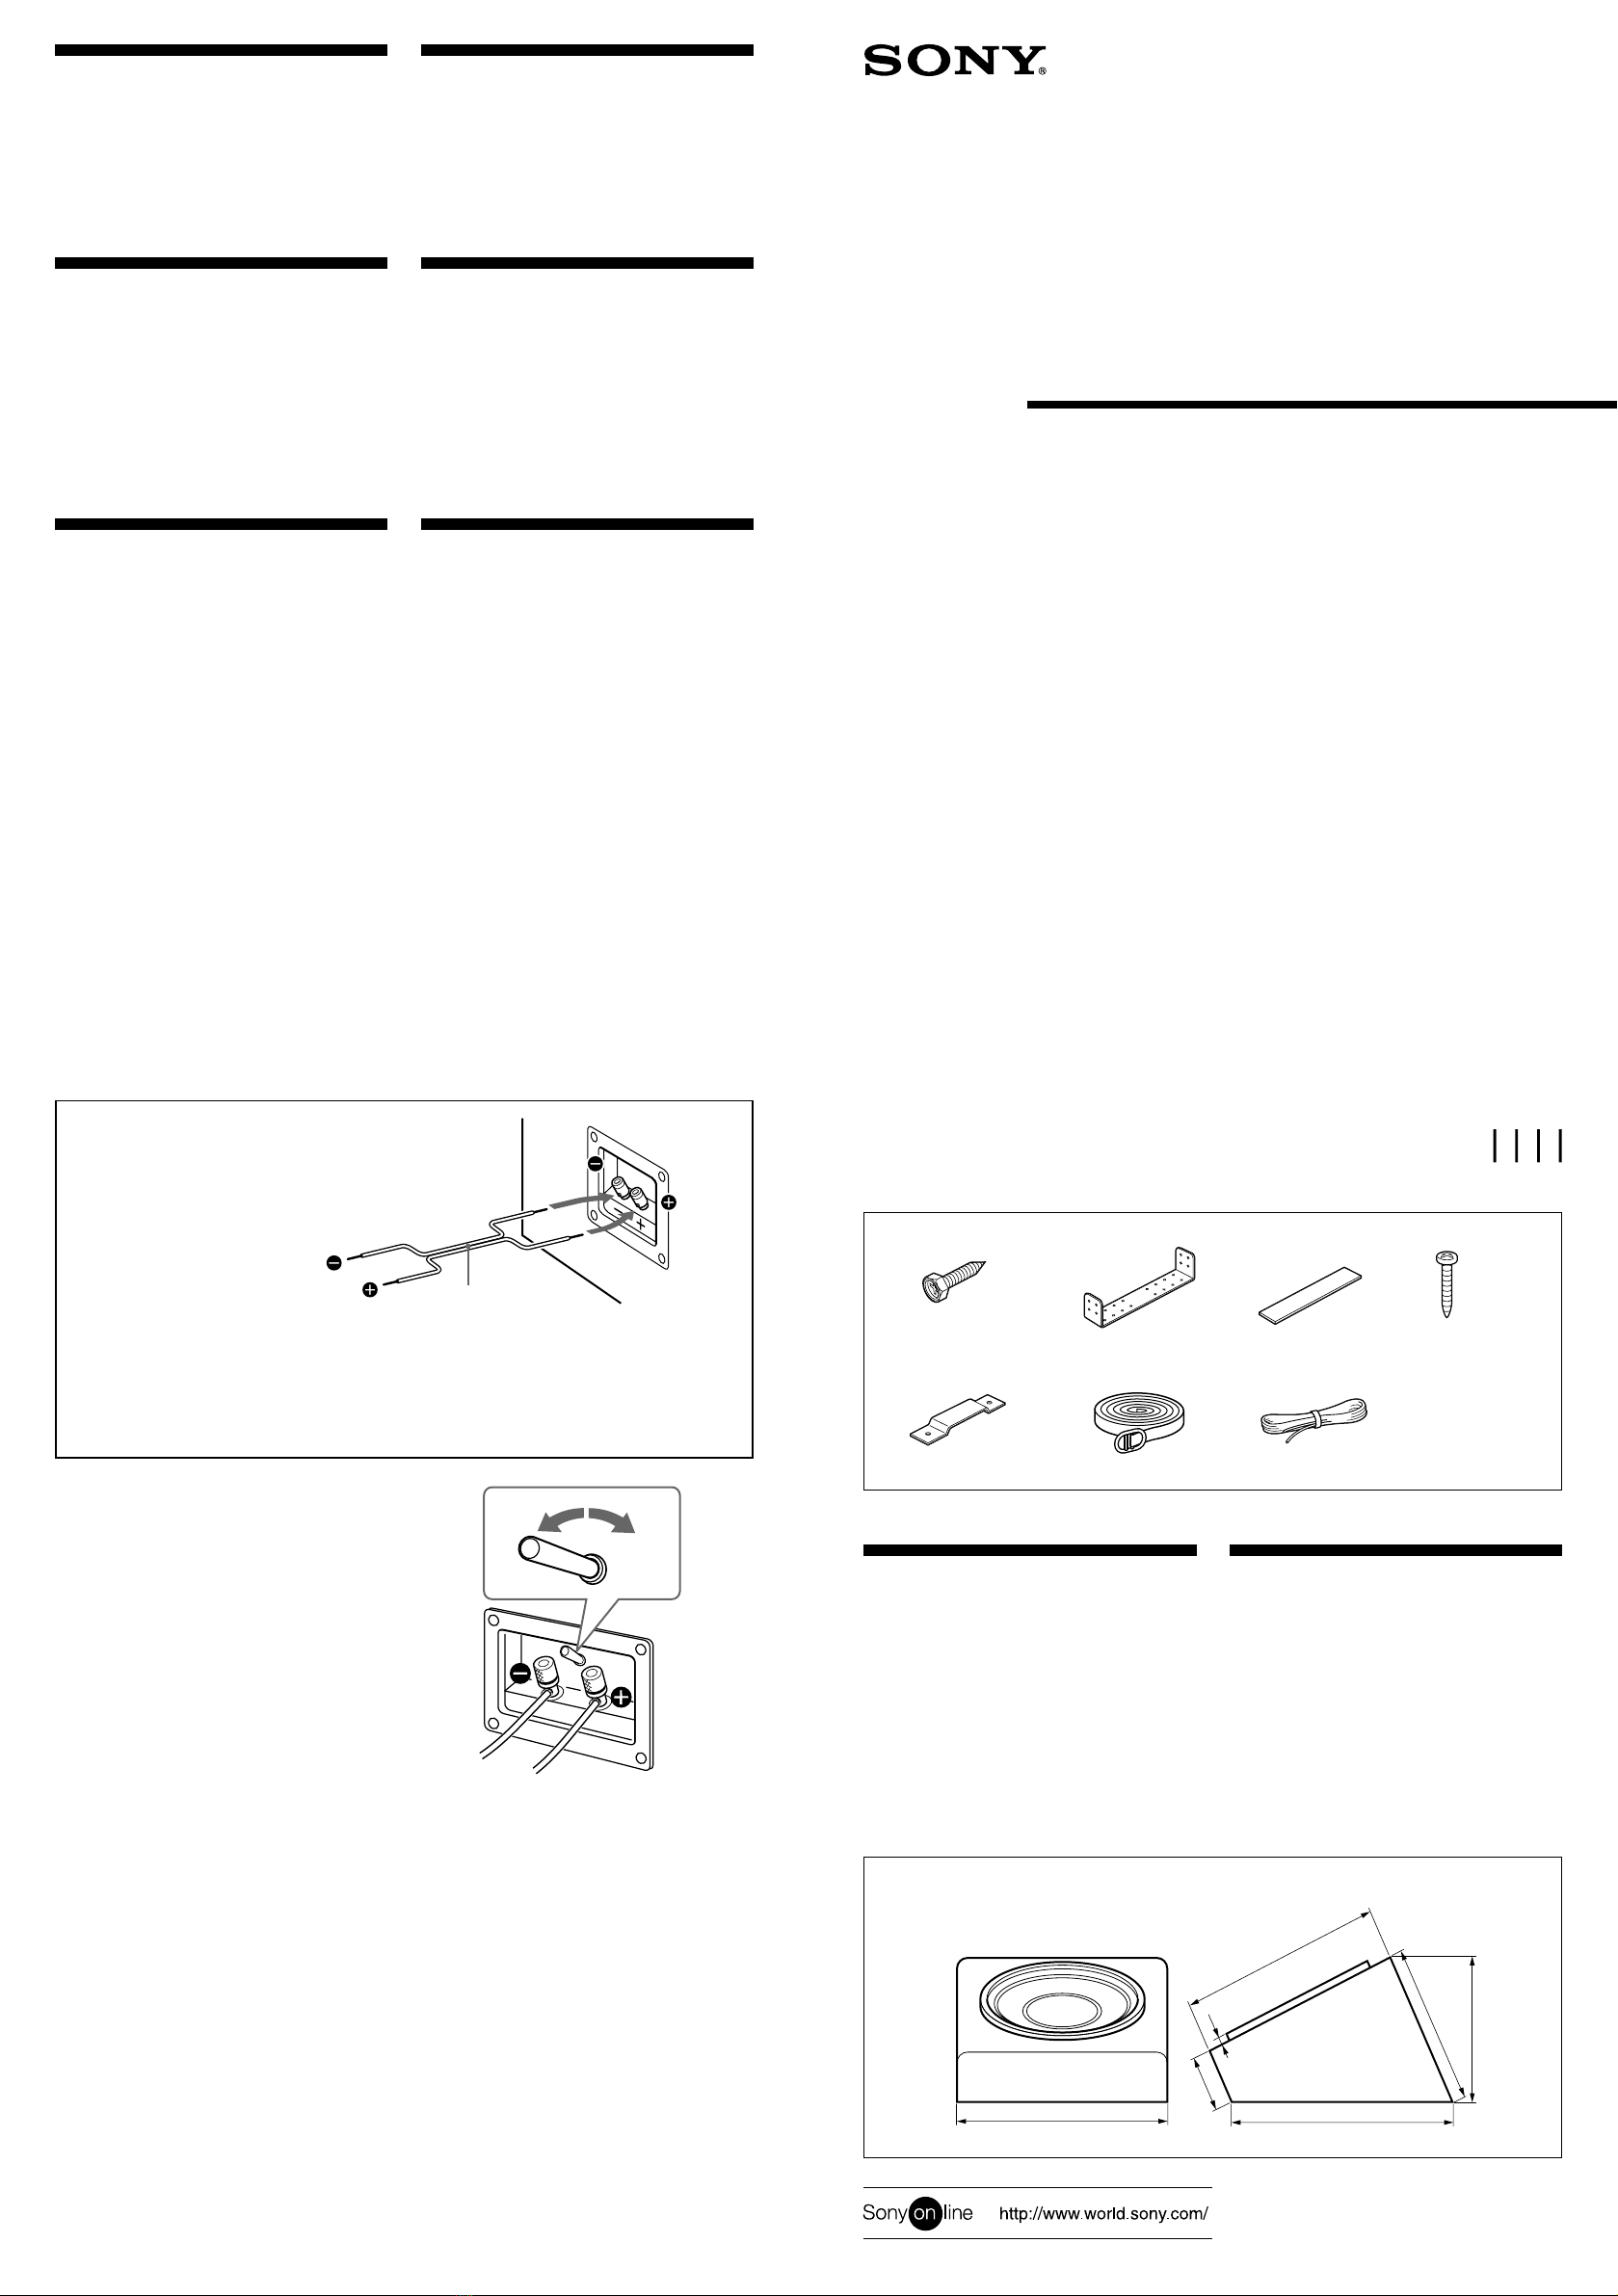
Parts list
567
3
×2
1
35 ×20
×16
2
×2
2 m2 m×4
Dimensions
Dimensions
425 (16 3/4)
4
34 ×20
×8
385 (15 1/4)
255 (10
1
/8)
387 (15
1
/4)
280 (11 1/8)
95 (3
3
/
4
)
11
(7/16)
Unit: mm (in.)
Unité: mm (po.)
Precaution
•This product is designed to be installed in
the trunk or cargo space of a car. Do not
install this product in a place where it could
distract you or another driver from the
road. See installation section.
•If your car is parked in direct sunlight and
there is a considerable rise in temperature
inside the car, allow the unit to cool down
before use.
•Do not use the unit on a weak battery as its
optimum performance depends on a good
power supply.
•For safety reasons, keep your car audio
volume moderate so that you can still hear
sounds outside your car.
Précautions
•Ce produit est conçu pour être installé dans
le coffre ou dans la zone de chargement
d’une voiture. N’installez pas ce produit à
un endroit où il pourrait distraire votre
attention ou celle d’un autre conducteur des
dangers de la route. Reportez-vous à la
section relative à l’installation.
•Si votre voiture est parquée en plein soleil et
que la température a considérablement
augmenté dans l’habitacle, laissez refroidir
l’appareil avant de l’utiliser.
•Ne faites pas fonctionner l’appareil sur une
batterie faiblement chargée, car il ne peut
délivrer des performances optimales qu’avec
une bonne alimentation.
•Pour des raisons de sécurité, gardez le volume
de votre autoradio à un niveau modéré de
façon à ce que vous puissiez encore entendre
les bruits de la circulation.
Features
•Maximum input power is 500 W
•Playback of ultra bass tones with the large
30 cm (11 7/8in.) woofer*
•Maximize cargo space with the space saving
speaker box
*Depending on the input level, the ringed edge of
the woofer will light up. (At low levels, it will not
light up. And, depending on the frequency of the
music, it might take some time to light up.)
Caractéristiques
•La puissance d’entrée maximale est de 500 W
•Reproduction de sons ultra-graves grâce au
gros haut-parleur de graves de 30 cm
(11 7/8po.)*
•Maximisez l’espace d’emplacement grâce au
boîtier de haut-parleur peu encombrant
*En fonction du niveau d’entrée, le bord annulaire
du haut-parleur s’allumera. (A faible niveau, il ne
s’allumera pas. Et, en fonction de la fréquence de
la musique, il peut falloir un certain temps avant
que ça s’allume.)
Connections
For details, refer to the Installation/
Connections manual of each product.
Connection diagram
7
Power amplifier
Amplificateur de puissance
Connect the striped speaker cord to the
negative terminal.
As there is no low-pass filter built-in to this
unit, be sure to adjust beforehand the
amplifier you connect to (we recommend a
cut-off frequency of 50 - 300Hz).
Adjust the switch as described below, based on
the regulations of the state of usage:
A: When you do not want the speaker ring to
light up, or when it’s not allowed by the
traffic regulations of your state.
B: When you want to light up the speaker
ring and there are no restrictive traffic
regulations.
*This speaker ring will light up to a maximum of
5000 cd/m2. Because there are states that prohibit
the installation of lighted objects inside a car,
adjust the switch accordingly after confirming your
local laws.
The light bulb of the speaker ring has a built-in a
protection circuit. If this unit inputs excessive
power, the protection circuit is activated and the
speaker ring will not light up.
If this happens, turn the volume down and wait
for a few minutes until it returns to normal.
If the light bulb burns out it will need to be
replaced, consult your nearest Sony dealer.
About the terminal switch
A propos du commutateur de borne A B
Connexions
Pour plus de détails, consulter le manuel
d’installation/connexions de chaque
produit.
Schéma de connexion
Raccordez le fil de haut-parleur rayé à la
borne négative.
Etant donné qu’il n’y a pas de filtre passe-bas
intégré dans cet appareil, veillez à régler au
préalable l’amplificateur que vous raccordez
(nous recommandons une fréquence de
coupure de 50 - 300Hz).
Réglez le commutateur comme décrit ci-dessous,
en fonction de la loi en vigueur :
A: Lorsque vous ne souhaitez pas que le bord
annulaire du haut-parleur s’allume, ou
lorsque l’illumination de celui-ci n’est pas
autorisé par le code de la route.
B: Lorsque vous souhaitez que le bord
annulaire du haut-parleur s’allume ou
lorsque le code de la route le permet.
*Le bord annulaire de ce haut-parleur s’allumera à
un maximum de 5000 cd/m2. Dans la mesure où
certaines lois interdisent l’installation d’objets
illuminés dans des voitures, positionnez le
commutateur afin de respecter la loi en vigueur.
L’ampoule d’illumination de l’anneau du haut-
parleur possède un circuit de protection intégré.
Si le haut-parleur reçoit un courant excessif, le
circuit de protection est activé et l’anneau du
haut-parleur ne s’allumera pas.
Si cela se produit, baissez le volume et attendez
quelques minutes avant de pouvoir reprendre
une utilisation normale.
Si l’ampoule d’illumination est grillée ou si vous
devez la remplacer, contactez votre revendeur
Sony le plus proche.
Liste des composants
Spécifications
Haut-parleur 30 cm (11 7/8po.) de dia.,
en cône
Puissance d’entrée maximale 500 W
Puissance d’entrée nominale 150 W
Impédance 4 ohms
Sensibilité 85 dB/W/m (à 50 Hz)
Réponse en fréquence 25 – 500 Hz
Masse Approx. 11 kg (24 li.
4 oz.)
Accessoires fournis Accessoires d’installation
et de raccordement
(1 jeu)
La conception et les spécifications sont sujettes à
modifications sans préavis.
Warning is
The illuminated subwoofer should be installed
in your trunk. If your car does not have a trunk,
it should be installed in the interior cargo area of
your car with the flashing light turned off
because some states prohibit certain types of
lights from being installed inside your car.
Avertissement
Le haut-parleur de graves devra être installé
dans le coffre de votre voiture. Si votre voiture
n’a pas de coffre, ce caisson devra être installé
dans la zone de chargement intérieure de votre
voiture en faisant en sorte que les lumières
clignotantes soient éteintes. La loi peut en effet
interdire l’installation de certaines lumières à
l’intérieur de votre véhicule.


