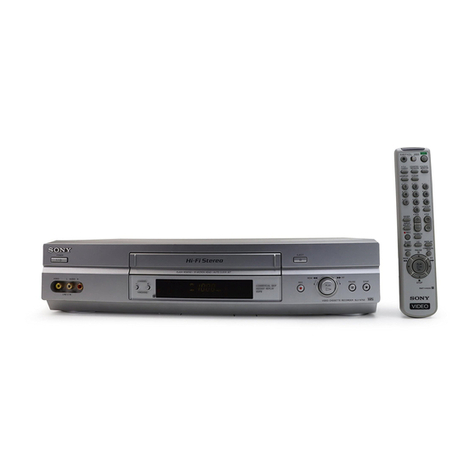
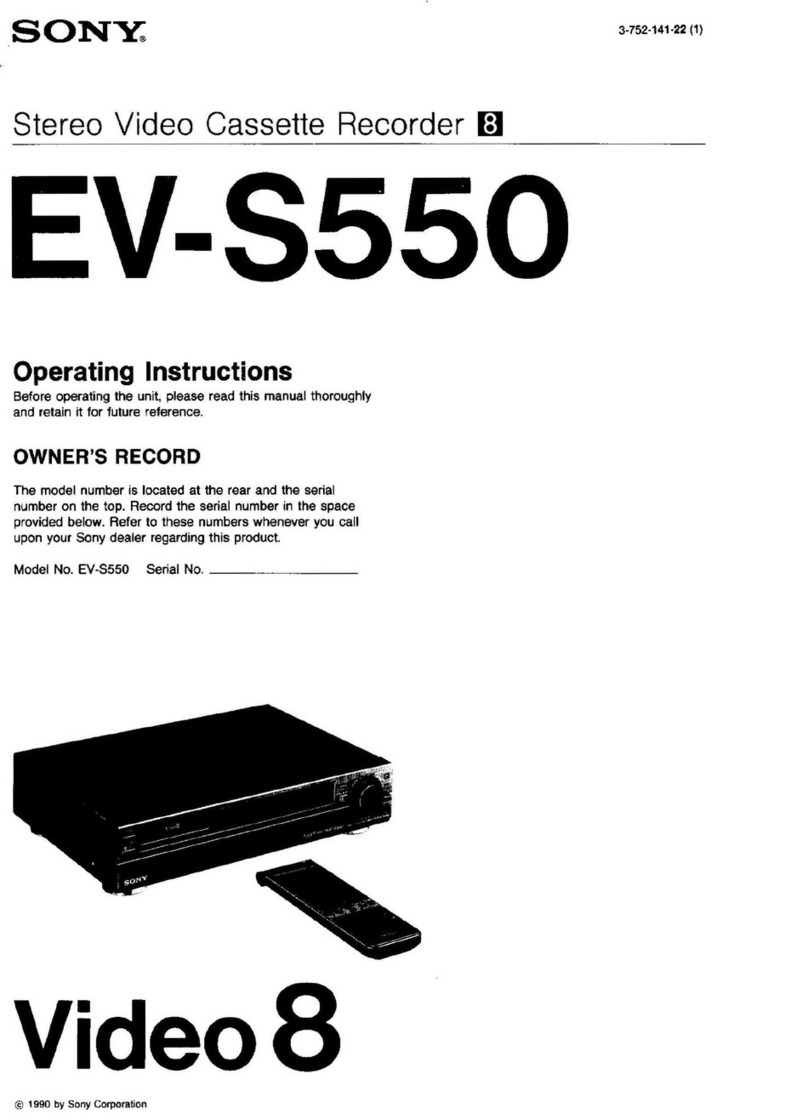
Sony EV-C500E User manual

SONY.
EV-C500E
introduction
Chapter
1
Chapter
2
Preparation
Chapter
3
Basic
Operations
Chapter
4
Advanced
Operations
Chapter
5
Editing
Chapter
6
Additional
Information
Video
Cassette
Recorder
FRU
Operating
Instructions
Before
operating
the
unit,
please
read
this
manual
thoroughly
and
retain
it
for
future
reference.
©
1993
by
Sony
Corporation

To
prevent
fire
or
shock
hazard,
do
not
expose
the
unit
to
rain
or
moisture.
To
avoid
electrical
shock,
do
not
open
the
cabinet.
Refer
servicing
to
qualified
personne!
only.
NOTICE
FOR THE
CUSTOMERS
IN
THE
UNITED
KINGDOM
;
A
moulded
plug
complying
with
BS
1363
is
fitted
to
this
equipment
for
your
safety
and
convenience.
Should
the
fuse
in
the
plug
supplied
need
to
be
replaced,
a
5
AMP
fuse
approved
by
ASTA
or
BS!
to
BS
1362,
(i.€.,
marked
with
@
or
Y
mark)
must
be
used.
If
the
plug
supplied
with
this
equipment
has
a
detachable
fuse
cover,
be
sure
to
attach
the
fuse
cover
after
you
change
the
fuse.
Never
use
the
plug
without
the
fuse
cover.
If
you
should
lose
the
fuse
cover,
please
contact
your
nearest
Sony
service
Station.
IMPORTANT
Hf
the
plug
supplied
is
not
suitable
for
the
socket
outlets
in
your
home,
it
should
be
cut
off
and
an
appropriate
plug
fitted
in
accordance
with
the
following
instructions.
The
wires
in
this
mains
lead
are
coloured
in
accordance
with
the
following
code:
Blue:
Neutral
Brown:
Live
As
the
colours
of
the
wires
in
the
mains
lead
of
this
«
apparatus
may
not
correspond
with
the
coloured
markings
identifying
the
terminals
in
your
plug,
proceed
as
follows:
The
wire
which
is
coloured
blue
must
be
connected
to
the
terminal
which
is
marked
with
the
letter
N
or
coloured
black.
The
wire
which
is
coloured
brown
must
be
connected
to
the
terminal
which
is
marked
with
the
letter
L
or
coloured
red.
Do
not
connect
either
wire
to
the
earth
terminal
in
the
plug
which
is
marked
by
the
letter
E
or
by
the
safety
earth
symbol
+
or
coloured
green
or
green-and-yellow.
WARNING
To
prevent
shock
hazard,
do
not
insert
the
plug
cut
off
from
the
mains
lead
into
a
socket
outlet.
This
plug
cannot
be
used
and
should
be
destroyed.
Caution
Television
programmes,
films,
video
tapes
and
other
materials
may
be
copyrighted.
Unauthorized
recording
of
such
material
may
be
contrary
to
the
provisions
of
copyright
laws.
Also,
use
of
this
recorder
with
cable
television
transmission
may
require
authorization
from
the
cable
television
transmitter
and/or
programme
owner.

Welcome!
Congratulations
on
your
purchase
of
the
Sony
EV-C500E
Video
Cassette
Recorder.
This
video
cassette
recorder
ts
the
result
of
our
commitment
to
bring
Sony
customers
high
quality
and
state-of-the-art
technology.
Thank
you
for
choosing
Sony.
Table
of
Contents
PLOCAUTIONS
......-.::.crcussecscssssecaverssesesssecsncansccenbnctennszanencaes
4
Chapter
1
Introduction
FOAtUres
ccccccoass
saesaneewares
acess
ncussticen
spesaivendiancesvpssossoctveutetrie
5
Chapter
2
Preparation
Hookups
and
Getting
Started
...scsscessesscosscassseerseenutss
a
Hookup
1
Audio/Video
(A/V)
HOOKUP
.......-s+ssecsseveens
7
Hookup
2
RFU
DC
OUT
Hookup
Inserting
Batteries
..........rsscrsserssessneaecesreniensceseees
Chapter
3
Basic
operations
Playback
sssesscsssssssnssssennessssnetssmmassonsssonssesseseversrnesesavecennes
11
Inserting
a
Video
Cassette
Saeiidbecatedgsisnsdosossanseodensess
11
Ejecting
the
Video
Cassette
.........-ssssersesenessesees
11
Cassette
Care........
iaducebonedoccasassesuedencoussvaasussecseueneete
11
Playing
Back
&
CaSSette
.......ecscscesencssserseenssessneenesens
12
AUtO
Play
.1s..cesssescsssscnseseeseccesersesserenssusrsscerensiaeesssree
13
Indexing
the
Tape
Contents
.......-s.rsssssessesrserseses
13
‘Locating
a
Particular
Scene
Later
........ssesecsserssees
13
Listening
More
Easily
to
Conversation
Recorded
With
@
CAMCOIER
.....s.scrreeesesecseessssnrsonssenssesseerees
Selecting
the
Monitor
Sound
........
RRECOPING
.n..:-ccrssconrssonercerseerecsenesseetssennsorssesecnsescssenesevess
15
Recording
a
Video
Programme
while
Watching
It
...15
PAUSITIG
...ossseccesesesceetsecessssenessesesseessecesoneeneeessntecsesnnens
16
Selecting
the
Audio
Input
from
the
External
Source
......
Recording
TV
Programmes
Chapter
4
Advanced
Operations
Variable
Speed
Playback
........cccrsscsssccseccssecansentscasseneeee
18
SHll
PICHUIO
.............-ccccscssecesscecesoesonrsacnscsacernesossaeneess
18
Picture
Search
During
Playback
..........s:scssssesseseee
18
Locked
Picture
S@arch
........sscssssccsseseerersrereeees
18
x
2
(Double),
-x
2
(Reverse
Double)
ee
Playback
......ssscsesecessessesseeseeessves
one
-x
1
(Reverse)
Speed
Playback
...
bee
Frame-by-Frame
PICture........csecssscereesnseces
’
Slow
Motion
Playback
.......
Tracking
Adjustment
........ecsecee
Cutting
out
the
Unwanted
Scenes
—
SHUTTLE
EDIT
......cssocsesssosssversscecsseseteensonvensnennssmenens
During
Recording
During
Playback
Chapter
5
Editing
Overview
of
the
Editing
Functions
seidseenmt
sarevecesarennesea
2D
Tape
DUbDING
6.....cc.ccssccsssceresvenseees
aspicieesueessavetetedesasisl
woe
24
Editing
from
the
Other
VCR
24
Editing
onto
the
Other
VCR
26
scssnectussssansnccecouncssensowesine
sete?
Synchronized
Editing
.......
Connecting
Video
Equipment
with
the
LANC
Connector
.......ssccsccssenesesreenecenes
27
Connecting
Video
Equipment
with
the
CONTROL
S
Connector
.......ccscssesssneaseee
28
LANC
Mode
Setting
....ccssssessscsssssssessssscesennecneesie
at
100
29
Synchronized
Assemble
Editing
.........-+-ssecsseenereees
30
Chapter
6
Additional
Information
identifying
the
Parts
and
Controls
.....-...-csssmnseen
DT
Front
Panel
.........csscocsoresecseesssersereesssonenesnes
suescn
dl
Display
Window
..
.
we
Rear
Panel
.......ss.scceeeeee
jaenneidBe
Remote
Commander
.....ccsscscsrssesssccesrsereeetne
saree
33
Techaical
Infortmatlon
......ccsssecceccesrrssvens
eorereernnsneaceee
GA
Troubleshooting
....:sccssscsssssessorssseversnrenccentesessserosoumaseos
OO
Taking
Care
of
Your
EV-CSOOE
...-rccersescsssnecenssnseneracees
36
Video
Head
Cleaning
.........ssssrrsescssssees
sae
oe
dG
Worn
Video
Heads
.........ccsscssssssssssesecserseeseene
soete
36
Check
the
Video
Heads
after
1
‘000
Hours
of
Use
...36
Molsture
Condensation
......:ccssressssscnessessereeene
sonve
36
Spechflcattonns
...cresecccsseneesssreccnseenssrecenecenserssenseserenene
ere
GT,
IROX
...srecseccssccssnsesncsscesseveessenecsecennscseneetenneerseecuesen®
exeseerr
OB
3
Precautions
Safety
*
For
the
models
designed
for
UK,
operate
the
unit
only
on
240
V
AC,
50
Hz.
For
the
models
designed
for
other
European
countries,
operate
the
unit
on
220
—
240
V
AC,
50
Hz.
*
If
anything
falls
into
the
cabinet,
unplug
the
unit
and
have
it
checked
by
qualified
personnel
before
operating
it
any
further.
¢
Unplug
the
unit
from
the
wail
outlet
if
you
do
not
intend
to
use
it
for
an
extended
period
of
time.
To
disconnect
the
cord,
pull
it
out
by
the
plug,
never
by
the
cord
itself.
*
The
unit
is
not
disconnected
from
the
mains
(AC
power
source),
as
long
as
it
is
connected
to
the
mains
outlet,
even
if
the
unit
itself
has
been
tumed
oft.
«
The
ON/STANDBY
indicator
lights
up
red
when
the
VCR
is
turned
off
(standby
mode),
and
lights
up
green
when
the
VCR
is
tumed
on
(power
on
mode).
Installation
¢
Allow
adequate
air
circulation
to
prevent
internal
heat
buildup
*
Do
not
place
the
unit
on
surfaces
(rugs,
blankets,
etc.)
or
near
materials
(curtains,
draperies)
that
may
block
the
ventilation
holes.
*
Do
not
install
the
unit
near
heat
sources
such
as
radiators
or
air
ducts,
or
in
a
place
subject
to
direct
sunlight,
excessive
dust,
mechanical
vibration
or
shock.
¢
Do
not
install
the
unit
in
an
inclined
position.
It
is
designed
to
be
operated
in
a
horizontal
position
only.
*
Keep
the
unit
and
cassettes
away
from
equipment
with
strong
magnets,
such
as
microwave
ovens
or
large
loudspeakers.
.
*
Keep
the
unit
away
from
a
TV.
Otherwise,
it
may
cause
interference
with
the
TV.
¢
Do
not
place
heavy
objects
on
the
unit.
Operation
—
«
When
the
unit
is
not
in
use,
tum
the
power
off
to
conserve
energy
and
to
extend
its
life.
*
Remove
and
store
video
cassettes
after
recording
or
playback.
Cleaning
¢
Clean
the
cabinet,
panel
and
controls
with
a
dry,
soft
cloth,
or
a
soft
cloth
slightly
moistened
with
a
mild
detergent
solution.
*
Do
not
use
any
type
of
solvent,
such
as
alcohol
or
benzine.
Recording
and
Playback
*
This
VCR
uses
8
mm
video
format
cassettes.
*
This
VCR
records
and
plays
back
both
in
the
Hi8
video
system
and
standard
8
mm
video
system.
¢
This
VCR
records
only
in
SP
mode
and
piays
back
both
in
SP
and
LP
modes.
*
The
PCM
audio
feature
is
not
available
on
this
VCR.
Therefore,
you
can
neither
record
in
the
digital
multi
system,
nor
play
back
a
tape
recorded
in
the
digital
multi
system
on
other
VCRs.
Audio
dubbing
cannot
be
performed
on
this
VCR.
4
Precautions

Chapter
1
Introduction
Features
High
quality
picture
and
sound
*
Hi8
video
system
The
Hi8
video
format
features
400
lines
of
horizontal
resolution,
giving
you
a
high
video
quality.
°
AFM
Hi-FI
stereo
system
You
can
record
Hi-Fi
sound
with
a
live
stereo
sound
atmosphere.
Editing
+
DUAL
MODE
SHUTTLE
ring
Allows
quick
access
to
the
desired
scene
and
playback
at
various
speeds
in
both
forward
and
reverse
directions.
*
CONTROL
L
@
(LANC)
connector
Allows
easy
connection
to
another
piece
of
equipment
such
as
a
video
camera
recorder
(camcorder).
This
lets
you
control
tape
transport
of
both
devices
from
one
set
of
controls.
With
this
simultaneous
control
you
can
use
bi-directional
synchronized
editing.
*
CONTROL
S
IN
connector
Allows
remote
control
of
this
VCR
by
other
Sony
video
equipment
with
a
CONTROL
S
OUT
connector.
*
§
VIDEO
IN/OUT
connector
Allows
clear
picture
by
separating
colour
signal
from
luminance
signal.
Function
*
Voice
boost
function
When
playing
back
a
tape
recorded
with
a
video
camera
recorder
(camcorder),
voice
boost
enhances
the
voice
portion
of
the
sound
and
reduces
“unwanted”
background
noise
like
wind
so
that
it
is
easier
to
listen
to
conversation.
How
to
Use
This
Manual
This
manual
is
divided
into
the
following
six
chapters:
Chapter
1
introduction,
Chapter
2
Preparation,
Chapter
3
Basic
Operations,
Chapter
4
Advanced
Operations,
Chapter
5
Editing
and
Chapter
6
Additional
Information.
if
you
are
already
familiar
with
the
basic
operations,
skip
Chapter
3
Basic
Operations
and
see
Chapter
4
Advanced
Operations.
if
you
have
any
problems
with
installing
or
operating
the
EV-C500E,
refer
to
the
troubleshooting
section
first
before
calling
your
local
Sony
dealer.
When
you
are
reading
through
the
manual,
remember:
+
Buttons
and
switches
on
the
VCR
to
be
used
in
operating
the
VCR
are
called
out
and
shown
in
uppercase
letters
in
the
illustrations.
»
Buttons
and
switches
on
the
Remote
Commander
to
be
used
for
operating
the
VCR
are
called
out
and
enlarged
in
the
illustrations.
Conventions
:
This
indicates
a
function
operated
only
with
the
buttons
on
the
VCR
itself,
but
not
with
those
on
the
Remote
Commander.
5
This
indicates
a
function
operated
only
with
the
buttons
on
the
Remote
Commander,
but not
with
those
on
the
VCR
a
itself.
Unpacking
Unpack
all
the
items
and
check
to
confirm
that
you
have
everything
listed
below.
*
Remote
Commander RMT-V124C
(1)
*
R6
(size
AA)
batteries
(2)
+
AV
(audio/video)
cable
(3
phono
to
3
phono)
(1)
*
Mains
lead
(1)
Intreduction
5

Chapter
2
Preparation
Hookups
and
Getting
Started
Before
you
can
use
your
VGR
for
the
first
time,
you
need
to
connect
it
to
your
TV
and
set
it
up
to
play
back
video
programmes
for
viewing.
This
section
explains
how
to
hook
up,
set
up,
and
prepare
the
Remote
Commander
so
that
you
can
start
enjoy
it
right
away.
There
are,
however,
many
types
of
TVs
available
and
many
different
ways
in
which
your
TV
can
be
hooked
up.
As
a
result,
this
manual
describes
several
ways
your
VCR
can
be
connected.
Use
the
following
table
to
select
the
correct
hookup
for
your
TV.
When
Your
TV
has
audio/video
(A/V)
inputs
Your
TV
does
not
have
audio/video
(A/V)
inputs
Hookup
1
Audio/Video
(A/V)
Hookup
(pages
7
and
8)
Hookup
2
RFU
DC
OUT
Hookup
(page
9)
Before
making
the
connections,
check
the
following
points:
:
*
Turn
off
the
power
to
the
VCR
and
TV.
*
Do
not
connect
the
mains
lead
until
all
of
the
connections
are
completed.
m=
To
a
wail
outlet
*
Make
connections
firmly.
Loose
connections
may
cause
picture
distortion.
+
If
your
TV
does
not
match
any
of
the
examples
;
provided, consult
your
nearest
Sony
dealer
or
qualified
technician.
Caution
Do
not
place
the
VCR
near
a
TV.
The
playback
picture
may
become
distorted.
6
|
Preparation

if
your
TV
has
audio/video
(A/V)
input
jacks,
you
will
get
a
better
picture
and
sound
if
you
hook
up
your
VCR
using
these
connections.
If
your
TV
does
not
have
A/V
inputs,
see
page
9
for
RFU
DC
OUT
hookup.
1A
1B
ic
Use
hookup
1A
if
your
TV
is
equipped
with
stereo-type
audio/video
input
Jacks.
TV
LINE
IN
©]
VIDEO
(Yellow)
©
|
AUDIO
L
(White)
@|
AUDIO
R
(Red)
LINEOUT1
VIDEO
(Yellow)
ro
AUDIO
L
(White)
8
E
E
AUDIO
R
(Red)
Supplied
AV
cable
VIDEO
(Yellow)
AUDIO
(Black)
LINEOUT1
VIDEO
(Yellow)
oo
AUDIO
L
(White)
8
BE
AUDIO
R
(Red)
Use
hookup
1C
If
your
TV
Is
equipped
with
both
the
stereo-type
audio/video
Input
jacks
andtine
S$
VIDEO
connector.
Using
this
connection,
you
can
play
back
a
cassette
for
a
much
better
picture.
S
VIDEO
cable
(not
supplied)
VIDEO
(Yellow)
AUDIO
L
(White)
AUDIO
R
(Red)
LINEOUT1
VIDEO
(Yeliow)
3
3
G
AUDIO
L
(White)
E
AUDIO
Ri
(Red)
Supplied
AV
cable
Note
:
If
your
TV
has
an
S
VIDEO/VIDEO
selector
switch,
set
this
to
“S
VIDEO”
to
view
the
picture
from
the
§S
VIDEO
connector.
Preparatio;
7

8
1D
1E
Use
hookup
1D
If
your
TV
is
equipped
with
a
EURO
21-pin
connector.
With
this
connection
the
VCR
cannot
record
TV
programmes.
It
can
only
play
back
a
pre-recorded
video
tape.
Tv
VCR
(a)...
sees
s
6oo@us
fi,
:
.2—
EURO-AVC
SY,
LF
Euroa:
EURO
cable
(VMC-2121,
not
supplied)
When
using
hookup
1D,
you
should
set
the
VIDEO
OUT
selector,
located
just
below
the
EURO
21-pin
connector,
to
“S”
if
your
TV
has
an
S
EURO-AV
connector
and
you
want
to
obtain
a
much
better
quality
playback
picture
(same
as
in
hookup
1C).
if
your
TV
does
not
have
an
S
EURO-AV
connector,
set
the
VIDEO
OUT
selector
to
“NORMAL.”
Note
If
your
TV
does
not
have
an
S
VIDEO
function
and
if
you
set
the
VIDEO
OUT
selector
to
“S,”
the
playback
picture
will
be
monochrome.
Use
hookup
1E
if
your
TV
is
equipped
with
a
EURO
21-pin
connector
and
you
want
to
record
TV
rogrammes.
This
hookup
allows
you
to
record
broadcast
programmes
received
by
your
TV
if
the
aerial
Input
is
directly
connected
to
your
TV.
TV
Bh
uNEIN
EE,
VIDEO
(Yellow)
ff}
AUDIO
EURO-AV
C3-
LINE
OUT
1
VIDEO
(Yellow)
AUDIO
L
(White)
AUDIO
R
(Red)
EURO
cable
(VMC-2106S,
not
supplied)
Preparation

If
your
TV
does
not
have
audio/video
input
jacks
or
a
EURO
21-pin
connector,
you
should
make
an
RFU
DC
OUT
connection
using
an
RFU
kit
(RFU-89EKA,
not
supplied).
For
details
of
the
RFU
kit,
refer
to
the
instruction
manual
of
the
RFU
kit.
Connecting
an
aerial
1
Disconnect
the
aerial
input
lead
from
your
TV
and
connect
it
to
the
ANT
input
socket
of
the
RFU
kit.
2
Connect
the
ANT
output
plug
of
the
aerial
selector
to
the
aerial
input
socket
of
your
TV.
3
Connect
the
aerial
selector
to
the
RFU
adaptor.
.
4
Connect
the
RFU
adaptor
to
the
LINE
OUT2
RFU
DC
OUT
connecior
of
the
VCR.
Notes
+
When
you
use
the
VCR,
set
the
selector
switch
on
the
aerial
selector
to
“VTR.”
+
The
output
sound
will
be
monaural
when
using
this
hookup
even
though
you
play
back
a
stereo
tape.
Aerial
Aerial
lead
LINE
OUT2
VIDEO
RFU
unit
selector
RFU
channel
screw
VTR
input
plug
connector
Preparation
|
9

10
Preparation
.
inserting
Batteries
1
Open
the
lid.
2
Insert
two
R6
batteries
(IEC
designation)
by
matching
the
+
and
~
on
the
batteries
with
the
+
and
—
indications
in
the
dattery
compartment.
3
Close
the
lid.
Notes
on
the
handling
of
batteries
*
With
normal
use,
the
batteries
should
last
for
approximately
six
months.
*
ff
you
do
not
use
the
Remote
Commander
for
an
extended
period
of
time,
remove
the
batteries
to
avoid
possible
damage
from
battery
ieakage.
*
Do
not
use
a
new
battery
together
with
an
old
one.
Do
not
use
different
types
of
batteries.
Controlling
Other
Sony
Video
Equipment
You
can
control
other
Sony
video
equipment
having
the
command
mode
selector,
using
this
Remote
Commander.
Set
the
command
mode
selector
for
the
other
equipment
to
“VTR2.”
If
other
Sony
video
equipment
does
not
have
the
command
mode
selector
You
can
contro!
an
8
mm
format
VCR
only.
You
cannot
use
this
Remote
Commander
with
a
Betamax
VCR
or
a
VHS-format
VCR.

Chapter
3
Basic
Operations
Playback
@
EJECT
Rear
side
of
a
cassette
This
section
shows
you
how
to
play
back
a
video
casseite.
inserting
a
Video
Cassette
1
Insert
a
video
cassette
with
the
window
facing
upwards.
2
Genily
press
the
centre
of
the
front
side
of
the
cassette
until
the
mechanism
draws
it
into
the
compartment.
When
the
cassette
has
been
inserted,
the
cassette
indicator
lights
up
in
the
display
window
and
the
VCR
turns
on
automatically.
Ejecting
the
Video
Cassette
Press
4
EJECT
on
the
VCR.
You
can
eject
the
cassette
when
the
power
is
off.
When
you
press
&
EJECT,
the
power
is
turned
on.
After
ejecting
the
cassette,
the
power
automatically
shuts
off.
Note
You
cannot
eject
a
cassette
during
recording
or
recording
pause
mode.
Cassette
Care
Notes
+
Always
insert
the
cassette
in
the
correct
position.
*
Never
insert
anything
in
the
smali
holes
on
the
rear
of
the
cassette.
«
Store
cassettes
in
their
cases
and
keep
them
in
an
upright
position
to
prevent
intrusion
of
dust
and
uneven
winding.
*
To
record
from
the
beginning
of
the
tape,
run
the
VCR
for
about
15
seconds
at
the
beginning
of
a
cassette
before
recording.
*
When
the
VCR
is
not
in
use,
remove
the
cassette.
*
Stick
the
cassette
label
in
the
designated
area.
*
Stick
the
label
on
securely
so
it
will
not
pee!
off
and
damage
the
VCR.
Playback
Time
.
{LP
mode)
_
Protecting
your
cassette
against
accidental
erasure
To
prevent
accidental
erasure,
slide
out
the
tab
on
the
back
of
the
cassette
So
that
the
red
colour
is
visible.
To
re-record
on
the
cassette,
slide
the
tab
back.
Basic
Operations
11

ON/STANDBY
STOP
»
PLAY
DUAL
MODE
SHUTTLE
ring
Never
unplug
the
mains
lead
while
a
tape
is
moving
This
may
cause
the
tape
to
be
jammed
in
the
VCR.
When
you
need
to
unplug
the
mains
lead,
be
sure
to
remove
the
cassette
or
turn
off
the
power
of
the
VCR.
|
2
Basic
Operations
Playing
Back
a
Cassette
You
can
control
playback
with
the
identically
marked
buttons
on
either
the
VCR
or
the
Remote
Commander.
The
VCR
automatically
detects
the
video
system
and
tape
speed
in
which
the
tape
was
recorded
(Hi8
or
standard
video
system,
for
details
see
page
34;
SP
or
LP
mode)
and
plays
it
back
accordingly.
When
a
tape
recorded
in
the
Hi8
video
system
is
played
back,
the
Hi8
lamp
on
the
front
panel
lights
up.
1
Insert
a
cassette.
The
VCR
tums
on
automatically.
2
Turn
on
the
TV.
If
your
VCR
has
a
LINE
OUT
or
EURO-AV
connection,
select
the
AV
input.
If
your
VCR
has
an
RFU
DC
OUT
connection,
set
the
selector
switch
on
the
aerial
selector
to
“VTR”
and
tum
the
TV
to
the
programme
position
for
the
VCR
you
set
with
the
RF
channel
screw
on
the
RFU
adaptor.
(For
the
RFU
DC
OUT
connection,
see
page
9.)
3
Press
B
PLAY.
To
stop
playback
~
Press
B
STOP.
To
stop
playback
for
a
moment
Press
Il
PAUSE.
Press
if
PAUSE
again
or
press
>
PLAY
to
resume
playback.
To
advance
the
tape
rapidly
VCR:
Press
B
STOP,
then
tum
the
DUAL
MODE
SHUTTLE
ring
clockwse.
Remote
Commander:
Press
B
STOP,
then
FF
>>.
To
rewind
the
tape
VCR:
Press
&
STOP,
then
turn
the
DUAL
MODE
SHUTTLE
ring
counterclockwise.
Remote
Commander:
Press
STOP,
then
44
REW.
To
view
the
picture
during
fast
forward
mode
or
rewind
mode
You
can
view
the
picture
momentarily
while
the
VCR
is
in
fast
forward
orrewind
mode.
VCR:
Turn
the
DUAL
MODE
SHUTTLE
ring
clockwise
in
fast
forward
mece,
or
counterclockwise
in
rewind
mode.
Then
release
the
ring
to
return
to
fast
lorward
or
rewind
mode.
Remote
Commander:
Press
and
hold
FF
>>
in
fast
forward
mode,
or
press
and
hold
<4
REW
in
rewind
mode.
Then
release
the
button
to
retum
to
fast
forward
or
rewind
mode.
To
eject
the
cassette
Press
&
EJECT
on
the
VCR.
Pressing
&
EJECT
when
the
VCR
is
turned
off
will
turn
the
VCR
on,
ejec
the
cassette
and
then
turn
it
off
again.
When
the
tape
reaches
the
end
during
playback
The
VCR
automatically
rewinds
the
tape
to
the
beginning
and
the
power
remains
on.
To
turn
the,
YCR
on
or
off
Press
ON/STANDBY
on
the
VCR
or
©
on
the
Remote
Commander.

VB
(VOICE
BOOST)
>»
PLAY
DUAL
MODE
SHUTTLE
ring
COUNTER
RESET
Notes
on
counter
reading
The
counter
does
not
work
on
unrecorded
portions
of
the
tape.
After
a
cassette
is
ejected,
the
counter
reading
is
retained.
When
a
cassette
is
inserted
in
the
VCR,
the
counter
reading
automatically
resats
to
“OHOOMOOS.”
The
linear
time
counter
installed
in
this
VCR
is
not
a
clock.
There
is
a
difference
between
the
actual
recording
and
playback
time,
and
the
counter
display.
This
difference
may
increase
when
switching
the
tape
speed
from
SP
to
LP
and
vice-versa,
or
depending
on
tape
position
being
played
back.
Auto
Play
You
can
start
playback
automatically
after
rewinding
a
cassette.
This
operation
works
only
on
the
VCR.
(You
cannot
use
AUTO
PLAY
with
the
Remote
Commander.)
Press
B>
PLAY
while
tuming
the
DUAL
MODE
SHUTTLE
ring
counterclockwise
fully.
Playback
starts
automatically
after
the
tape
is
rewound
to
the
beginning
of
the
tape.
Indexing
the
Tape
Contents
Before
recording
or
playback,
press
COUNTER
RESET
to
reset
the
counter
to
zero.
This
counter
is
a
“linear
time
counter,”
which
shows
you
how
much
the
tape
has
run
in
terms
of
time.
By
noting
the
setting,
you
can
find
that
point
later
by
referring
to
the
counter.
Use
the
label
on
a
cassette
to
list
the
programmes
and
their
counter
readings.
Since
the-counter
is
not
very
accurate,
use
it
only
for
reference.
Locating
a
Particular
Scene
Later
lf
you
want
to
return
to
a
particular
scene
later,
press
COUNTER
RESET
on
the
VCR
at
the
desired
scene
so
that
the
linear
time
counter
resets
to
“OHOOMOOS.”
To
return
to
the
desired
scene
Press
TAPE
RETURN
on
the
Remote
Commander
while
the
VCR
is
in
stop
mode.
The
tape
rewinds
to
the
position
where
the
counter
reads
“OHOOMO0S,”
and
stops.
To
start
playback
of
the
scene
Press
B®
PLAY.
Listening
More
Easily
to
Conversation
Recorded
with
a
Camcorder
When
you
press
VB
(VOICE
BOOST)
while
playing
back
a
tape
recorded
with
a
camcorder,
the
human
voice
portion
of
the
sound
is
enhanced
sc
that
it
is
easier
to
hear
conversation.
This
reduces
the
sound
of
wind
and
other
“unwanted”
background
noise.
Note
on
VOICE
BOOST
:
When
you
use
VOICE
BOOST
while
playing
back
a
tape
recorded
by
video
equipment
other
than
a
camcorder,
the
sound
may
not-be
heard
easily.
VOICE
BOOST
may
not
be
effective
while
playing
back
a
tape
recorded
in
monaural
or
bilingual
programmes.
Basic
Operations
13

14
Basic
Operations
Selecting
the
Monitor
Sound
You
can
select
the
sound
you
want
to
hear
when
you
play
a
bilingual
tape.
Press
AUDIO
MONITOR
on
the
Remote
Commander.
With
each
press,
you
can
select
main
sound,
sub
sound,
or
main
and sub
sound.
The
monitor
sound
indicators
will
tell
you
what
sound
you
are
selecting.
When
you
play
back
a
monaural
tape,
the
indicator
will
not
light
up
and
the
button
will
become
inoperative.
“he
VOR
Font
pane!
MAIN/L
and
SUB/R
Main
and
sub
sound
If
you
record
a
bilingual
programme
in
stereo
mode,
the
programme
can
be
played
back
in
main
(L)
or
sub
(R)
sound
by
pressing
AUDIO
MONITOR.
Even
if
you
select
only
one
channel
(right
channel
or
left
channel),
the
slight
sound
of
unselected
channel
will
be
heard.

Recording
Hi8
(AUTO/OFF)
&
STOP
Notes
*
Use
the
S
VIDEO
cable
(not
supplied)
to
obtain
Hi8
picture
quality
fully
during
recording.
*
{tis
not
necessary
to
tum
on
the
TV,
if
you
are
not
going
to
watch
a
video
programme
while
recording
it.
Skip
steps
2
and
3.
*
When
the
tape
reaches
the
end,
the
VCR
automatically
rewinds
the
tape
to
the
beginning
and
the
power
remains
on.
This
section
shows
you
how
to
record
a
video
programme
from
other
equipment
having
A/V
output
jacks
such
as
a
camcorder.
You
can
record
in
the
Hi8
video
system
or
the
standard
8
mm
video
system.
This
VCR
records
only
in
SP
mode.
To
select
the
recording
system
*
To
record
a
Hi8
video
tape
in
the
Hi8
system,
press
Hi8
(AUTO/OFF)
so
that
the
Hi8
lamp
lights
up
(AUTO
mode).
*
To
record
a
Hi8
video
tape
in
the
standard
8
mm
system,
press
Hi8
(AUTO/OFF)
so
that
the
Hi8
lamp
goes
off
(OFF
mode).
«
When
a
standard
8
mm
video
tape
is
to
be
used,
the
Hi8
(AUTO/OFF)
button
becomes
inoperative
and
recording
is
always
made
in
the
standard
8
mm
system.
ne
ue
li
Hi8
video
tape
Hi8
video
system
Standard
8
mm
video
system
Standard
8
mm
Uni
video
tape
Standard
8
mm
video
system
Before
You
Begin
Check
the
following
points:
*
Make
sure
that
the
connections
have
been
made
correctly
(see
pages
7
ard
8).
*
Make
sure
the
cassette
is
long
enough
to
record
the
source
programme.
+
Make
sure
the
safety
tab
of
the
cassette
has
not
been
slid
out.
If
you
inserta
cassette
with
the
safety
tab
visible
in
red
(closed)
and
press
@
REC,
the
VCR
automatically
ejects
the
cassette.
Recording
a
Video
Programme
while
Watching
It
1
insert
a
cassette.
The
VCR
turns
on
automatically.
2
Tum
on
the
TV.
3
If
your
VCR
has
a
LINE
OUT
or
EURO-AV
connection,
select
the
AV
input.
If
your
VCR
has
an
RFU
DC
OUT
connection,
set
the
selector
switch
on
the
aerial
selector
to
“VTR”
and
turn
the
TV
to
the
programme
position
you
set
with
the
RF
channel
screw
on
the
RFU
adaptor.
4
Press
both
@
RECs
on
the
Remote
Commander
at
the
same
time,
or
@
REC
on
the
VCR.
The
REC
indicator
on
the
VCR
lights
up.
To
stop
recording
Press
@
STOP.
To
pause
recording
Press
If
PAUSE.
To
resume
recording
Press
If
PAUSE.
If
the
recording
pause
exceeds
7
minutes,
the
VCR
stops.
Basic
Operations
15

AUDIO
LINE
IN
(ST/BIL)
16
DUAL
MODE
SHUTTLE
ring
Basic
Operations
Pausing
Technique
1
You
can
stop
recording
an
unwanted
scene
and
resume
recording
smoothly.
11
Press
il
PAUSE
when
an
unwanted
scene
appears.
Recording
will
stop
and
the
VCR
enters
recording
pause
mode.
2
Press
lf
PAUSE
at
the
ending
of
the
unwanted
part,
to
release
pause
mode.
Recording
resumes
from
the
point
set
in
step
1.
Technique
2
When
an
unwanted
scene
has
already
started
recording,
you
can
rewind
the
cassette
to
the
beginning
of
the
unwanted
part,
have
the
VCR
standby
in
recording
pause
mode,
and
resume
recording
when
the
unwanted
scene
is
over.
1
Press
ll
PAUSE
to
set
the
VCR
to
recording
pause
mode.
2
Tum
the
DUAL
MODE
SHUTTLE
ring
on
the
VCR
counterclockwise
or
clockwise
to
search
for
the
point
trom
which
you
wish
to
continues
recording.
3
Release
the
DUAL
MODE
SHUTTLE
ring
on
the
VCR
at
the
desired
point.
After
an
instant
in
still
mode,
the
VCR
automatically
enters
recordingpause
J
mode.
4
Press
il
PAUSE.
Recording
resumes.
‘Selecting
the
Audio
Input
from
the
Extemal
Source
You
can
select
the
sound
you
want
to
record
when
you
want
to
record
astereo
or
bilingual
pre-recorded
programme
from
other
equipment
such
as
a
VHS-format
VCR.
Press
AUDIO
LINE
IN
(ST/BIL)
on
the
front
of
the
VCR.
For
each
press,
you
can
select
the
sound
to
be
recorded.
The
lighted
sound
indicators
will
show
you
what
sound
you
are
recording.
When
recording
Lighted
monitor
sound
indicators
on
the
VCR
‘|
front
panel:
STEREO
STEREO
STEREO
sound
BILINGUAL
[SUBR——s|
SUB
sound
MAIN/L
and
SUB/R
MAIN+SUB
syaind
Sound
mode
Monitor
sound

AUDIO
LINE
IN
(ST/BIL)
@
REC
Recording
TV
Programmes
Since
the
VCR
itself
does
not
have
a
built-in
TV
tuner,
you
cannot
record
TV
programmes
if
you
have
made
a
VCR-TV
connection
using
1A,
1B,
1C
or
1D
of
Audio/Video
(A/V)
Hookup
on
pages
7
and
8,
or
RFU
DC
OUT
Hookup
on
page
9.
However,
if
your
TV
has
line
output
jacks,
you
can
record
TV
programmes.
You
will
need
to
make
an
additional
connection
shown
below.
If
you
have
made
a
VCR-TV
connection
using
1E
of
Audio/Video
(A/V)
Hookup
on
page
8,
you
can
record
TV
programmes
without
making
an
additional
connection.
Note
When
you
use
the
LINE
IN
VIDEO
jack
and
the
LINE
IN
S
VIDEO
connector
at
the
same
time,
the
LINE
IN
S
VIDEO
connector
has
priority,
and
no
signal
will
be
input
to
the
LINE
IN
VIDEO
jack.
Therefore,
if
you
do
not
use
the
LINE
IN
S
VIDEO
connector,
be
sure
to
disconnect
the
S
VIDEO
cable.
1
Turn
on
the
TV
and
select
the
TV
programme
you
want
to
record
on
the
TV,
2
Insert
a
cassette
into
the
VCR.
3
Select
the
sound
with
AUDIO
LINE
IN
(ST/BIL)
on
the
front
of
the
VCR.
4
Press
both
@
RECs
on
the
Remote
Commander
at
the
same
time,
or
@
REC
on
the
VCR.
You
should
keep
the
TV
on
while
you
are
recording
TV
programmes.
Basic
Operations
|
17

Chapter
4
Advanced
Operations
Variable
Speed
Playback
>
PLAY
DUAL
MODE
SHUTTLE
ring
Notes
«
When
viewing
the
picture
in
variable
speed
playback
mode,
the
picture
may
shake
vertically
or
the
colour
may
become
black
and
white,
depending
upon
the
TV
you
are
using.
*
During
picture
search,
several
streaks
will
appear
on
the
TV
screen.
This
is
normal.
If
you
play
back
a
tape
recorded
in
LP
mode,
a
wider
streak
will
appear
on
the
TV
screen
during
picture
search.
*
If
you
perform
picture
search
with
the
VCR
connected
to
your
TY
via
LINE
OUT2
RFU
DC
OUT,
you
may
hear
a
slight
sound
such
as
a
buzzing
sound.
+
When
you
perform
a
variable
speed
playback
in
the
reverse
direction,
a
wider
streak
appears
on
the
screen,
especially
in
SP
mode.
This
is
normal.
18
|
Advanced
Operations
The
following
section
explains
the
advanced
playback
functions
available
on
your
VCR.
Using
the
DUAL
MODE
SHUTTLE
ring
on
the
VCR
or
FF
»
and
<<
REW
on
the
Remote
Commander,
you
can
play
a
cassette
at
a
variety
of
forward
and
reverse
speeds.
You
can
also
freeze
a
picture
using
the
pause
function.
Variable
speed
playback
of
the
cassette
recorded
in
LP
mode
is
possible,
but
not
garanteed.
Still
Picture
During
playback,
press
fl
PAUSE
to
hold
the
picture
in
one
place.
To
resume
normal
playback
Press
either
B»
PLAY
or
il
PAUSE.
If
you
leave
your
VCR
in
pause
mode,
normal
playback
resumes
after
approximately
7
minutes.
The
sound
is
not
heard
during
still
picture
playback.
If
a
still
picture
shakes
up
and
down
or
has‘streaks,
you
can
adjust
it
using
=
SLOW/STILL
ADJUST
V/A
on
the
Remote
Commander.
(See
“Tracking
Adjustment’
on
page
20.)
a}
Picture
Search
During
Playback
VCR:
Turn
the
DUAL
MODE
SHUTTLE
ring
clockwise
or
counterclockwise.
When
you
release
the
ring,
normal
playback
will
resume.
Remote
Commander:
Press
FF
>
or
44
REW.
When
you
release
the
button,
normal
playback
will
resume.
Locked
Picture
Search
This
feature
works
only
when
using
the
Remote
Commander.
Press
©
or
&
SEARCH
on
the
Remote
Commander
during
playback
er
playback
pause.
If
you
press
@
SEARCH,
the
VCR
enters
locked
picture
searchrnode
in
the
reverse
direction.
If
you
press
&
SEARCH,
the
VCR
enters
locked
picture
search
mode
in
the
forward
direction.
To
resume
norma!
playback
Press
®
PLAY.

DUAL
MODE
SHUTTLE
ring
Notes
*
Ittakes
about
a
few
seconds
to
reverse
the
direction
in
slow
motion
mode
or
frame-by-frame
mode.
+
When
the
tape
speed
is
switched,
noise
appears
a
moment.
«
Ifa
tape
has
portions
recorded
in
both
SP
and
LP
modes,
the
VCR
will
automatically
adjust
the
tape
speed
during
reverse/forward
slow
motion
playback.
However,
you
will
not
notice
any
change
during
x2
playback
even
though
the
tape
speed
is
actually
switched
from
SP
to
LP
or
LP
to
SP.
x
2
(Double),
—x
2
(Reverse
Double)
Speed
Playback
VCR:
,
Slowly
turn
the
DUAL
MODE
SHUTTLE
ring
clockwise
(in
the
forward
direction)
or
counterclockwise
(in
the
reverse
direction)
to
view
pictures
at
double
normal
speed.
To
return
to
normal
playback
Release
the
ring.
Remote
Commander:
Press
x2.
To
play
back
in
the
reverse
direction
Press
<
DIRECTION.
To
resume
the
forward
direction
Press
DIRECTION
>.
To
return
to
normal
playback
Press
B®
PLAY.
The
sound
Is
muted
during
forward
double-speed
playback
and
reverse
double-speed
playback.
If
a
picture
shakes
up
and
down
or
has
streaks
during
forward
double-speed
=
playback,
you
can
adjust
it
using
SLOW/STILL
ADJUST
W/A
on
the
Remote
aS
Commander.
(See
“Tracking
Adjustment”
on
page
20.)
-x
1
(Reverse
Normal)
Speed
Playback
VCR:
Gently
tum
the
DUAL
MODE
SHUTTLE
ring
counterciockwise
until
the
VCR
enters
reverse
slow
motion
playback
mode.
After
a
slow
motion
picture
appears
on
the
TV
screen,
you
can
view
a—x
1
(reverse
normal)
speed
playback
picture.
Hold
the
DUAL
MODE
SHUTTLE
ring
at
that
point.
Remote
Commander:
Press
PLAY,
then
<
DIRECTION.
Frame-by-Frame
Picture
During
playback
pause,
press
DIRECTION
>
to
advance
the
picture
one
frame
or
<
DIRECTION
to
reverse
the
picture
one
frame.
Each
time
you
press
the
button,
the
picture
moves
one
frame.
To
resume
normal
playback
Press
B
PLAY.
,
Advanced
Operation:
1
9

Note
It
is
necessary
to
adjust
tracking
for
both
the
SP
and
LP
modes.
20
DUAL
MODE
SHUTTLE
ring
Advanced
Operations
Siow
Motion
Playback
VCR:
Slowly
tum
the
DUAL
MODE
SHUTTLE
ring
clockwise
(in
the
forward
direction)
or
counterclockwise
(in
the
reverse
direction)
until
the
tape
is
played
back
in
slow
motion
in
the
forward
or
reverse
direction.
To
return
to
normal
playback
Release
the
ring.
Remote
Commander:
Press
B»
SLOW.
To
play
back
in
the
reverse
direction
Press
<
DIRECTION.
To
resume
forward
direction
Press
DIRECTION
>.
To
return
to
normal
playback
Press
PLAY.
The
sound
is
muted
during
reverse
slow
motion
playback.
If
you
leave
the
VCR
in
slow
motion
mode
for
more
than
approximately
30
seconds,
the
VCR
will
automatically
retum
to
normal
playback.
—
if
a
slow
motion
picture
shakes
up
and
down
or
has
streaks,
you
can
adust
it
=
by
pressing
SLOW/STILL
ADJUST
W/A
on
the
Remote
Commander.
(See
=
“Tracking
Adjustment”
below.)
Tracking
Adjustment
If
a
picture
shakes
up
and
down
or
has
streaks
during
forward
double-speed
playback,
still
playback,
slow
motion
playback
(in
the
forward
and
reverse
direction),
you
can
adjust
it
using
SLOW
/STILL
ADJUST
¥/a
on
the
Remote
Commander.
However,
the
adjustment
cannot
be
performed
while
you
are
turning
the
DUAL
MODE
SHUTTLE
ring.
.
Use
the
Remote
Commander,
therefore,
for
operating
still
picture
and
sw
motion
playback.
Press
and
hold
SLOW/STILL
ADJUST
W/A
on
the
Remote
Commander
until
you
obtain
the
best
possible
picture
on
the
TV
screen.
Table of contents
Other Sony VCR System manuals

Sony
Sony HDWM2000/20 User manual

Sony
Sony LX40 User manual

Sony
Sony TC-758 Setup guide

Sony
Sony SLV-675HF PX User manual

Sony
Sony SVO-9500MDP User manual

Sony
Sony MSW-A2000 User manual

Sony
Sony SLV-N99 - Video Cassette Recorder User manual

Sony
Sony SLV-N650 User manual

Sony
Sony DVCAM DSR-80 User manual

Sony
Sony SLV-X821MK2 Installation instructions manual

Sony
Sony SLV-SE50EE User manual

Sony
Sony SLV-779HF - Video Cassette Recorder User manual

Sony
Sony SLV-M11HF - Video Cassette Recorder User manual

Sony
Sony SL-C6E User manual

Sony
Sony HKDV-507 User manual

Sony
Sony SLV-GA35ME User manual

Sony
Sony DSR-70 User manual

Sony
Sony SLV-SF950N User manual

Sony
Sony SL-2700 User manual

Sony
Sony SRW-5000 User manual