5. Connect the Antenna to the Access Point
Connect the antenna to your APX 320X access point
by using the supplied cables. You can use your sector/
directional antenna either in combination with the standard
omni-directional antennas or with another sector/
directional antenna.
Choose the appropriate connection for the scenario which
best fits your use case - as shown in the table below.
NOTE: Regulatory restrictions in some countries prohibit
the use of low band 5 GHz channels which do not support
DFS in outdoor environments. Therefore, Radio-1 cannot be
configured when used in the countries listed here: https://
support.sophos.com/support/s/article/KB-000039850 In
those countries, this model will function as a single radio
device (2.4 OR 5 GHz), your antennas should be connected
to Radio-0 only, and concurrent use of the sector/
directional and omni-directional antennas is not possible.
6. Configure your Software Settings
Once the external antenna is connected, please select
the corresponding antenna settings within your wireless
controller, e.g. Sophos Central. Once selected and the
configuration synched, the AP reboots and the correct
power values will be set.
WARNING: Failure to configure the correct antenna
settings may place the AP outside of regulatory limits. The
administrator is responsible for ensuring this configuration
is correct.
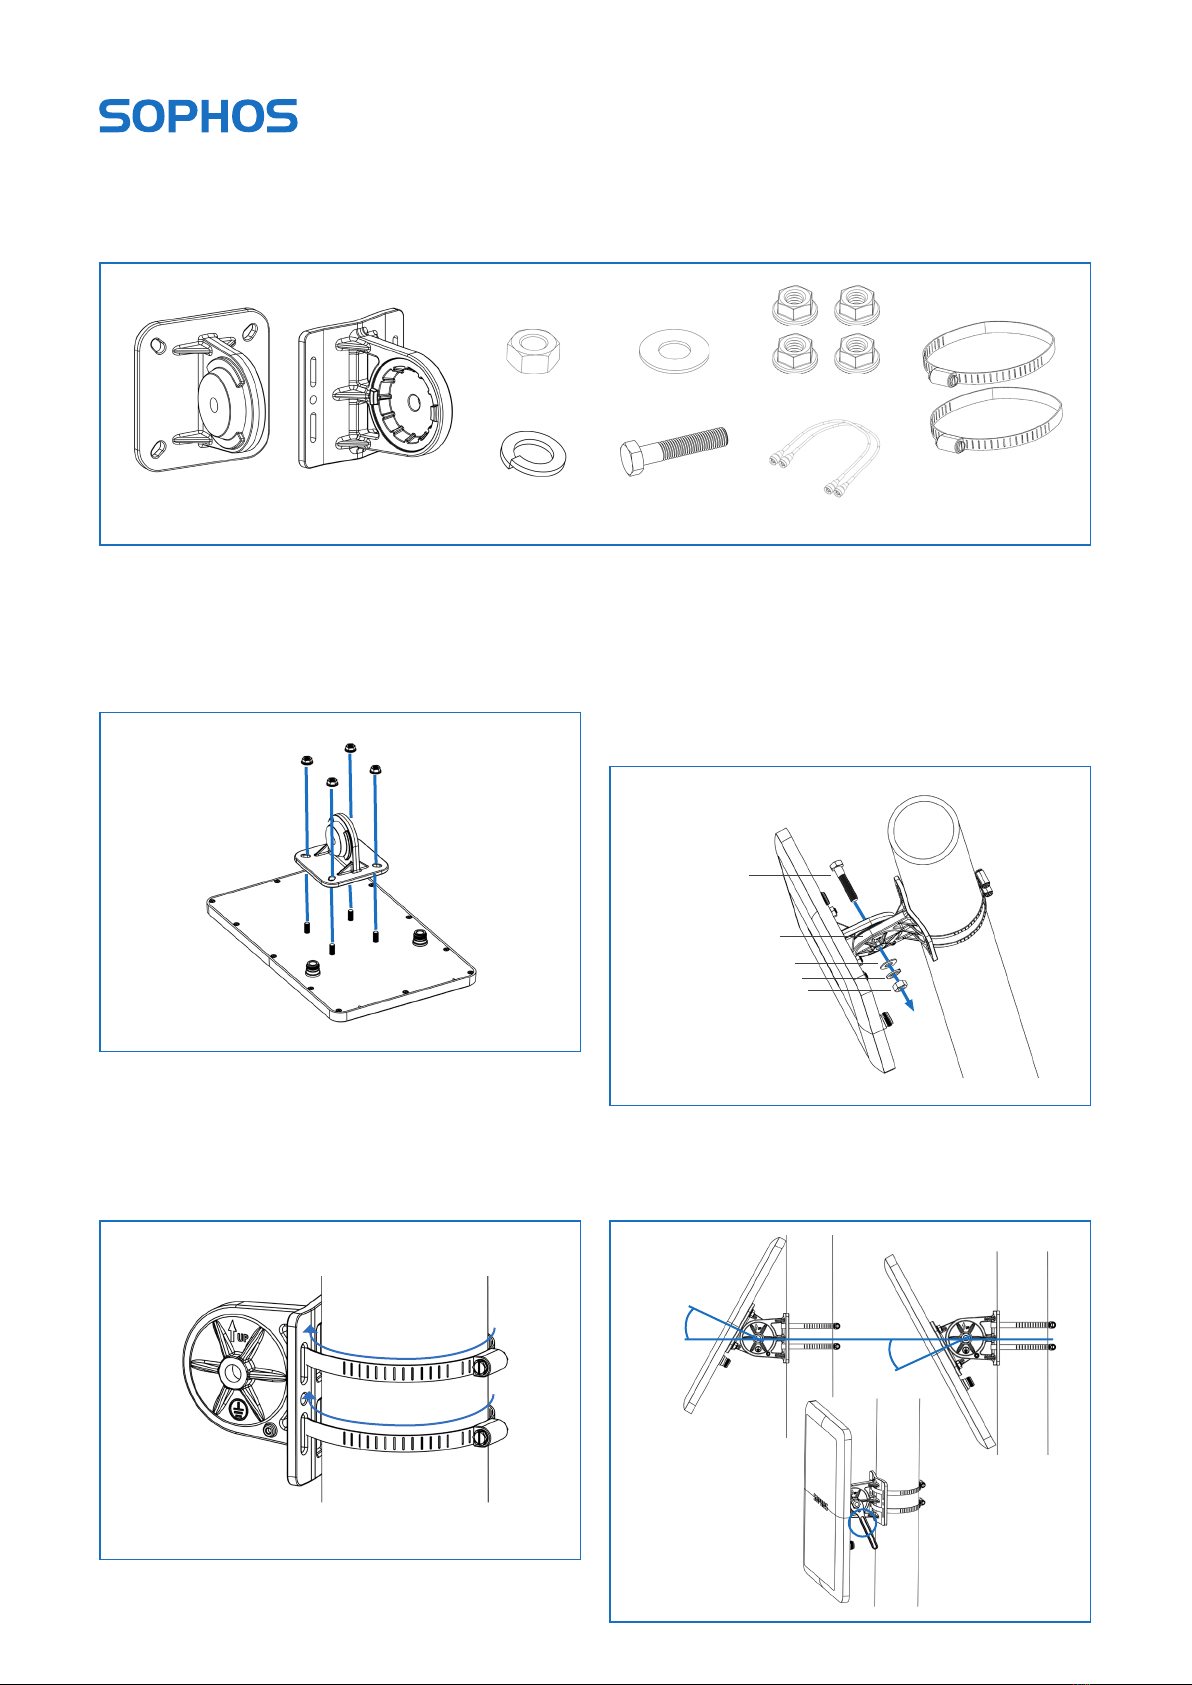
Sector / Directional Antenna Mounting Instructions APX 320X
Scenario Radio 0
(2.4/5 GHz High Band)
Radio 1
(5 GHz Low Band)
aSector / Directional (Top / Bottom) Sector / Directional (Top / Bottom)
bSector / Directional (Top / Bottom) Omni (Top / Bottom)
cOmni (Top / Bottom) Sector / Directional (Top / Bottom)
a. b. c.
United Kingdom and Worldwide Sales
Tel: +44 (0)8447 671131
North American Sales
Toll Free: 1-866-866-2802
Australia and New Zealand Sales
Tel: +61 2 9409 9100
Asia Sales
Tel: +65 62244168
© Copyright 2020. Sophos Ltd. All rights reserved.
Registered in England and Wales No. 2096520, The Pentagon, Abingdon Science Park, Abingdon, OX14 3YP, UK
Sophos is the registered trademark of Sophos Ltd. All other product and company names mentioned are
trademarks or registered trademarks of their respective owners.
2020-09-04 (PC)