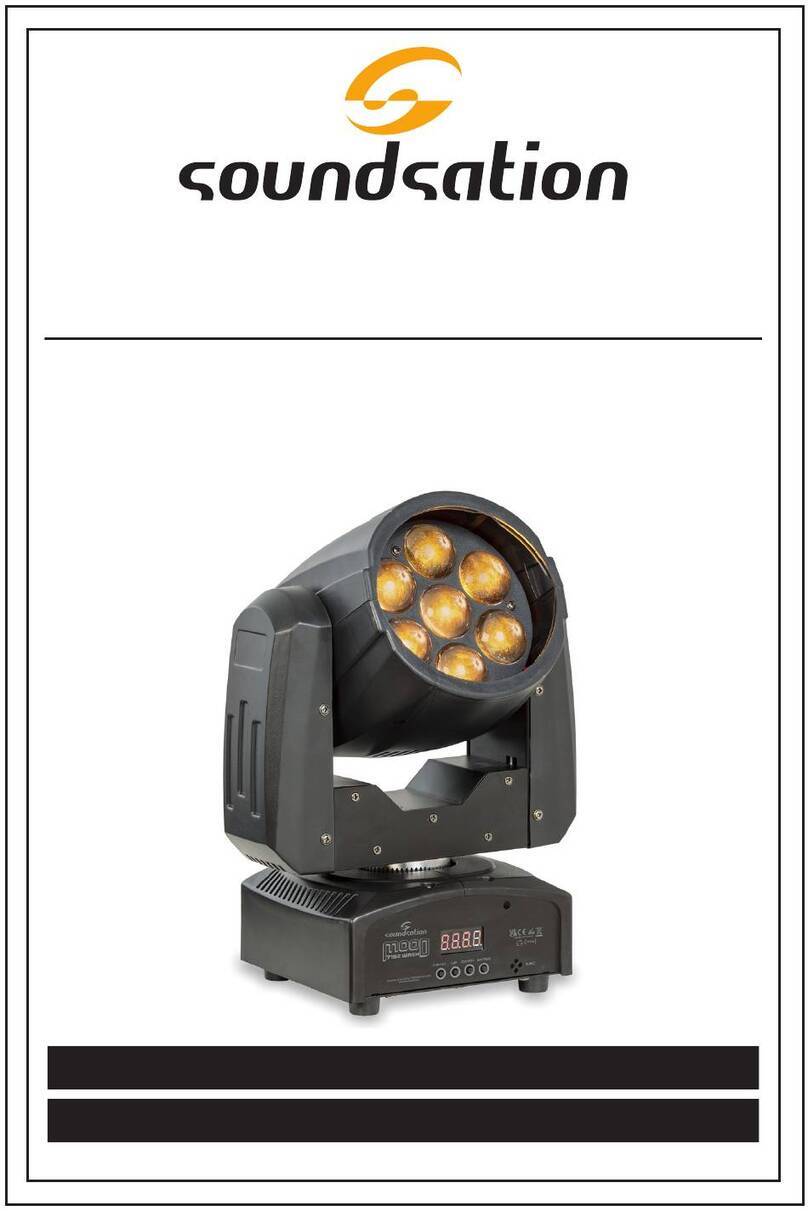
Sound Sation PAR-181R User manual

Please read this manual carefully and proper take care of this manual.
USER MANUAL
PAR-181R
18x1W (6R, 6G, 6B) PAR Light
with remote control
Leggete questo manuale e conservatelo per future consultazioni!
MANUALE utente

Dear customer,
First of all thanks for purchasing a SOUNDSATION® product. Our mission is to satisfy
all possible needs of musical instrument, professional audio and lighting users offering
a wide range of products using the latest technologies.
We hope you will be satised with this item and, if you want to collaborate, we are
looking for a feedback from you about the operation of the product and possible im-
provements to introduce in the next future. Go to our website www.soundsationmusic.
com and send an e-mail with your opinion, this will help us to build instruments ever
closer to customer’s real requirements.
One last thing: read this manual before using the instrument, an incorrect operation
can cause damages to you and to the unit. Take care!
The SOUNDSATION Team
Gentile Cliente,
Grazie per aver scelto un prodotto SOUNDSATION®. La nostra missione è quella di
offrire ai nostri utenti una vasta gamma di strumenti musicali ed apparecchiature audio
e lighting con tecnologie di ultima generazione.
Speriamo di aver soddisfatto le vostre aspettative e, se voleste collaborare, saremmo
lieti di ricevere un vostro feedback sulla qualità del prodotto al ne di migliorare co-
stantemente la nostra produzione. Visitate il nostro sito www.soundsationmusic.com ed
inviateci una mail con la vostra opinione, questo ci aiuterà a sviluppare nuovi prodotti
quanto più vicini alle vostre esigenze.
Un’ultima cosa, leggete il presente manuale al ne di evitare danni alla persona ed al
prodotto, derivanti da un utilizzo non corretto.
Il Team SOUNDSATION

TABLE OF CONTENTS
1. UNPACKING ...............................................................................................................6
1.1. Getting started........................................................................................................................................................6
2. ACCESSORIES .............................................................................................................7
3. OVERVIEW..................................................................................................................7
4. MAIN FEATURES........................................................................................................7
5. REAR PANEL CONTROLS...........................................................................................7
6. INSTALLATION...........................................................................................................8
6.1. Rigging and Clamps..............................................................................................................................................8
6.2. Mains Connections................................................................................................................................................9
6.3. DMX-512 Connection...........................................................................................................................................9
7. LED DISPLAY AND BUTTONS OPERATION ...........................................................10
7.1. LED display function ...........................................................................................................................................10
8. DMX512 CHANNEL CHART (7CH).........................................................................11
9. IR REMOTE CONTROL .............................................................................................12
10. SPECIFICATIONS ......................................................................................................12
11. WARRANTY AND SERVICE .....................................................................................14
12. WARNING.................................................................................................................14
3
ENGLISH

IMPORTANT SAFETY SYMBOLS
The symbol is used to indicate that some hazardous live terminals are
involved within this apparatus, even under the normal operating con-
ditions, which may be sufcient to constitute the risk of electric shock
or death.
The symbol is used in the service documentation to indicate that spe-
cic component shall be replaced only by the component specied in
that documentation for safety reasons.
Protective grounding terminal
Alternating current/voltage
Hazardous live terminal
Denotes the apparatus is turned on
Denotes the apparatus is turned off
WARNING: Describes precautions that should be observed to prevent the danger
of injury or death to the operator.
CAUTION: Describes precautions that should be observed to prevent danger of
the apparatus.
TAKING CARE OF YOUR PRODUCT
fRead these instructions
fKeep these instructions
fHeed all warning
fFollow all instructions
Water / Moisture
The apparatus should be protected from moisture and rain and can not be used near
water; for example near a bathtub, a kitchen sink, a swimming pool, etc.
Heat
The apparatus should be located away from heat sources such as radiators, stoves or
other appliances that produce heat.
4
ENGLISH
WF-U11 User manual

Ventilation
Do not block areas of ventilation opening. Failure to do could result in re. Always
install according to the manufacturer’s instructions.
Object and Liquid Entry
Objects do not fall into and liquids are not spilled into the inside of the apparatus for
safety.
Installation
Always secure xture using a safety chain and carrying handles. Never carry the xture
by its cord.
Power Cord and Plug
Protect the power cord from being walked on or pinched particularly at plugs, conve-
nience receptacles, and the point where they exit from the apparatus. Do not defeat
the safety purpose of the polarized or grounding-type plug. A polarized plug has two
poles; a grounding-type plug has two poles and a third grounding terminal. The third
prong is provided for your safety. If the provided plug does not t into your outlet, refer
to an electrician for replacement.
Power Supply
In case of external power supply, the apparatus should be connected to the power sup-
ply only of the type as marked on the apparatus or described in the manual. Failure to
do could result in damage to the product and possibly the user. Unplug this apparatus
during lightning storms or when unused for long periods of time.
Fuse
To prevent the risk of re and damaging the unit, please use only of the recommend-
ed fuse type as described in the manual. Before replacing the fuse, make sure the unit
turned off and disconnected from the AC outlet.
Electrical Connection
Always disconnect from power source before servicing or replacing fuse and be sure
to replace with same fuse size and type. Cut off power before moving, repairing and
cleaning the machine. Improper electrical wiring may invalidate the product warranty.
To avoid electric shock, all xtures must be connected to circuits with a suitable ground.
Do not power on and power off the xture in a short time.
DMX connection
When use DMX controller, please make sure that there is no interference sources (e.g.
intercom, high frequency radio waves and radiation source).
Cleaning
Clean only with a dry cloth. Do not use any solvents such as benzene or alcohol.
5
ENGLISH
WF-U11 User manual

Servicing
In case of failure or mis-function occurred, stop using the unit immediately, Do not
implement any servicing other than those means described in the manual. Refer all
servicing to qualied service personnel only. Only use accessories/attachments or parts
recommended by the manufacturer.
Warning
Please remember the high sound pressure do not only temporarily damage your sense
of hearing, but can also cause permanent damage. Be careful to select a suitable vol-
ume.
Interference from cell phone
Using a cell phone near the wireless system can induce noise. If this occurs, move the
cell phone further away from the components of the wireless system.
1. UNPACKING
Carefully unpack the box and check the contents to ensure that all parts are present
and in good conditions. Package includes following parts:
fPAR-181R PAR light
fRemote control (Lithium battery not included)
fThis user manual
If anything damaged during transport, notify the shipper immediately and keep the
packing material for inspection. Again, please save the carton and all packing materi-
als. If the xture must be returned to manufacturer, it is important that the xture be
returned in the original manufacturer box and packing.
ATTENTION: Packaging bag is not a toy! Keep out of reach of children!!! Keep
in a safe place the original packaging material for future use.
1.1. Getting started
Make sure there is enough space around the unit for proper ventilation and prevent
overheating; do not place the unit on top of hot devices such as radiators or power
ampliers. The xture is connected to mains through its mains cord. The product meets
the required safety standards.
Make sure that all units must be properly grounded. For your safety, you
should never remove any ground connector from electrical devices or power
cables, or make them inoperative.
Our products are subject to a process of continual further development. Therefore
modications to the technical features remain subject to change without further notice.
6
ENGLISH
WF-U11 User manual

2. ACCESSORIES
SOUNDSATION can supply a wide range of quality accessories that you can use with
your this PAR, like DMX Cables, Lighting consoles, and other accessories.
All products in our catalogue has been long tested with this device so we recommend
to use Genuine SOUNDSATION Accessories and Spare Parts.
Ask your SOUNDSATION dealer for any accessories you could need to ensure best
performance of the product.
3. OVERVIEW
PAR-181R combines LED technology benets with DMX and IR remote control in a
lightweight housing. It is equipped with 18pcs ultra-brightness 1W LED (6 Red, 6 Green,
6 Blue) and it meets many live or xed installation applications. The compact housing
design helps heat radiation so it works more stably in despite of how rigorous con-
dition it is. What’s more, it is driven by the latest dimmer technology so it brings you
more smooth and excellent color mixture. Finally, the IR remote control function make
it very easy use. Even without a DMX controller.
4. MAIN FEATURES
f1W x 18PCS (6R, 6G, 6B) high brightness LEDs
fAdvanced dimmer system
fIR remote control
5. REAR PANEL CONTROLS
MENU UP DOWN ENTER
1
2
3
4 5
1. Display: It shows all menus and functions. Please refer to “7. LED DISPLAY AND
BUTTONS OPERATION” at page 10 for further information.
2. Buttons: The four buttons allow the user to navigate all menus and change value
7
ENGLISH
WF-U11 User manual

to all functions. Please refer to “7. LED DISPLAY AND BUTTONS OPERATION” at
page 10 for further information.
3. DMX Signal output: It transfers DMX signal to next xture. Please use 3pin XLR
signal cable.
4. DMX signal input: It receives DMX signal from another xture. Please use 3pin
XLR signal cable.
5. Power PLUG: This is a grounding-type plug with two poles and a third grounding
terminal. The third prong is provided for your safety. If the provided plug does not
t into your outlet, refer to an electrician for replacement.
6. INSTALLATION
6.1. Rigging and Clamps
Pay attention to the safety! Please respectively consider the EN 60598-2-17
and the national standard during the installation. The authorized dealer must
only carry out the installation.
The installation of the xture has to be built and constructed in a way that it can hold
10 times the weight for 1 hour without any harming demolish. The installation must al-
ways be secured with a secondary safety attachment, e.g. an appropriate catch net. This
secondary safety attachment must be constructed in a way that no part of the installa-
tion can fall down if the main attachment fails.
When rigging, de-rigging or servicing the xture staying in the area below the instal-
lation place, on bridges, under high working places and other endangered areas is
forbidden. The operator has to make sure that the safety measure and the machine’s
technical installation is approved by an expert before taking into operation for the rst
time and after changes before taking into operation anther time. He has also to make
sure that an expert approves safety measure and the machine’s technical installation
once a years.
WARNING:Thextureshouldbeinstalledoutsideareaswherepersonsmay
walk by or be seated.
IMPORTANT:Overheadriggingrequiresextensiveexperience,including(but
not limited to) calculating working load limits, installation material being
used, and periodic safety inspection of all installation material and the pro-
jector.Ifyoulackthesequalications,donotattempttheinstallationyour-
self, but instead use a professional structural rigger. Improper installation can
result in bodily injury or property loss.
If the xture shall be lowered from the ceiling or high joists, professional trussing
systems have to be used. The xture must never be xed swinging freely in the room.
8
ENGLISH
WF-U11 User manual

Before rigging make sure that the installation area can hold a minimum point load of 10
times the projector’s weight.
CAUTION:Fixturemaycausesevereinjurieswhencrashingdown.Ifyouhave
doubts concerning the safety of a possible installation, do not install the
xture!
CAUTION:Usetwoappropriateclampstorigthextureonthetruss.Follow
the instructions mentioned at the bottom of the base. Make sure that the
deviceisxedproperly!Ensurethatthestructure(truss)towhichyouare
attachingthexturesissecure.
DANGER OF FIRE! When installing the device, make sure there is no highly
inammablematerial(decorationarticles,etc.)withinadistanceofminimum
0.5m.
For overhead use, always install a safety rope that can hold at least 10 times the weight
of the xture.
6.2.Mains Connections
Connect the device to mains with the power-plug. Wire correspondence is as follow:
WIRE PIN INTERNATIONAL
Brown Live L
Blue Neutral N
Yellow/Green Earth
The earth must to be connected! Pay attention to safety!
Before taking into operation for the rst time, the installation has to be approved by an
expert.
6.3.DMX-512 Connection
Wires must not come into contact with each
other; otherwise the xtures will not work at all,
or will not work properly. Only use a DMX cable,
3-pin XLR plugs and connectors in order to con-
trol with the xture or one xture with another.
If you are using the recommended controllers,
you can connect the DMX output of the controller directly with the DMX input of the
rst xture in the DMX chain. If you wish to connect DMX controllers with other XLR
output, you need to use adapter-cables.
DMX use of XLR connectors
1 = Ground / Shield
2 = DMX +
3 = DMX -
INPUT OUTPUT
9
ENGLISH
WF-U11 User manual

Building a Serial DMX Chain
DMX 512
DMX Termonator
Connect the DMX output of the rst xture in the DMX chain with the DMX input of
the next xture. Always connect one output with the input of the next xture until all
xtures are connected.
A word on termination: DMX is a resilient communication protocol,
however errors still occasionally occur. Termination reduces signal
errors, and therefore best practices include use of a terminator in all
circumstances. If you are experiencing problems with erratic xture
behavior, especially over long signal cable runs, a terminator may
help improve performance.
To build your own DMX Terminator: Obtain a 120-ohm, 1/4-watt resistor, and wire it be-
tween pins 2&3 of the last xture. They are also readily available from specialty retailers.
Complimentarysignalcablecantransmitssignalsto20unitxturesatmost.
Signalamplierisamusttoconnectmorextures.
7. LED DISPLAY AND BUTTONS OPERATION
1 2 3 4
Sq No. Display Function
1 MENU It enter selected menu
2 UP Next menu/value
3 DOWN Previous menu/value
4 ENTER It enters select function
7.1. LED display function
Press MENU button to choose a function and ENTER button to enter the chosen func-
tion; then press UP/DOWN button to select a parameter and ENTER to conrm. Menu
DMX Terminator
120ohm, 1/4W
resistor
10
ENGLISH
WF-U11 User manual

operation as follows:
No. MENU Description
1 D001-D512 DMX channel selection: it changes numerical value by press-
ing up and down buttons
2 CC01-CC64 Color selection: it selects different colors by pressing up and
down buttons
3 RB01-RB16 Colors fade: it changes speed by pressing up and down
buttons; the bigger values, the faster
4 PL01-PL16 Colors pulse transform: it changes speed by pressing up and
down buttons; the bigger values, the faster
5 SD01-SD16 Colors transition: it changes speed by pressing up and
down; the bigger values, the faster
6 Sound Sound control mode selection
7 R000-R255 Manual set R: Red color brightness setting. It changes
brightness by up and down
8 G000-G255 Manual set G: Green color brightness setting. It changes
brightness by up and down
9 B000-B255 Manual set B: Blue color brightness setting. It changes
brightness by up and down
8. DMX512 CHANNEL CHART (7CH)
CH Function Specication
CH1
0-10 No action
11-50 A1 select
51-100 A2 saltus step
101-150 A3 shadow
151-200 A4 voice control
201-255 A5 strobe
CH2
0-39 All color circulation 01
40-59 Red 02
60-79 Green 03
80-99 Blue 04
100-119 Yellow 05
120-139 Cyan 06
140-159 Purple 07
160-179 Red blue 08
180-199 Red blue 09
200-219 Green blue 10
220-255 Red green blue 11
11
ENGLISH
WF-U11 User manual

CH3 0 No action
1-255 Blue dimming. From dark to bright
CH4 0 No action
1-255 Blue dimming. From dark to bright
CH5 0 No action
1-255 Strobe. From slow to fast
CH6
0-10 Controlled by CH2-CH5
11-60 Macro program 1
61-110 Macro program 2
111-160 Macro program 3
160-210 Macro program 4
211-255 Macro program 5
CH7 0-255 Blue 0-255 0-100% white dimming
9. IR REMOTE CONTROL
PAR-10W-7-R features an IR remote controller. It operates within 10m from the xture.
LED On/Off
Dimmer function with 0-255 value. Press "UP" and
"DOWN" to change brightness
Choose different colors. Press "UP" and "DOWN" to
choose different color combinations
Gradual color change. Press "UP" and "DOWN" to
change speed
Pulse color change. Press "UP" and "DOWN" to change
speed
Jump change. Press "UP" and "DOWN" to change speed
Sound control
DMX control mode. Press "UP"/"DOWN" to add/subtract
address value. D001 is slave mode when controller is not
connected
Macro selection. Press “UP” and “DOWN” to choose
among different macro programs
10. SPECIFICATIONS
Voltage: AC100-240V, 50Hz/60Hz
Power consumption: 25W
Light source: 18x1W (R6, G6, B6)
LED lamps Life Time: 60000 hours
12
ENGLISH
WF-U11 User manual

Color temperature: 6000-6500K
Beam angle: 25°
Control panel: 4 Digital LED display digits
Control mode: Sound activation, Auto, Master/Slave, DMX512, IR remote
DMX channels: 7CH
IR remote: up to 10 meters
Working environment: Indoor, -20°C to 40°C
Protection rate: IP20
Cover: Plastic
Dimension size (WxHxD): 177 x 180 x 100 mm (brackets installed)
Packing size (WxHxD): 190 x 190 x 130 mm
Net Weight: 0.8 kg
Gross Weight: 1.0 kg
13
ENGLISH
WF-U11 User manual

11. WARRANTY AND SERVICE
All SOUNDSATION products feature a limited two-year warranty. This two-year warranty is specic
to the date of purchase as shown on your purchase receipt.
The following cases/components are not covered from the above warranty:
• Any accessories supplied with the product
• Improper use
• Fault due to wear and tear
• Any modication of the product effected by the user or a third party
SOUNDSATION shall satisfy the warranty obligations by remedying any material or manufacturing
faults free of charge at SOUNDSATION’S discretion either by repair or by exchanging individual
parts or the entire appliance. Any defective parts removed from a product during the course of a
warranty claim shall become the property of SOUNDSATION.
While under warranty period, defective products may be returned to your local SOUNDSATION
dealer together with original proof of purchase. To avoid any damages in transit, please use the
original packaging if available. Alternatively you can send the product to SOUNDSATION SERVICE
CENTER – Via Enzo Ferrari , 10 – 62017 Porto Recanati - Italy . In order to send a product to service
center you need an RMA number. Shipping charges have to be covered by the owner of the prod-
uct.
For further information please visit www.soundsationmusic.com
12. WARNING
PLEASE READ CAREFULLY – EU and EEA (Norway, Iceland and Liechtenstein) only
This symbol indicates that this product is not to be disposed of with your household waste, ac-
cording to the WEEE Directive (2202/96/EC) and your national law.
This product should be handed over to a designated collection point, e.g., on an authorized one-
for-one basis when you buy a new similar product or to an authorized collection site for recycling
waste electrical and electronic equipment (WEEE).
Improper handling of this type of waste could have a possible negative impact on the environment
and human health due to potentially hazardous substances that are generally associated with EEE.
At the same time, your cooperation in the correct disposal of this product will contribute to the
effective usage of natural resources.
For more information about where you can drop off your waste equipment for recycling, please
contact your local city ofce, waste authority, approved WEEE scheme or your household waste
disposal service.
14
ENGLISH
WF-U11 User manual

SOMMARIO
13. DISIMBALLAGGIO ...................................................................................................18
13.1. Per iniziare ..............................................................................................................................................................18
14. ACCESSORI ...............................................................................................................19
15. PANORAMICA..........................................................................................................19
16. CARATTERISTICHE...................................................................................................19
17. PANNELLO POSTERIORE.........................................................................................19
18. INSTALLAZIONE.......................................................................................................20
18.1. Montaggio sospeso ............................................................................................................................................20
18.2. Connessioni di rete..............................................................................................................................................21
18.3. Collegare il DMX-512.........................................................................................................................................21
19. FUNZIONI DEL DISPLAY E DEI CONTROLLI ..........................................................22
19.1. Funzioni del display ............................................................................................................................................22
20. TABELLA DEI CANALI DMX512 (7CH) ...................................................................23
21. CONTROLLO REMOTO IR........................................................................................24
22. SPECIFICHE...............................................................................................................24
23. GARANZIA ED ASSISTENZA ...................................................................................26
24. AVVISO .....................................................................................................................26
15
ITALIANO

IMPORTANTI ISTRUZIONI DI SICUREZZA
Il simbolo è usato per indicare che in questa apparecchiatura sono
presenti alcuni terminali sotto tensione pericolosi, anche in condizioni
di normale funzionamento, che possono costituire rischio di scosse
elettriche o di morte.
Il simbolo viene utilizzato nella documentazione di servizio per indi-
care che uno specico componente può essere sostituito esclusiva-
mente dal componente specicato nella documentazione per motivi di
sicurezza.
Terminale di Terra
Corrente/Tensione alternata
Terminale in tensione pericoloso
Indica che l’apparato è acceso
Indica che l’apparato è spento
WARNING: Precauzioni da osservare per evitare il pericolo di ferimento o di morte
per l’utilizzatore.
CAUTION: Precauzioni da osservare per evitare danni all’apparecchio.
CURA DEL PRODOTTO
fLeggete queste istruzioni
fConservate queste istruzioni
fRispettate tutte le avvertenze
fSeguite tutte le istruzioni
ACQUA / UMIDITA
L’apparecchio deve essere protetto dall’umidità e dalla pioggia, non può essere usato
in prossimità di acqua; ad esempio nei pressi di una vasca da bagno, di un lavandino, di
una piscina, etc.
Calore
L’apparecchio deve essere posto lontano da fonti di calore come radiatori, stufe o altri
apparecchi che producono calore.
16
ITALIANO
Manuale d’uso PAR-181R

Ventilazione
Non ostruite le prese d’aria per la ventilazione: ciò potrebbe provocare incendi. Installate
sempre l’unità secondo le istruzioni del produttore.
Introduzione di oggetti e liquidi
Non introdurre oggetti o versare liquidi all’interno dell’apparato per ragioni di sicurezza.
Installazione
Avere sempre un ssaggio sicuro utilizzando una catena di sicurezza e maniglie di tra-
sporto. Non trasportare l’apparecchio mediante il cavo.
CAVO DI RETE
Proteggere il cavo di alimentazione per evitare che venga calpestato o schiacciato, in
particolare in corrispondenza delle spine, prese e il punto di uscita dall’apparecchio.
Non annullare l’obiettivo di sicurezza della spina polarizzata o con messa a terra. Una
spina polarizzata ha due poli; una spina di messa a terra presenta due poli ed un terzo
terminale di terra. Il terzo polo è previsto per la vostra sicurezza. Se la spina fornita non
entra nella presa, consultare un elettricista per la sostituzione.
Alimentazione
L’apparecchio deve essere collegato alla sorgente di alimentazione elettrica del tipo
indicato sull’apparecchio o descritto nel manuale. In caso contrario si potrebbero
provocare danni al prodotto ed eventualmente all’utente. Staccate la spina in caso di
temporali o quando non viene utilizzato per lunghi periodi di tempo.
Fusibile
Per evitare il rischio di incendio e danneggiare l’apparecchio, utilizzare solo il tipo di
fusibile come descritto nel manuale. Prima di sostituire il fusibile, assicurarsi che l’unità
spento e scollegato dalla presa di corrente.
Collegamento alla rete elettrica
Scollegare sempre il prodotto dalla corrente prima di sostituire fusibili e accertarsi di
montare lampade con le stesse dimensioni e dello stesso tipo del fusibile. Scollegare
l’alimentazione prima di spostare, riparare e pulire la macchina. Un cablaggio elettrico
improprio può invalidare la garanzia del prodotto.
Per evitare shock elettrico, tutti gli apparecchi devono essere collegati a circuiti con un
terreno adatto. Non accendere e spegnere l’apparecchio in un breve periodo di tempo.
Collegamento del DMX
Quando viene usato una centralina DMX, assicurarsi che non vi siano fonti di interfe-
renza (per esempio citofoni, onde radio ad alta frequenza e sorgente di radiazione).
Pulizia
Pulire solo con un panno asciutto. Non utilizzare solventi come benzene o alcool.
17
ITALIANO
Manuale d’uso PAR-181R

Manutenzione
In caso di guasto o malfunzionamento, interrompere immediatamente l’unità. Non ef-
fettuate qualsiasi altro intervento al di fuori di quelli descritti nel manuale. Per eventua-
le assistenza rivolgetevi solo a personale qualicato. Utilizzate solo accessori / compo-
nenti suggeriti dal produttore.
Avvisi
Vogliamo ricordare che un’alta pressione sonora non solo può danneggiare temporane-
amente il senso dell’udito, ma può anche causare danni permanenti. Prestate attenzio-
ne afnché il volume sia sempre adeguato.
Interferenze dovute a telefoni cellulari
Usare un telefono cellulare vicino a sistemi wireless può causare rumori. Se ciò avviene,
allontanate il cellulare dai componenti del sistema wireless.
13.DISIMBALLAGGIO
Disimballare con cura la confezione e controllare il contenuto per garantire che tutte le
parti siano presenti e in buone condizioni. La confezione include le seguenti parti:
fFaro PAR-181R
fTelecomando per controllo remoto (Batteria al Litio non inclusa)
fQuesto manuale d’uso
Se qualcosa risulta danneggiata durante il trasporto, informare immediatamente lo
spedizioniere e mantenere il materiale di imballaggio per l’ispezione. Anche in questo
caso, si prega di conservare il cartone e tutti i materiali di imballaggio. Se l’apparecchio
deve essere restituito al produttore, è importante che il prodotto sia imballato nella
scatola originale del produttore.
ATTENZIONE: L’imballo non è un giocattolo! Tenere fuori dalla portata dei bambini!!!
Conservare in un luogo sicuro il materiale di imballaggio originale per un utilizzo futuro.
13.1. Per iniziare
Assicurarsi che vi sia spazio sufciente intorno all’unità per una corretta ventilazione e
prevenire il surriscaldamento; non posizionare l’unità sopra dispositivi di calore come
radiatori o amplicatori di potenza. L’apparecchio è collegato alla rete elettrica tramite il
cavo di alimentazione. Il prodotto soddisfa gli standard di sicurezza.
Assicurarsi che tutte le unità devono essere adeguatamente messe a terra.
Per la vostra sicurezza, non si dovrebbe mai rimuovere le presa di terra degli
apparecchi o del cavo di alimentazione, o renderle in-operative.
I nostri prodotti sono soggetti ad un processo di continuo sviluppo. Pertanto modiche
alle caratteristiche tecniche restano soggette a modiche senza preavviso.
18
ITALIANO
Manuale d’uso PAR-181R

14.ACCESSORI
SOUNDSATION in grado di fornire una vasta gamma di accessori di qualità che è
possibile utilizzare con questo PAR, come cavi DMX, console di illuminazione, e altri
accessori.
Tutti i prodotti del catalogo SOUNDSATION sono stati a lungo testati con questo dispo-
sitivo quindi si consiglia di utilizzare accessori originali e parti di ricambio Soundsation.
Chiedete al vostro rivenditore SOUNDSATION per gli accessori il necessario per garantire
le migliori prestazioni del prodotto.
15.PANORAMICA
PAR-181R combina tutti i più recenti vantaggi della tecnologia LED con DMX e
telecomando IR in un involucro leggero. PAR-181R è dotato di 18 LED ad ultra-luminosità
da 1W (6 Rossi, 6 Verdi, 6 Blu) in modo da soddisfare la maggior parte delle applicazioni
in installazione diretta o ssa. Il design alloggiamento compatto aiuta la dispersione del
calore in modo che il funzionamento sia più stabile a dispetto della rigorosa condizione.
In più, è dotato della più recente tecnologia dimmer in modo che la combinazione dei
colori risulti più liscia ed eccellente. Inne, la funzione di controllo remoto a infrarossi
rende l’uso molto facile. Anche senza una centralina DMX.
16.CARATTERISTICHE
f18 LED ad alta luminosità da 1W (6R, 6G, 6B)
fSistema dimmer avanzato
fTelecomando per controllo remoto a infrarossi
17. PANNELLO POSTERIORE
MENU UP DOWN ENTER
1
2
3
4 5
1. Display: Mostra il menu e tutte le funzioni. Per favore, fare riferimento al capitolo “19.
FUNZIONI DEL DISPLAY E DEI CONTROLLI” a pagina 22 per ulteriori informazioni.
19
ITALIANO
Manuale d’uso PAR-181R

2. Tasti: I quattro tasti permettono di navigare nel menu e cambiare il valore di tutte le
funzioni. Fare riferimento al capitolo “19. FUNZIONI DEL DISPLAY E DEI CONTROLLI”
a pagina 22 per ulteriori informazioni.
3. Uscita del segnale DMX: Trasferisce il segnale DMX al prossimo apparecchio. Si
prega di usare il cavo XLR a 3 piedini.
4. Ingresso del segnale DMX: Riceve il segnale DMX da un altro apparecchio. Si prega
di usare il cavo XLR a 3 piedini.
5. Alimentazione: Questa spina è del tipo a due poli ed un terzo terminale di terra.
Il terzo polo è previsto per massima la sicurezza. Se la spina fornita non entra nella
presa, consultare un elettricista per la sostituzione.
18. INSTALLAZIONE
18.1. Montaggio sospeso
Prestare attenzione alla sicurezza! Si prega di prendere in considerazione,
rispettivamente, la norma EN 60598-2-17 e la norma nazionale durante l’in-
stallazione. Il rivenditore autorizzato può eseguire solo l’installazione.
L’installazione dell’apparecchio deve essere effettuata in modo da poter sopportare 10
volte il peso per 1 ora senza danneggiamento. L’installazione deve essere sempre assi-
curata con un’allacciatura di sicurezza, ad esempio una rete di cattura adeguata. Questa
dispositivo di sicurezza aggiuntivo deve essere installato in modo che nessuna parte
dell’impianto possa cadere qualora l’ancoraggio principale venga meno.
Durante il montaggio, la sostituzione delle parti o la riparazione, è vietato posizionare
la macchina nella zona sottostante il luogo di installazione, su ponti, sotto a postazioni
alte di lavoro e altre aree a rischio. L’operatore deve assicurarsi che le misure di sicurez-
za e l’installazione tecnica sia approvata da un esperto prima di mettere in funzione per
la prima volta o riutilizzare la macchina dopo alcune modiche. Inoltre, l’operatore deve
fare in modo che un esperto approvi le misure di sicurezza e l’installazione tecnica della
macchina una volta all’anno anno.
ATTENZIONE: L’apparecchio deve essere installato in aree esterne dove le
persone possono passeggiare o stare sedute.
IMPORTANTE: Il montaggio del prodotto richiede una certa esperienza,
inclusa (ma non limitata) a calcolare limiti di carico di lavoro, materiale di
installazione utilizzato e controlli di sicurezza periodici di tutto il materiale di
installazione. Se mancano tali presupposti, non tentare l’installazione da soli,
maafdarsiaduntecnicospecializzatoeprofessionale.L’installazionenon
corretta può causare danni alle persone o danni a proprietà.
Se l’apparecchio deve essere montato più basso dal softto, devono essere utilizzati
20
ITALIANO
Manuale d’uso PAR-181R
Table of contents
Languages:
Other Sound Sation Light Fixture manuals
Popular Light Fixture manuals by other brands
Cameo
Cameo ROOT PAR 4 user manual

Chauvet
Chauvet LEG-5000 supplementary guide
aidapt
aidapt VG830 Fitting and Maintenance Instructions
Blizzard Lighting
Blizzard Lighting G60 user manual
Lithonia Lighting
Lithonia Lighting VAP installation instructions

Westfalia
Westfalia Wetelux 91 96 03 Original instructions
American Lighting
American Lighting LS Series installation instructions

Euri
Euri EPN24-2040sem-2 installation guide

Philips
Philips iColor Cove QLX Powercore installation instructions
Philips
Philips GreenPerform RC160V Mounting instruction

RAB Lighting
RAB Lighting GNLED13Y instruction manual
SEVEN
SEVEN G40 quick start guide
