manuals.online logo
Brands
  1. Home
  2. •
  3. Brands
  4. •
  5. SOUNDMASTER
  6. •
  7. CD Player
  8. •
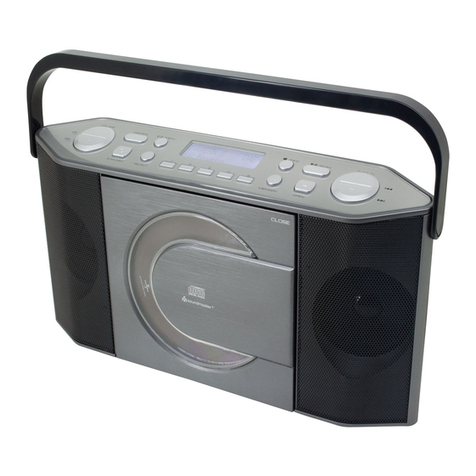
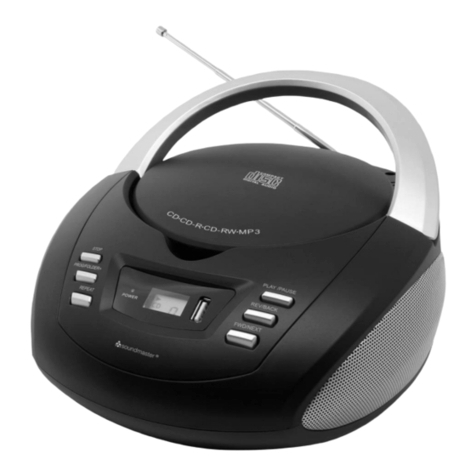
  9. SOUNDMASTER RCD 1100 User manual

SOUNDMASTER RCD 1100 User manual

ALIMENTATION : AC : 230 ~ 50 Hz
DC : 9V 1.5V 6 TYPE C / LR14 / UM2
DIMENSIONS : 265(L) x 157(H) x 82(P)
Poids Net :
RADIO
GAMME DE FREQUENCES : FM/MODULATION DE FREQUENCE : 88 - 108 MHz
AM/MODULATION D’AMPLITUDE : 540 - 1600KHz
DISQUE COMPACT
TETE DE LECTURE LASER : LASER 3 FAISCEAUX
ATTENTION : Cet appareil est équipé d’une tête de lecture à rayon laser.Afin d’éviter tout accident dû à ce type de rayon laser, ce produit ne
doit être ouvert que par une personne qualifiée. L’unité est conforme aux réglementations internationales de sécurité et aux directives de la
communauté européenne. Elle est également conforme aux normes en vigueur en matière de sécurité électrique et de compatibilité
électromagnétique EMC .
Appuyez sur la touche PROGRAMME (13). “PROGRAM” s’affiche et clignote à l’écran (4).
Appuyez sur les touches RETOUR ou AVANCE pour sélectionner le numéro du titre que vous souhaitez mémoriser. Exemple :
TITRE 7.
Appuyez à nouveau sur la touche PROGRAMME (13) pour mémoriser le titre.
Répétez les étapes 2 et 3 jusqu’à ce que tous les titres que vous souhaitez écouter soient programmés.
Appuyez sur LECTURE/PAUSE (10) pour lancer la lecture programmée. “PROGRAM” s’affiche et clignote à l’écran (4).
Appuyez sur la touche ARRET pour arrêter la lecture programmée. La lecture du CD s’arrête mais le programme reste en mémoire.
Appuyez sur la touche PROGRAMME (13) puis sur LECTURE/PAUSE (10) pour reprendre la lecture programmée.Pour effacer
programme mémorisé, ouvrez le couvercle du CD, passez en mode Radio ou positionnez le bouton de fonctions sur “POWER OFF”(7).
1. Positionnez le bouton de fonctions (7) sur CD. Le symbole “--” s’affiche à l’écran (4).
2. Introduisez un disque (face imprimée vers l’extérieur) dans le compartiment de CD (15.16). Le nombre total de titres s’affichent (4).
3. Appuyez sur la touche (10) pour lancer la lecture du CD puis réglez le volume (6) à votre convenance. “ PLAY ” s’affiche à l’écran
(4).
REMARQUE : Utilisez également cette touche pour suspendre momentanément la lecture du CD. “ PLAY ” clignote. Appuyez de
nouveau sur la touche (10) pour reprendre la lecture.
4. Appuyez sur la touche (14) pour arrêter la lecture du disque.
AUTRES FONCTIONS DU LECTEUR CD
SAUT / AVANCE/RETOUR RAPIDE (11): Appuyez une fois sur pour passer au titre suivant ou à plusieurs reprises pour
sauter plusieurs titres. Appuyez sur pour revenir au début du titre ou à plusieurs reprises pour revenir en arrière et sauter plusieurs
titres. Appuyez en continu sur les touches ou pour avancer ou revenir en arrière dans un titre.
LECTURE EN BOUCLE
LECTURE EN BOUCLE D’UN TITRE : Appuyez une fois sur la touche REPETITION (12) pendant la lecture d’un titre. “REPEAT” s’affiche à
l’écran.
LECTURE EN BOUCLE DU CD COMPLET : Appuyez deux fois sur la touche REPETITION (12) jusqu’à ce que “REPEAT ALL” s’affiche à
l’écran.
ANNULATION DE LALECTURE EN BOUCLE : Appuyez de nouveau sur la touche REPETITION (12) jusqu’à ce que “REPEAT” ou
“REPEATALL” disparaissent de l’écran.
LECTURE PROGRAMMEE
- N’utilisez pas votre appareil immédiatement après l’avoir déplacé d’un endroit froid à un endroit chaud. Vous pourriez rencontrer des
problèmes de condensation.
- Gardez votre appareil à l’écart de l’eau et des températures élevées. Nettoyez-le à l’aide d’un chiffon doux ou d’une peau de chamois humide.
N’utilisez jamais de solvant.
REMARQUES CONCERNANT LES CD
- Des rayures, saletés ou empreintes de doigts sur le CD peuvent entraîner des erreurs de lecture. Avant de lancer la lecture, nettoyez le CD à
l’aide d’un chiffon en essuyant du centre vers l’extérieur. Afin d’éviter que les disques ne se déforment, ne les rangez pas dans des endroits
exposés à des températures élevées ou à une forte humidité. Rangez le CD dans son boîtier après chaque lecture.
Cet appareil fonctionne sur courant alternatif (230V~50Hz) ou continu ( 9V ).
FONCTIONNEMENT SUR COURANT ALTERNATIF : Branchez le câble d’alimentation AC fourni avec l’appareil à la prise à l’arrière de
l’unité (17) avant de le brancher à une prise secteur AC adaptée.
FONCTIONNEMENT SUR COURANT CONTINU : Insérez 6 piles de 1.5V (Type C / LR14 /UM2) dans le compartiment de piles (18) à
l’arrière de l’appareil en respectant les polarités indiquées.
REMARQUE : Afin d’éviter toute fuite, enlevez systématiquement les piles si vous n’utilisez pas votre appareil pendant une période prolongée.
RCD 1100
RADIO/LECTEUR CD PORTABLE
1. Positionnez le bouton de fonctions (7) sur AM ou FM.
2. Sélectionnez une station de radio (9,2) et réglez le volume (6) à votre convenance.
FM : Déployez et orientez l’antenne (8) si le signal reçu est faible.
AM : Cet appareil est équipé d’une antenne directionnelle en ferrite. Orientez l’appareil pour obtenir la meilleure qualité de réception des
signaux.
3. Pour éteindre la radio, positionnez le bouton de fonctions (7) sur « Power OFF ».
PRECAUTIONS D’EMPLOI
ATTENTION
RISQUED’ELECTROCUTION
NE PAS OUVRIR
ATTENTION :Afin de prévenir les risques d’électrocution, ne pas retirer le couvercle. Cet appareil ne comporte
aucune pièce réparable par l’utilisateur. Les réparations doivent être effectuées par un réparateur qualifié.
Le symbole de l’éclair dans le triangle a pour but d’attirer l’attention de l’utilisateur sur la présence, à l’intérieur de l’appareil, d’une
tension électrique dangereuse.
Le point d’exclamation dans le triangle a pour but d’attirer l’attention de l’utilisateur sur la présence, dans le manuel qui accompagne
l’appareil, d’informations importantes.
ATTENTION : Le soleil dans le triangle à pour but d’attirer l’attention sur les risques de radiation par le faisceau laser.
Cet appareil utilise un laser ! Des radiations invisibles en cas d’ouverture et de défaillance de mise hors service du dispositif de verrouillage.
Eviter toute exposition directe au faisceau laser.
Toute utilisation des boutons de commande ou réglages ou procédure de fonctionnement autres que ceux décrits dans ce manuel pourra mener
à un risque d’exposition d’une radiation dangereuse.
AVERTISSEMENT :
- Afin de réduire les risques d’incendie ou d’électrocution, ne pas exposer cet appareil à la pluie ou à l’humidité.
- Ne pas obstruer la ventilation.
IMPORTANT
- Ne pas jeter les piles dans le feu !
- Ne pas exposer le produit à des projections de liquides. Ne pas poser d’objets remplis de liquides,
tels que des vases, sur l’appareil.
FR
RD509 / EU / FR / Mar.10
RCD 1100
RADIO/LECTEUR CD PORTABLE
D
Lautsprecher
Senderfrequenzskala
Kopfhörerbuchse
CD-Anzeige
Tragegriff
Lautstärke
Funktionsschalter
UKW-FM Teleskopantenne
Sendereinstellung
CD Start/Pause
Titelsprung/-suche CD
CD Wiederholtaste
CD Programm
CD Stop
CD-Fach öffnen
CD-Fach
Netzkabelanschluss
Batteriefach
Netzanschluss / Einlegen der Batterien (Batterien nicht inkl.)
Schliessen Sie das Netzkabel an die Buchse (17) und Netzstecker an eine Steckdose 230V 50Hz an.
Bei Batteriebetrieb verwenden sie ausschliesslich ALKALINE Batterien 6 Stück UM-2/Type C 1,5V und legen diese in das Batteriefach (18)
polrichtig wie im Fach abgebildet ein.
Radiobetrieb
1. Teleskopantenne (8) für UKW vollständig ausziehen (MW-Ferritantenne im Gerät eingebaut)
2. Funktionsschalter (7) auf Pos. FM-UKW oder AM-MW
3. Mit Regler (9) Senderfrequenz und Regler (6) Lautstärke einstellen.
4. Um das Gerät abzuschalten, Funktionsschalter (7) auf Pos. OFF
CD-Betrieb
1. CD-Fach mit Schalter/Knopf (15) öffnen.
2. Legen Sie eine CD mit der bedruckten Seite zu ihnen zeigend in das CD-Fach vorsichitig ein.
3. Schliessen sie das CD-Fach wieder
4. Funktionsschalter (7) auf Pos. CD. Das Gerät liest die Anzahl der Titel ein und zeigt diese in der Anzeige (4) an.
5. Taste drücken um CD zu starten. Lautstärke mit Regler (6) einstellen.
6. Mit Tasten (11) können sie zum nächsten/vorherigen Titel springen und den Schnellvorlauf starten.
Kurzen drücken: Titelsprung vorwärts/rückwärts
Drücken & halten: Schnellvorlauf/-rücklauf
7. Während des Abspielens, können sie die CD kurzzeitig stoppen
Taste (10) drücken = Pause, wiederholttes Drücken = Wiedergabe
8. Um CD zu komplett zu stoppen, Taste (14) drücken
Kopfhöreranschluss
Schliessen Sie einen Kopfhörer (nicht inkl.) mit 3.5mm Klinkenstecker an die Buchse (3) an.
Der Lautsprecher schaltet automatisch ab
CDWiederholfunktion
Ein Titel wiederholen: Während des Abspielens Taste (12) 1x drücken (Anzeige REPEAT)
Alle Titel wiederholen: Während desAbspielens Taste (12) 2x drücken (Anzeige REAPET ALL)
Programmiertes Abspielen einer CD (max. 20 Titel)
1. Taste Programm (13) drücken (in der Anzeige blinkt PROGRAMM)
2. Mit Tasten (11) gewünschten Titel anwählen
3. Taste Programm (13) nochmals drücken und Titel ist gespeichert
4. Schritte 1-3 so lange wiederholen bis alle Titel (max. 20) gespeichert sind.
5. Taste (10) drücken um programm. Abspielen zu starten (Anzeige PROGRAMM blinkt)
6. Um zu stoppen, Taste (14) STOP drücken (Programm noch im Speicher)
7. Um das Programm wieder zu starten, Taste (13) drücken und Taste (10)
8. Um Programm zu löschen, CD-Fach öffnen oder Funktionsschlalter (7) auf Pos. OFF
Umwelthinweise
Verwenden sie ausschliesslich ALKALINE Batterien, die quecksilber & cadmiumfrei sind.
Verbrauchte Batterien gehören nicht in des Hausmüll !!
Geben sie diese an geeigneten Sammelstellen oder bei ihrem Händler wieder ab !!
Sicherheitshinweise
· Niemals das Gerät selbständig öffnen (STROMSCHLAGGEFAHR !!)
(Dies ist NUR Fachpersonal in ihrer/unserer Werkstatt gestattet !!)
· Das Gerät niemals mit Feuchtigkeit in Verbindung bringen
· Das Gerät niemals direkter Sonnenbestrahlung oder anderen Hitzequellen aussetzen
· Das Gerät ausnahmslos nur mit einem trockenen Tuch reinignen
. Bei längerem Nichtgebrauch, Netzstecker ziehen und Batterien aus dem Batteriefach nehmen.
Technische Daten
UKW-FM Frequenz 88 – 108MHz
MW-AM Frequenz 540 – 1600KHz
Netzbetrieb AC 230 V 50Hz
Batteriebetrieb DC 9V 6xUM-2/C/R14 1.5V (Batterien nicht inkl.)
Copyrights by Woerlein GmbH, D-90556 Cadolzburg, Germany
Technische Änderungen und Druckfehler vorbehalten
RD509 / EU / D / Mar.10
Dieses Produkt darf am Ende seiner Lebensdauer nicht über den normalen Haushaltsabfall entsorgt werden, sondern muss an
einem Sammelpunkt für das Recycling von elektrischen und elektronischen Geräten abgegeben werden. Das Symbol auf dem
Produkt, in der Gebrauchsanleitung oder auf der Verpackung weist darauf hin.
Die Werkstoffe sind gemäß ihrer Kennzeichnung wiederverwertbar. Mit der Wiederverwendung, der stofflichen Verwertung
oder anderen Formen der Verwertung von Altgeräten, leisten Sie einen wichtigen Beitrag zum Schutze unserer Umwelt.
Bitte fragen Sie bei Ihrer Gemeindeverwaltung nach der zuständigen Entsorgungsstelle.
Bedienelemente
ALIMENTATION
COMMANDES
ECOUTER LA RADIO
ECOUTER UN CD
1.
2.
3.
4.
5.
6.
7.
8.
9.
10.
11.
12.
13.
14.
15.
16.
17.
18.
HAUT-PARLEUR
POINTEUR DES STATIONS RADIOPHONIQUES
PRISE CASQUE
AFFICHAGE CD
POIGNEE DE TRANSPORT
REGLAGE DU VOLUME
BOUTON FONCTIONS (Mise hors tension - AM - FM - CD)
ANTENNE TELESCOPIQUE
MOLETTE DE RECHERCHE DES STATIONS
TOUCHE LECTURE/PAUSE CD
SAUT / AVANCE/RETOUR RAPIDE
TOUCHE REPETITION CD
TOUCHE PROGRAMME CD
TOUCHE ARRET CD
TOUCHE OUVERTURE DU COUVERCLE DU COMPARTIMENT DE CD
COUVERCLE COMPARTIMENT DE CD
PRISE AC
COUVERCLE DU COMPARTIMENT DE PILES
INFORMATIONS SUPPLEMENTAIRES
CARACTERISTIQUES TECHNIQUES
REMARQUE : La programmation est possible uniquement si le lecteur est en mode Arrêt.
1.
2.
3.
4.
5.
6.
7.
8.
La lecture programmée vous permet d’écouter les titres d’un CD dans l’ordre que vous souhaitez. Vous pouvez programmer jusqu’à 20 titres.
1.
2.
3.
4.
5.
6.
7.
8.
9.
10.
11.
12.
13.
14.
15.
16.
17.
18.
Si vous souhaitez vous débarrasser de cet appareil, pensez à le recycler dans une décharge pour appareils ménagers
électriques. Renseignez-vous pour connaître votre centre de recyclage le plus proche. Informez-vous auprès des autorités
locales ou de votre revendeur pour de plus amples détails. (Directive sur les Déchets des équipements électriques et
électroniques)
This set operates on AC (230V~50Hz) or DC ( 9V ).
AC OPERATION: Connecat at the back of the unit (17) the AC power cord provided, before to insert into a
convenient standard AC outlet.
BATTERY OPERATION: Insert 6 x 1.5V batteries (Type C / LR14 /UM2) at back of the unit (18) as described inside
the battery compartment.
NOTE: In order to avoid leakage, always remove the batteries when unit will not be used for a long period of time.
RCD 1100
PORTABLE RADIO CD PLAYER
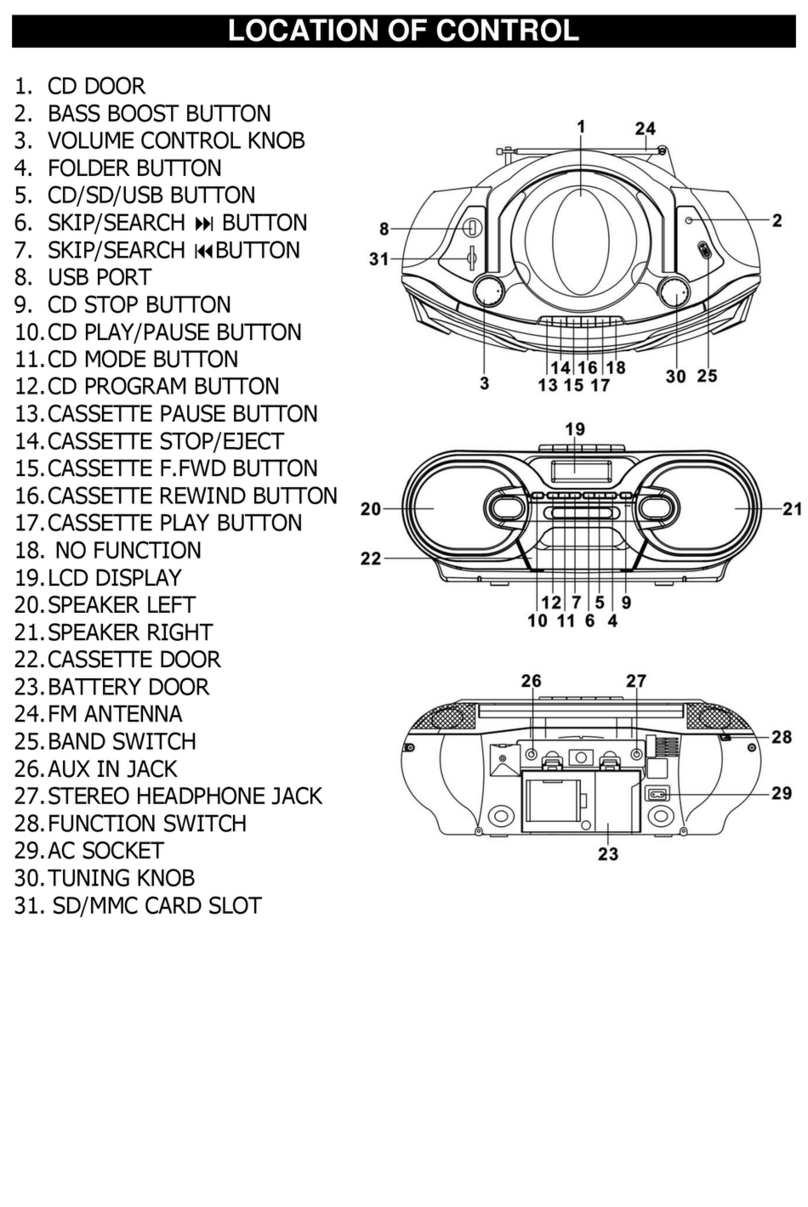
1. SPEAKER
2. DIAL SCALE
3. PHONES JACK
4. CD DISPLAY
5. CARRYING HANDLE
6. VOLUME CONTROL
7. FUNCTION SWITCH (Power off - AM - FM - CD)
8. TELESCOPIC ANTENNA
9. TUNING CONTROL
10. CD PLAY/PAUSE BUTTON
11. SKIP FAST SEARCH
12. CD REPEAT BUTTON
13. CD PROGRAM BUTTON
14. CD STOP BUTTON
15. CD OPEN BUTTON
16. CD DOOR
17. AC SOCKET
18. BATTERY DOOR
CONTROLS IDENTIFICATION
POWER SUPPLY
LISTENING TO THE RADIO
1. Switch (7) to AM or FM position.
2. Select your radio station (9,2) and adjust the volume level (6).
FM: Extend and rotate the antenna (8) when received the signal is weak.
AM: This unit is equipped with a built-in directional ferrite antenna. Rotate the unit to get the best receiving
position.
3. To stop listening to the radio, switch (7) to power OFF position.
1. Switch (7) to CD position. “ -- ” is displayed (4).
2. Insert the disc (label side front) in the CD compartment(15.16), the total number of tracks is displayed (4).
3. press (10) to start playing and adjust the volume level(6) “ PLAY ” will appear on display (4).
NOTE : Use also this knob to suspend momentarily, the playing track “ PLAY ” will blink, press (10)
once again to resume play .
4. press (14) to stop listening to the disc .
OTHER CD PLAYER FUNCTIONS
SKIP/FAST SEARCH (11):press to skip foward to the next track or repeatedly to skip several
tracks . press to beginning of the track or press repeatedly to skip backward several tracks. press and hold
or to search quickly within a track.
REPEATPLAYBACK
TO REPEAT THE SAME TRACK: press the REPEAT button (12) once during playback, the CD display will
indicate “ REPEAT ”
TO REPEAT THE WHOLE DISC: press the REPEAT button (12) twice until “REPEAT ALL” displays.
TO CANCEL REPEAT PLAYBACK FUNCTION: press the REPEAT button (12) again until “REPEAT” or “REPEAT
ALL” disappears from the display.
PROGRAMMEDPLAYBACK
programmed playback enables tracks on a disc to be played in any desired order.up to 20 tracks can be
programmed.
1. Press the PROGRAM button(13). “PROGRAM” indicator flashes in the display (4).
2. Press the REV or FWD button to select the desired track number . Example:TRACK 7 .
3. Press PROGRAM (13) again to memorize the track.
4. Repeat steps 2 and 3 until all desired tracks are programmed.
5 Press the PLAY/PAUSE (10) to start playback “PROGRAM” indicator is flashing in the CD display (4).
. Press STOP button to stop programmed playback . The CD playback stops but the program remains in
the memory .
7. Press PROGRAM (13) and the PLAY/PAUSE (10) to resume programmed playback.
8. To clear the program memory. open the CD door,change to Radio function or switch the power “OFF”(7).
NOTE: Programming can only be done when player is in stop mode.
MOREINFORMATION
- Do not use your set immediately after transport from a cold place to a warm place. there may be condensation
problems.
- Make sure that you keep your set away from water and high temperatures. Clean the player with a soft cloth,or
a damp chamois leather.Never use solvate.
NOTES ON COMPACT DISCS
- If there is a scratch,dirt or fingerprints on the CD ,it may cause tracking error. Before playing, clean the CD
with a cleaning cloth.Wipe the CD from the center out. Don’t store discs in places with high temperature or high
humidity - they can become warp.After playing, store the CD in its case.
SPECIFICATION
POWER SUPPLY: AC: 230 ~ 50 Hz
DC: 9V 1.5V 6TYPE C / LR14 / UM2
UNIT DIMENSION: 265(W) x 157(H) x 82(D)
N.W.:
RADIO SECTION
FREQUENCY RANGE: FM/FREQUENCY MODULATION: 88 - 108 MHz
AM/AMPLITUDE MODULATION: 540 - 1600KHz
COMPACT DISC SECTION
OPTICAL PICKUP: 3 - BEAM LASER
CAUTION:This set uses a laser beam. To prevent any accident due to this type of beam ,the set should only be
opened by properly trained personnel.The unlt conforms to the international safety specifications and to guide
lines of the european community, and also complies with current standards concerning electrical safety and
electromagnetic compatibilty EMC .
WA RNINGS
ATTENTION: To reduce the risk of electric shock,do not remove the cover.There are no
user serviceable parts inside the unit .Refer all servicing to qualified personnel.
The lightening flash with arrowhead symbol within the triangle is a warning sign alerting the user of
“dangerous voltage”inside the unit.
The exclamation point within the triangle is a warning sign alerting the user of impotant instructions
accompanying the product.
CAUTION : invisible laser radiation when open and interlocks defeated. Avoid exposure to beam.
WARNING:
- To reduce the risk of fire or electric shock, do not expose this appliance to rain or moisture.
- Ventilation not being impeded.
IMPORTANT
- Do not throw batteries in fire!
- Do not exposed to dripping or splashing, and that objects filled with liquids, such as vases,shall not be placed on
the apparatus.
GB
RD509 / EU / GB / Mar.10
LISTENING TO THE CD PLAYER
Este conjunto funciona con alimentación de CA (230V~50Hz) o DC (9V ).
Operación de CA: Conecte en la parte posterior de la unidad (17) el cable de alimentación de CA suministrado, antes de insertar en una
cómoda salida de CA estándar.
La operación de la batería: Insertar 6x baterías de 1.5V (Tipo C / UM-2) en la parte posterior de la unidad (18) como se describe en el
interior del compartimento de la batería.
NOTA: Con el fin de evitar la fuga, siempre retire las pilas cuando la unidad no se utiliza durante un largo período de tiempo.
1. S1. Altavoz
2. Dial
3. auricular toma
4. Pantalla CD
5. Mango
6. Control del volumen
7. Selector de funciones
8. Antena FM
9. Sintonizador de radio
10. Reproducir/pausa CD
11. Avanzar CD
12. Repetir
13. PROG
14. CD Stop
15. CD open button
16. CD door
17. Toma CA
18. Toma DC
IDENTIFICACIÓN DE LOS CONTROLES
FUENTE DE ALIMENTACIÓN
ESCUCHANDO LA RADIO
1) Switch (7) a la posición de AM o FM.
2) Seleccione su estación de radio y ajustar el nivel de volumen(6).
FM: Extienda y gire la antena (8) cuando recibió la señal es débil.
AM: Esta unidad está equipada con una antena direccional de ferrita. Gire la unidad para obtener la mejor posición de recepción.
3) Para dejar de escuchar la radio, interruptor (7) a la posición OFF el poder.
RCD1100
LECTOR DE CD DE LA RADIO PORTABLE
Láser Clase 1
DIMENSIONES DELAPARATO: 265(largo) x 157(alto) x 82(profundo) mm
CC: 9V 6 baterías 1,5V, tamaño UM2/C
CA: 230V~ 50Hz
Frecuencia FM/UKW: 88 – 108 MHz
Frecuencia AM/MW: 540 – 1600 KHz
SECCIÓ N CD
LENTE Ó PTICA: TRES RAYOS LÁSER
ADVERTENCIA: Este juego utiliza un rayo láser. Para prevenir cualquier accidente debido a este tipo de haz, el conjunto sólo debe ser
abierto por personal debidamente capacitado. Theunlt se ajusta a las especificaciones internacionales de seguridad y para orientar las líneas
de la Comunidad Europea, y también cumple con las normas actuales sobre seguridad eléctrica y EMC Compatibilidad electromagnética.
ESCUCHAR EL CD
INFORMACIÓN ADICIONAL
ESPECIFICACIONES TÉCNICAS
- No exponga el aparato a la humedad o a temperaturas elevadas.
- Limpie el reproductor con un paño suave o una gamuza húmeda. No utilice nunca disolventes.
OBSERVACIONES SOBRE LOS CD
- Si el disco está rayado, sucio o tiene huellas marcadas, puede que el aparato no funcione correctamente. Antes de comenzar la reproducción,
limpie el disco con un paño. Límpielo desde dentro hacia fuera. No guarde los discos en lugares con temperaturas elevadas o una humedad
considerable; podrían deformarse. Una vez que haya reproducido el disco, guárdelo en su estuche.
1) Switch (7) a la posición de CD “- -” se muestra (4)
2) Inserte el disco (delanteros lado de la etiqueta) en el compartimento de CD (15,16). El número total de pistas se muestra (4)
3) Pulse (10) para comenzar a jugar y ajustar el nivel de volumen (6)
NOTA: también puede utilizar este mando a suspender momentáneamente la pista de juego “PLAY “ comenzará a parpadear, pulse
(10) de nuevo para reanudar el juego.
4) Presione STOP para dejar de escuchar el disco.
Otras funciones de CD
Prensa para saltar a la pista siguiente o repetidamente para saltar varias pistas. Prensa al principio de la pista previa o
repetidamente para saltar hacia atrás varias pistas. Pulse y mantenga o buscar rápidamente dentro de una pista.
La repetición de reproducción:
Repetir la pista actual: Presione el botón REPEAT una vez.
Repetir todo el disco: Pulse el botón REPEAT dos veces.
Para cancelar la función de repetición: Presione el botón REPEATde nuevo hasta que todos indicador desaparece de la pantalla.
La reproducción programada:
La reproducción programada permite a las pistas de un disco para ser reproducido en cualquier orden que desee hasta 20 pistas pueden ser
programados.
1) Presione el botón PROGRAMA. “Programa” indicador brilló en la pantalla.
2) Pulse el o botón para seleccionar el número de pista deseado.
3) Pulse el botón PROGRAM para memorizar la pista.
4) Repita los pasos 2 y 3 hasta que se programan todas las pistas deseadas.
5) Pulse el botón PLAY / PAUSE para iniciar la reproducción.
6) Pulse el botón STOP para detener la reproducción.
7) Para borrar la memoria del programa. Abra la puerta del CD, el cambio de función de radio.
Nota: De programación sólo se puede hacer cuando el jugador está en el modo de parada.
If at any time in the future you should need to dispose of this product please note that Waste
electrical products should not be disposed of with household waste. Please recycle where facilities
exist. Check with your Local Authority or retailer for recycling advice.(Waste Electrical and
Electronic Equipment Directive)
RD509 / EU / ES / Mar.10
ADVERTENCIA
ADVERTENCIAATENCIÓN: Para reducir el riesgo de descarga eléctrica, no quite la cubierta. No hay ninguna
pieza que pueda dentro de la unidad. Confíe las reparaciones a personal cualificado.
El símbolo del rayo con punta de flecha dentro del triángulo es un signo de advertencia que alerta al usuario de “voltaje peligroso”
dentro de la unidad.
The exclamation point within the triangle is a warning sign alerting the user of impotant instructions accompanying the product.
PRECAUCIÓ N: la radiación láser invisible al abrir y enclavamientos derrotado. Evite la exposición al rayo.
ADVERTENCIA: - Para reducir el riesgo de incendios o descargas eléctricas, no exponga este aparato a la lluvia o la humedad. - La
ventilación no se vea obstaculizada.
IMPORTANTE: - No tire las pilas en el fuego! - No exponer a goteos o salpicaduras, y que los objetos que contengan líquidos, como jarrones,
no se incluirá en el aparato. “
Copyright, Woerlein GmbH, D-90556 Cadolzburg, Alemania Puede someterse a cambios técnicos sin previo aviso.
Si en algún momento, en el futuro, necesitara eliminar este producto, por favor tenga en cuenta que los residuos de productos
eléctricos no se deben eliminar con los residuos caseros. Por favor, recíclelo en las instalaciones correspondientes. Compruebe con
las autoridades locales o con su proveedor dónde reciclar productos de este tipo. ( Directiva de Residuos Eléctricos y Electrónicos)

Other SOUNDMASTER CD Player manuals

SOUNDMASTER SCD-3700 User manual

SOUNDMASTER

SOUNDMASTER SCD-3700 User manual

SOUNDMASTER CD9180 User manual

SOUNDMASTER

SOUNDMASTER CD9180 User manual

SOUNDMASTER URD 700 User manual

SOUNDMASTER

SOUNDMASTER URD 700 User manual

SOUNDMASTER SCD5701 User manual

SOUNDMASTER

SOUNDMASTER SCD5701 User manual

SOUNDMASTER MCD 800 User manual

SOUNDMASTER

SOUNDMASTER MCD 800 User manual

SOUNDMASTER High line SCD 2700USB User manual

SOUNDMASTER

SOUNDMASTER High line SCD 2700USB User manual

SOUNDMASTER SCD 2400 User manual

SOUNDMASTER

SOUNDMASTER SCD 2400 User manual

SOUNDMASTER SCD 6600 User manual

SOUNDMASTER

SOUNDMASTER SCD 6600 User manual

SOUNDMASTER NR-980CD User manual

SOUNDMASTER

SOUNDMASTER NR-980CD User manual

SOUNDMASTER SCD-5600 User manual

SOUNDMASTER

SOUNDMASTER SCD-5600 User manual

SOUNDMASTER SCD3550 User manual

SOUNDMASTER

SOUNDMASTER SCD3550 User manual

SOUNDMASTER CD9250 User manual

SOUNDMASTER

SOUNDMASTER CD9250 User manual

SOUNDMASTER SCD1960 User manual

SOUNDMASTER

SOUNDMASTER SCD1960 User manual

SOUNDMASTER RCD1750SI User manual

SOUNDMASTER

SOUNDMASTER RCD1750SI User manual

SOUNDMASTER DISC4020 User manual

SOUNDMASTER

SOUNDMASTER DISC4020 User manual

SOUNDMASTER SCD1960 User manual

SOUNDMASTER

SOUNDMASTER SCD1960 User manual

SOUNDMASTER SCD8000 User manual

SOUNDMASTER

SOUNDMASTER SCD8000 User manual

SOUNDMASTER SCD5410 User manual

SOUNDMASTER

SOUNDMASTER SCD5410 User manual

SOUNDMASTER CD9290SW User manual

SOUNDMASTER

SOUNDMASTER CD9290SW User manual

SOUNDMASTER SCD1500 User manual

SOUNDMASTER

SOUNDMASTER SCD1500 User manual

SOUNDMASTER SCD-6300MP3 User manual

SOUNDMASTER

SOUNDMASTER SCD-6300MP3 User manual

SOUNDMASTER CD9180 User manual

SOUNDMASTER

SOUNDMASTER CD9180 User manual

SOUNDMASTER CD9290 User manual

SOUNDMASTER

SOUNDMASTER CD9290 User manual

SOUNDMASTER DAB970 User manual

SOUNDMASTER

SOUNDMASTER DAB970 User manual

Popular CD Player manuals by other brands

Sharp MD-MT80W(S) Service manual

Sharp

Sharp MD-MT80W(S) Service manual

moon SuperNova CD Player owner's manual

moon

moon SuperNova CD Player owner's manual

Grundig Mystixx CDP 9410 SPCD user manual

Grundig

Grundig Mystixx CDP 9410 SPCD user manual

Pioneer Premier DEH-P630 Service manual

Pioneer

Pioneer Premier DEH-P630 Service manual

Technics SL-PG390 Service manual

Technics

Technics SL-PG390 Service manual

The Singing Machine Bratz SMB-623 instruction manual

The Singing Machine

The Singing Machine Bratz SMB-623 instruction manual

Sony CFD-V7 user manual

Sony

Sony CFD-V7 user manual

Pioneer DEH-P6800MP Operation manual

Pioneer

Pioneer DEH-P6800MP Operation manual

Philips AX2400 Manual del usario

Philips

Philips AX2400 Manual del usario

Audiovox CE144A operating instructions

Audiovox

Audiovox CE144A operating instructions

Sony WALKMAN MZ-NF520 operating instructions

Sony

Sony WALKMAN MZ-NF520 operating instructions

Sharp MD-DR470H Operation manual

Sharp

Sharp MD-DR470H Operation manual

VINCENT CD-S5 manual

VINCENT

VINCENT CD-S5 manual

Onkyo DX-C730 Service manual

Onkyo

Onkyo DX-C730 Service manual

Citronic CDUSB-2 user manual

Citronic

Citronic CDUSB-2 user manual

Sony CDP-997 - Compact Disc Player Service manual

Sony

Sony CDP-997 - Compact Disc Player Service manual

Kenwood DP-1060 Service manual

Kenwood

Kenwood DP-1060 Service manual

Sony CFD-646 operating instructions

Sony

Sony CFD-646 operating instructions

manuals.online logo
manuals.online logoBrands
  • About & Mission
  • Contact us
  • Privacy Policy
  • Terms and Conditions

Copyright 2025 Manuals.Online. All Rights Reserved.