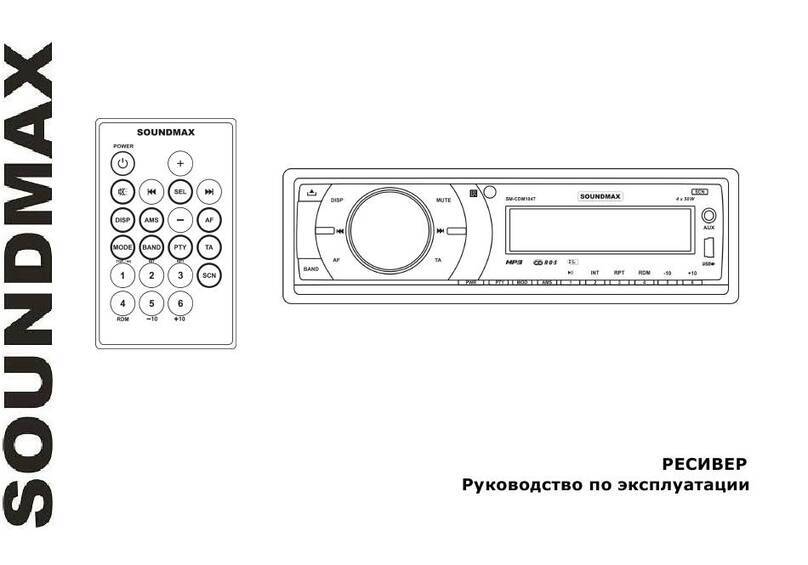
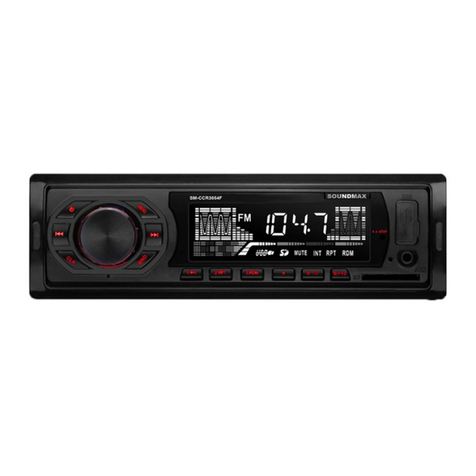
SoundMax SM-CCR3033 User manual

2
D e ar cu st om e r !
Thank you for purchasing our product. For safet y, it is st rongly recom m ended t o read t his m anual carefully
before connect ing, operating and/ or adjust ing the product and keep the m anual for reference in t he fut ure.
Ta ble of cont e nt s
Table of contents............................................................................................... 2
Important safeguards......................................................................................... 3
Accessories....................................................................................................... 4
Installation/connection ....................................................................................... 5
Control elements ............................................................................................... 8
LCD layout........................................................................................................ 9
General operations............................................................................................10
Radio operat ions...............................................................................................11
USB/ SD/ MMC operations....................................................................................12
Troubleshooting guide .......................................................................................13
Specification ....................................................................................................14

3
I m porta nt sa fegua r ds
‚Read carefully t hrough this m anual to fam iliar ize yourself wit h t his high-quality sound system .
‚The beginning of operation is the moment of the unit installation. Before use the device in winter it is
recommended to heat up the passenger compartment during 20 seconds or to the operation
t em per at ur e.
‚Use t he unit wit h the tem perature t hat goes beyond t he operat ion tem perat ure great ly decreases t he
operat ion resource of the screen and other com ponents of device and can result an out age.
‚Disconnect t he v ehicle's negative batt ery t erm inal w hile m ount ing and connect ing t he unit .
‚When replacing the fuse, be sure to use one with an ident ical am perage rat ing. Using a fuse wit h a
higher amperage rating m ay cause serious dam age to t he unit.
‚Do not attempt to disassemble the unit. Laser beams from the optical pickup are dangerous to the
eyes.
‚Make sure t hat pins or oth er foreign obj ect s do not get inside t he unit ; t hey m ay cause malfu nct ions, or
create safety hazards such as elect rical shock or laser beam exposure.
‚Do not use the unit in places w here it can be exposed to water, m oist ure and dust.
‚Do not open covers and do not repair yourself. Consult t he dealer or an experienced technician for help.
‚Make sure you disconnect the power supply and aerial if you will not be using the system for a long
period or during a t hunderstorm.
‚Make sure you disconnect the power supply if the system appears to be working incorrectly, is making
an unusual sound, has a strange smell, has smoke em itting from it or liquids have got inside it. Have a
qualified t echnician check t he system .
‚The unit is designed for negative terminal of the battery, which is connected to the vehicle metal.
Please confirm it before inst allat ion.
‚Do not allow the speaker wires to be shorted together when the unit is switched on. Otherwise it may
overload or burn out the power am plifier.
5
I n st a llat ion / conn ect ion
Ge ne ral n ot es
‚Choose the m ount ing location where the unit will not int erfere wit h t he norm al driving function of the
driver.
‚Before finally installing t he unit, connect t he wiring and m ake sure that t he unit works properly.
‚Consult with your nearest dealer if installat ion requires the drilling of holes or ot her m odifications of t he
vehicle.
‚Install the unit where it does not get in the driver's way and cannot injure the passenger if there is a
sudden st op, like an em er gency st op.
‚Avoid installing t he unit w here it would be subj ect t o high tem perat ure, such as from direct sunlight, or
from hot air, from t h e heat er, or where it w ould be subj ect t o d ust , d ir t or ex cessive v ibr at ion.
D I N f r on t - m ou n t ( M e th od A)
‚I nst all t he sleeve int o t he dashboard; ensure it is inst alled with t he
correct side and t here are no obstacles (wires, dashboard
elem ent s, et c) for t he unit installat ion.
‚Aft er inst alling t he sleeve int o t he dashboard, bend t abs fit t ing t o
the size of t he dashboard t o fix t he sleeve in place.
‚Make the necessary wire connections. Ensure the connections are
correct.
‚I nst all t he unit int o t he sleeve unt il t he side locks are fixed.
1. Dash board
2. Sleeve tab to bend

6
Trim f r am e inst a lla t ion
To install the trim frame, press it to the unit body and push it to fix it in place. This should be done before
inst alling t he front panel; otherwise you are not able t o install t he t rim fram e. When t he trim frame being
inst alled, t he side w it h t he groov e should face down and fixed first .
2 . D I N r e ar - m oun t ( M et hod B)
For t his m ethod, u se t he scr ew h oles in t h e lat er al sides of t he un it . Fix
the unit wit h t he help of t he fact ory radio m ount ing brackets.
1. Select a posit ion in which the screw holes of t he brackets ( 3) are
aligned wit h the screw holes in the unit body, and screw in two screws
( 2) in each side.
2. Screw.
3. Fact ory radio m ount ing brackets.
4. Vehicle dashboard.
5. Lock ( r em ove t his part ) .
N ot e : The out er t rim fram e and m ounting sleeve are not used for m et hod of inst allation.
D ism a nt ling t h e u n it
– Tr im fram e
– Fram e uninst all d irect ion
– Release k ey inser t ion
1. Swit ch off the unit and det ach t he front panel.
2. Insert your fingers into the groove in the front side of the trim frame (apply
som e effor t t o det ach t he fram e) . Pull t he fram e to det ach it .
3. Insert the supplied release keys into the both sides of the unit body to click,
as shown in the picture. To extract t he unit from the dashboard, pull the release
keys or the unit body to pull it out . Before detaching t he unit, ensure it is not
fixed wit h t he m etal st rap.

8
Cont rol e le m e nt s
Fr on t pan el
1. 4 but t on
2. 1/ PLAY/ PAUSE button
3. 2/ RPT butt on
4. 3/ RDM but t on
5. DI SP button
6. BAND but t on
7. SELECT but ton/ VOLUME
regulat or
8. <but t on
9. MODE button
10. Display
11. USB port
12. 5/ - 10 bu tt on
13. SD/ MMC m em or y card slot
14. 6/ + 10 button
15. PWR button
16. ;but t on

10
Gener al oper a tions
Tur ning t h e u n it on / off
Press PWR but t on t o turn t he unit on. Press the butt on again t o turn t he unit off.
Mod e select
Press MODE button repeatedly to select between Radio, auxiliary input, USB or Memory Card m odes. Modes
of operat ion are indicat ed on t he display. Mem ory card and USB m odes are not available unless a m em ory
card or USB device is connected.
Volum e control
Adj ust v olume by rot at ing VOLUME r eg ulat or ( 0 0- 40) .
Au dio p ar am et e r se t tin g
Press SELECT button repeatedly to select a parameter: VOL (volume) => BAS (bass) => TRE (treble) = >
BAL ( balance) = > FAD ( fader) . Rot at e VOLUME r eg ulat or t o adj ust each m ode:
‚Bass/ Tr eble: from - 7 t o 7;
‚Balance: L15 ( left ) t o R15 ( r igh t ) ;
‚Fad er : fr om R15 ( rear ) t o F1 5 ( fr ont ) .
Clo ck
Press DISP button to display the time on the screen. Then press and hold this button; the time indication
will blink. Rotat e VOLUME regulator clockwise t o adjust m inutes; rotate VOLUME regulat or ant iclockwise to
adj ust hours. To confirm the adjust m ent , press DI SP butt on or leave the unit idle for several seconds.

11
Ra dio ope rat ion s
Band se lect
I n Radio m ode press BAND button to select a radio band: FM1, FM2 or FM3. 6 stations can be saved in each
band m aking tot al 18 stations.
M a nu al/ aut om a t ic t unin g
‚Press ;/<butt ons t o st art automat ic search of the nearest st at ion with st rong signal in the current
band downwards or upwar ds. Repeat t o find oth er stations.
‚To adj ust t he needed f requency m anually, press an d hold ;/<but tons; release the but t on when the
needed frequency is found.
Aut om a t ic st or ing
Press and hold BAND button; the receiver will automatically find and save 6 stations with strong signal in
the current band.
St or ing an d r e ca lling st at ions
To st ore a stat ion, t une to the needed st at ion, then press and hold the desired number but t on. The
frequency will be st ored under t he corr esponding num ber. When stored, t he preset num ber will appear on
the display. A st ored st at ion can be recalled anyt im e by pressing t he corresponding num ber but t on.

12
USB/ SD/ MMC opera t ions
Conne ct ing a USB- device / m e m or y ca rd
I nsert a USB device int o the USB port of this unit . Or insert an SD/ MMC mem ory card unt il a click int o the
m em ory card slot . To r em ove t he car d, press it unt il a click, and t hen pull out from t he slot .
N ot e : USB/ SD/ MMC supported capacity: up to 8 Gb. For correct and sat isfact ory operat ion, licensed
SD/ MMC m em ory cards of fam ous brands should be used w it h t his unit . Avoid using m em ory cards of
unknown brands. Som e m odels of USB devices ( 1.1 st andard) cannot be supported by t his unit due to
incom pat ibilit y. FAT and FAT32 file system s ar e supported .
Playba ck
When a USB or a memory card is first connected, playback will begin automatically. Depending on the
num ber of f iles and folder s, it m ay t ake t he dev ice sev er al seconds t o beg in p layback.
Tr a ck se le ct
Press <butt on t o skip t o t he beg inning of t he next t rack. Press ;but t on t o skip t o t he pr ev ious t rack.
1 0 - track skip
Press 5/ - 10 but ton t o go t o 1 0 t racks back. Press 6/ + 10 but t on t o go t o 10 t racks forward.
Play/ Pause
Press 1/ PLAY/ PAUSE but t on to t em porarily st op file playback. Press it again t o resume playback.
Repe a t playback
Press 2/ RPT but t on t o cont inuously repeat the current t rack. Press again to cancel.
Random playback
Press 3/ RDM but t on t o play all the tracks in t he current folder in random order. Press again t o cancel.

13
Trou ble shoot in g guide
Below is a table describing simple measures that can help you eliminate most problems likely to emerge
when t his unit is in use. I f below m easures do not help, t urn t o a service center or t o the nearest dealer.
Sy m p t o m Cause So lu t ion
Wiring is connect ed incorr ect ly . Make correct wiring connect ion.
The car ignit ion is not on. I f t he p ower supply is properly connect ed t o
t he car accessor y, sw itch t he ign ition on.
No power
The fuse is blown. Replace the fuse.
Volum e is in m inim um . Adjust volume t o the desired level.No sound
Wiring is not properly connected. Check wiring connection.
The radio does not wor k The ant enna cable is not
connect ed.
I nsert the antenna cable properly.
The radio stat ion
aut om at ic t uning does
not wor k
The signals are too weak. Select st at ions m anually.
Cle a ning t h e un it b od y
Wipe wit h a soft clot h. I f t he cabinet is very dirt y, dam pen (not dropping wet) t he cloth with a weak solut ion
of soapy water, and t hen wipe clean.

14
Spe cifica t ion
Gen e r al
Maxim um pow er output: 4 x 45 W
Dim ensions/ weight : 177 x 150 x 50 m m / 0.67 kg
Suitable speaker im pedance: 4 – 8 Ohm
Fuse: 8 A/ 0.5 A
St orage support: USB/ SD/ MMC up t o 8 Gb
Tem perat ure range - 200C – + 600C
FM St ere o Ra dio
Frequency range: 87.5 – 108.0 MHz
Sensit ivity: 26 dB
Preset m em ory st at ions: 18
Out pu t
St ereo RCA line out ( 2 V) +
AUX input ( RCA) +
Spe cif icat ions ar e su bj e ct t o ch an ge w it hou t n otice. M ass and dim ensions a r e a pproxim at e.

15
"!
""""". """"
" " " " , " 1" " "
""""".
....................................................................................................15
"...................................................................................16
" ..........................................................................................17
1 ...................................................................................18
" ......................................................................................22
"/......................................................................................23
" .............................................................................................24
""............................................................................................25
USB- 1" ....................................................25
""" ......................................................27
" ............................................................................28

16
"
‚""", """.
‚"""""""""""
" . " " " " " " ,
""""""".
‚"""" ". """"
. ", """"""""""
", """. """".
‚, """""". """"
"""""""".
‚" " " "" "" " . "
" " " " " " " " " "
20 """"""".
‚" " " , " " " "
, """"""""""
""""".
‚" " " " " " " "
.
‚""", """""
""". , """".
‚" " , , " " " " " "
. " " " " " , "
"".
‚""""""""""""
". """""""""".
‚, """"", """"
"""""""".

17
‚, " " " , " " " " ,
""", , """""".
"""""".
‚" " " , " " " " "
"".
‚" " " " " " " " " " "
".
"
1. 1
2. 1
3. "":
/ 2
" 1
" 1
" 1
4. "" 1
5. " 1
6. "" 1

18
1
"
‚""""""""",
""", """"".
‚"""""""", "
". """""""""
.
‚" """"""" "" "
/""""", "".
‚" " , " " " " " " " " "
" " " " " " " " " " "
, , "".
‚"""""", """"
", , """"", ""
"""", ", """", ",
"""".
‚"""""".
""""" « » ( ")
1. ""
2. """.
‚" " " " " " ,
, """"""
( , " " )
".
‚" " " " " "
" " " " ,

19
"". """"
.
‚"""". """.
‚"""""""".
""
" """ """ " " " , ""
. """""", """"
""" (""""""""""
".).
""""" « » ( ")
" " " " " " "
""". ""
"""".
1. "", """""
(3) """"""
"""""" (2) "
.
2. .
3. """.
4. """".
5. ("") .
:""""""""""""
.

20
"
– "
– ""
– ""
1. """"".
2. """"""""
*"""") . """,
".
3. """"""""
", """, ". ""
" " " " , " " "
" " " " " (" " ,
""""").
Other manuals for SM-CCR3033
1
Table of contents
Other SoundMax Car Stereo System manuals

SoundMax
SoundMax SM-CMD3012 User manual

SoundMax
SoundMax SM- CCR3038 User manual

SoundMax
SoundMax SM-CCR3054F User manual

SoundMax
SoundMax SM-CDM1047 User manual

SoundMax
SoundMax SM-CCR3035 User manual

SoundMax
SoundMax SM-CSL602 User manual

SoundMax
SoundMax SM-CSL502 User manual

SoundMax
SoundMax SM-CCR3060FB User manual
Popular Car Stereo System manuals by other brands

PNI
PNI Clementine 8425 user manual

Alpine
Alpine MDA-5051 Guide for installation and connections

Alpine
Alpine CDA-117Ri Quick installation guide

Kenwood
Kenwood KDC-C467 instruction manual

Discount Car Stereo
Discount Car Stereo A2D-HON03 installation guide

Dual Electronics Corporation
Dual Electronics Corporation XDMA6330 Installation