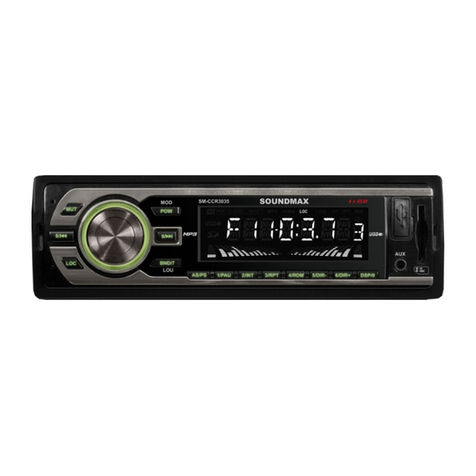
SoundMax SM-CCR3054F User manual

SM-CCR3 0 5 4 F
USB/ SD m edia playe r USB/ SD -
I nst r uct ion m anua l

De ar cust om e r!
Than k you for pur chasing our product . For safet y, it is st rongly r ecom m ended t o read t his m anual car efully
before connect ing, operating and/ or adj ust ing t he product and keep t he m anual for reference in the futur e.
Ta ble of con t en t s
TABLE OF CONTENTS ...................................................................................................................................................... 2
I MPORTANT SAFEGUARDS ............................................................................................................................................ 3
ACCESSORI ES.................................................................................................................................................................... 4
I NSTALLATI ON/ CONNECTI ON ...................................................................................................................................... 5
CONTROL ELEMENTS....................................................................................................................................................... 8
GENERAL OPERATI ONS .................................................................................................................................................. 9
RADI O OPERATI ONS........................................................................................................................................................ 11
USB/ SD OPERATI ONS ..................................................................................................................................................... 12
TROUBLESHOOTI NG GUI DE.......................................................................................................................................... 13
SPECI FI CATI ON ................................................................................................................................................................. 14
2

I m por t ant sa fe gu ar ds
•Read carefully t hr ough t his m anual to fam iliarize yourself wit h t his high-qualit y sound syst em .
•The beginning of operat ion is the m om ent of t he unit inst allat ion. Before use the device in wint er it is
recom m ended t o heat up t he passenger com part m ent during 20 seconds or t o t he operat ion t em perat ure.
•Use t he unit wit h t he t em perature t hat goes beyond t he operat ion t em perat ure great ly decreases the
operation resource of t he screen and other com ponent s of device and can result an out age.
•Disconnect the vehicle's negat ive bat t ery t erm inal while m ounting and connect ing t he unit .
•When replacing t he fuse, be sure t o use one wit h an ident ical am perage rat ing. Using a fuse wit h a higher
am perage rat ing m ay cause serious dam age t o t he unit .
•Make sure t hat pins or ot her foreign obj ect s do not get inside the unit ; they m ay cause m alfunct ions, or
cr eat e safet y hazar ds such as elect rical shock.
•Do not use the unit in places where it can be exposed t o wat er, m oisture and dust .
•Do not open covers and do not repair yourself. Consult t he dealer or an experienced technician for help.
•Make sure you disconnect t he power supply and aerial if you will not be using t he syst em for a long period
or during a t hunder storm .
•Make sure you disconnect t he power supply if the syst em appears to be working incor rect ly , is m ak ing an
unusual sound, has a st r ange sm ell, has sm oke em itt ing from it or liquids have got inside it. Have a
qualified t echnician check t he syst em .
•The unit is designed for negat ive term inal of t he batt ery, which is connect ed to t he vehicle m et al. Please
confirm it before installation.
•Do not allow the speaker wires to be short ed t ogether when t he unit is swit ched on. Ot herwise it m ay
over load or burn out t he power am plifier.
3
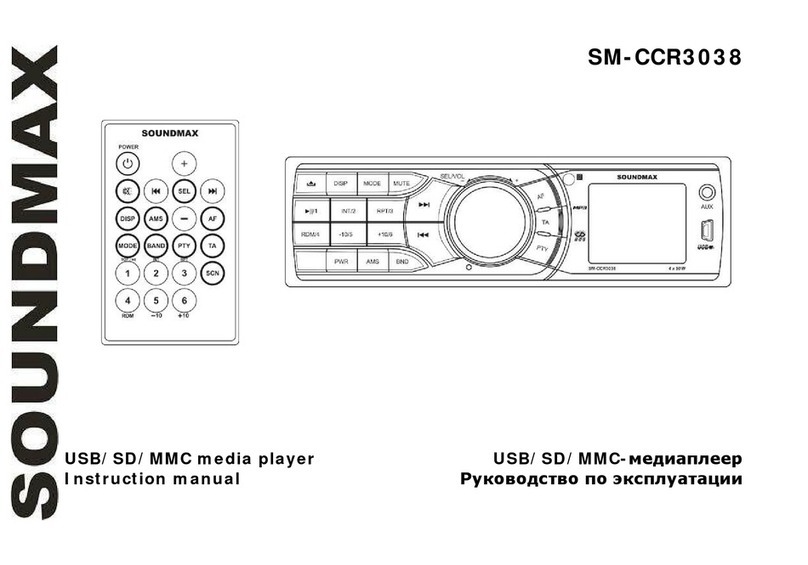
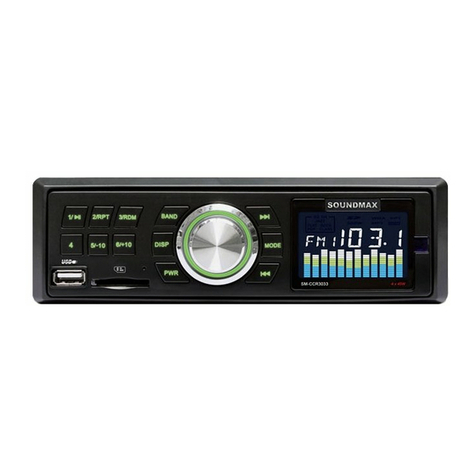
Accessories
1. Receiver 1 pc
2. Mount ing part s:
Hexagon nut 1 pc
Mount ing sleeve 1 pc
Release keys 2 pcs
Met al bar 1 pc
Plain washer 1 pc
Spring washer 1 pc
Self-t apping screw 1 pc
Screw 4 pc
3. Connect or 1 pc
4. Consum er infor m at ion 1 pc
5. War ran t y car d 1 pc
6. I n st ruct ion m an ual 1 pc
4

I nst a lla t ion/ Con ne ct ion
Ge ne r a l n ot e s
•Choose the m ounting locat ion where t he unit will not int erfere wit h t he norm al driving funct ion of t he
driver.
•Before finally installing t he unit , connect t he wiring and m ake sure t hat the unit works properly.
•Consult wit h your near est dealer if inst allat ion requir es t he dr illing of holes or ot her m odificat ions of t he
vehicle.
•I nstall t he unit where it does not get in t he driver's way and cannot inj ure t he passenger if t here is a
sudden st op, like an em ergency st op.
•Avoid installing the unit where it would be subj ect to high tem perature, such as from direct sunlight , or
from hot air, from t he heat er, or where it would be subj ect to dust , dirt or excessive vibrat ion.
D I N FRON T-M O UN T
1. Car dashboar d
2. Sleeve
3. Bolt
4. Nut
5. Spring washer
6. Scr ew
7. Met al st r ap
8. Flat washer
1. I nst all the sleeve int o t he dashboard; ensure it is installed wit h t he correct side and t here are no
obst acles ( wires, dashboard elem ent s, et c) for t he unit inst allat ion.
2. Aft er inst alling t he sleeve into t he dashboard, bend t abs fitt ing t o t he size of t he dashboard t o fix the
sleeve in place.
3. Use t he m et al strap to fix t he rear side of t he unit . Det erm ine a place for fixing and install t he st rap as
shown in t he picture. You can bend t he st rap t o t he needed angle wit h y our hands.
5

4. Make t he necessary wire connections. Ensure t he connect ions are correct .
5. I nst all t he unit into the sleeve unt il t he side locks are fixed.
D ism a n t li ng t he u ni t
1. Make sure t he ignit ion is turned off, then disconnect t he cable from t he
vehicle bat tery’s negat ive ( -) t erm inal.
2. Rem ove t he m et al st rap at tached t he back of t he unit ( if at t ached) .
3. I nsert both of t he supplied keys into t he slot s at the m iddle left and right
sides of t he unit , t hen pull the unit out of the dashboard.
6

Con ne ct io n di a gr a m
N ot e : Aut o an t en na w ire is int end ed for power supply of t he ant enna and for rem ote cont rol of an
addit ional am plifier.
7

Cont rol elem ent s
Fr on t pa n e l
1. but t on
2. MODE but ton
3. but t on
4. but t on
5. BND but ton
6. CLK but t on
7. VOLUME knob/
BASS/ TREBLE/ BALANCE
/ FADER/ LOUD/ EQ but t on
8. 1 PLAY/ PAUSE but ton
9. 2/ RPT butt on
10. 3/ RDM but t on
11. LCD
12. 4 butt on
13. 5/ -10 but ton
14. 6/ + 10 but ton
15. SD card slot
16. RESET but t on ( hole)
17. AUX input
18. USB por t
8

Gen er a l ope ra t ion s
Tu rn in g t h e un it on / of f
Press t he but t on t o t urn the unit on. Press the but ton again to t urn t he unit off.
Re se t t he u ni t
When first using the device or aft er replacing t he car bat t ery, you must reset t he unit . Press t he RESET
but t on ( hole) wit h a pointed obj ect (such as a ballpoint pen) t o set t he unit t o its init ial st ate.
When som e errors occur, you can also press the RESET but t on t o ret urn t o factory sett ings, but not e that
it will erase clock set ting and som e m em orized functions.
Mode se le ct ion
Press t he MODE but ton repeat edly t o select between Radio, AUX, MP3 m odes. Operat ion m odes are
indicated on the display. MP3 m ode is not available unless a m em ory card or a USB device is connect ed.
Clock
Press t he CLK butt on t o display t im e. Press and hold t his but ton to set the clock, rot at e t he volum e knob for
adj ust m ent .
V olu m e con t r ol
Adj ust the volum e by rot at ing t he VOLUME knob.
9

Au dio p a r am et e r se t t in g
Press t he VOL knob r epeat edly t o select a par am et er: BAS ( bass) = > TRE ( t reble) = > BAL ( balance) = >
FAD ( fader ) . Pr ess and hold t he but t on t o select LOUD ( loudness) , pr ess an d hold again t o select EQ
(equalizer) . Rotat e t he knob t o adj ust each m ode.
• Bass/ Tr eble: from -7 to + 7;
• Balance: -10 ( left ) t o + 10 ( right ) ;
• Fader: from -1 0 ( rear ) t o + 10 ( fr ont ) .
• Loudness: see “Loudness” paragraph below
• EQ: select POP/ CLASS/ ROCK or OFF equalizer mode.
When equalizer is in any m ode except OFF, bass and t reble are not adj ustable.
Loudne ss
Act ivat ing t his feat ur e w ill enh ance bass and t reble frequencies w hen list ening t o m usic at low volum es.
AUX inpu t
AUX-in j ack is int ended for connect ing an ext er nal audio equipm ent to am plify t he sound. I f connect ion is
m ade cor rect ly , t he audio signal fr om t he ext ernal sour ce w ill be t ransm it t ed t hrough t he acoustics of t he head
unit . This enables to adj ust the volum e and qualit y of the sounding. For exam ple, you can connect an MP3-
player t o list en t o t racks using t he car acoust ic syst em .
10

Ra dio op er a t ion s
Ba n d se le ct
I n Radio m ode press t he BAND but t on t o select a radio band: FM1 = > FM2 = > FM3.
M a nu a l/ a u t om a t ic t u n in g
• Press shortly or but t on. The radio will aut om at ically sear ch for t he next fr equency wit h a strong
and clear signal.
• Press and hold or but ton, the unit will go to m anual t uning m ode. Press / but t ons
repeat edly t o adj ust t he needed fr equency m an ually .
St or ing a nd r e ca lling st at ion s
• Press and hold t he BAND but ton for several seconds t o aut om at ically find and st ore 6 st rongest st at ions
in t he current band corresponding wit h t he preset num ber but t on.
• Press pr eset but t ons ( 1-6) t o select saved channels. I f you want to save a new st at ion in a preset posit ion,
select t he corresponding stat ion num ber wit h preset but tons. Then t une to the needed frequency as described
in “ Manual/ aut om at ic tuning“ above and press and hold a preset but ton. The new frequency will be saved in
the selected posit ion.
11

USB/ SD oper a t ions
SD ca rd slot
Carefully insert t he SD car d int o t he card slot on t he front panel. Unit start s playback aut om at ically. To disconnect the
m em or y car d, pr ess it unt il a click, and t hen car efully pull it out from the slot .
USB port
Carefully con nect a USB d riv er t o t he USB j ack on t he fr ont panel. Unit st ar ts play back aut om at ically .
USB/ SD n ot e s
USB form at suppor ts 2 .0 . Capacit y: u p t o 1 6 GB. SD cards cap acit y : up t o 16 GB. Suppor ted f ile sy st em s ar e FAT/ FAT32 .
N ot e : Because of t he great v ar iet y of pr oducts wit h SD-card slot s and their som et im es quit e m anufactur er -specific
functions t he pr oducer can neither guar ant ee that all devices will be r ecognized nor that all operat ing opt ions that are
possible in t heory will actually work. Before disconnect ing a st orage, sw it ch t he unit t o anot her m ode.
N e xt / Pr ev iou s t r a ck
Press or butt ons to choose next or previous t r ack. Press and hold this but t on t o choose for ward playback or
backward play back; r elease t he but t on t o ret urn to norm al play back.
Play/ Pause
Press PLAY/ PAUSE but ton to pause t he playback , pr ess one m or e t im e t o r esum e nor m al play back .
Repeat pla yba ck
When RPT but t on is pressed, play back of t he select ed t rack w ill be continually repeat ed and RPT indicator will be displayed
unt il t he t r ack repeat m ode is can celed by pr essing 3 RPT but t on ag ain.
Random
When RDM but ton is pressed, each t r ack on t he st orage is play ed in r andom instead of norm al order. RDM indicat or will be
displayed. To cancel Random m ode, pr ess 4 RDM but ton again.
Sk ippin g t r acks
Press -10 but ton t o go back 10 t r ack s. Press + 10 but t on to go forward 10 t r acks.
12

Tr ou ble shoot in g gu ide
Below is a t able describing sim ple m easures t hat can help you elim inat e m ost pr oblem s likely t o em er ge when
this unit is in use. I f below measures do not help, t urn t o a service cent er or t o t he nearest dealer.
Sym pt om
Ca u se
Solu t ion
No power
Wiring is connect ed incorrect ly.
Make correct wiring connection.
The car ignit ion is not on.
I f the power supply is properly connect ed to
the car accessory, swit ch the ignit ion on.
The fuse is blown.
Replace the fuse.
No sound
Volum e is in m inim um .
Adj ust v olum e t o t he desired level.
Wiring is not properly connect ed.
Check wiring connect ion.
The radio does not
wor k
The ant enna cable is n ot
connect ed.
I nsert t he ant enna cable properly.
The radio st ation
aut om at ic t uning does
not work
The signals ar e t oo weak.
Select st at ions m anually.
Cle a ni ng t h e u nit b ody
Wipe wit h a soft clot h. I f t he cabinet is very dam pen ( not dropping wet ) t he clot h with a weak solut ion of
soapy wat er, and t hen wipe clean.
13

Spe cifica t ion
Genera l
Maxim um power out put
4 x 45 W
Required speaker im pedance
4 Ohm
Fuse
5 A
Unit dim ensions
178 x 50 x 97 m m
Net weight
0.36 kg
FM st ere o radio
Frequency range
87.5 - 108.0 MHz
Preset stations
18
St ereo separat ion
> 25 dB
Pla ye r
Support ed st orages
USB/ SD
Line out
St ereo RCA out put (2 V)
Spe cif ica t io ns a r e su bj e ct t o ch a ng e w it h ou t no t ice . D im e n sio ns a re a p pr ox im a t e .
14

!
.
, / ,
.
.................................................................................................................................................................... 15
...................................................................................................................................... 16
.................................................................................................................................................. 17
/...................................................................................................................................... 18
............................................................................................................................................. 21
......................................................................................................................................................... 22
...................................................................................................................................................... 24
USB/ SD ............................................................................................................. 25
..................................................................................... 27
............................................................................................................................ 28
15

• , .
• .
20
.
• ,
,
.
•
.
• , .
,
.
• , , .
•, .
.
• .
•, ,
.
•, , ,
, , .
.
• ,
. , .
•
. .
16

1. 1
2. :
1
1
- 2
1
1
1
- 1
4
3. 1
4. 1
5. 1
6. 1
17

/
• ,
, .
• ,
. .
•
- , .
• ,
, , .
• ,
, , ,
, , , ,
.
• .
«»
1.
2.
3.
4.
5.
6. -
7. .
8.
18

1. , ,
(, )
.
2. ,
. .
3. .
.
.
4. . .
5. .
1. , ,
(-) .
2. ,
.
3. -
, ,
, .
19

:
.
20
Other manuals for SM-CCR3054F
1
Table of contents
Other SoundMax Car Stereo System manuals

SoundMax
SoundMax SM-CSL502 User manual

SoundMax
SoundMax SM-CCR3033 User manual

SoundMax
SoundMax SM-CCR3060FB User manual

SoundMax
SoundMax SM-CCR3035 User manual

SoundMax
SoundMax SM-CSL602 User manual

SoundMax
SoundMax SM- CCR3038 User manual

SoundMax
SoundMax SM-CDM1047 User manual

SoundMax
SoundMax SM-CMD3012 User manual