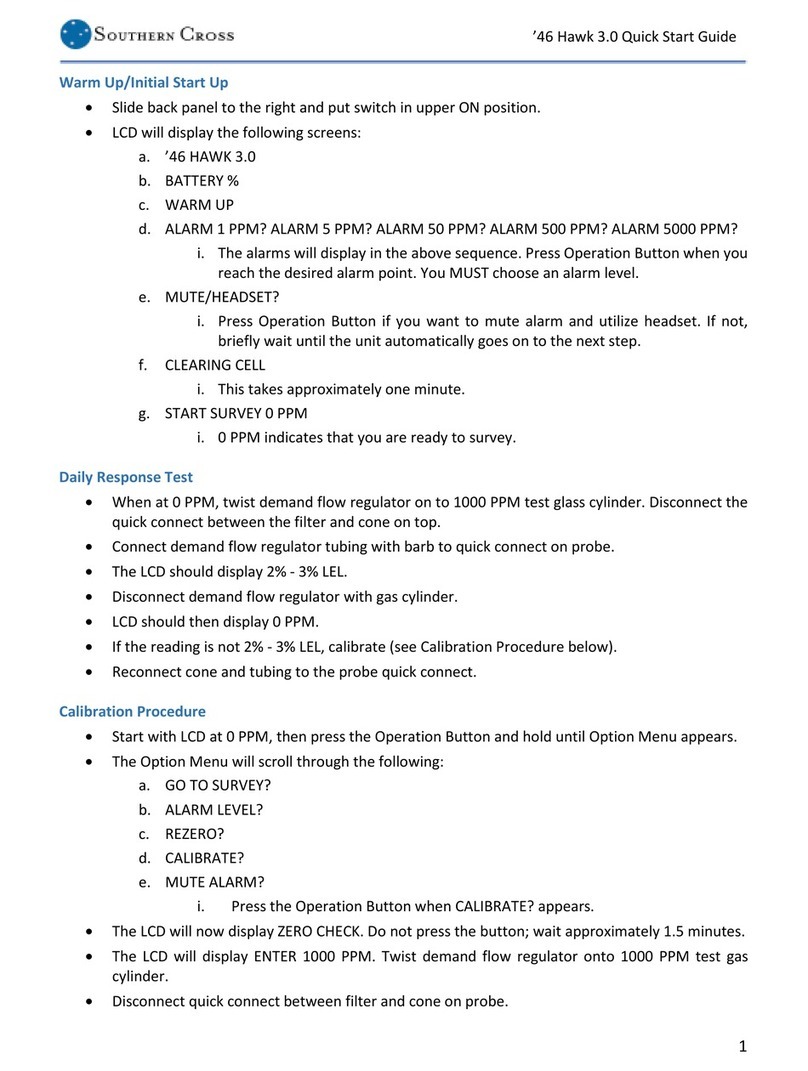
Southern Cross 46 HAWK 3.0 User manual

’46 HAWK 3.0
Laser Diode Methane
Detector
December 2018
Southern Cross Inc.
3175 Corners North Court
Peachtree Corners, GA 30071
www.southerncrossinc.com
1 (800) 241-5057

’46 Hawk 3.0 Laser Diode Methane Detector
2
Updated 12102018
Contents
Figure 1: HAWK DIAGRAM....................................................................................................... 3
Figure 2: HAWK DIAGRAM (REAR VIEW) ................................................................................. 4
Figure 3: HAWK DIAGRAM (REAR PANEL) ............................................................................... 5
1.0: INTRODUCTION......................................................................................................... 6
2.0: WARRANTY STATEMENT ........................................................................................... 6
3.0: FEATURES AND SPECIFICATION ................................................................................. 7
4.0: PRINCIPLES OF OPERATION ....................................................................................... 7
Figure 4: INTERNAL BLOCK DIAGRAM ..................................................................................... 8
5.0: SAFETY GUIDELINES .................................................................................................. 8
6.0: DAILY IN-LINE FILTER INSTALLATION ......................................................................... 9
Figure 5: EXTERNAL PARTS & ASSEMBLY............................................................................... 10
7.0: PRE-START INSPECTION........................................................................................... 10
8.0: START-UP................................................................................................................ 11
9.0: DAILY RESPONSE (BUMP) TEST ................................................................................ 13
10.0: CALIBRATION PROCEDURE .................................................................................... 14
11.0: OPTION MENU WHILE IN SURVEY MODE ............................................................... 17
12.0: SHUT DOWN ......................................................................................................... 19
13.0: START-UP WHILE IN SLEEP MODE .......................................................................... 19
14.0: OPERATIONAL SUGGESTIONS ................................................................................ 20
15.0: IN-GROUND PIN POINTER...................................................................................... 20
16.0: SURVEY PROCEDURE ............................................................................................. 21
17.0: CHARGING BATTERY.............................................................................................. 22
18.0: BACK-UP BATTERY USE .......................................................................................... 22
19.0: DATA LOGGING..................................................................................................... 22
20.0: CLEANING AND CARE............................................................................................. 23
21.0: TROUBLESHOOTING .............................................................................................. 24
22.0: RETURNING EQUIPMENT FOR REPAIRS ................................................................. 25
23.0: REPLACEMENT PARTS............................................................................................ 26
24.0: SPECIFICATIONS .................................................................................................... 27

’46 Hawk 3.0 Laser Diode Methane Detector
3
Updated 12102018
Figure 1: HAWK DIAGRAM
Number
Name
Description
1 Probe Cone
Intake port for air samples. A pleated polyester
filter may be placed here under dusty
conditions.
2 Filter Housing
Contains filter element that should be changed
daily.
3 Probe Stiffener
Stiffens normally flexible probe tubing for
greater precision.
4 Probe Assembly
Directs filtered air samples to the laser diode for
analysis.
5Laser Diode Methane Detector
Provides rapid, specific, and accurate detection
of methane leaks.
6
Moisture Filter
Prevents moisture from entering unit.
Figure 1: HAWK DIAGRAM
1
2
3
5
4
6

’46 Hawk 3.0 Laser Diode Methane Detector
4
Updated 12102018
Figure 2: HAWK DIAGRAM (REAR VIEW)
Number
Name
Description
1
Light Emitting Diode (LED)
Lights during operation
2
Liquid Crystal Display (LCD)
Read out for functions
3 Operation Button
Turns on LCD backlight and scrolls through
options menu
4
Handle
Handgrip for use
5
Instrument Body
Houses electronic and sampling components
6 Recharge Port
Receptacle for the 110-volt battery recharger.
Use only Ault I.T.E. Power Supply
PW117RA0903B01.
7 Headset Port
Receptacle for optional alarm earphone
headset
8 Rear Panel Door
Slide open to the right for access to backup
battery tube, power switch, and computer
connection
Figure 2: HAWK DIAGRAM (REAR VIEW)
Name
Description
Light Emitting Diode (LED)
Lights during operation
Liquid Crystal Display (LCD)
Read out for functions
Turns on LCD backlight and scrolls through
1
2
3
4
5
6
7
8

’46 Hawk 3.0 Laser Diode Methane Detector
5
Updated 12102018
Figure 3: HAWK DIAGRAM (REAR PANEL)
Number
Name
Description
1
Recharge Port
Receptacle for the battery recharger
2 Headset Port
Receptacle for optional alarm earphone
headset.
3 3-Way Power Switch
(expanded view)
Place in the upper (Recharge/on) position to
power up using rechargeable batteries, middle
position (shown above) to turn the unit off, or
lower position (Lithium) to run on disposable
backup batteries
4
Rear Panel Sliding Door
Provides access when open
5 Data Port
Connects to computer for data logging
downloads
6 Backup Battery Holding Tube
Place 4 Lithium batteries in tube with the
positive (+) terminals facing inward
1
2
3
4
6
5

’46 Hawk 3.0 Laser Diode Methane Detector
6
Updated 12102018
1.0: INTRODUCTION
The ’46 Hawk revolutionizes gas leak surveying by providing you with the tools required for an
efficient survey in one lightweight instrument. The ’46 Hawk requires no fuel, thereby eliminating
hazmat worries. Your new survey tool operates over 12 hours on rechargeable batteries.
Emergency lithium AA batteries provide an additional eight hours of operation.
The ’46 Hawk simplifies leak surveys with easy to operate one button operation. After you have
selected your alarm point, you can begin your survey. When natural gas is detected, the
instrument will automatically range from PPM (parts per million) to %LEL (percent lower
explosive level) to %Gas. For in-ground pinpointing, simply attach the probe provided and take
the readings. There are no switches or calculations to be made – the ’46 Hawk makes the
adjustments for you!
2.0: WARRANTY STATEMENT
Southern Cross Corp. will repair any ’46 Hawk that develops any problem that is the
manufacturer’s fault under normal use and service at no charge to the customer for parts and
labor. The service policy is limited to repairing a ’46 Hawk which proves to be defective, with
return transportation prepaid, within one year of date of purchase. This does not include
consumable items such as batteries, filters, and intake cone components.
This service policy does not apply if the ’46 Hawk has been repaired, resold, or altered by
unauthorized persons or has been subject to misuse, negligence, or has had serial numbers
defaced or removed.
The manufacturer reserves the right to make changes in the design of the ’46 Hawk and to make
additions or improvements without incurring any obligation to modify any units previously sold.
After the one-year warranty period, the customer is responsible for any ’46 Hawk repairs at the
current material and labor prices. Other warranty packages may be available.

’46 Hawk 3.0 Laser Diode Methane Detector
7
Updated 12102018
3.0: FEATURES AND SPECIFICATION
•Designed for above and below ground leak searches and investigations
•Detects methane only
•Detects 1 PPM within 3 seconds
•Renders readings in actual PPMs
•Operates 12+ hours on rechargeable batteries
•Runs up to 8 hours on 4 lithium AA disposable batteries
•Records and stores monthly calibration data that can be downloaded onto any computer
with HyperTerminal and Microsoft Excel
•Laser reference and sample diodes are rated to last 5 years
•Pump rated to last 3 years
•Rechargeable batteries are rated to last 2 years
•Carrying case with battery charger, 4 backup batteries, andfilters included
4.0: PRINCIPLES OF OPERATION
Past models of handheld natural gas leak detectors used flame ionization detection technology.
This technology called for the burning of sample air and the electronic detection of flame-
produced hydrocarbon ions. These instruments required a constant flame powered by a
consumable non-hydrocarbon gas supply, which posed some risk in hazardous environments.
Southern Cross utilizes a new generation of laser diode-based handheld natural gas leak
detectors, thereby replacing the FI instruments. Advantages to the laser-based instrument
include: no need for hazardous fuel supplies, no risk of natural gas ignition by the instrument,
and full range (1 PPM to % LEL to % GAS) automatic detection.
The ’46 Hawk draws sample air through a chamber where a laser beam is reflected multiple times
across two mirrors (see diagram below). This is known as a multi-pass cell. The laser touches a
detector, which then communicates data to a digital signal processor (controller) and onto a
micro-controller for the alarm systems. This controller looks for absorption of a certain
wavelength of laser light that is caused only by methane.

’46 Hawk 3.0 Laser Diode Methane Detector
8
Updated 12102018
Figure 4: INTERNAL BLOCK DIAGRAM
This results in methane detection only and the elimination of false alarms. The laser diode
responds faster than other technologies to presence of methane and recovers faster from
exposure to high methane levels than other types of instruments. The ’46 Hawk’s sensitivity and
specificity for methane meets or exceeds that of older technologies.
5.0: SAFETY GUIDELINES
The instrument is inherently safe, as it carries no flame or spark producing components. The
instrument operates on very low voltage and has eye safe low intensity laser.
Use Care When Installing Batteries
•The power switch MUST be in the Off (middle) position.
•Do not damage terminals.
•Double check battery connections.
Proper precautions for personal safety must be observed as described in the “Survey Procedure”
section.

’46 Hawk 3.0 Laser Diode Methane Detector
9
Updated 12102018
6.0: DAILY IN-LINE FILTER INSTALLATION
It is crucial that the in-line filter be installed correctly each day. Incorrect installation will allow
dirt into sample chamber, which could lead to an ERROR message and costly repair. The filter
housing for the ’46 Hawk is located in line in the probe.
Steps to Install In-Line Filter:
1. Unscrew the filter housing. Remove gasket, spring, and micron filter. Gasket may stay in
the top section of the filter housing. Be careful not to lose the gasket.
2. Attain clean filter. (Remove dirty filter and replace with clean filter)
3. Install spring with wide end first into filter housing.
4. Install closed end of filter on top of spring (small end of spring) in filter housing.
5. Place gasket at opposite end of filter (see picture below).
6. Assemble both parts of filter housing.
7. Tighten by hand; it is not necessary to use a wrench. The O-ring on the top section of the
filter housing will provide a leak-free seal.

’46 Hawk 3.0 Laser Diode Methane Detector
10
Updated 12102018
Figure 5: EXTERNAL PARTS & ASSEMBLY
A DIRTY FILTER message indicates blockage from the following:
•Dirty filter,
•Moisture,
•Obstruction of the sample flow into the instrument, and/or
•Filter installed incorrectly.
To correct DIRTY FILTER, follow the instructions below:
•Replace moisture filter with a clean, dry filter.
•Inspect probe for obstructions.
•Ensure spring, O-ring, and filter are positioned in filter housing correctly.
•Push Operation Button – The LCD will display CLEARING CELL and then 0PPM.
If message does not clear, replace moisture filter. Never operate without both filters.
7.0: PRE-START INSPECTION
Prior to turning on the ’46 Hawk, Southern Cross recommends conducting a visible inspection of
the unit for damages such as cracks, broken probe, and missing or loose components.
Top
Gasket
Filter
Spring
Intake Cone
Quick
Connect
Filter
Housing
Moisture
Filter
Figure 5: EXTERNAL PARTS & ASSEMBLY
Top
Gasket
Filter
Spring
Intake Cone
Quick
Filter
Housing
Moisture
Filter

’46 Hawk 3.0 Laser Diode Methane Detector
11
Updated 12102018
8.0: START-UP
The ’46 Hawk will arrive fully assembled and ready to go. Please follow the steps below for startup
out of the box or after a complete shutdown.
Warm Up/Initial Set Up
Step 1: To power on, slide rear panel door to the right.
Push power switch to upper (recharge) position. Unit will
then start. Slide panel back to closed position.
Step 2: The LCD will display ’46 Hawk + current software
on the screen.
Step 3: LCD will display BATTERY %.
Step 4: Several seconds later, the LCD will display WARM-
UP.
Step 5: Choose an Alarm Option. Set your alarm point by
pressing the operation button. When you find the desired
alarm point, hold operation button and wait for beep.
NOTE: You must choose an alarm point. Unit will repeat
alarm choices until alarm is chosen.

’46 Hawk 3.0 Laser Diode Methane Detector
12
Updated 12102018
Warm Up/Initial Set Up
Step 6: Mute Alarm/Headset. If you do not choose to
mute alarm, unit will bypass this option and continue.
Step 7: The LCD will display CLEARING CELL. This will last
for approximately 1.5 minutes.
Step 8: The LCD will display START SURVEY and then
display 0 PPM. You are now ready to survey.
NOTE: Bump Testing can be done at this point. See Daily
Response Testing in next section.

’46 Hawk 3.0 Laser Diode Methane Detector
13
Updated 12102018
9.0: DAILY RESPONSE (BUMP) TEST
Step 1: The Survey Technician can perform a Daily
Response Test (Bump Test). Once initial warm up/start up
is completed and LCD displays 0 PPM, the response test
can be conducted.
Step 2: Twist demand flow regulator onto the 1000-PPM
test gas cylinder. Detach Quick Connect between filter
housing and cone on probe. Connect demand flow
regulator tubing to Quick Connect at cone end of probe.
Step 3: The LCD will display a reading 2%-3% LEL.
Step 4:
Disconnect demand flow regulator and gas
cylinder. Assemble probe Quick Connect to cone Quick
Connect.
NOTE: If LCD does not display 2%-3% LEL or does not
return to 0 PPM, proceed to calibration procedure.

’46 Hawk 3.0 Laser Diode Methane Detector
14
Updated 12102018
10.0: CALIBRATION PROCEDURE
The Hawk does a self-check calibration on startup. If
recalibration is needed, it can be done at the necessary
frequency. This should only be needed once a month.
Step 1: Start in Survey Mode. 0 PPM is displayed on LCD.
Press and hold Operation Button. Notice back light is
illuminated. Press Operation Button until you see OPTION
MENU.
Step 2: OPTION MENU will prompt the following:
•GO TO SURVEY
•ALARM LEVEL
•MUTE ALARM/HEADSET
•CALIBRATE?
Press and hold Operation Button at CALIBRATE? prompt.
Step 3: The LCD will display CALIBRATION. Do not press
button. This step takes approximately 5 seconds.
Step 4: The LCD will then display ZERO CHECK for
approximately 1.5 minutes. Do not press Operation
Button – wait for next prompt.

’46 Hawk 3.0 Laser Diode Methane Detector
15
Updated 12102018
Step 5: The LCD will now display ENTER 1000 PPM.
Connect demand flow regulator to 1000 PPM test gas
cylinder. Twist on barbed connected of the demand flow
regulator, while attached to gas cylinder, into the probe
Quick Connect and leave connected. (See daily response
test for connection details.)
Step 6: Once gas and regulator are connected, press and
hold Operation Button. The LCD will display CALIBRATING
for approximately 1.5 minutes.
Step 7: The LCD will display CAL ACCEPTED. LCD will
display REMOVE 1000 PPM. Disconnect demand flow
regulator from unit probe cone, then press and hold
Operation Button.
Step 8: The LCD will display CLEARING CELL for
approximately 1.5 minutes.

’46 Hawk 3.0 Laser Diode Methane Detector
16
Updated 12102018
Step 9: Connect cone Quick Connect to the probe Quick
Connect.
Step 10: The LCD will display START SURVEY and go
immediately to 0 PPM.
Step 11: If LCD displays CALIBRATION FAIL
, check
connections are secure. Check 1000 PPM calibration test
gas to be correct type and above 350 psi. Next, press
Operation Button for OPTION MENU
, then choose
CALIBRATE? and retry calibration. If CALIBRATION FAIL
occurs again, turn unit completely off and restart in warm
up mode, then try to calibrate. Call Southern Cross
support if calibration fails more than 3 times at 800-241-
5057.
NOTE:
Provided response testing (bump test) is
performed daily. Once per month calibration is
recommended in a clean air environment. The ’46 Hawk is
not sensitive to false positive readings or calibration
interference from non-methane hydrocarbons.

’46 Hawk 3.0 Laser Diode Methane Detector
17
Updated 12102018
11.0: OPTION MENU WHILE IN SURVEY MODE
Step 1: To access the OPTION MENU while in survey
mode, press and hold the Operation Button for at least 3
seconds. You will see OPTION MENU displayed on the
LCD.
Step 2: The LCD will display GO TO SURVEY? If you want
to go to survey, press and hold the Operation Button. 0
PPM will appear on the LCD. You are now ready to survey.
Not pressing Operation Button will lead to next option
screen.
Step 3: Next, the LCD will display ALARM LEVEL? If you
want to change the alarm level, press and hold the
Operation Button. LCD will prompt you to choose alarm
level. Press and hold the Operation Button at desired
alarm level. Not pressing the Operation Button will lead to
next option screen.
Step 4: Next, the LCD will display REZERO? If you want to
manually perform a zero reset, see
section 21,
“Troubleshooting”, for detailed instructions. Not pressing
Operation Button will lead to next option screen.

’46 Hawk 3.0 Laser Diode Methane Detector
18
Updated 12102018
Step 5: Next, the LCD will display CALIBRATE? If you want
to calibrate the system, press and hold the Operation
Button. Not pressing Operation Button will lead to next
option screen.
Step 6: Next, the LCD will display MUTE ALARM? Press
Operation Button to mute alarm. If you do not want to
mute alarm, do not press Operation Button. The next
prompt will then be displayed.
Step 7: The LCD will repeat STEP 1. Not pressing Operation
Button will lead to next option screen.

’46 Hawk 3.0 Laser Diode Methane Detector
19
Updated 12102018
12.0: SHUT DOWN
13.0: START-UP WHILE IN SLEEP MODE
Step 1: To shut unit down, move power switch to middle
position. Unit will turn completely OFF. The power switch
is located behind the back-rear slide panel.
Step 2: Wipe down the instrument with a clean, dry cloth
and store it in the case.
Step 3: For daily use, it is best to keep unit running all day.
The rechargeable battery will last for more than 12 hours.
Charge unit nightly using the charger provided by
Southern Cross. It should have yellow tape around the
jack. Do not use a different charger, as it could cause the
batter to overheat or undercharge.
Step 1: Press and hold Operation Button. The LCD will
display ’46 HAWK 3.0 (Note: Operation Button will not put
unit to sleep mode on version 3.0, but it can wake unit up
from sleep mode).
Step 2: The LCD will go through same start up sequence as
described in “Warm Up/Initial Start Up” section.

’46 Hawk 3.0 Laser Diode Methane Detector
20
Updated 12102018
14.0: OPERATIONAL SUGGESTIONS
•The ’46 Hawk is manufactured with precision parts. Unnecessary shaking or shock to the
instrument should be avoided.
•Keep liquid from entering the ’46 Hawk. If the ’46 Hawk gets wet for any reason (dropped
in water, extensively rained on, etc.), shut unit off, remove backup batteries, and dry
instrument completely.
15.0: IN-GROUND PIN POINTER
•To attach the in-ground pinpointer, detach the quick connect
below filter housing. The probe is now detached from cone.
•Connect in-ground pinpointer end to the quick connect on
probe cone end.
•The ’46 Hawk will automatically read in- ground leaks the same
as the Hawk reads above ground leaks without switching or
changing settings.
Know the Importance of Pinpointing!
•Pinpointing the gas leak using the below ground probe will save
time, money, and frustration, while also mitigating potential hazards.
•It is important to have accurate locations of all below-ground gas pipes in the leak. Make
use of available maps, drawings, locate marks, and your own expertise.
•Center the leak by determining the highest sustained gas reading at theouter boundaries
of the leakage spread.
•Start bar holes at the estimated leak location and work outward along the pipe. The
spacing of the bar holes depends on the leak spread. Small spreads could be started with
bar holes every 5 feet, while larger spreads may require bar holes every 10 to 15 feet.
•Maintain consistency in the spacing and depth of all bar holes. Bar holes must be taken
to probe depth for the most accurate pinpointing. Be careful not to damage the pipe!
•All below-ground readings must be taken at an equal depth. The highest sustained
reading usually indicates the leak location. Additional bar holes can be made to narrow
the source of the leak.
•In some cases, several bar holes will give equal readings. A useful techniqueis to measure
the concentration at the top of the bar hole. The hole with the highest reading is
probably nearest the leak.
Table of contents
Other Southern Cross Gas Detector manuals
Popular Gas Detector manuals by other brands

Helio
Helio SL Series operating manual
Bticino
Bticino AXOLUTE Instructions for use
Emerson
Emerson Rosemount 936 quick start guide
olympia electronics
olympia electronics BS-377/WP/A manual
Crowcon
Crowcon Flamgard-4/20 Installation, operating and maintenance guide
EsiWelma
EsiWelma Sensigas URS20SL quick start guide
