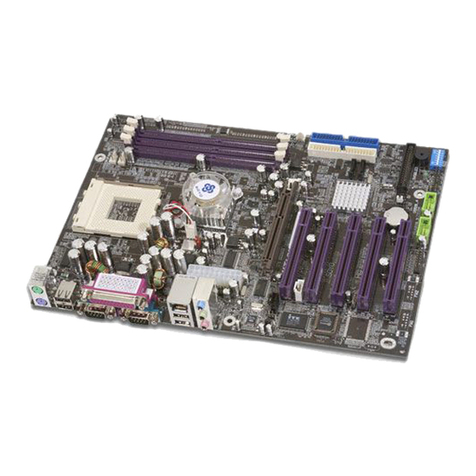
SOYO SY-P4VM800 User manual

SOYO SY-P4VM800 Quick Start Guide
Precautions
1. Please read this Quick Start Guide before proceeding with your installations. Serious damage
mayoccuriftheinstallationproceduresarenotfollowedproperly.
2. AGP cards running at 3.3v are not supported. Only AGP cards running at 1.5v & 0.8v (4x /8x
AGPcards)aresupportedonthismotherboard.
3. Please ensure that your memory modules are installed properly. They can fit into the memory
slotsonlyoneway,andshouldfitcompletelyinthesocketwithoutstickingout.Failuretodosowill
damageyour motherboardandmemorymodule.
4. An ATX 12V power supply (Power supply for Pentium 4 system) is required for the system to
operatenormally.(Preferably350 watts forminimalloadingor 400 wattsforfullyloadedsystem).
5. If you have any problem getting your system to work, please follow the troubleshooting tips on
Page32of your userguide.
6. Onsomemotherboards,theactualchipsetcoolerfan/heatsink,despiteits differentlookfromthat
showing on the color box, is of the same quality and will workjust as well. (The chipset cooler is
assufficientasthechipsetfanbasedon adifferentdesign.)
7. ForFrequentlyAskedQuestionsandTroubleshootingTools,pleasevisitouronlinetechnical
supportcenterat
SOYOUSA: http://www.soyousa.com/support
KnowledgeDatabase:http://www.soyousa.com/kb/
1

SOYO SY-P4VM800 Quick Start Guide
SOYO SY-P4VM800 Motherboard
Introduction
Copyright©2004by SOYO Computer Inc.
Trademarks:
SOYO is a registered trademark of SOYO Computer Inc. All other trademarks are properties of their owners. All
other names of the products and companies mentioned herein are used for identification purposes only. The
registeredtrademarks andcopyrights belongto theirrespectivecompanies.
Copyright Notice:
ThismanualhasbeencopyrightedbySOYOComputerInc.Nopartofthismanualmaybereproduced,transmitted,
transcribed,translatedintoanyotherlanguage,orstoredinaretrievalsystem,inanyformorbyanymeans,suchas
byelectronic,mechanical, magnetic, optical,chemical,manualorotherwise,withoutwritten permissionfromSOYO
ComputerInc.
Disclaimer:
SOYO Computer Inc. makes no representations or warranties regarding the contents of this manual. We reserve
the right to amend the manual or change the specifications of the product described in it from time to time without
obligationtonotifyanypersonofsuchrevisionoramend.Theinformationcontainedinthismanualisprovidedtoour
customers for general installation use. Customers should be aware that the personal computer field is subject to
manypatents.Allof our customersshouldknowthattheiruseofourproducts does notinfringe upon anypatents.It
is the policy of SOYO Computer Inc. to respect the valid patent rights of third parties and not to infringe upon or to
causeothers to infringeuponsuch rights.
PleasebeadvisedthatsomeSOYOmotherboardsaredesignedwithoverclockingfeaturesandmayallowusers to
run the components beyond manufacturer's default settings. Overclockingbeyond manufacturer's specifications is
not recommended nor endorsed by SOYO, Inc. and will void your manufacturer's warranty. Overclockingbeyond
manufacturer'sspecificationsisnotencouragedandshouldbeassumedattheuser'sownrisk.Unsafeoverclocking
candamagetheuser's system orcauseseriouspersonalinjury. If theuseris unsureorindoubtaboutoverclocking,
please seek professional advise. SOYO, Inc. is not responsible for any direct or indirect damage resulting from
overclocking.
Restricted Rights Legend:
Use, duplication, or disclosure by the Government is subject to restrictions set forth in subparagraph (c)(1)(ii) of the
RightsinTechnical Data and Computer Softwareclauseat252.277-7013.
About This Quick Start Guide:
ThisQuickStartGuideis intendedto help systemmanufacturers and end users installandsetupthemotherboard.
Information in this guide has been carefully checked for reliability; however, to the correctness of the contents there
isnoguaranteegiven.Theinformation in this documentissubject to amendmentwithoutnotice.
Forfurtherinformation,pleasevisitourwebsiteat"http://www.soyousa.com".
P4VM800 Series - Version V1.1 - Edition: Oct. 2004
*Thespecificationsofthemotherboardaresubject to amendment without notice
2

SOYO SY-P4VM800 Quick Start Guide
Table of Contents
Precaution………………………………………..………………………………………….……..….…P1
SOYO SY-P4VM800 Motherboard…………..…….……………………………………….……….…P2
Chapter 1 Introduction…………………..…………………………………………………….……....P5
1.1 Contentsof theMotherboard……………………………………………………….……….P5
1.2 MotherboardLayout…………………………………………………………………………P6
1.3 I/OPorts Layout……………………………………………………………………………...P6
1.4 KeyFeatures…………………………………………………………………………………P7
Chapter 2 Installingthe Motherboard…………………………………..…………………………...P8
2.1 InstallingtheCPU……………………………………………………………………………P9
2.2 InstallingtheMemoryModules…………………………………………………………..….P10
2.3 InstallingtheHardDiskDriveandOpticalDevice……………………….…………………P11
2.3.1InstallingtheSATAHardDiskDrive………………………...………………………...……P12
2.4 InstallingtheExpansionCards………………………………………………………………P13
2.5 ConnectingthePowerSupply……………………………………………………………….P14
2.6 ClearingCMOS(JP5)………………………………………………………………………..P15
2.7 ConnectorsandjumperDefinition…………………………………...……………………...P16
2.8 ConnectingMulti-ChannelSpeakers……………………………………...………………..P17
Chapter 3 Quick BIOS Setup………………………………………………………………………....P18
3.1 Introduction……………………………………………………………..…………………….P18
3.2 RunningtheSetup…………………………………………………………………..……….P18
3.3 StandardCMOSSetupMenu…………………………………………………..…………...P19
3.4 StandardCMOSSetupMenu………………………………………………..……………...P20
3.5 AdvancedSetupMenu……………………………………………………..………………...P20
3.6 FeatureSetupPage………………………………………………………..……...…………P21
3.7 PowerManagementSetupPage………………………………………..…………………..P22
3.8 PCI/Plug&PlaySetupPage……………………………...……………..…………………..P23
3.9 BIOSSecurityFeaturesSetupPage……………………………….……………………….P24
3.10CPUPnPSetupPage…………………………………………...…………………………...P24
3.11HardwareMonitorPage…………………………………………..………………………….P25
3.12LoadOptimalDefaults………………………………….……………………………………P26
3.13SaveChangesandExit……………………………………………………………….……..P26
3.14DiscardChangesandExit……………………..………………………….…………………P26
3

SOYO SY-P4VM800 Quick Start Guide
Chapter 4 The SOYO CD…………..….……………………………………………………………....P27
Introduction
4.1 TheContentsofSOYOCD………………………………………..….……………………..P27
4.2 HowtoUseSOYOCD?........................................................................................................P28
Chapter 5 Installingthe USB 2.0Driver……………………………………….…………………....P30
Chapter 6 Troubleshooting………………………...………………………………………………...P31
Chapter 7 How to Contact US?…………………………………………………………...………....P37
4

SOYO SY-P4VM800 Quick Start Guide
1
1
Introduction
ware/software installation of themotherboard with simplified
1.1 Contents of the Motherboard
When unpacking the Motherboard, check the following items:
1 * SOYO SY-P4VM800 Motherboard
Thank you for purchasing SOYO SY-P4VM800 Motherboard. This Quick Start Guide will
guide you throughout the entire hard
steps.
1 * Quick Start Guide
1 * Drivers/Software CD
1 * 80-Conductor UATA 66/100/133 IDE Cable
1 * Floppy Disk Drive Cable
1 * SerialATA Cable
1 * Back panel
5

SOYO SY-P4VM800 Quick Start Guide
1.2 Motherboard Layout
Hardware
Installation
1.3 I/O Ports Layout
(
O
p
tional
)
(
Sharedwith JP
2
)
6

SOYO SY-P4VM800 Quick Start Guide
1.4 Key Features
CHIPSETS FEATURES
PM800
(North Bridge)
IntelPentium4 PrescottCPUwith HT
400/533/800MHz FSB
DDR266/333/400MHz SDRAMupto2 GB
UltraV-Link1066MB/sinterconnection
Integrated VIAS3UniChromePrographicscontroller
VT8237
(South
Bridge)
V-RAID function
UATA66/100/133IDEcontroller
VIA10/100Ethernetcontroller
AGP4X/8X
Max. 8 USB2.0ports
2SerialATAports
I/OPORTS FEATURES
VGA Port Connects the monitor with the integrated VIA S3 UniChrome
ProGraphicscontroller
PS/2 ConnectsaPS/2keyboard and a PS/2mouse
ParallelPort Connects aparallel device such as aprinter
COM1 Connects aserial device such as mice or fax/modems.
LANPort Connects a RJ-45jack to build intranet/internetconnections.
USB Ports Connects USB 1.1/2.0 devices such as printer, digital camera,
scanner,externalharddrive/opticaldevice, flashdrive,etc
Audio Ports Connects microphone and multi-channelspeakersup to 6
channels
7

SOYO SY-P4VM800 Quick Start Guide
2
2
Installing the Motherboard
otherboard, please follow the instructions below before
of the system's metal chassis to avoid possible static damage to the item.
To avoid damage to the m
handling this equipment:
Before installing the motherboard, ground yourself by touching the unpainted
portion
Hardware
Installation
Check the motherboard for obvious physical damage. If any component appears to have
come off or been damaged, contact our local customer service center for an immediate
replacement.
The following is a list of common components to prepare before the installation:
A Intel Pentium 4/Prescott Socket mPGA478 CPU (CPU with Vcore higher than 1.6
volts is not supported)
Averified cooling fan/heatsink for Intel Pentium 4 CPUs
1~2 verified DDR SDRAM modules
AGP 4X/8X or PCI graphic card
Computer case with adequate power supply (at least 350W,ATX 12V approved)
Monitor
Keyboard (PS/2 or USB)
Pointing Device ( USB/PS2 Mouse/Trackball)
Speakers (optional)
Internal Drives: Hard Disk, CD/DVD-ROM/RW, Floppy Drive…
External Peripherals: printer, modem, scanner (optional)
8

SOYO SY-P4VM800 Quick Start Guide
2.1 Installing the CPU
SOYOSY-P4VM800MotherboardsupportsasingleIntelPentium®4/PrescottSocketmPGA478CPU.
PleasefollowthestepstoinstalltheCPU.
478-Pin CPUSocket
Pin1
CPULever
CPUFAN1
1
1
3
4
2
1. Lift the socket lever up to a vertical position.
2. Place the marked CPU corner with the base of the socket lever (Pin 1).
3. Push the CPU firmly into the socket with adequate force.
4. Hold the socket lever down to a horizontal position to secure the CPU.
5. Spread the thermal grease all over the surface of the CPU.
6. Secure the CPU cooling fan/heatsink to the CPU socket and attach its power cable to a
nearby power connector. Failure to do so may cause serious damage to the CPU and
motherboard and its attached components.
9

SOYO SY-P4VM800 Quick Start Guide
2.2 Installing the Memory Modules
This motherboard accommodates two memory module slots, supporting 184-pin
dual channel DDR 266/333/400 SDRAM up to 2GB. You can add 1 or 2 memory
modules to the system at your choice. In the case of adding two memory modules,
please use two verified memory modules of the same manufacturer and
specifications/capacity to increase their compatibility with motherboard. Please
note that dual channel function is activated only when two memory modules of the
specifications/capacity are present.
Hardware
Installation
DDR
2
DDR1
2.2.1 Memory Frequency Table
Memory frequency is subject to CPU Front Side Bus.The following is a reference table:
CPU FSB (MHz) Memory Frequency (MHz) DIMM DDR Code Name
400 266 PC2100
533 266/333 PC2100 / 2700
800 400/320* PC3200 / 2700
*Sometimeswhenpairingan800MHzFSBCPUwithPC2700DIMMDDRSDRAM,the
memory frequency willread 320 MHzinstead of333 MHzdue tochipset limitations.
10

SOYO SY-P4VM800 Quick Start Guide
2.3 Installingthe Hard Disk Drive/Optical Device
Before Installing the IDE Devices:
1. For the ease of installation, we strongly recommend you install the hard drives
first on IDE1, followed by the installation of the optical device on IDE2.
2. Installation of a hard disk and an optical device on one IDE slot/cable is not
recommended since it will reduce system performance.
3. When installing two IDE devices on one IDE slot/cable, set one of
the two IDE devices (usually the booting hard drive) to MASTER
and the other SLAVE(usually a second hard drive or
CD/DVD-Rom/RW). The documentations of the IDE devices
usually details how to use jumpers or switches to swap the devices
between MASTER and SLAVE modes.
Connecting IDE 1 / Primary IDE Slot
The booting hard drive must always be attached to IDE1.
Connecting IDE 2 / SecondaryIDE Slot
The second drive (usually a CD/DVD-ROM/RW) on this controller must be set to
slave mode. The installation process is the same as that of IDE1.
11

SOYO SY-P4VM800 Quick Start Guide
2.3.1 Installing the SATA Hard Disk Drive
Toinstall a SATAharddrive,useaSATAcablethat supportstheSATAprotocol.This SATAcable
comeswithanSATApowercable.YoucanconnecteitherendoftheSATAcabletotheSATA
harddriveortotheSATAslotonthemotherboard.
SATACable(Optional) SATAPowerCable(Optional)
Hardware
Installation
Followthestepsbelowforproperinstallation:
1. Attacheither endofthecabletotheSATAslot(A)onthemotherboard.
2. Attachthe otherend ofthecable(B)totheSATAharddrive.
3. Connect a SATA power cable to the SATA hard drive (C) and the other end of the to a
powersupplyconnector.
Note: Thismotherboarddoes notsupportthe SATA “Hot-Plug”function.
12

SOYO SY-P4VM800 Quick Start Guide
2.4 Installingthe Expansion Cards
The motherboard holds 1 AGP 4X/8X slot, 3 PCI slots, and 1 CNR slot. Special attention
shouldbepaidwheninstallinganAGPcard. EnsureyourAGPcardiscompliantwithAGP
4X/8X specifications with 1.5 & 0.8v power consumption. Accidentally or intentionally
installing an incompatible AGP 1X/2X card may cause serious damage to the
motherboardand attached componentsand void thewarranty.SomepowerfulAGPcards
may require additional power supply to sustain normal operation. Ensure all installed
expansion cards align with and firmly attach to their corresponding slots before powering
onthe system.
1. Referto the documentationofAGPcardfor itscompatibility with the motherboard.
2. Pressthe expansion card firmlyinto thecorresponding expansion slot.
3. Be surethe gold contact fingers of the cardare secured in place.
4. Replace the screw to secure the slotbracket ofthe expansion card.
5. Attachadditional power cableto theAGPcardif necessary.
GoldContactFin
g
erso
f
a
n
Incom
p
atibleAGP1X/2XCar
d
GoldContactFin
g
ersofaStandar
d
AGP4X/8XCar
d
13

SOYO SY-P4VM800 Quick Start Guide
2.5 Connecting the Power Supply
Follow the steps below to wire the motherboard to complete the installation process. The motherboard
requires an ATX 12V compliant power supply. When connecting the power connectors, follow its
directionality and do not force them into the sockets. Ensure the power supply is not electrified prior to
thecompletionofthe entire hardware installationprocess.
Hardware
Installation
A
TX1
PJ1
1. Connectthe20-pinconnectortoATX1powerconnector.(SeeFIG1)
2. Connectthe4-pinconnector to JP1 power connector. (SeeFIG2)
FIG 1
ATX1 Power Socket FIG 2
PJ1 Power Socket
+12V Power Connector
Pin1
Pin3
+12VDC
COM
5VS
B
12
V
5
V
5
V
PW-O
K
-5
V
GN
D
GN
D
GN
D
5
V
GN
D
GN
D
GN
D
5
V
PS-O
N
GN
D
3.3
V
-12
V
3.3
V
3.3
V
14

SOYO SY-P4VM800 Quick Start Guide
2.6 ClearingCMOS (JP5)
In the case of CMOS being wrongly configured that results in boot-up errors or hardware/software
malfunction,followthe procedures belowto cleartheCMOStorestoredefaultsettings.
1. ShortPin2-3ofJP5jumperas indicated below.
2. Placethe jumper cap backon pin1-2 to return to default settings.
3 2 1
JP
5
Clear CMOS Short Circuit Open
JP5 Short Pin 2-3 for 5 seconds
tocleartheCMOS ShortPin1-2to
retainnewsettings
Note:Thepowercordmustbedetached from theATXpowersupply or electricsocket before
performingtheClearingCMOSoperation.
123
123
15

SOYO SY-P4VM800 Quick Start Guide
2.7 Connectors and Jumper Definition
CPU Cooling
FanCPU_FAN1 System Cooling Fan
CHA_FAN1 CD1
Pin1 Pin2 Pin3 Pin1 Pin2 Pin3 Pin1 Pin2 Pin3 Pin4
GND +12V Sensor GND +12V Sensor CDINL GND GND CDINR
AUDIO1:Front Panel Audio Connector
Pin1 Pin2 Pin3 Pin4 Pin5 Pin6 Pin7 Pin8 Pin9 Pin10
AUD_MIC AUD_GND AUD_MIC_BIAS AUD_VCC AUD_FPOUT_R AUD_RET_R HP_ON KEY AUD_FPOUT_L AUD_RET_L
USB2 / USB3: Front Panel USB Connector
Pin1 Pin2 Pin3 Pin4 Pin5
VERG_FP_USBPWR0 VERG_FP_USBPWR0 USB_FP_P0- USB_FP_P1- USB_FP_P0+
Pin6 Pin7 Pin8 Pin9 Pin10
USB_FP_P1+ GROUND GROUND KEY USB_FP_OC0
IR1: Infrared Port
Pin1 Pin2 Pin3 Pin4 Pin5 Pin6
NC KEY Vcc5 GND IRTX IRRX
Hardware
Installation
Power LED
Pin11 Pin12 Pin13
VCC NC GND
Speaker
Pin17 Pin18 Pin19 Pin20
VCC NC NC Speakerout
HDD LED PWRBT RESET
Pin9 Pin10 Pin4 Pin5 Pin1 Pin2
LEDAnode LEDCathode PowerOn/Off GND ControlPIN GND
Power On/Off: PWRBT
Connectyourpowerswitchtothis header (momentary switchtype).
To turn off the system, press this switch and hold down for longer than 4 seconds.
ATX 12V Power Supply:ATX PW
AttachtheATX12VPowercable to the connector. (This motherboard requires anATX 12V power supply,
anATorATX power supplycan NOTbeused.)
WhenusingthePower-Onby Keyboardfunction, please ensuretheATXpower supplyisabletoprovide
atleast720mAonthe 5V Standby lead (5VSB).
16

SOYO SY-P4VM800 Quick Start Guide
2.8 Connecting Multi-channel Speakers
TheintegratedVIAVinylAudiocontrollersupportsuptosix-channelaudiooutput. Installthedriverbefore
connectingtheaudiocablestotheaudiojackreferringtothetablebelow.Remembertochangethenumberof
speaksaccordinglyinthepreinstalledaudiodriverutility.
Number of
Speakers Front Speaks Rear Speakers Subwoofer
2 Line-out
3 Line-out Mic-in
5 Line-out Line-in Mic-in
Line-in (Blue)
Line-out (Green)
Mic-in(Red)
17

SOYO SY-P4VM800 Quick Start Guide
3
3
Quick BIOS Setup
3.1 Introduction
The BIOS Setup Utility records settings and information of your computer, such as date and
time, the type of hardware installed,and various configuration settings. Your computer a
the information to initialize all the components when booting up and basic functions of
coordination between system components. If theSetup Utility configuration is incorrect,
cause the system to malfunction. It can even stop your computer booting properly. If it
happens, you can use the clear CMOS jumper to clear the CMOS memory which has stored
the configuration information; or you can hold down the Page Up key while rebooting your
computer. Holding down the Page Up key also clears the setup information. You can run the
setup utility and manually change the configuration. You might need to do this to configur
some hardware installed in or co
pplies
it may
e
nnected to the motherboard, such as the CPU, system
emory, disk drives, etc.
ete> or <Del> key, and the Main menu page of the Setup
tility appears on your monitor.
SSetupUtility-Copyright(C)198 Megatrends,Inc.
m
The SOYO CD
3.2 Running the Setup Utility
Every time you start your computer, a message appears on the screen before the operating
system loading that prompts you to “Hit <DEL>if you want to run SETUP”. Whenever you
see this message, press the <Del
U
COM 5-2003,American
StandardCMOSSetup
up dChangesandExit
AdvancedSetup
FeaturesSetup
PowerManagementSetup
PCI/PlugandPlaySet
BIOSSecuritySetup
CPUPnPSetup
HardwareMonitor
LoadOptimalDefaults
SaveChangesandExit
Discar
↑↓←→:Move Enter:Select +/-/:Value F10:Save ESC:Exit
F1:GeneralHelp F9:OptimizedDefaults
Sta tc.
V02.54(C)Copyright1985-2003,AmericanMegatrends,Inc.
ndardsCOMOSsetupforchangingtime,date,harddisktype,e
18

SOYO SY-P4VM800 Quick Start Guide
3.3 The BIOS Navigation Keys
Nameof Keys Function
Esc Exitsthecurrentmenu
←→↑↓ Scrollsthroughtheitemsonamenu
+/–,PageUp/PageDown Modifiesthevaluesofaselecteditem
F10 Savesthecurrentconfigurationandexitssetup
F1 Displaysascreenthatdescribesallkeyfunctions
F5 LoadspreviouslysavedvaluestoCMOS
Shift+F2 ChangeCMOSmenucolors
3.4 Standard CMOS Setup Menu
This page displays a table of items defining basic information about your system.
CMOSSETUPUTILITY–Copyright(C)1985-2003,AmericanMegatrends,Inc.
StandardCMOSSetup
HelpItem
SystemTime 23:40:15
SystemDate Sun05/09/2004
PrimaryIDEMaster HardDisk
PrimaryIDESlave NotDetected
SecondaryIDEMaster NotDetected
SecondaryIDESlave CD/DVDROM
Floppy A 1.44MB31/2”
Floppy B Disabled
Use[Enter],[TAB]or
[SHIFT-TAB]toselecta
field.
Use[+]or[-]toconfigure
systemTime.
↑↓←→ :Move Enter:Select +/-/:Value F10:Save Esc:Exit
F1:GeneralHelp F9:OptimizedDefaults
The SOYO CD
Date &Time These items set up system date and time.
IDEPriMaster
PriSlave
SecMaster
SecSlave
These items configure devices connected to the Primary and
Secondary IDE channels. To configure an IDE hard disk
drive, chooseAuto. If theAuto setting fails to find a hard disk
drive, set it to User, and then fill in the hard disk characteristics
(Size, Cyls, etc.) manually. If you have a CD-ROM drive,
select the setting CDROM. If you have anATAPI device with
removable media
(
e.
g
. a ZIP drive or an LS
-
120
)
, select
19

SOYO SY-P4VM800 Quick Start Guide
Floptical.
FloppyA
FloppyB These items set up size and capacity of the floppy diskette
drive(s) installed in the system.
3.5 Advanced Setup Menu
This page sets up more advanced information about your system. Handle this page with
caution.Any changes can affect the operation of your computer.
CMOSSETUPUTILITY–Copyright(C)1985-2003,AmericanMegatrends,Inc.
AdvancedSetup
HelpItem
QuickBoot Enabled
1st BootDevice PM-Maxtor 6Y060P0
2nd BootDevice SS-MATSHITACR-58
3rd BootDevice 1ST FLOPPYDRIVE
TryOtherBootDevice Yes
BootupNum-Lock On
BootToOS/2>64MB No
AGPApertureSize 64MB
DRAMTiming AutoBYSPD
HyperThreadingFunction Disabled
AutoDetectDIMM/PCICIK Enabled
SpreadSpectrum Disabled
AllowsBIOStoskipcertaintests
whilebooting.Thiswilldecreasethe
timeneededtobootthesystem.
↑↓←→ :Move Enter:Select +/-/:Value F10:Save Esc:Exit
F1:GeneralHelp F9:OptimizedDefaults
The SOYO CD
QuickBoot If you enable this item, the system starts up more
quickly be elimination some of the power on test
routines.
1st BootDevice
2nd BootDevice
3rd BootDevice
Use these items to determine the device order the
computer uses to look for an operating system to load at
start-up time.
TryOther BootDevice If you enable this item, the system will also search for
other boot devices if it fails to find an operating system
from the first two locations.
BootUpNum-Lock This item determines if the Num Lock key is active or
inactive at system start-up time.
20
Table of contents
Other SOYO Motherboard manuals

SOYO
SOYO SY-6BB User manual

SOYO
SOYO SY-7IWM/L V1.0 User manual

SOYO
SOYO SY-7IWB User manual

SOYO
SOYO SY-P4IS2 User manual

SOYO
SOYO SY-K8USA DRAGON Ultra User manual

SOYO
SOYO SY-K7V DRAGON Plus User manual

SOYO
SOYO ATX 12V User manual

SOYO
SOYO SY-KT600 DRAGON Plus User manual

SOYO
SOYO SY-5SSM User manual

SOYO
SOYO SY-K7ADA User manual

SOYO
SOYO 82430 TX Use and care manual

SOYO
SOYO SY-P4S DRAGON Ultra User manual

SOYO
SOYO Super 7 SY-5EMA User manual

SOYO
SOYO SY-KT600 DRAGON Plus User manual

SOYO
SOYO SC-5EH5 Use and care manual

SOYO
SOYO SY-7VCA User manual

SOYO
SOYO SY-5EH5/5EHM V1.2 Super 7 User manual

SOYO
SOYO SY-6ICA User manual

SOYO
SOYO SY-6IZM/3 User manual

SOYO
SOYO SY-P4VGA User manual